When you click on links to various merchants on this site and make a purchase, this can result in this site earning a commission. Affiliate programs and affiliations include, but are not limited to, the eBay Partner Network.
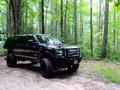
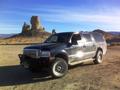
Restoring a 2000 X I bought for pretty cheap... Got her running and passed emissions/inspection. Some minor engine problems I need to solve but I decided to switch to cosmetic stuff just for a change of pace.
Been looking at replacing the supports for the running boards.
As you can see, they are pretty rusted out and pieces fall off every time I was stepping on it.
Removing the plastic wasn't too bad. The bolts holding the support to the attachment arms were more work... needed to hold the top with a pair of pliers in order to remove the nut.
Most places I went to wanted over $200/pair of these supports and given that that the old ones rusted out, I wanted to find another option - and something cheaper.
So I went with a TREX Board. $20 and change from Home Depot for a 1x5x8 board.
I cut all but the two interior and the outer retaining (plastic) bolts that are supposed to hold the running board shell to the support. First drilled a hole larger than the the bolt and then bored it out due to the raised profile at the base.
Without much trouble, it fit on the first try.
Next - I fit it back onto the support arms... Had to angle it up and the in. I had originally wanted to secure the running board shell to the TREX board but the board is about 1/2 too thick. And with the heat (I did this in my parking space in front of my townhouse), I wanted to just get it on and wasn't too worried about it looking perfect. I decided to just bolt the front and rear arms directly through the entire assembly.
Flange bolts and nuts were about $1 a piece from Home Depot.
I used a wire strap to hold the wire against the side of the TREX board (in this case - having it 1 inches thick was a big benefit).
I ended up replacing the light fixtures... Can't remember where I got them but the old ones were pretty stained and dirty.
Painted the whole thing a matte black.
If you want to have as close to the OEM look, you could bore out the underside of the TREX Board and bolt the shell to it. My thinking it that unless I do some serious offroading, these aren't going anywhere.
On the other 3 support arms, I used 1 inch wood screws to secure the TREX board to them.
Next step is to put get something to act as a shield for the light assemblies. I'll post pictures when I do that.
Anyway... about $50 in parts. Probably a total of 2-3 hours of labor. I waited about 2 hours for the paint to dry on the shell before I continued with the install... Leaving it in direct sunlight certainly made it dry faster.
You can do this with other things - wood, obviously. I went with TREX because it's more durable and I don't have to worry about rusting or wood rot.
Easiest way to drill the holes for the TREX board (or whatever else you want to use) is to line it up and mark off centerline on each plastic bolt on the side of the board. For the outer bolts - it is 20mm from the edge (of a 5 inch board) and 34mm from the edge for the inner bolts. I would verify just to make sure.
If you use at least a 5/16 drill bit, it should fit right in... I would recommend 3/8 just to give yourself room for error. Then a 3/4 inch counter-sink bit to make sure that the base doesn't interfere with the seating.
The boards were cut to 7 feet to fit underneath the shell - left that important point out. You can cut it shorter but I wouldn't cut it any less than 80 inches just to make sure that you have enough length to seat the outer bolts... 7 feet is about the length of the original support.
Props for the ingenuity, that's really quite clever and pretty much guarantees rusting won't be an issue in the future - nice work!
Originally Posted by RTrud
This is the only part that bothers me personally a bit, those raised bolt heads. May I ask why you didn't go with a button head or flat-top internal torx or allen head? Seems like the smoother and lower profile wouldn't be so visible nor as prominent. It's a little nick-picky I will admit, but primarily just curious on your hardware choice.
Never really considered the Torx or Allen head route... that's not a bad idea. I may go back and do just that.
To answer your question, I was going about it pretty quick and didn't give it too much thought. Now that you brought it up, I think I'll swing by HD and see what they have.
Never really considered the Torx or Allen head route... that's not a bad idea. I may go back and do just that.
To answer your question, I was going about it pretty quick and didn't give it too much thought. Now that you brought it up, I think I'll swing by HD and see what they have.
That makes perfect sense, kind of what I was expecting for an answer. But hey, it's what we're all here for - offering suggestions for improvements or modifications that we ourselves may have overlooked
Yeah, but then ya lose the gription of those bolt heads on a snowy/slick running board.
I was thinking he should add more. Heck, what do I know... i used a sawzall on my boulder kissed/caressed boards.
Picked up some hex bolts at HD ($6 a piece for the 2 in).
Here's a comparison.
WRT to recent questions... I considered reattaching the shell with the OEM bolts that were used to affix them to the rusted out supports which would have required boring out the bottoms to make room for the nuts. I even considered throwing the TREX board on my table saw and cutting it in half but I was afraid of losing strength in the board. If you went with a 1/2 inch wood board, this might work. I'd go with a hard wood just for the strength. And definitely treated. I couldn't find any 1/2 inch TREX boards.
You can easily do this and get the OEM look by dropping the flange bolt, countersunk into the top of the TREX board once you've drilled out the holes aligned with the Support Arms. The plastic bolts for holding the shell on are pretty short, though... maybe 5/8 to 3/4 of an inch long. If you were to attached all of them - about a dozen, that would certainly keep it on.
Originally - this was what I had in mind but as I said earlier - between the heat and humidity - doing it in direct sunlight and with football season starting, I just wanted to get it done and look half-way decent.
Another option would be to get flush type screws and just screw the shell onto the TREX board once mounted. If you do it in a symmetrical pattern, it would just look like a custom job and painted to match, you'd probably not notice it much. We typically will ignore things if it's symmetrical or assume that it was part of the original design.
So - after putting in the HEX bolt - I decided that I'm going to stick with the flange bolts. They do stick out but since they basically act as retainers for the shell to the TREX board, I felt they were more secure. And plus, they've kind of grown on me. I think it adds a little character.
Cool fix! Would it have been possible to bolt to board to the supports and then bolt the cover down to the board while it is on the X/supports?
You can absolutely do that... even though the TREX board was twice the thickness, I was able to slide the shell angle-up and then press-down to seat on the board. You could also loosen the support arms to buy you an extra 1/4 to 1/2 inch of clearance. I found that not necessary for mine.
If you want a totally clean look - do everything I did before attaching to the truck. Position the whole assembly on the support arms where you want them and then use a sharpie to color in the holes were you want to attach to the support arm.
Drill those through with a 5/16 inch bit (the bolts I used were all 1/4 inch). On the top of the TREX Board - use a counter sink bit to give your flanged bolt head room to be flush with the board. I would put lock-washers or something on it to help grab and hold while you are tightening the nut.
You'll need to make room on the bottom of the TREX board where the shell's plastic bots are to be able to put in the nuts to attach the shell to the board.
I did all this without removing or adjusting the support arms. Unless you remove the support arms, you can't attached the TREX board (if it's 1 inch) and the shell separately. You have to put them on as a unit because otherwise you'd have a difficult time trying to line up the plastic bolts on the shell with the holes on the TREX board as you are angling it in.
If you remove the support arms then this isn't a problem.
This Hennessey Takes the Expedition Tremor's Off-Roading Capability to the Next Level
Slideshow: The VelociRaptor Expedition gains a lift, upgraded suspension, Brembo brakes, and trail-ready equipment while retaining the stock 440-horsepower EcoBoost V6.
Rezvani's Latest Post-Apocalyptic Monster Is a Ford F-150 Raptor Underneath
Slideshow: Called the Fortress, the 850-horsepower pickup combines Raptor underpinnings with military-inspired features, survival equipment, and a starting price of $285,000.












 sawzall on my boulder kissed/caressed boards.

