When you click on links to various merchants on this site and make a purchase, this can result in this site earning a commission. Affiliate programs and affiliations include, but are not limited to, the eBay Partner Network.
I changed my evaporator and heater core in my driveway in less time than that. Grab the service manuals, this dash is EASY to pull. 6 bolts for the dash, steering column bolt, 7 camlock electrical connections and center console +/-1 piece and it is on the seats. The hardest part is loosening the center 7/16" nut from the engine bay if you choose to remove the HVAC box like I did.
You have to install the sensor, these units use evaporator temp sensor to cycle the clutch (unverified but I cannot find a low pressure reading or switch on forscan or autoenginuity). Pressure and temperature are one in the same with refrigerants so it works. Trust me, I dreaded the dash deal too. It is CAKE compared to other cars I have done in the past.
To the guys that claim "you gotta take it to..." I have only this to say, get with the times and buy a laptop, forscan is your friend and stop with the cold feet. If you could work on a 7.3 or better, a 6.0, you got these 6.7s licked. I had cold feet till I jumped in, so if you have issues with my above comment, prove me wrong.
Resurrection #2
HVAC module sensor data (no suction side pressure info) PCM module sensor info (only high side pressure) High side pressure Part of what you need if you plan to work on these trucks.
Thank you for the excellent post mgadde! Are those service manuals available online or to rent somewhere as I'm not inclined to purchase them since I'd imagine they are pricey. As an update on my situation, I bought and plugged in a new evap core sensor. It is not installed in the core itself though as I did not pop for 10 hours at dealer rates. The A/C works again, but I do have to cycle it by hand otherwise I have noticed a decrease in fan flow, as I think the core is probably freezing up solid and preventing the air from blowing thru it. So I would like to install the sensor.
Mgadde you mentioned there are only 6 bolts holding the dash in place. How difficult is it to reach these 6 bolts? I am tempted to try lifting the dash to get the sensor installed. I see you went further and replaced the core too, but at this point, I'd be happy just getting the sensor in the A/C heater box. Any pointers you would be willing to offer on the removal part of the job, I would be most appreciative!
The manuals are anywhere between $200 -$350. Or you can go on www.motorcraftservice.com and pay $35 for a three day subscription to all of the ford manuals, TSB's and guides. All of the information can be downloaded as PDFs so you can have the updated books on a computer.
I will take some photos of the bolt locations here in a few and post back. Working from a phone so I cannot easily ensure I answer everything.
This procedure confused me at first and still does until I think about it, primarily step 20. I think those are the top dash bolts that are accessed in between the dash and the windshield. Once you go through all of the work of getting the dash loosened up I would recommend that you install the sensor in the evaporator fins. If you don't then you will be controlling evaporator temp (suction pressure) by the air temp (delta T of suction temp vice leaving air temp), less frequent but you will still have the freeze up issues.
Page 1 of removal procedure. Page 2 of removal procedure. Page 3 of removal procedure. Page 4 of removal procedure. Page 5 of removal procedure. Fords definition of what the Evaporator Temp Sensor does.
Last edited by mgadde; May 8, 2019 at 02:58 PM.
Reason: Photos are blurry / new photos attached
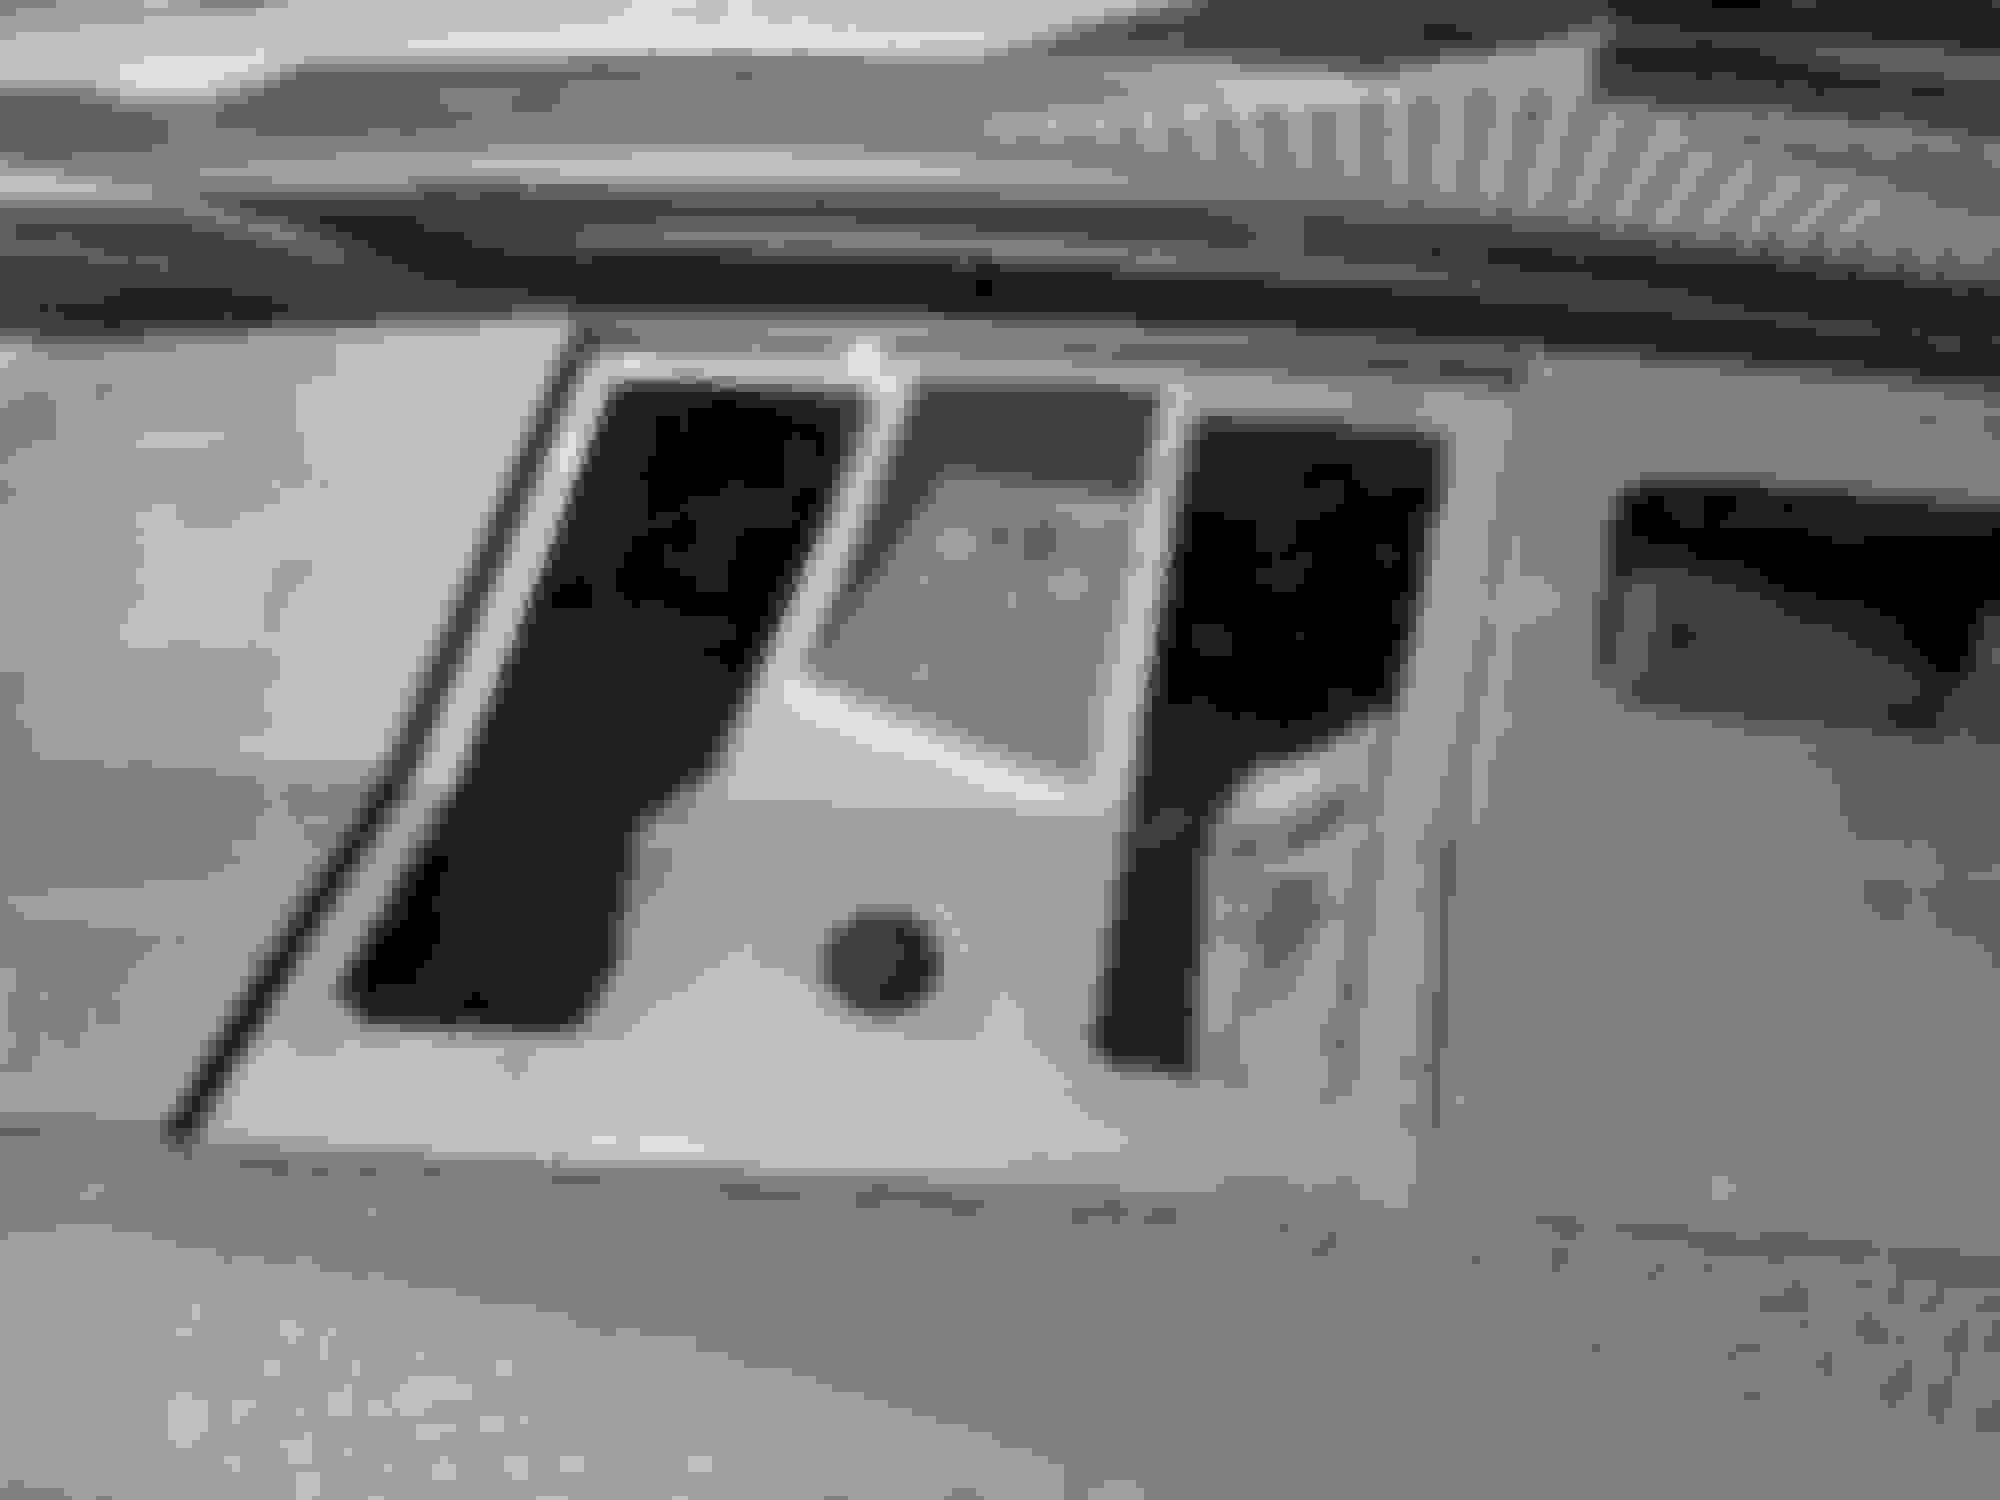
Finally, here are the dashboard bolts I was speaking of. I am a liar and there are 7 of the main bolts for the dash.
When you disconnect the dash wiring from the main harness EVERYTHING is disconnected. When you go to roll it off the firewall, you will laugh at the lack of guts hanging from the back end. Drivers side 2 bolts Drivers side upper 2 bolts in between the dash and windshield Passenger side upper bolt Passenger side 2 bolts
Oh man, you are a total God send. Thank you SO FRICKIN' MUCH for posting all of that!! I think we are going to give it a crack and see how it goes. I can see right where the temp sensor wires go into the box/core, but there just isn't enough room to lift the core lid off with the dash there. If the dash is up or out, it might be a simple job. Still seems like a lot of work and like Ford should have engineered a "trap door" into the heater/AC box for sensor replacement....but I guess that would make too much sense. Anyway, THANK YOU SO MUCH! I truly appreciate your effort and time in posting all of that. I will post up again once we dive into it here. I owe you a beer....or twelve! Cheers!
If you remove the dash, please post some pictures of how the cab looks with the dash down. Show some peeps how clean this job really is! If not, I have a bad sensor as well, screwed up and didn't replace while I had it out. New truck and couldn't stand to let it sit at the time.
No problem on the info. The forums for the 6.7 are filled with lack of confidence on repairs and the more I dive in, the more I do not understand this feeling people have about working on them. It is a sad day when I AM the voice of information on forums.
Good luck, you will enjoy this job once it is done trust me.
4.5 hours start to finish. This includes getting drinks and causal conversation that paused work. Also includes cleaning up the massive quantity of random junk in the console. The radio bezel does not need to be removed, j chose to as the dash is dirty as all get out. The two plugs that I am pointing at are two that I forgot to remove but did not hinder the work. The mass of plugs I'm holding are plugged into or by the BCM in the passenger floorboard.
Back at this today and digging into it. Can I ask a question if you're around about the "7" bolts? I am only finding 6 bolts holding the dash in place. 2 on each side and 1 on each side up top near the windshield. Where is the 7th bolt?
Also, did you have to remove the steering wheel? In one of your pics below it looks like the "steering column" part stays attached to the dash structure? I think that means you have to disconnect the "column" from the lower U-joint on the steering shaft...correct?
Thank you mgadde!
Originally Posted by mgadde
Finally, here are the dashboard bolts I was speaking of. I am a liar and there are 7 of the main bolts for the dash.
When you disconnect the dash wiring from the main harness EVERYTHING is disconnected. When you go to roll it off the firewall, you will laugh at the lack of guts hanging from the back end. Drivers side 2 bolts Drivers side upper 2 bolts in between the dash and windshield Passenger side upper bolt Passenger side 2 bolts
Replying from my phone so pardon if I do not answer all of your questions.
Starting from the driver's side. There will be one coming in from the side that you will have to get while the door is open and two that are pointing forward that you can get two without a fight. These three are on the driver's side, side of the dash.
There should be three up top. Two on the driver's side above the steering wheel and one on the passenger side. All three of these are under the two covers under the windshield.
On the passenger side there are only two pointing forward (bolt head will be facing the tailgate)
So I messed up and there are 8.
As for the steering wheel, yes, it is best to take it off. This will ensure that you don't rotate the column while it is down. The rest of the column will remain bolted except for the one 10mm bolt that holds the UJoint onto the gearbox side of the shaft.
Awesome, thank you! The one that has to be accessed when the door is open is the 7th I was missing. In between posting here and your reply, I found a YouTube that mentioned that one too. It is a bitch to get to with the door in place, but with a 1/4" drive ratchet and extensions I was able to reach it. I will have to look for the 2nd one on the upper dash, driver's side. Only removed one on the drivers side upper dash so far.
Thank you again for clarifying in your message where they all are! You da man.
Originally Posted by mgadde
Replying from my phone so pardon if I do not answer all of your questions.
Starting from the driver's side. There will be one coming in from the side that you will have to get while the door is open and two that are pointing forward that you can get two without a fight. These three are on the driver's side, side of the dash.
There should be three up top. Two on the driver's side above the steering wheel and one on the passenger side. All three of these are under the two covers under the windshield.
On the passenger side there are only two pointing forward (bolt head will be facing the tailgate)
So I messed up and there are 8.
As for the steering wheel, yes, it is best to take it off. This will ensure that you don't rotate the column while it is down. The rest of the column will remain bolted except for the one 10mm bolt that holds the UJoint onto the gearbox side of the shaft.
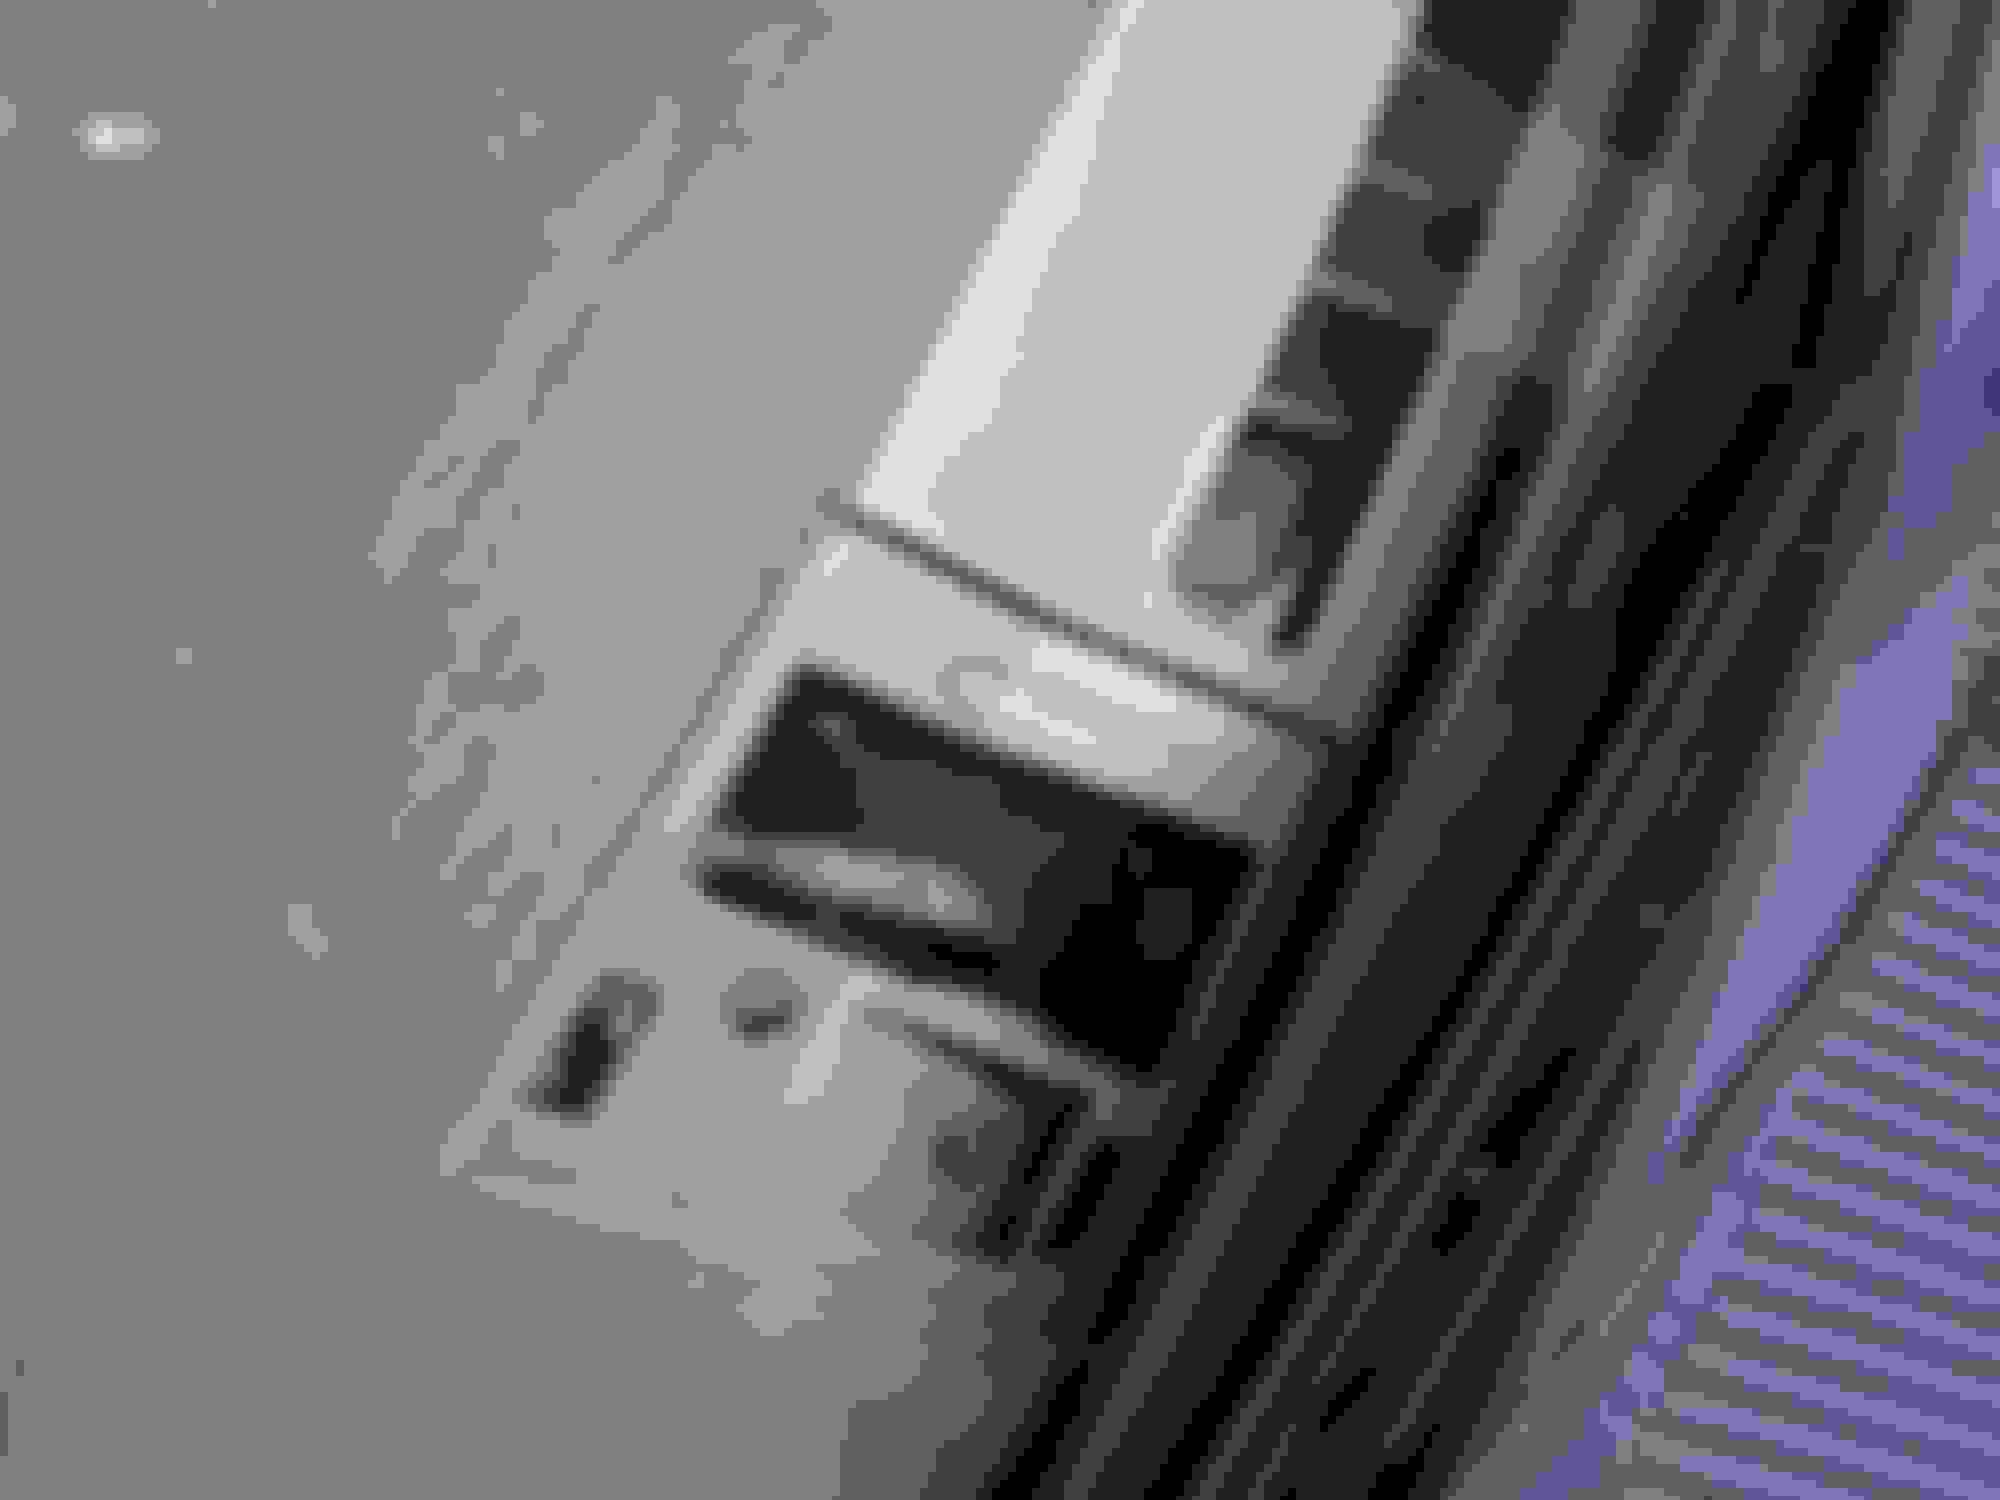
Hole in air box
You can cut a small hole in the air box. With hemostats and dikes you can replace the evap temp sensor from here and not risk damaging the coils from cutting. You end up rerouting the wire through here. Saves several hours and provides easy access for next time.
obviously not for everyone, but for those that aren�t as picky here ya go!
THIS - I was really thinking of doing something like this but was really concerned about not knowing the physical location of the evap core in the box! Is there any chance you would pop that square out and take a picture of what is behind it?
I'm really MUCH more interested in cutting an access panel than removing a dash, just want to know how much distance there is between that new "access panel area" and the evap core.
Thanks in advance for any more info you can provide
Personal preference on how you decide to proceed. I would be interested to see how the tape holds up over time. Got an additional truck recently and may be pulling the dash for damper motor verification soon.
Opinion time:
To me, my truck is worth ensuring that it is done right and I don't have to worry with it again. The days of me driving something that needs constant attention are behind me. Especially for my own shortcuts. Take into account how many times you may need to re-tape the hole due to condensation and air pressure pushing on the hole. I replaced the temp sensor back when I posted the photos of the truck apart. Driven close to 80,000 miles since with zero issues. (Well besides a busted sunroof guide)
Either way, hopefully both methods help others fix their AC, their own way. It sucks to be hot!