When you click on links to various merchants on this site and make a purchase, this can result in this site earning a commission. Affiliate programs and affiliations include, but are not limited to, the eBay Partner Network.
Looks promising. Interested in seeing how this turns out.
I have contemplated many times whether or not I would like to get rid of the in-cab gas tank.
Nice to see you are doing it correctly and taking your time. Good luck with the project!
Here's where the filler neck will go. About 10-3/4" back from the rear stake pocket.
The cordless drill just fits!
Drilled a 3/8" for the stud on the 3/4" hole punch that was big enough for the 3/4" stud on the 1-3/4" hole punch.
It fits! The better way to do this would be to make a little angle plate to mount the filler neck.....but I didn't think of that soon enough.
Gas nozzle test fixture.
It was a balmy 24� when I removed the bed.
I had to remove the crossmember and the angle iron.
Grind all of the rivets off and beat the crap out of them.
Done! Time to go back into the heated shop.
I used some 5" channel for the two new crossmembers.
The tank fit so well I didn't need to cut the little flanges off where the old crossmember mounted to the frame rails.
This should clear the bottom of the bed...fingers crossed.
I'll get more pics and measurments, but it looks like I will have about 2" of clearance between the diff. cover and the new crossmember.
That's it for now.
I hope to get a little more work done on it this weekend. I have a lot to do before I put the bed back on, I need to remove one of the shackle hangers due to rot, add air bags, a tank and compressor, finish the brake lines...
Looks promising. Interested in seeing how this turns out.
I have contemplated many times whether or not I would like to get rid of the in-cab gas tank.
Nice to see you are doing it correctly and taking your time. Good luck with the project!
Thanks, I almost gave up on the idea of a rear tank and was just about ready to put my tank back in thew cab.
Originally Posted by Gembone
I am interested to see how this turns out. Keep it up.
Did a similar build and moved crossmember forward and boxed the back for fuel tank. My buddy and I built a aluminum tank about 41gallons. Fabbed in a gage and electric pump for fast fuel injection. Gage was from autofab racing for the desert race trucks every thing is about done and truck runs great. You have a nice truck! very clean!
Since your a fab guy! Ever look into installing a 2011 newer set of leaf springs. 66.5" long leafs and the ride is way better! have a set on my 70 crew 4wd. used Oem 3/4 super dutys in the beginning. now just recently installed Carli suspension deavers 3.5 on my crew. got to make few modifications to get perfect ride height and no blocks on axle. Just trying to help you spend your money and use up more free time!
That's an awesome truck you have there. Shop looks bada$$ too!
Sort of an off topic question. What bolts are you using for your axle flange? Mine are beat up from someone using a wrench or the wrong socket or something.
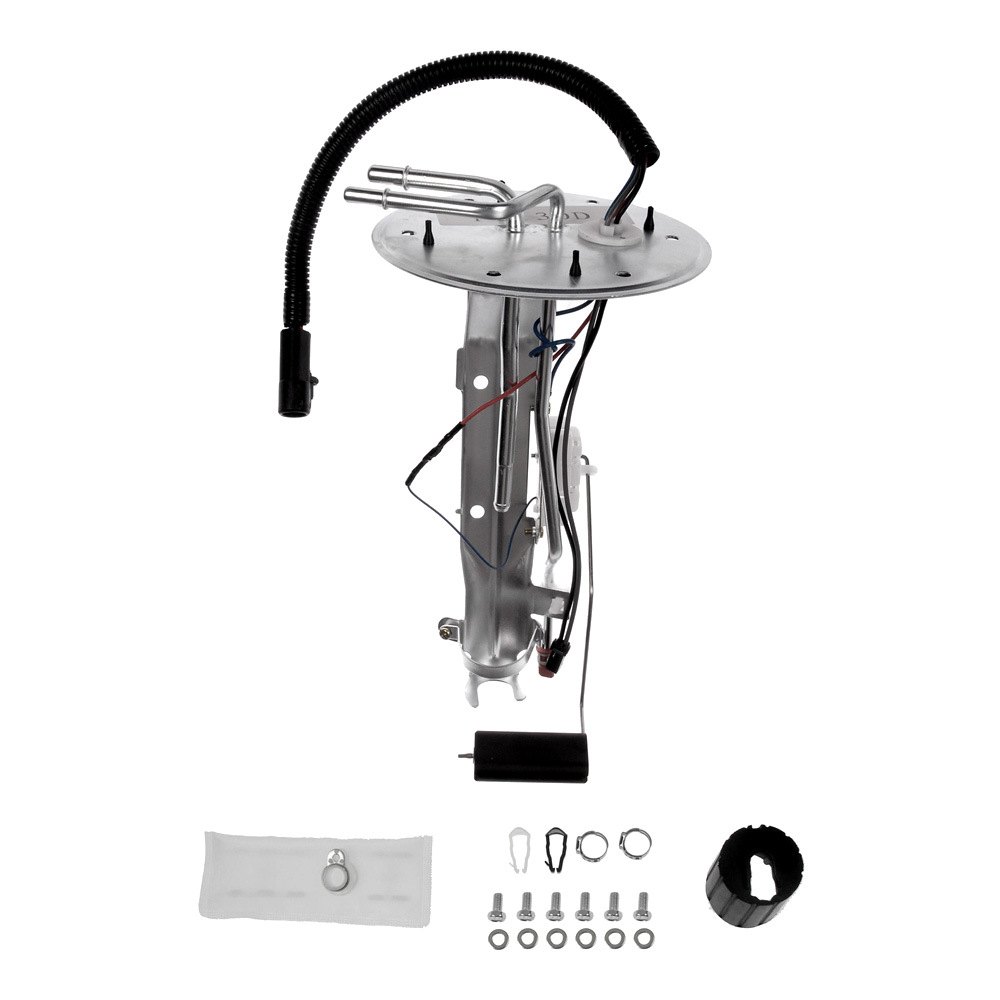
How about a 97-03 F series sender unit? It bolts to the side of a fuel pump/hanger assembly. I took F75Z9A299HA as an example. It fits 99-01 Super Cab 139"W.B midship 24.5 gallon tank. Depth not listed though. I tried doing a Bing illustration search and came up with a pic of a Dorman assembly. You can see the sender mounted to the side of it. 2 screws.
I just bought one for my race car fuel cell I'm building(out of alum).
Since you have a large hole to get into the center anyhow, just drill a hole and insert this in the corner where there is that sunked spot. I welded a 1/4" plate inside my tank and just drill/tapped for the screws. It needs about 1" above the mounting surface to clear the connections.
Did a similar build and moved crossmember forward and boxed the back for fuel tank. My buddy and I built a aluminum tank about 41gallons. Fabbed in a gage and electric pump for fast fuel injection. Gage was from autofab racing for the desert race trucks every thing is about done and truck runs great. You have a nice truck! very clean!
Thank you sir!
Originally Posted by wyoming4x4
Since your a fab guy! Ever look into installing a 2011 newer set of leaf springs. 66.5" long leafs and the ride is way better! have a set on my 70 crew 4wd. used Oem 3/4 super dutys in the beginning. now just recently installed Carli suspension deavers 3.5 on my crew. got to make few modifications to get perfect ride height and no blocks on axle. Just trying to help you spend your money and use up more free time!
I'm such a n00b about these trucks. I don't know what I don't know and I just got those Skyjacker rear leafs...they have zero miles on them.
Trust me, I need no help spending money and wasting time.
Originally Posted by rews2
That's an awesome truck you have there. Shop looks bada$$ too!
Sort of an off topic question. What bolts are you using for your axle flange? Mine are beat up from someone using a wrench or the wrong socket or something.
Thanks man! The axle bolts are just grade 8. I don't have any lock washers on them yet because I want to put a couple hundred miles on the truck and then adjust the wheel bearings.
Originally Posted by fe390pc
Nice Job, I wonder if a 78 or 79 Bronco Sending unit would work?
Thanks, the Bronco unit looks like a possible candidate.
Originally Posted by JEFFFAFA
How about a 97-03 F series sender unit? It bolts to the side of a fuel pump/hanger assembly. I took F75Z9A299HA as an example. It fits 99-01 Super Cab 139"W.B midship 24.5 gallon tank. Depth not listed though. I tried doing a Bing illustration search and came up with a pic of a Dorman assembly. You can see the sender mounted to the side of it. 2 screws.
I could just rob the sending unit off the one for the Bronco......hummm, this might work.
I just bought one for my race car fuel cell I'm building(out of alum).
Since you have a large hole to get into the center anyhow, just drill a hole and insert this in the corner where there is that sunked spot. I welded a 1/4" plate inside my tank and just drill/tapped for the screws. It needs about 1" above the mounting surface to clear the connections.
 02-25-2015, 09:16 PM