When you click on links to various merchants on this site and make a purchase, this can result in this site earning a commission. Affiliate programs and affiliations include, but are not limited to, the eBay Partner Network.
I was hoping to have the chassis mostly reassembled by now!! Now I have to get the rear-end repaired (almost complete) and the paint repaired because the rear-end bounced off the chassis before falling off the trailer - but the paint repair is getting close.
I didn't realize at first that the rear and frame were still separate on the trailer. You should have listened to yourself! That's a pretty fancy paint job for a driver frame. Me thinks yer fibbin us, maybe!
fibbin about what? If you look closely at it, the paint job isn't perfect. It's the first time I had painted. I had fixed most of the bad spots, but not all. Is it gonna be a daily driver? I'm not fully sure on that - I do plan on showing it. My current plan is not to have wood in the bed, but acrylic so that the paint job and the Kugel rear-end can be easily viewed!
Most of my good tools were at home and I didn't want to bring them out to Riverside - plus I still had all the nuts, bolts, and misc connectors still at home so I was bringing the freshly painted chassis and rear-end back to reassemble. In the end, I got really good at painting, but I didn't want to start over and redo it perfectly, mostly because it's gonna be hidden under the truck.
I'm only giving you friendly grief! I'm somewhat jealous (actually a lot jealous!). You are doing beautiful work.
It's OK to say you are building a show truck! I even admitted I have a bow tie under the hood.
I know you were only joking! I do want the truck to be show-truck quality, don't get me wrong - had that not been the goal I wouldn't have bought a custom chassis, a kugel rear-end, and mostly all new body parts! I just plan on using it more than most people use their show vehicles.
Frustrating - had a "long" reply and the browser crashed...
anyways, not sure if I should have started a new thread, but here I go.
I ordered and installed the March Performance serpentine system for the coyote to have PS and AC:
I couldn't get the pulley off of the tensioner - see red arrow. I would have been nice if the crank pulley had an aluminum replacement or cover and if it came with a serpentine belt - it was $2K.
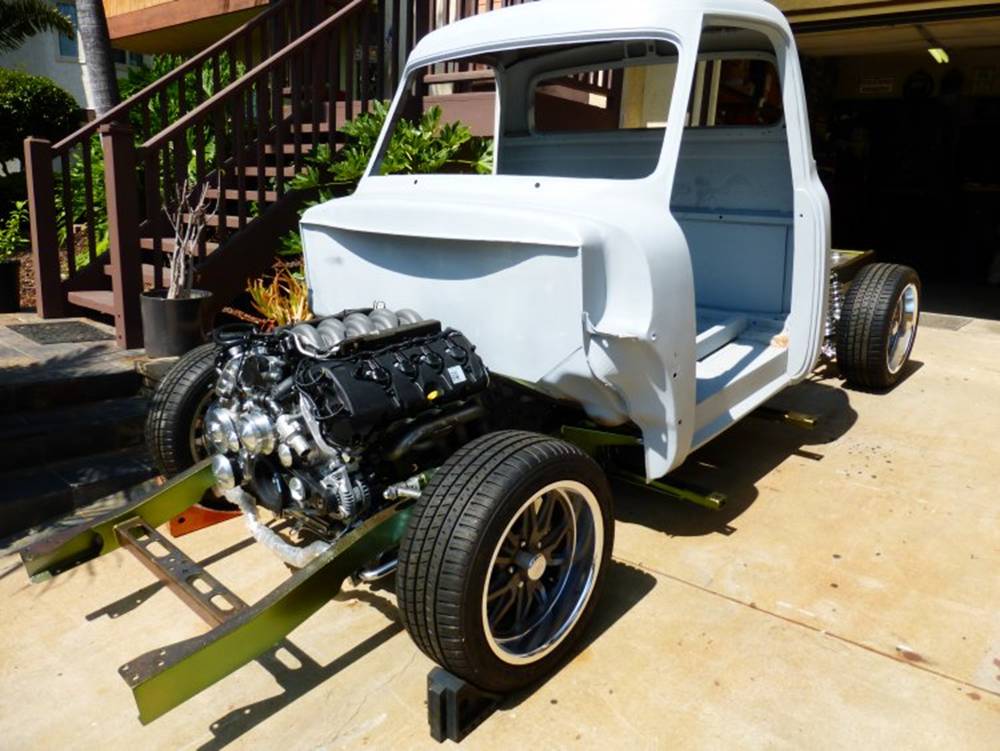
Anyways, nearing the home stretch. The engine and transmission are on:
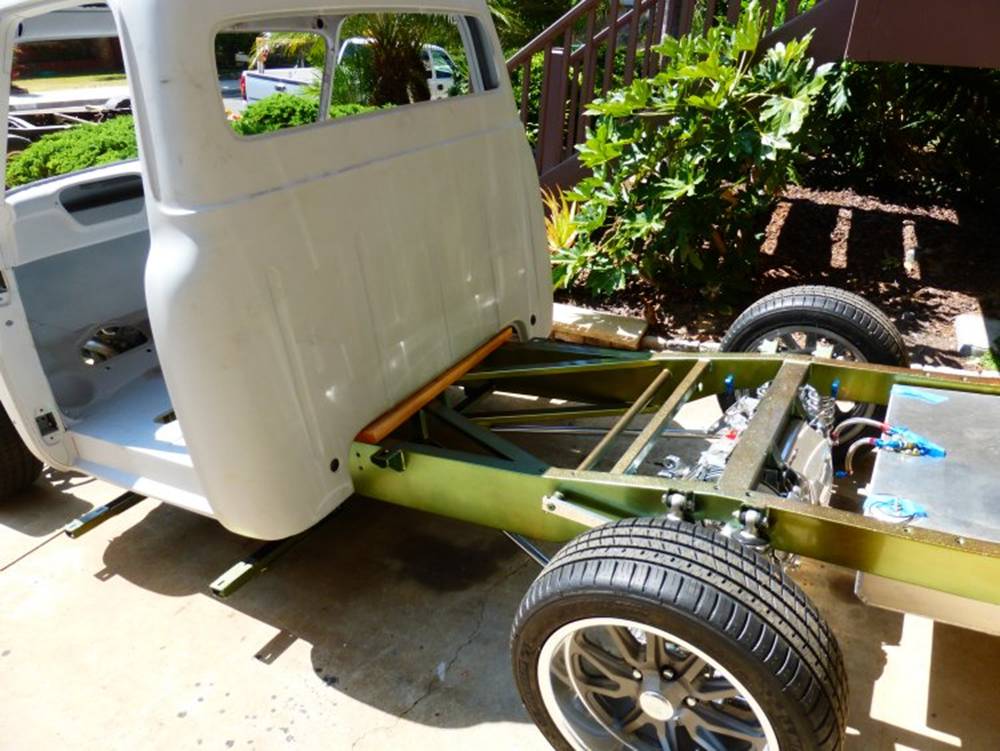
The chassis is mostly painted. There are some areas that could use some repair to look closer to professional, but as most of it will be covered I'll probably just add another layer or two of clear.
I had made a couple of big mistakes - namely rushing, using the same gun for multiple types of paint (rust stop, primer, paint, and clear). I now have multiple guns and it makes a huge difference. But the one good gun had gotten gunked up and that led to some other mistakes when I'd rush. I plan on using acrylic strips instead of wood so people can see the Kugel rear end, the fittings, and the aluminum gas tank as well as the painted chassis. So the area that will be viewable looks very nice. The rest I isn't bad, but there are areas you can see mistakes, but as they'll be under panels, etc and no visible, I chose to leave it.
So this is approximately what needs to be done:
* Put the brake lines on (mostly done)
* Put the gas lines on - I may wait for this one. I have all of the parts and really nice fittings and braided steel line, but as I need a place to mount the fuel regulator, it may make sense to wait till the cab is on
* Swap the seats (originally went with bench, didn't like how they came out, now have buckets)
* notch the inner fenders for the IFS
* paint
* get the acrylic bed strips
* drive shaft - I have this measured, but I'm a bit shy to order as an aluminum drive shaft is expensive if I make a mistake and all the sites I visit give the impression that 100% accuracy is required (radiator, engine, transmission, rear-end, and gas tank are all aluminum, so it makes sense to get an aluminum drive shaft)
* interior (probably going to take to a pro-shop for this)
* wiring (like coach controls or Hayes Inc)
* AC (about to order vintage air)
* PW (have the parts)
Ironically enough, his is one of the sites I had found. There is a place not too far from where I have the truck stored that makes them - Inland Empire Driveline. I can swing by and they'll measure which is what I'm thinking of doing the next time I move it. If it was stored at a garage/shop, they would actually come out to measure, but they wont come to a personal garage or a storage facility.
I've been a bit slow as of late, but the chassis is mostly done:
I thought I had pics of the driveshaft. I have a polished aluminum driveshaft on there now and I have the gas lines cut, mostly, I have to wait to I get the cab back on and get everything positioned.
As I went with a coyote, I'm gonna have to put a remove oil filter somewhere!
 09-10-2015, 11:01 PM