


Finally Fixing Those Reverse Lights
Cargo Master


Joined: Nov 2011
Posts: 2,946
Likes: 11
From: Northern California


Thread Starter
|
Elder User
Joined: Jul 2010
Posts: 501
Likes: 1
From: Pacific NW
OK folks, spent the better part of the day installing and documenting. So I guess I have sort-of a how-to.
Tools I used to cut open the bumper:
Sabre saw with fine metal blade
Dremel tool (to do some touch-up)
All the other stuff is just your run of the mill socket set and soldering iron set as well. Now on with the pics.
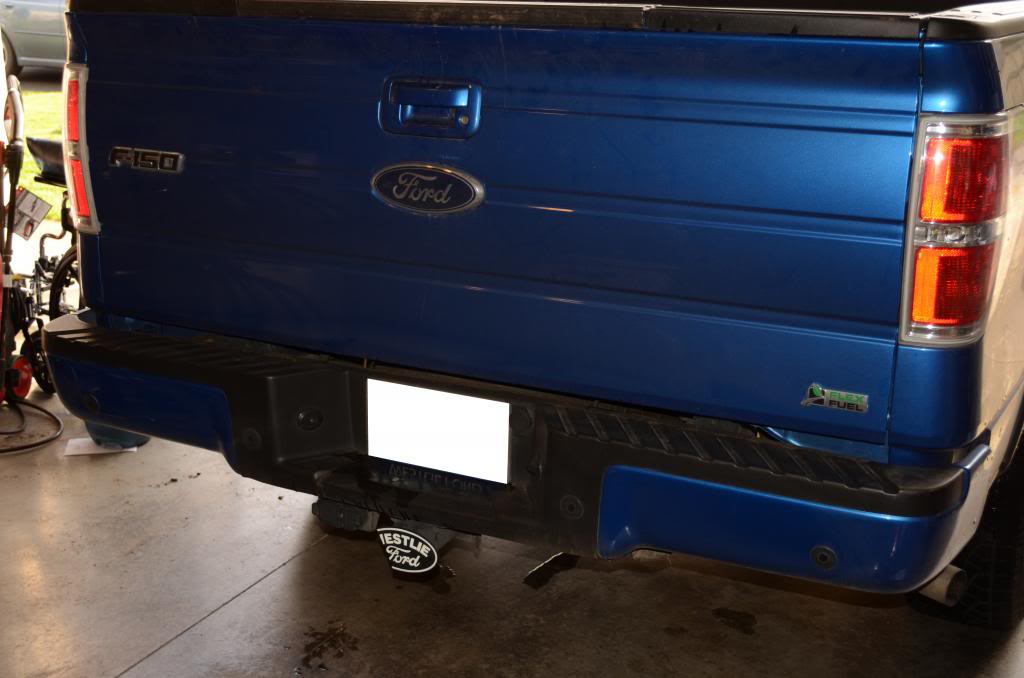
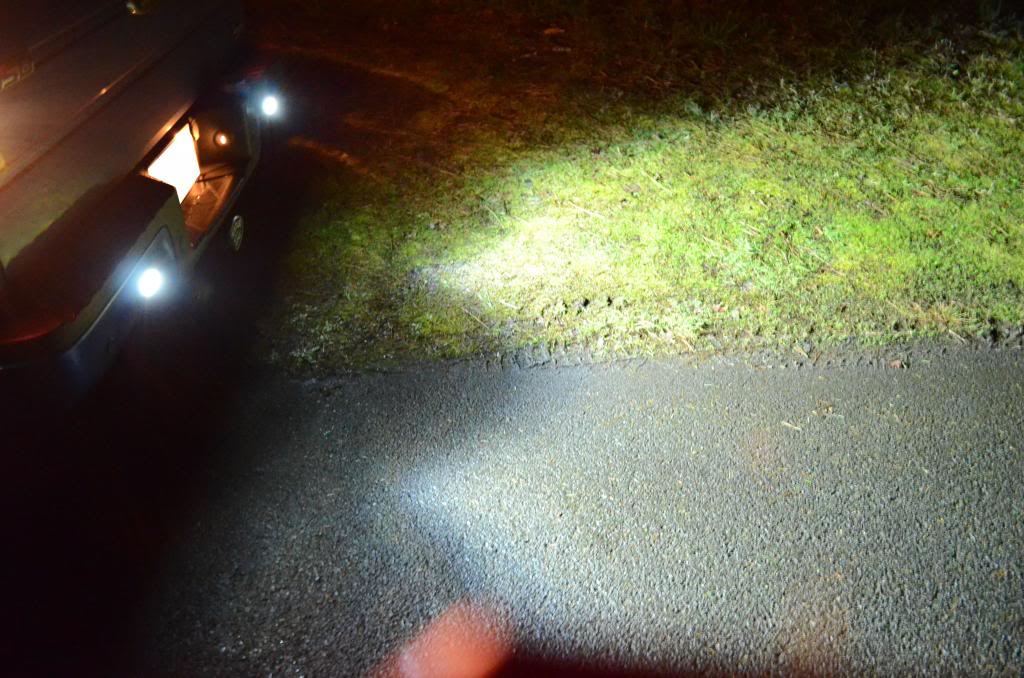
Before
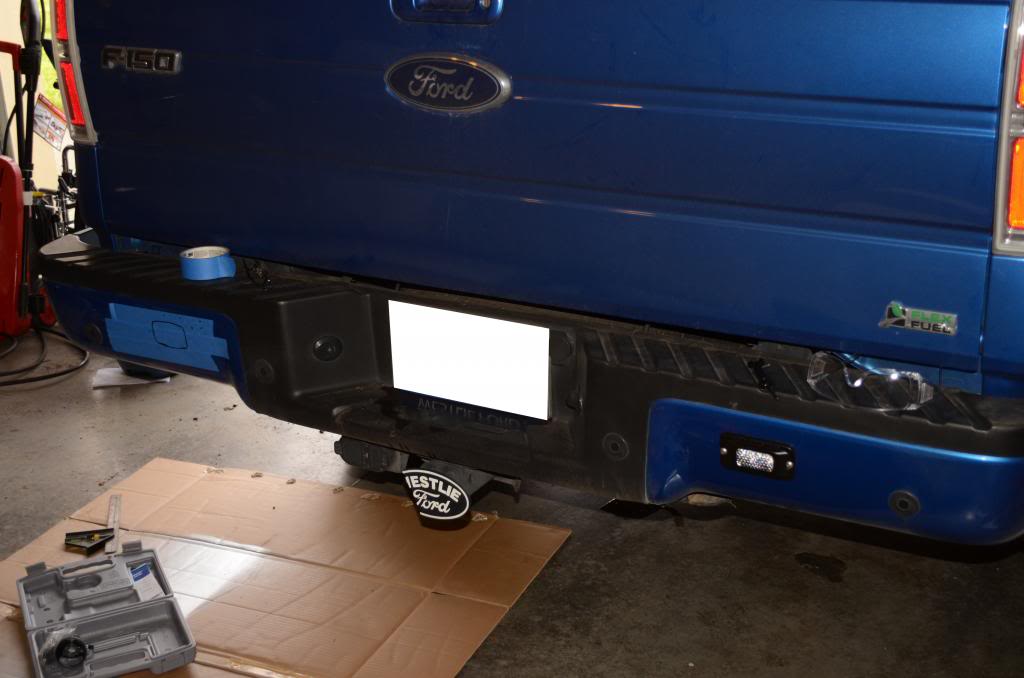
Measuring up

One in, one to go
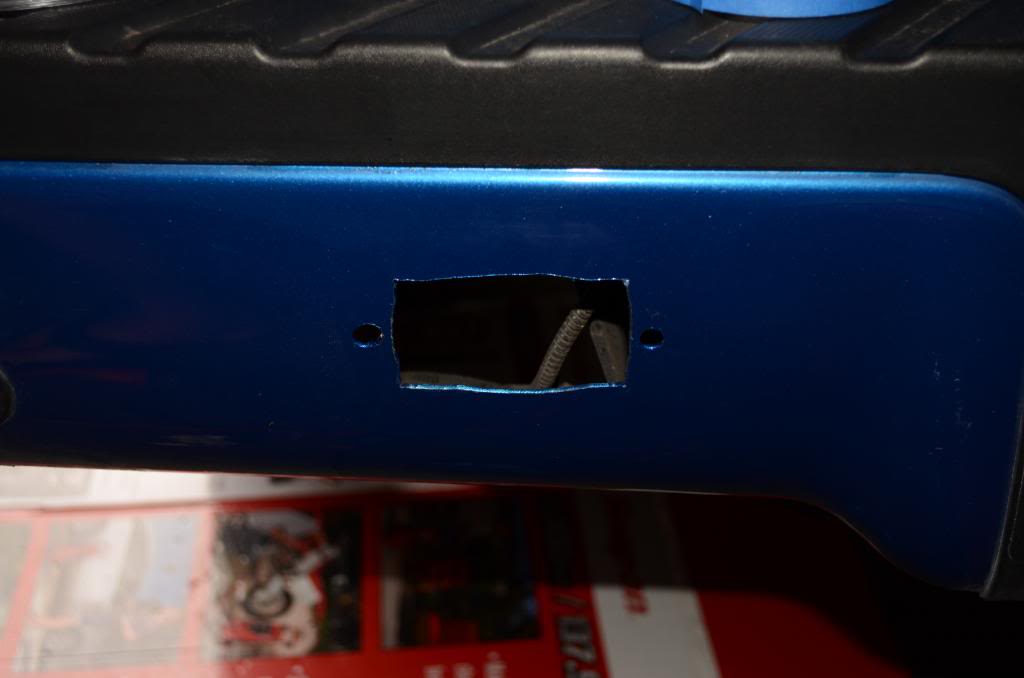
The cut
Opening up the reverse lights, it's the grey wire that is hot
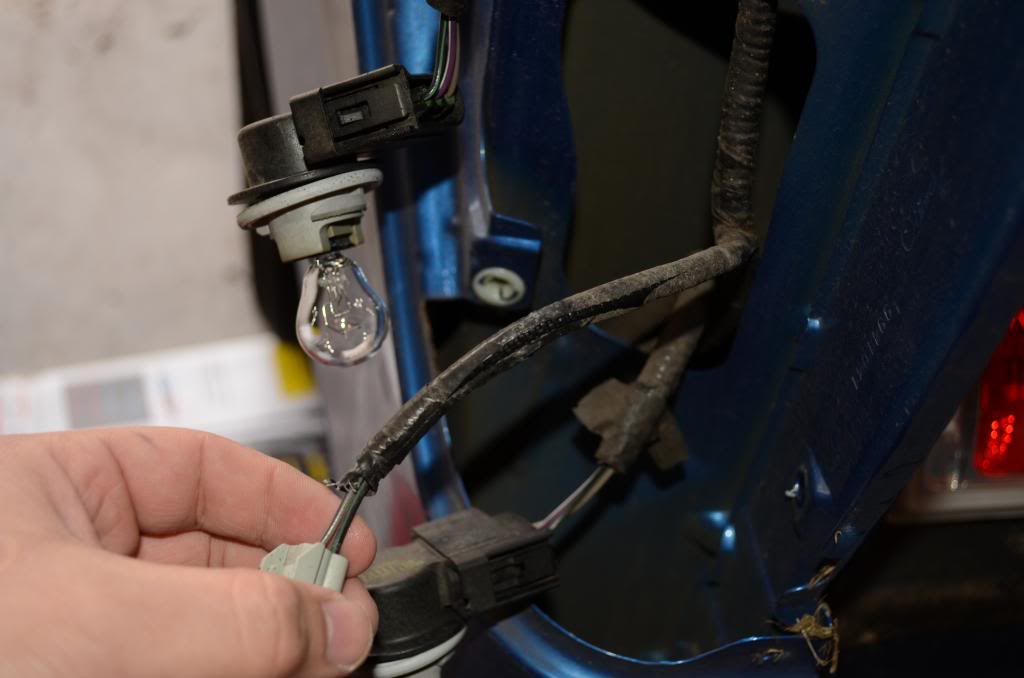
tapping in, I actually soldered the wires together, then I used liquid-electric-tape to seal things up, along with the old school stuff to be sure.
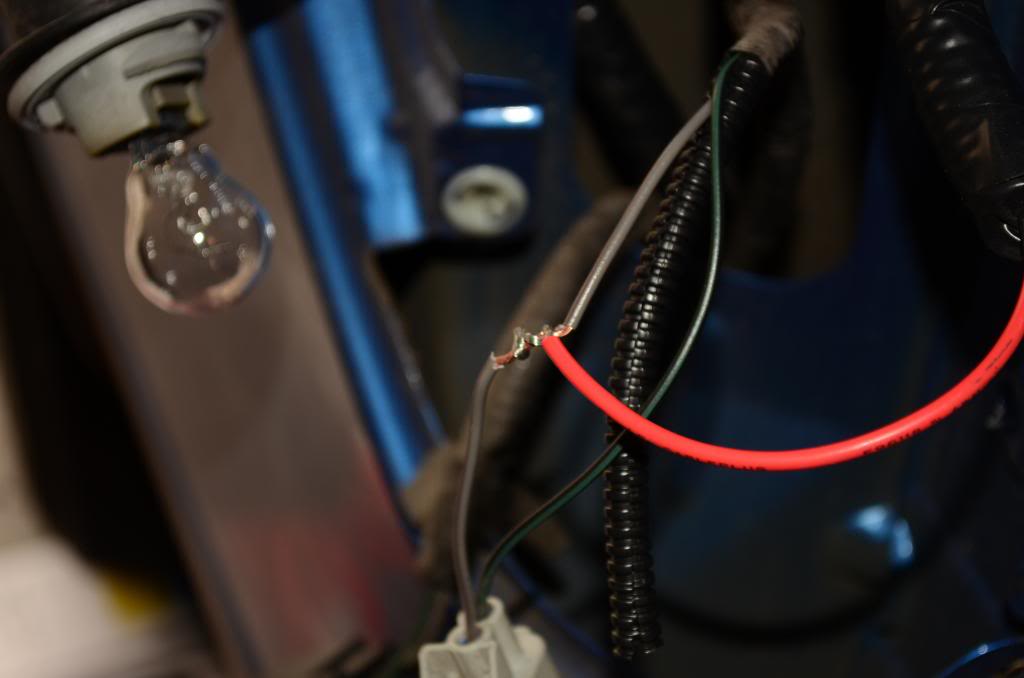
ground
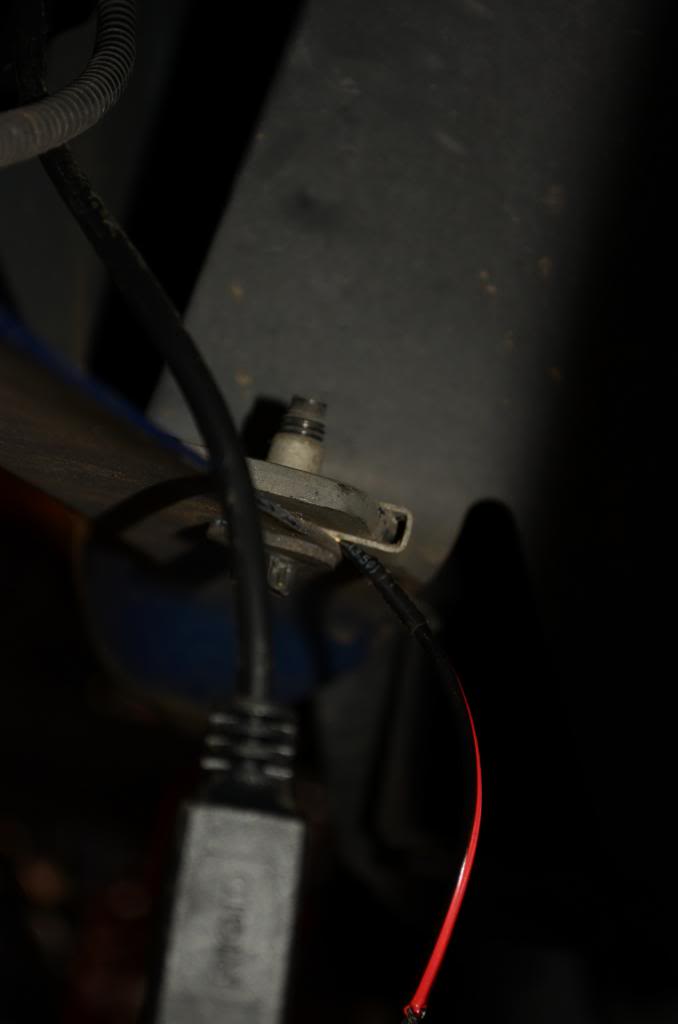
tucking things up
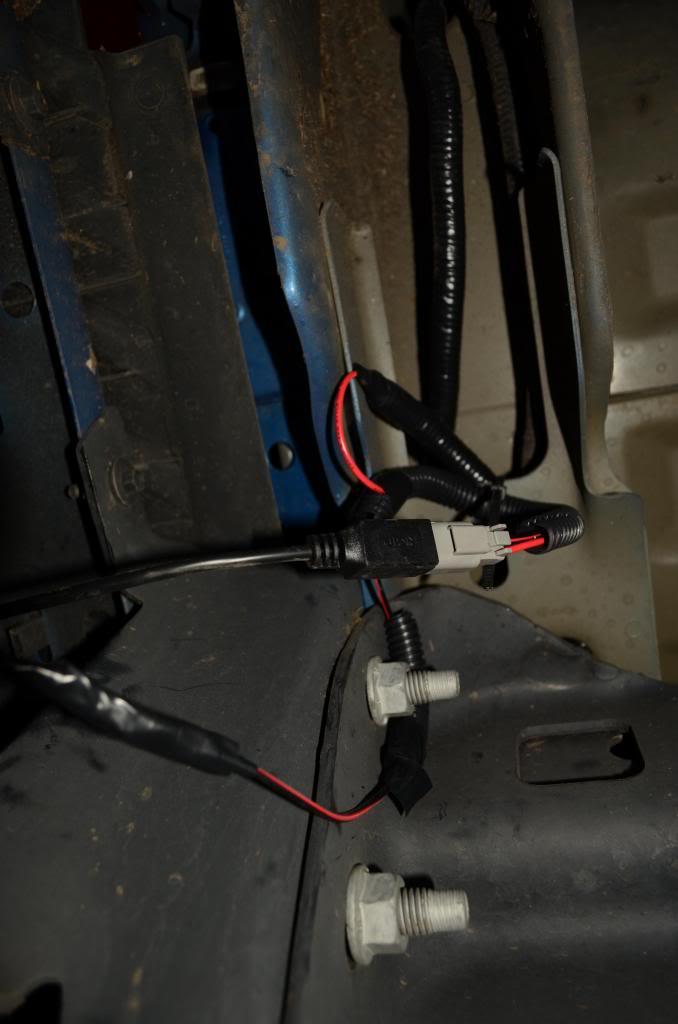
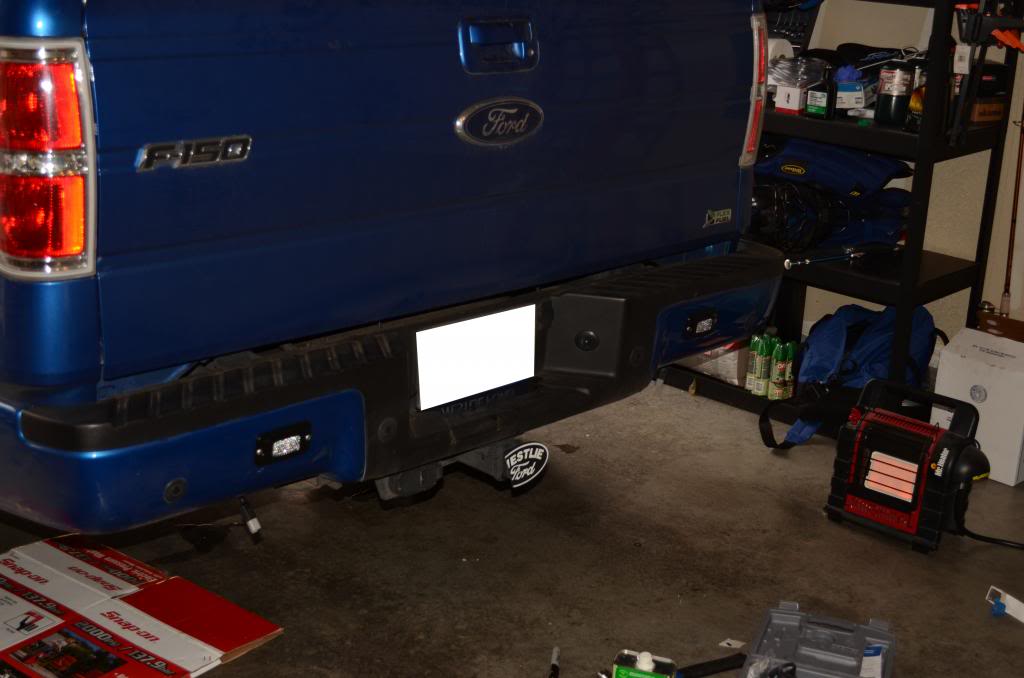
After

OK, now in case anyone wants to compare against my shots directly so we have a good comparison, I used my SLR camera and took pictures with these settings:
Shutter Speed: 1/6 (Very slow, I used my bed rail as a camera stand)
ISO: 6400
Depth of field: F5
White Balance: Direct Sun
No Flash
Normal lense, no filters
stock reverse only (LED's covered with cardboard)
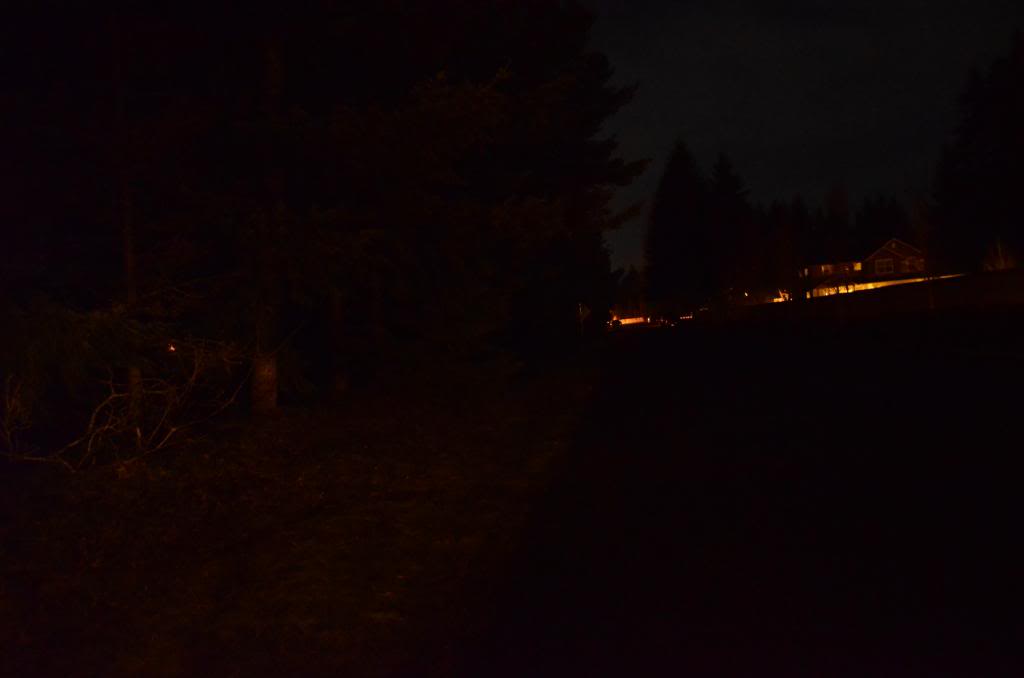
stock reverse + LED's
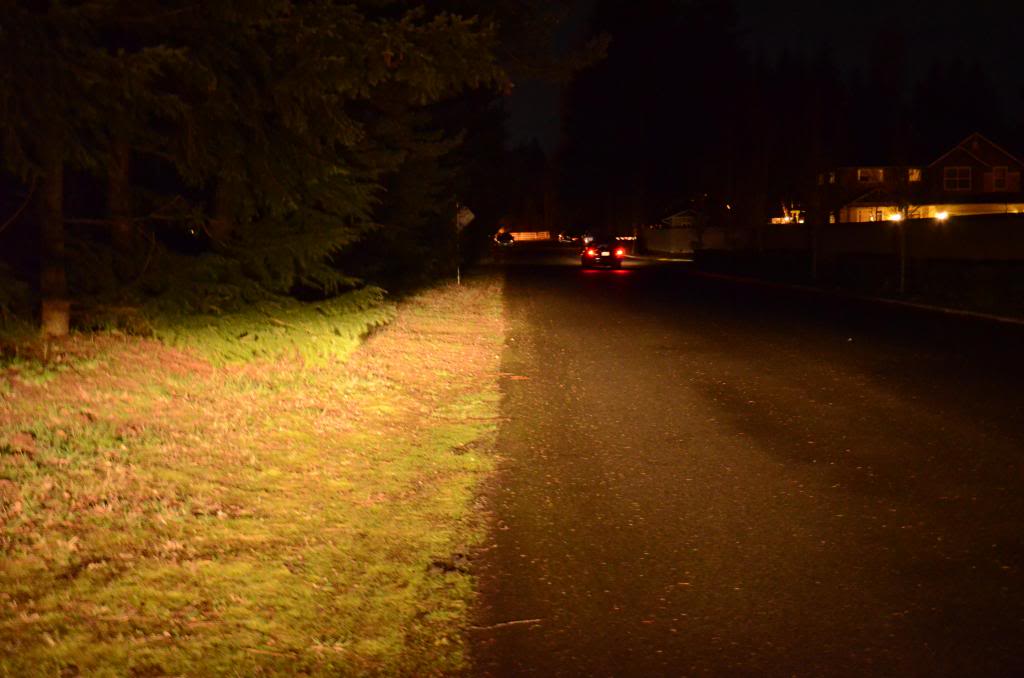
standing far away shot
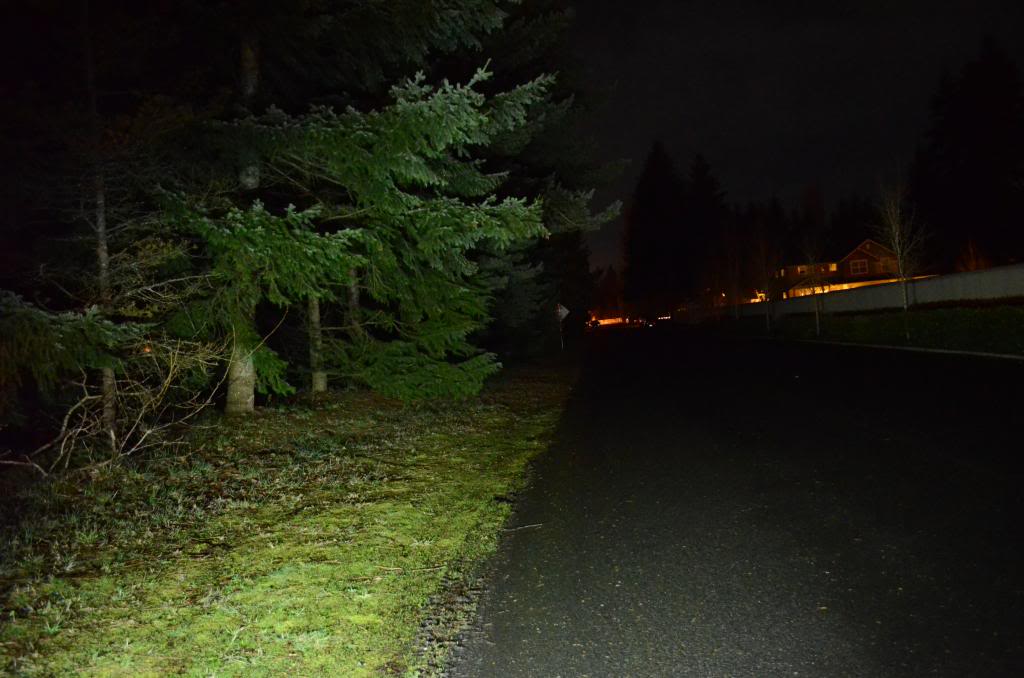
Beam pattern 1
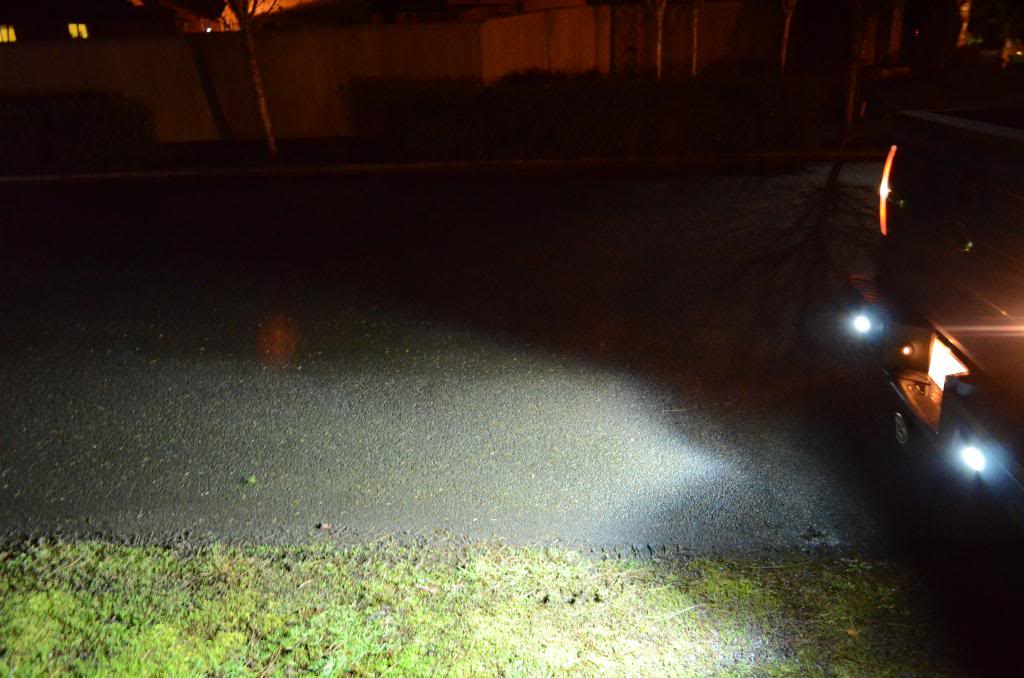
Beam pattern 2
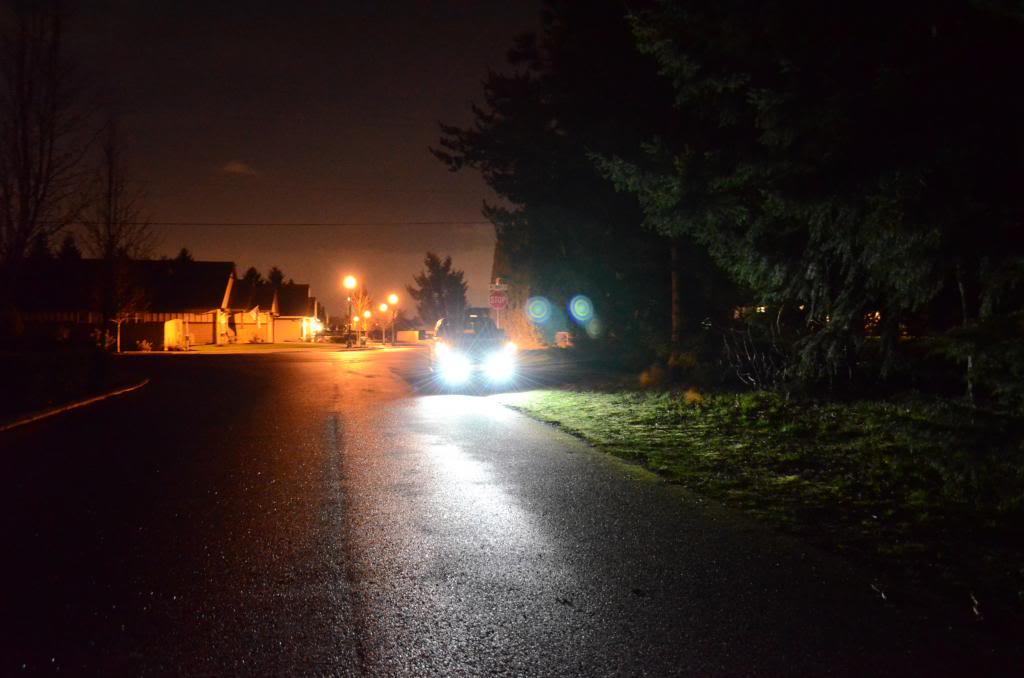
Halogen headlights to compare against. Yes, I lost my HID setup, because I busted up the lense really good on my headlights. So I just reverted back to my spare halogen headlights. They also perform better when there's snow (My HID's never got warm enough to really keep the lenses clear).
Tools I used to cut open the bumper:
Sabre saw with fine metal blade
Dremel tool (to do some touch-up)
All the other stuff is just your run of the mill socket set and soldering iron set as well. Now on with the pics.
Before
Measuring up
One in, one to go
The cut
Opening up the reverse lights, it's the grey wire that is hot
tapping in, I actually soldered the wires together, then I used liquid-electric-tape to seal things up, along with the old school stuff to be sure.
ground
tucking things up
After
OK, now in case anyone wants to compare against my shots directly so we have a good comparison, I used my SLR camera and took pictures with these settings:
Shutter Speed: 1/6 (Very slow, I used my bed rail as a camera stand)
ISO: 6400
Depth of field: F5
White Balance: Direct Sun
No Flash
Normal lense, no filters
stock reverse only (LED's covered with cardboard)
stock reverse + LED's
standing far away shot
Beam pattern 1
Beam pattern 2
Halogen headlights to compare against. Yes, I lost my HID setup, because I busted up the lense really good on my headlights. So I just reverted back to my spare halogen headlights. They also perform better when there's snow (My HID's never got warm enough to really keep the lenses clear).
Last edited by Jus2shy; Feb 23, 2013 at 10:07 PM. Reason: Forgot, I didn't get pics of my soldering job... :(
Thread Starter
|
Elder User
Joined: Jul 2010
Posts: 501
Likes: 1
From: Pacific NW
. I spent roughly $220 ish (don't have receipt near me right now). I have to say, the lights are very heavy duty feeling. I really liked how solid the housing is. I may be tempted to use their 30" SR light for the front of my truck. At first, I was set on getting an "E" series, but it'd be easier to hide an SR unit behind the stock grille using some angle iron and creativity. After driving through Idaho, Montana and Wyoming, I now understand why people need these light bars. My high beams were just not enough for illuminating the road and driving 70 mph at night. I saw plenty of blood stains on the road to convince me that this was something I'd need if I go eastward again.
Thread Starter
|
Elder User
Joined: Jul 2010
Posts: 501
Likes: 1
From: Pacific NW
Why not just use something like this:
2X CREE R5 Emitter 7W T10 Wedge 184 192 Super Bright LED Reverse Backup Lights | eBay
That way you don't have to cut into the bumper and people have said these lights work great to replace the stock backup lights. I read the 921's are the ones to get from CREE...there are 3, 5, and 7 watt. (I would get the 7 watt) People have said they also replaced the cab lights with these 7w bulbs as well.
Cargo Master


Joined: Oct 2010
Posts: 2,762
Likes: 536
From: barton city mi
You should have enough light now! Good job. These bumpers must not be as tough as a '77 Dodge. When I had Power Wagons, I built a light bar, and drilled through the bumper to mount it. That was some badaZZ steel. I must have had different thoughts when I mentioned a plasma cutter.LOL
Resident smarta$$
Joined: Aug 2006
Posts: 4,929
Likes: 9
From: Oaks,PA

Why not just use something like this:
2X CREE R5 Emitter 7W T10 Wedge 184 192 Super Bright LED Reverse Backup Lights | eBay
That way you don't have to cut into the bumper and people have said these lights work great to replace the stock backup lights. I read the 921's are the ones to get from CREE...there are 3, 5, and 7 watt. (I would get the 7 watt) People have said they also replaced the cab lights with these 7w bulbs as well.
2X CREE R5 Emitter 7W T10 Wedge 184 192 Super Bright LED Reverse Backup Lights | eBay
That way you don't have to cut into the bumper and people have said these lights work great to replace the stock backup lights. I read the 921's are the ones to get from CREE...there are 3, 5, and 7 watt. (I would get the 7 watt) People have said they also replaced the cab lights with these 7w bulbs as well.

Thread Starter
|
Elder User
Joined: Jul 2010
Posts: 501
Likes: 1
From: Pacific NW
You should have enough light now! Good job. These bumpers must not be as tough as a '77 Dodge. When I had Power Wagons, I built a light bar, and drilled through the bumper to mount it. That was some badaZZ steel. I must have had different thoughts when I mentioned a plasma cutter.LOL
FTE Stories
Ford Trucks for Ford Truck Enthusiasts

Top 6 Best Deals Available on New Fords & Lincolns Right Now
Brett Foote
This Hennessey Takes the Expedition Tremor's Off-Roading Capability to the Next Level
Verdad Gallardo
Top 10 Fords at 2026 Carlisle Ford Nationals
Joe Kucinski
3 Best / 3 Worst Parts of Modern Ford Ownership
Brett Foote
10 Amazing Upgrades That Solve Common Ford Truck Owner Headaches
Pouria Savadkouei
Every 2026 Ford Engine Explained
Brett Foote
10 Ugly Ford Trucks That We Still Kinda Love
Joe Kucinski
10 Things Every Truck Owner NEEDS (2026 Edition)
Michael S. Palmer
Rezvani's Latest Post-Apocalyptic Monster Is a Ford F-150 Raptor Underneath
Verdad Gallardo
Mountain Pass
Joined: May 2010
Posts: 241
Likes: 1
From: AZ, SSA
Same here. There should be a special place in h*ll reserved for those people.

Posting Guru
Joined: Feb 2005
Posts: 2,295
Likes: 2
It's quite entertaining.


Resident smarta$$
Joined: Aug 2006
Posts: 4,929
Likes: 9
From: Oaks,PA
Birthday money is burning a hole in my pocket What is the difference between the SR-M and the SR-M2 besides $50? I'm sure its more powerful, but the description on Rigids site is the same for both lights
EDIT: I am thinking of just getting the SR-M with the mounting bracket. I'm leary of cutting holes in my bumper, and if I get a newer truck some day I can take the SR-M off
What is the difference between the SR-M and the SR-M2 besides $50? I'm sure its more powerful, but the description on Rigids site is the same for both lightsEDIT: I am thinking of just getting the SR-M with the mounting bracket. I'm leary of cutting holes in my bumper, and if I get a newer truck some day I can take the SR-M off

New User
Joined: Feb 2013
Posts: 2
Likes: 0
Back up lights not woking
I had a pair of the Rigid lights mounted on the tow bar, they were woking great for about 6 months. Suddenlly they went out, checked fuses, bulbs, relays. Does anyone know where the switch on the trans is and could this be the problem.
Thanks
Thanks