
Stancor 586-902 Mounted As GPR Today
#1
 01-06-2010, 03:58 PM

Stancor 586-902 Mounted As GPR Today
I finally got around to installing the Stancor today. Since I had this piece of scrap copper plate and time on my hands I decided to make a bracket to mount it vertically. I cut out a 4" x 5" piece (4" x 5 1/2" would be better), as well as two straps approximately 3/4" x 3". Using the masking tape to outline the cuts worked great.
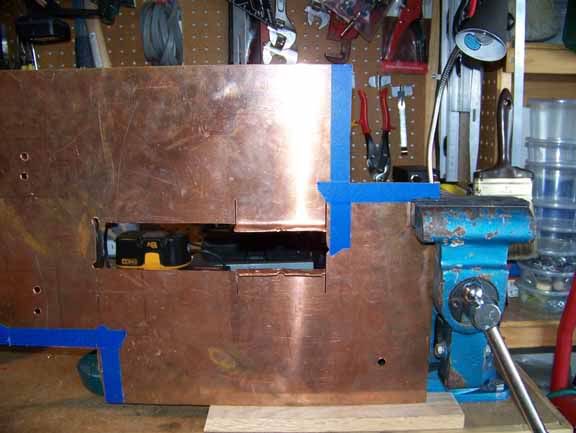
Here is the bracket after being bent and drilled. It is mounted to the stock GPR bracket using the original flange nuts. The two holes in the vertical side are for mounting the Stancor. The extra hole in the horizontal side was already in the copper plate. We can always call it a drain hole.
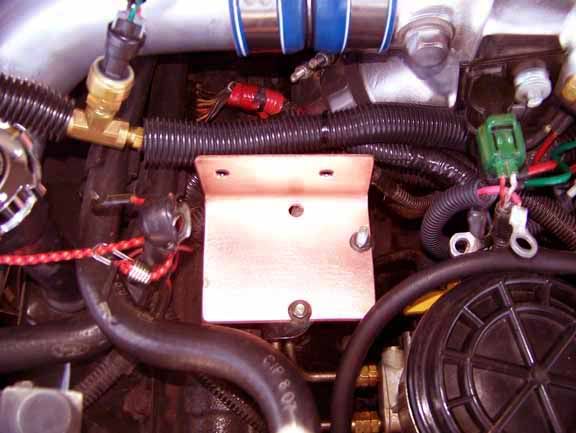
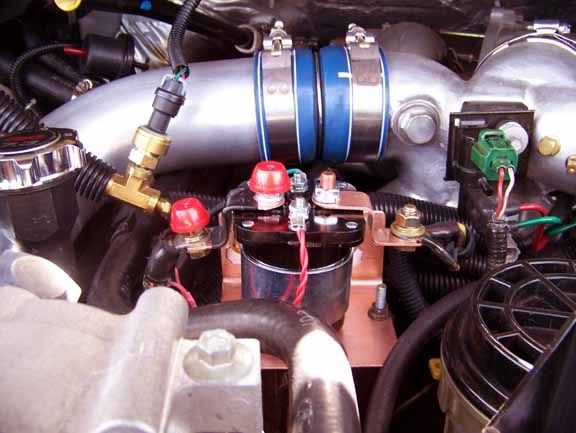
Since the Stancor is so tall I knew I would have to either extend the wiring or extend the terminals. I chose to extend the power terminals using the copper straps (just drilled and bent to fit), and just spliced in wire to extend the control leads. Found the red plastic push nuts with metal inserts at Ace. How long they will last only time will tell, but I wanted to protect the ALWAYS HOT terminals the best I could. The hot side strap also has a piece of shrink tubing covering the middle.
Stancor mounted and wired.
With the engine cover in place. Plenty of room because I offset the Stancor to the left, the reason I made the bracket 4" wide.
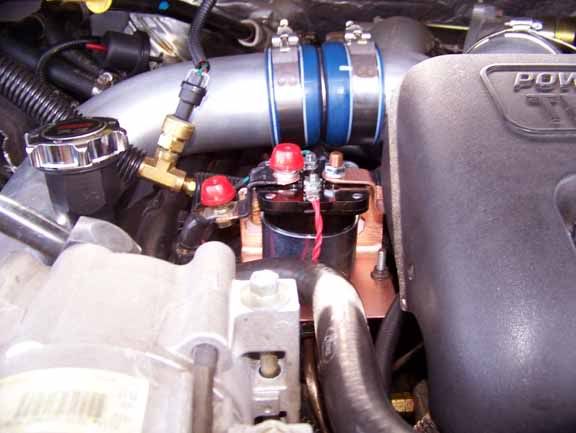
It all tested OK and is good to go.
TIP for the day : I don't have a bench grinder for rounding off edges or grinding down material for a better fit, so I improvised by using a vise to hold an angle grinder.
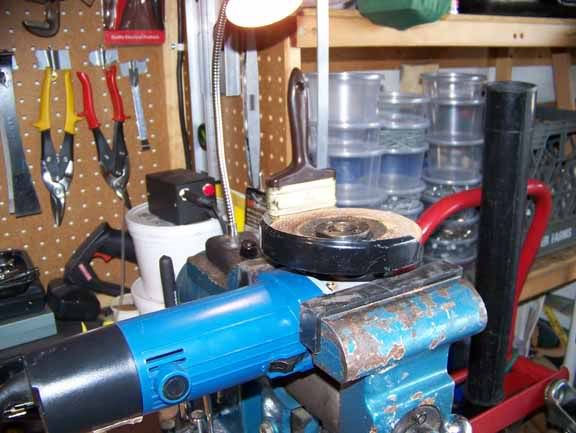
Second tip of the day : Wear safety glasses or goggles.
For those who can't link to Photobucket (I'm thinking of you Chase) here is a composite of the pics:
Here is the bracket after being bent and drilled. It is mounted to the stock GPR bracket using the original flange nuts. The two holes in the vertical side are for mounting the Stancor. The extra hole in the horizontal side was already in the copper plate. We can always call it a drain hole.
Since the Stancor is so tall I knew I would have to either extend the wiring or extend the terminals. I chose to extend the power terminals using the copper straps (just drilled and bent to fit), and just spliced in wire to extend the control leads. Found the red plastic push nuts with metal inserts at Ace. How long they will last only time will tell, but I wanted to protect the ALWAYS HOT terminals the best I could. The hot side strap also has a piece of shrink tubing covering the middle.
Stancor mounted and wired.
With the engine cover in place. Plenty of room because I offset the Stancor to the left, the reason I made the bracket 4" wide.
It all tested OK and is good to go.
TIP for the day : I don't have a bench grinder for rounding off edges or grinding down material for a better fit, so I improvised by using a vise to hold an angle grinder.
Second tip of the day : Wear safety glasses or goggles.
For those who can't link to Photobucket (I'm thinking of you Chase) here is a composite of the pics:
#4
01-06-2010, 05:05 PM

#6
01-06-2010, 06:02 PM

#7
01-06-2010, 06:09 PM

Trending Topics

#9
01-06-2010, 06:26 PM
Posting Guru
Join Date: Oct 2009
Location: Tonoph,AZ
Posts: 1,008
Likes: 0
Received 0 Likes
on
0 Posts
#10
01-06-2010, 06:26 PM
")
#11
01-06-2010, 07:23 PM
Join Date: Jan 2009
Location: Glen Rose,Texas
Posts: 2,667
Likes: 0
Received 0 Likes
on
0 Posts

#13
01-06-2010, 08:18 PM
Elder User
Join Date: Dec 2009
Location: Fort Campbell, KY
Posts: 864
Likes: 0
Received 0 Likes
on
0 Posts
#15
01-06-2010, 08:43 PM
Robin, outstanding detail of a well executed project. Good to see the Stancor mounted as designed. Reps -> U
OT How did you install the heater hose shutoff valve? (looks like one anyway. Close to the tranny dip stick with the read lead exiting toward the front of the engine.
OT How did you install the heater hose shutoff valve? (looks like one anyway. Close to the tranny dip stick with the read lead exiting toward the front of the engine.