Jon's 1950 f-1

#47
 12-02-2012, 09:21 PM
#48
12-02-2012, 09:23 PM
#49
12-02-2012, 09:56 PM
More pic's
Wife sent me a few more pic's from my files.

The wireing continues
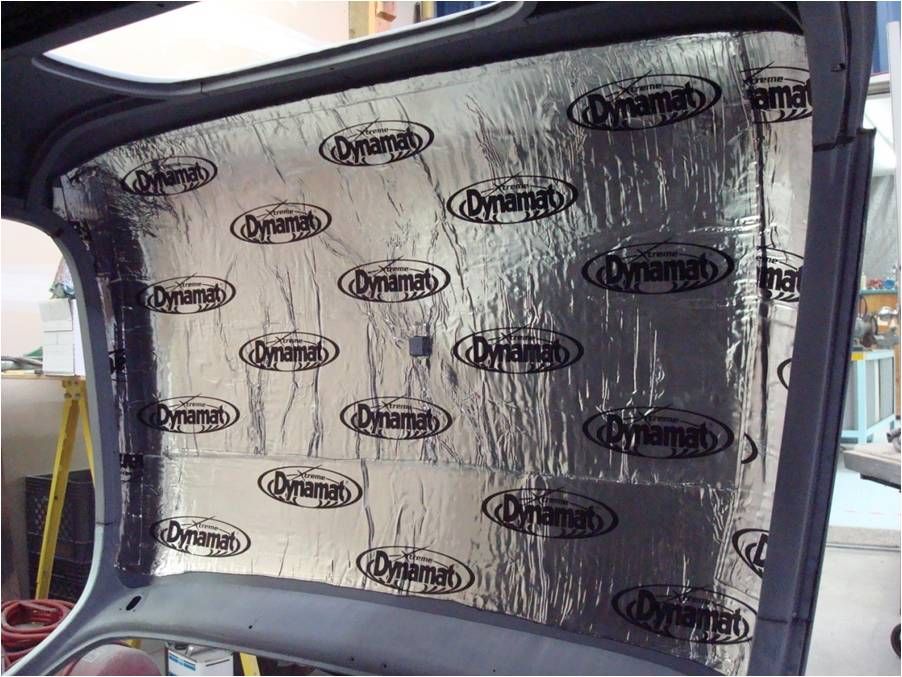
The dyna-mat makes the truck sound like your knocking on a block of wood.

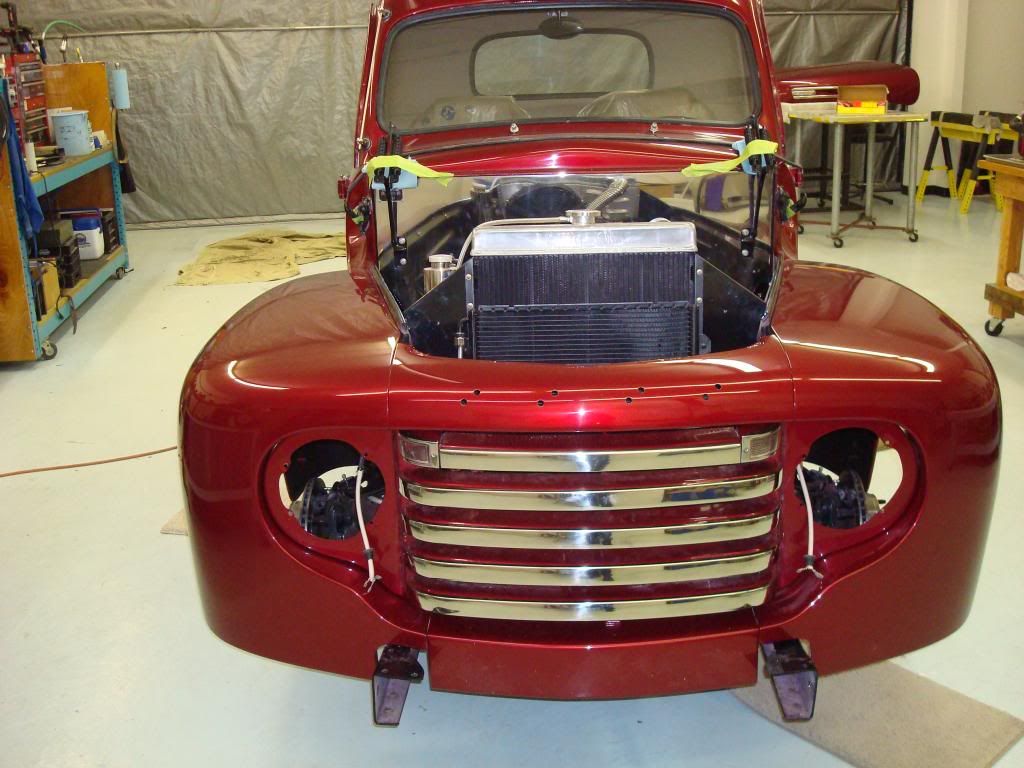
Jon did not want any wireing or hoses in the engine bay so I ran the hoses inside the R/H wheel well (minus the bungi cord)
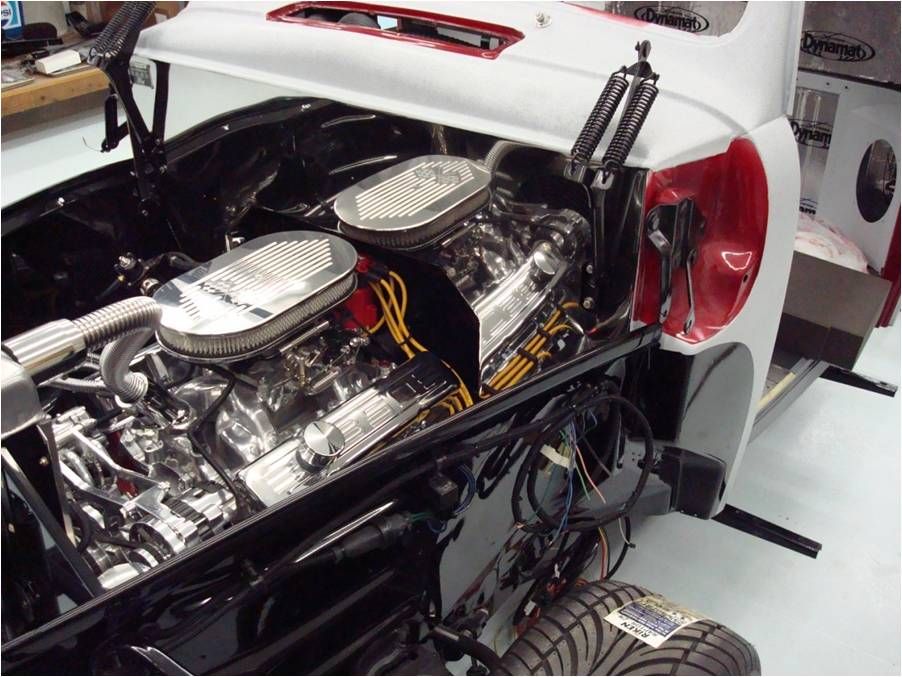
And all of the chassis wireing inside the L/H wheel well. All of the engine wireing is routed under the air cleaner then straight back thru the firewall into the cab.
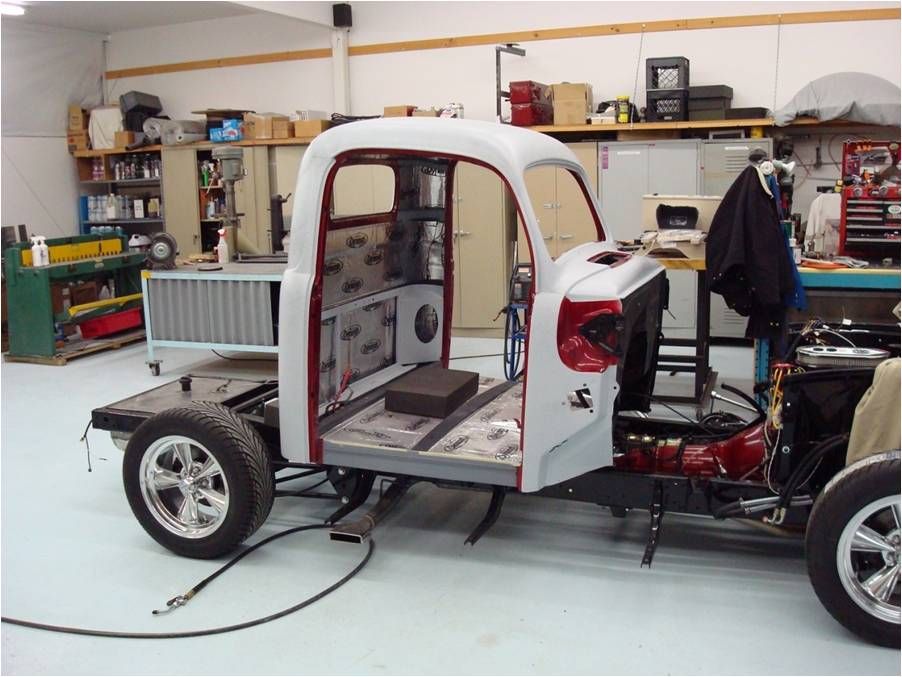
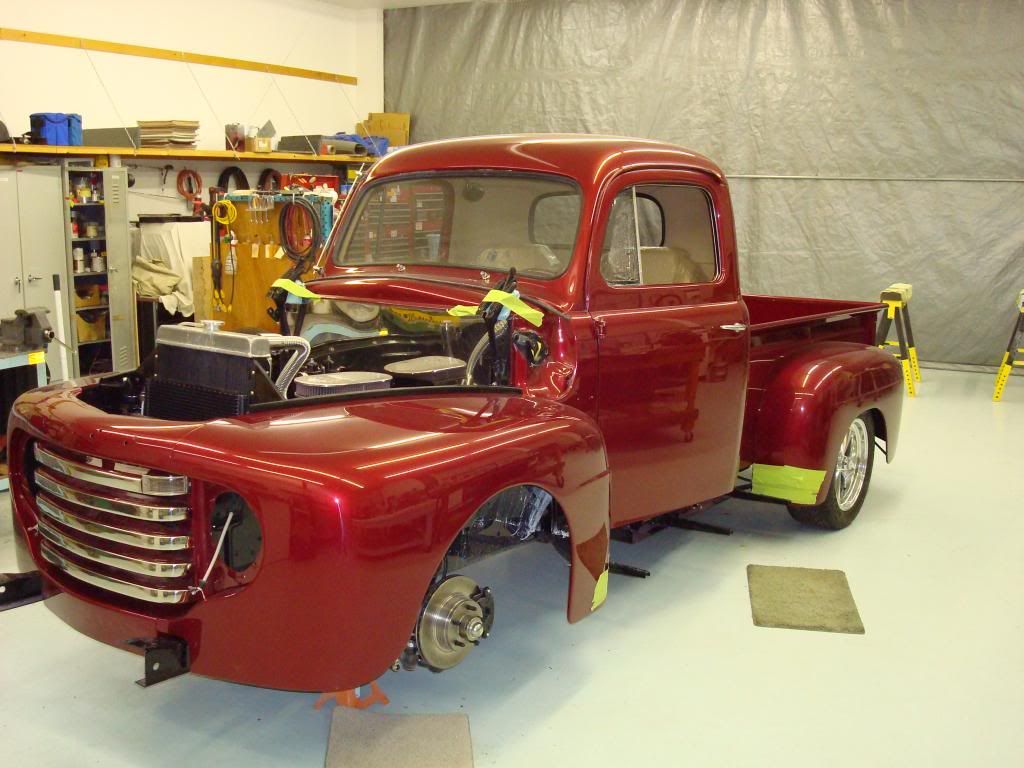
The cab waiting to be mated to the chassis.
The wireing continues
The dyna-mat makes the truck sound like your knocking on a block of wood.
Jon did not want any wireing or hoses in the engine bay so I ran the hoses inside the R/H wheel well (minus the bungi cord)
And all of the chassis wireing inside the L/H wheel well. All of the engine wireing is routed under the air cleaner then straight back thru the firewall into the cab.
The cab waiting to be mated to the chassis.
#50
12-02-2012, 10:01 PM

 OH! I was just wondering today about how I should proceed! I need to work on the cab before I wire everything. Too late to do any bodywork or paint this year..I am also an aviation guy, but not electrical. Structures were my thing. I want to see some connectors to do the same thing.
I mean I would like to be able to plug/unplug the cab.
#51
12-02-2012, 10:21 PM
OH! OH! I was just wondering today about how I should proceed! I need to work on the cab before I wire everything. Too late to do any bodywork or paint this year..I am also an aviation guy, but not electrical. Structures were my thing. I want to see some connectors to do the same thing.
I mean I would like to be able to plug/unplug the cab.
OH! I was just wondering today about how I should proceed! I need to work on the cab before I wire everything. Too late to do any bodywork or paint this year..I am also an aviation guy, but not electrical. Structures were my thing. I want to see some connectors to do the same thing.I mean I would like to be able to plug/unplug the cab.
I counted the number and wire size of all the wires exiting the cab.
Next I pulled out my EDMO Distributors book and started looking for an enviromental plug that would work.
Because of the limited space where I wanted the wireing to enter, I had to use two smaller plugs rather than one for the chassis, but only used one for all the engine wireing.
I'm pretty sure that the plugs I used were AMP units, they have a plastic case with enviro seals to keep water and crud out but I still coated the pins and sockets with DC-4 compond.
PS: I bought plugs with extra pins so if Jon wants to add something later he can just pop the pins and sockets in.
#52
12-02-2012, 11:06 PM
#53
12-02-2012, 11:52 PM
To be 100% honest, I can't remember the part numbers of the plugs I used but here is how I figured out which ones to buy.
I counted the number and wire size of all the wires exiting the cab.
Next I pulled out my EDMO Distributors book and started looking for an enviromental plug that would work.
Because of the limited space where I wanted the wireing to enter, I had to use two smaller plugs rather than one for the chassis, but only used one for all the engine wireing.
I'm pretty sure that the plugs I used were AMP units, they have a plastic case with enviro seals to keep water and crud out but I still coated the pins and sockets with DC-4 compond.
PS: I bought plugs with extra pins so if Jon wants to add something later he can just pop the pins and sockets in.
#54
12-04-2012, 01:44 PM
#55
12-04-2012, 01:51 PM
My truck on the other hand is going to be more or less a junk yard build do to the wifes rationing of funds.
#56
12-04-2012, 09:40 PM
Some finishing touches
OK, I have survived another season of xmas tree harvest and am back in Idaho again, enjoying my grandkids again.
Went in this am and took some pic's of the truck which has sat alone for a month now, waiting for us to finish the job.
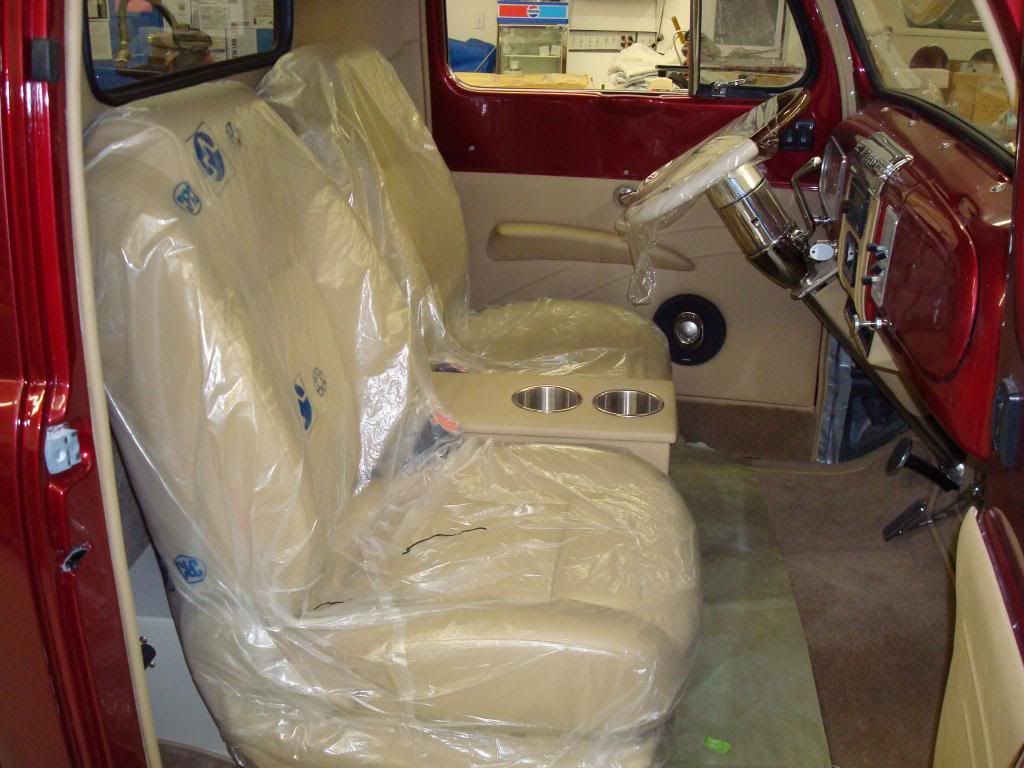
The interior is nearly complete but there are still some minor things to finish up.
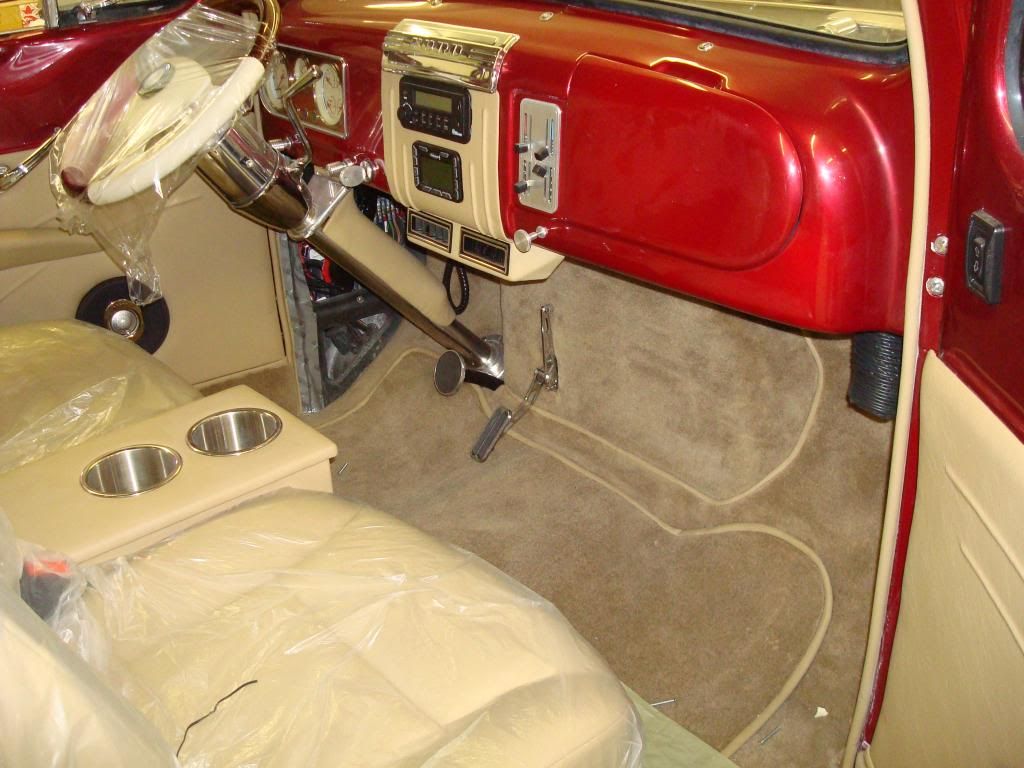
I have left the plastic over everything because I don't want to be thr first to mare the leather,,,thats Jon's job.

The door panels turned out better than I thought they would from the uphoustery guy Rick's discription.

And he went above and beyond on the headliner.
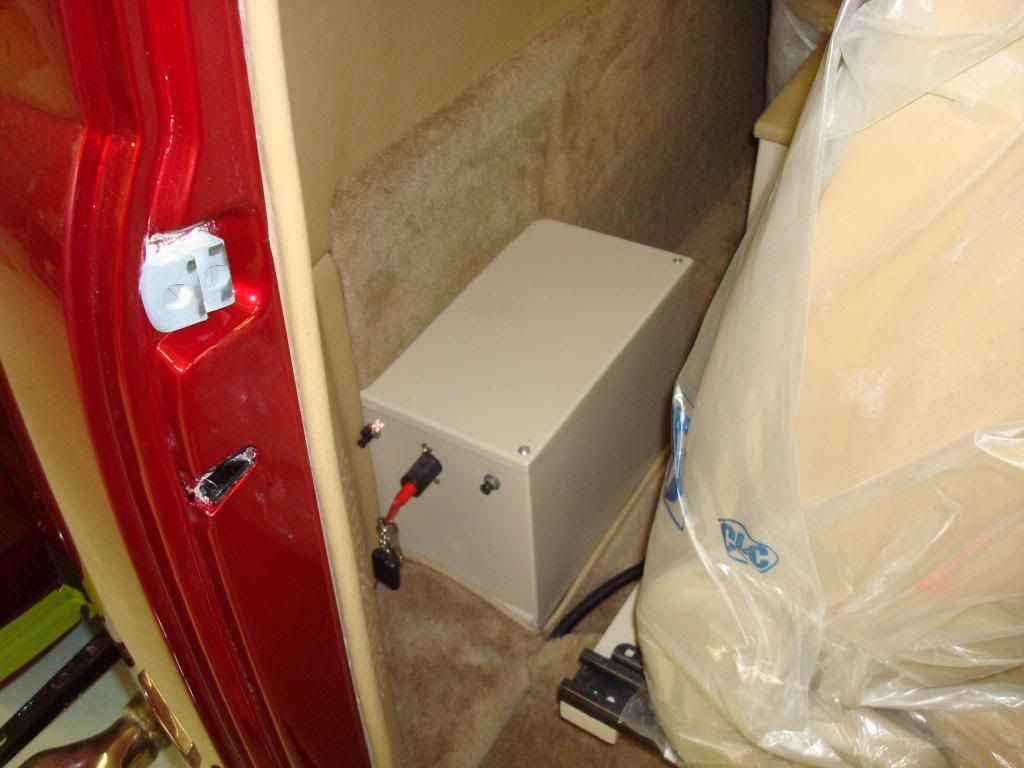
Here's the battery box, neatly tucked in behind the passenger seat.
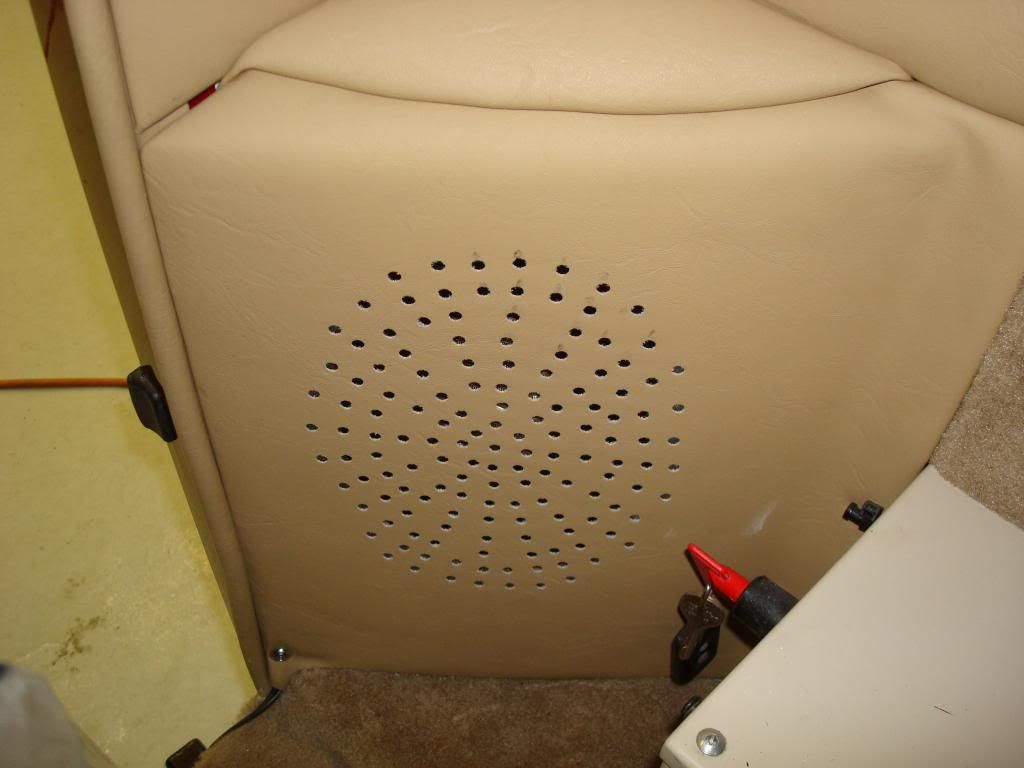
And the rear speaker grills were awesome too.
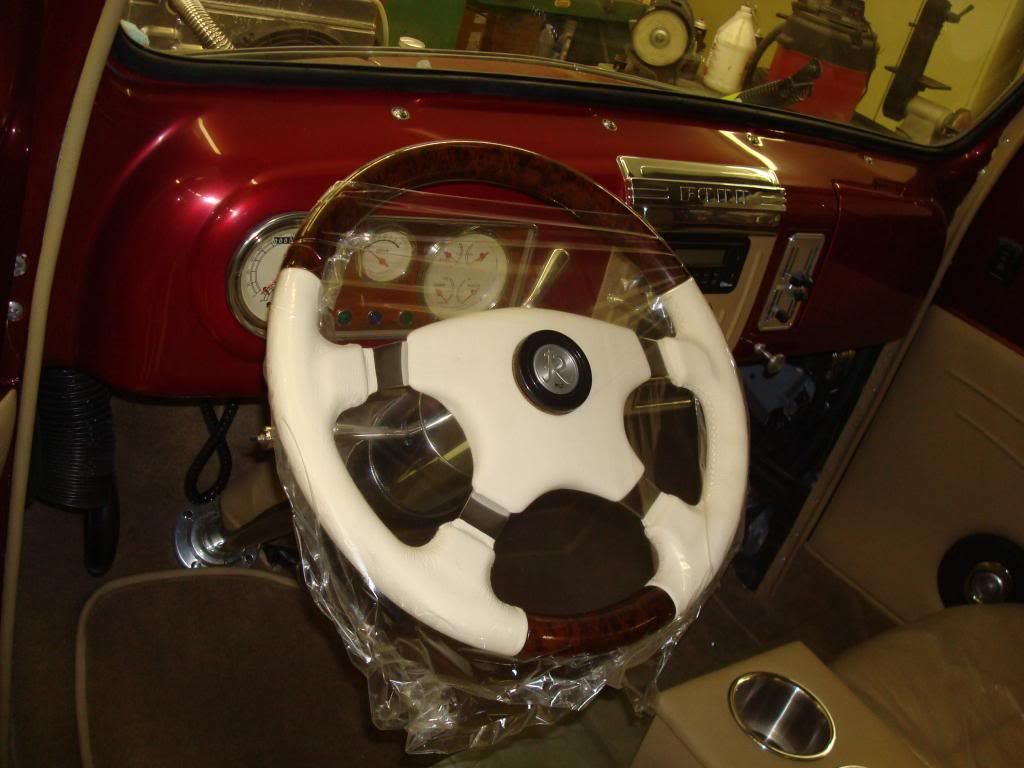
The flaming river wheel is beautiful but I'm afraid to touch it so I wraped it too.

The last items are the running boards which Cal is custom fitting to match the fender profiles exactly.

Cal fitted the fenders to the inner fender panels so perfectly that no welting of any kind is needed.
I hope to get the hood back on tommorrow and begin mounting up the bumper, headlights etc.
I can't wait to see it completed.
Went in this am and took some pic's of the truck which has sat alone for a month now, waiting for us to finish the job.
The interior is nearly complete but there are still some minor things to finish up.
I have left the plastic over everything because I don't want to be thr first to mare the leather,,,thats Jon's job.
The door panels turned out better than I thought they would from the uphoustery guy Rick's discription.
And he went above and beyond on the headliner.
Here's the battery box, neatly tucked in behind the passenger seat.
And the rear speaker grills were awesome too.
The flaming river wheel is beautiful but I'm afraid to touch it so I wraped it too.
The last items are the running boards which Cal is custom fitting to match the fender profiles exactly.
Cal fitted the fenders to the inner fender panels so perfectly that no welting of any kind is needed.
I hope to get the hood back on tommorrow and begin mounting up the bumper, headlights etc.
I can't wait to see it completed.
#57
12-05-2012, 06:25 AM
Elder User
Join Date: Oct 2011
Location: Neosho, MO
Posts: 777
Likes: 0
Received 0 Likes
on
0 Posts
#59
12-05-2012, 12:39 PM
#60
12-05-2012, 08:50 PM
We installed the hood today, (no pic's yet), plugged the last few bolts in the front fenders and I finally got the radiator tank painted, but thats about it as Cal (our body guy) is totally focused on the running boards right now.
I will post more in a few days as we get it back on it's wheels.
I will post more in a few days as we get it back on it's wheels.