How to replace the intake gasket?
#1
 07-26-2012, 04:42 PM

Join Date: Sep 2009
Location: nor cal
Posts: 503
Likes: 0
Received 0 Likes
on
0 Posts
How to replace the intake gasket?
1975 F250 360 fe.
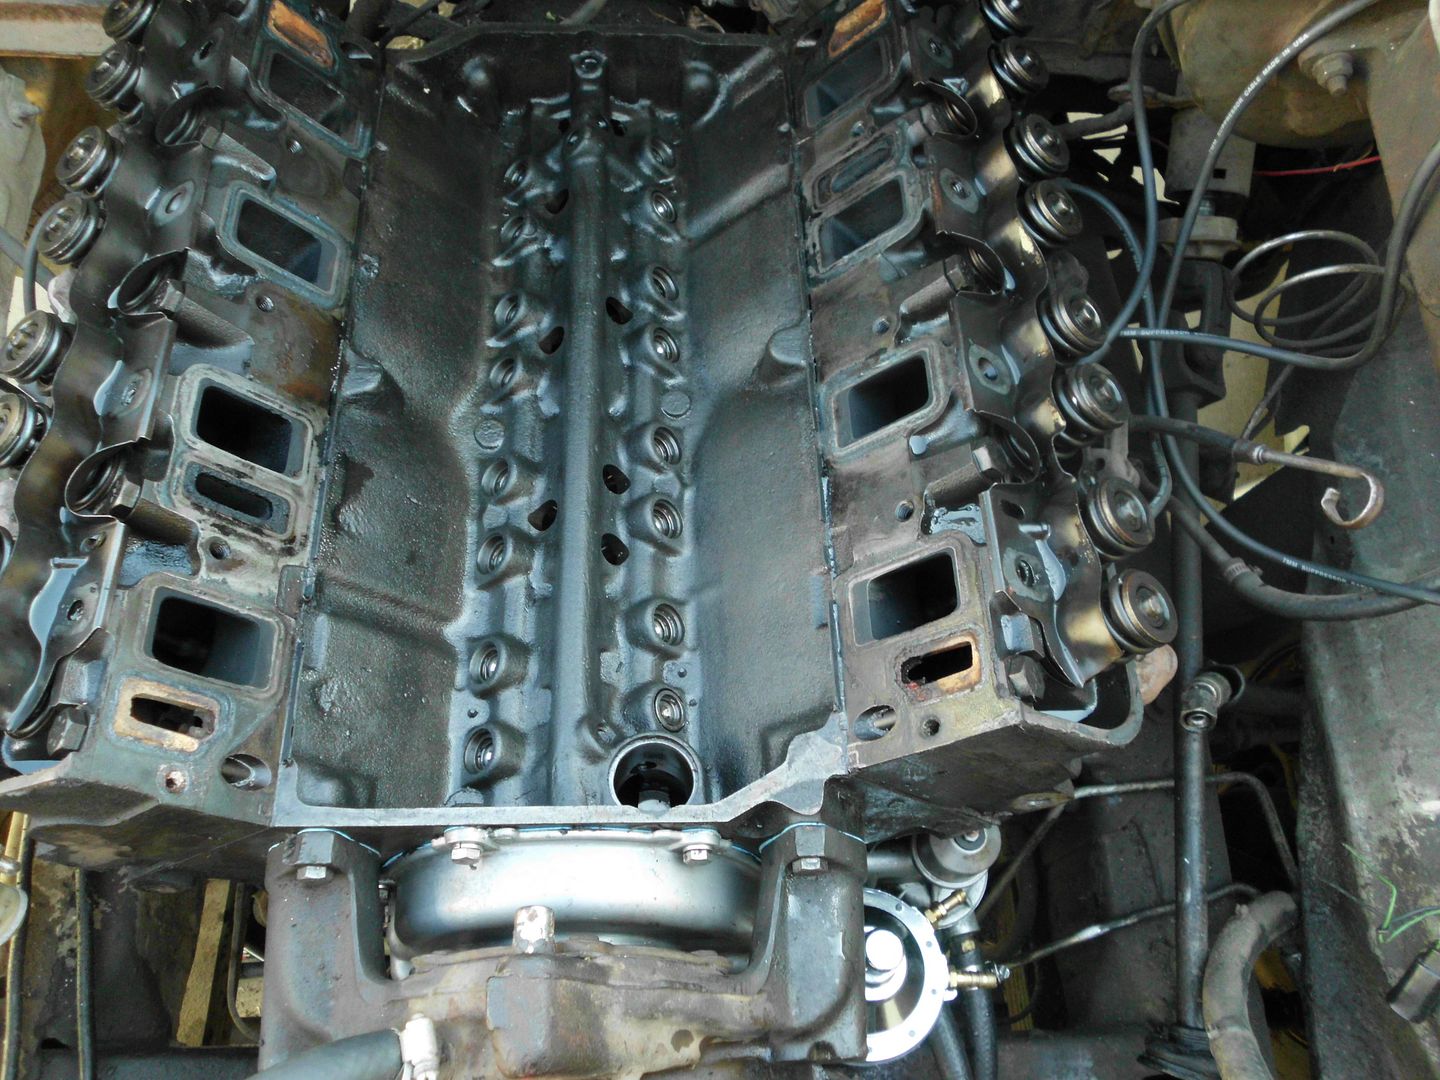
I went threw about 8 pages and stopped when I wouldn't find anything remote to the topic.. So how easy is it? Remove the carb and disconnect links, coil, I understand I should use a sharpy to mark where the distributor when is and when the #1 cylinder is Tdc, also marking the rotor inside. Unbolt 8 bolts and that's it?
Gasket and rtv or diesel silicone? 32-35 lbs.
It would probably be another 2 months before I get to it
thanks in advance
Last edited by FordmanShane; 07-26-2012 at 04:43 PM. Reason: tags
#2
07-26-2012, 06:09 PM
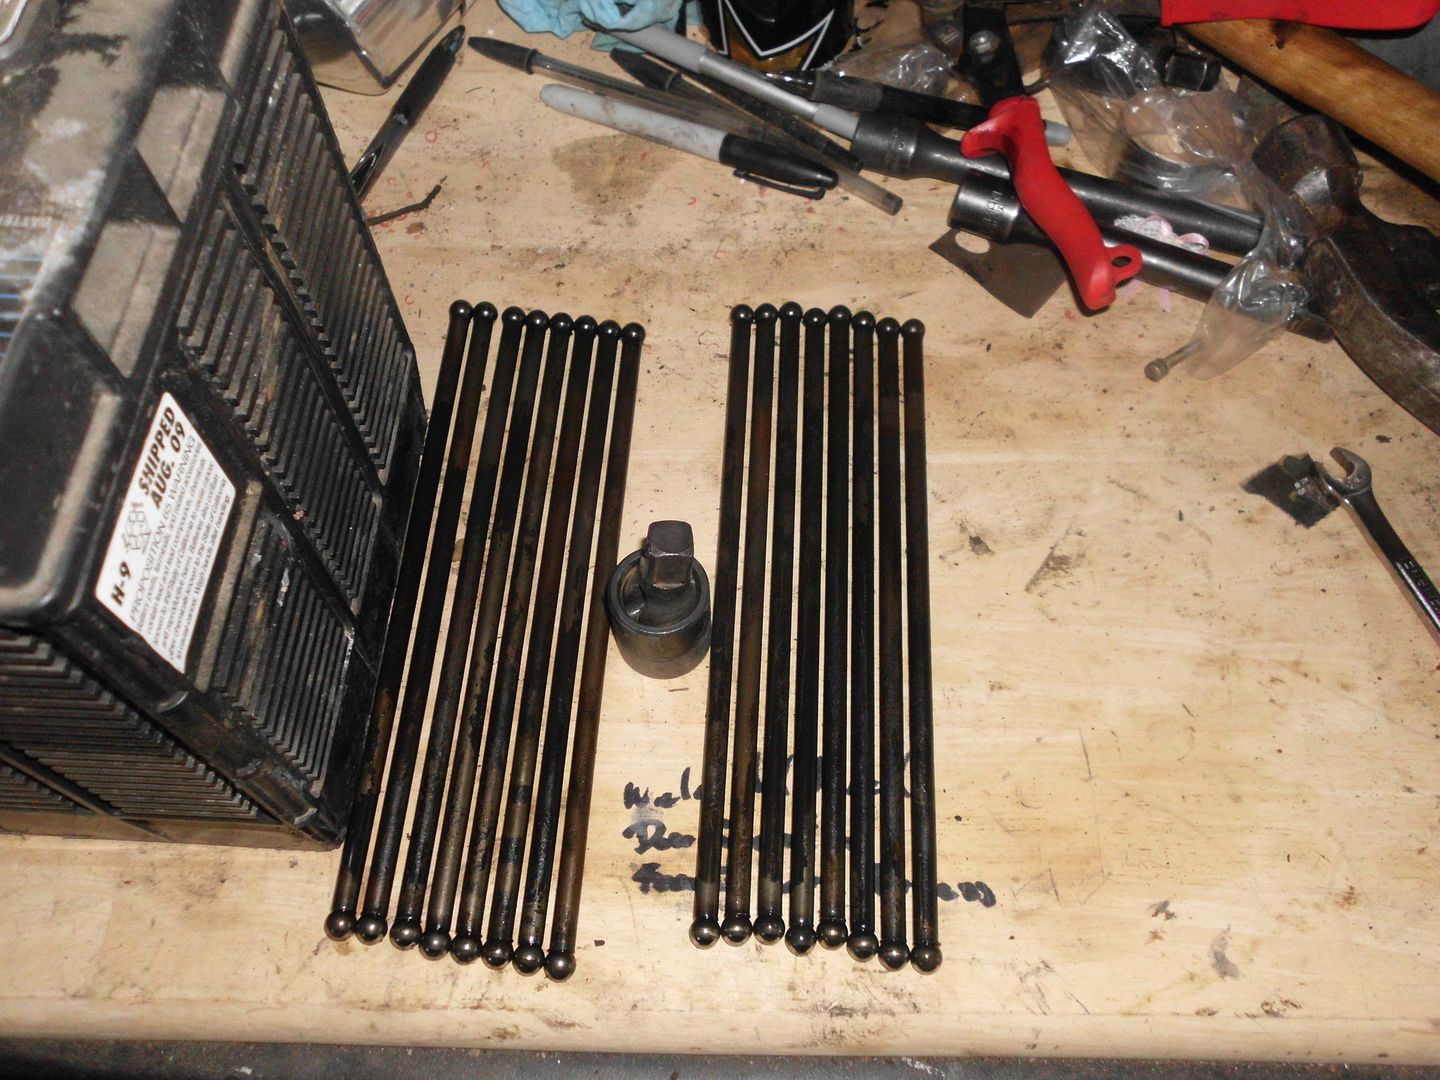
You didn't state what engine you have. If an FE you have to remove the valve covers, loosen the rocker arms and remove the push rods. When loosening the rocker arms, do so in 1/2 to 3/4 turn increments and retighten the same way till you reach the proper torque. If you remove the arms there is a bolt that's specific to oiling. Make sure it goes back in the same hole.
#3
07-26-2012, 06:49 PM


#4
07-27-2012, 12:46 PM
Join Date: Sep 2009
Location: nor cal
Posts: 503
Likes: 0
Received 0 Likes
on
0 Posts
push rod Q
You didn't state what engine you have. If an FE you have to remove the valve covers, loosen the rocker arms and remove the push rods. When loosening the rocker arms, do so in 1/2 to 3/4 turn increments and re-tighten the same way till you reach the proper torque. If you remove the arms there is a bolt that's specific to oiling. Make sure it goes back in the same hole.
haha aluminum

#6
07-27-2012, 03:39 PM
Join Date: Sep 2009
Location: nor cal
Posts: 503
Likes: 0
Received 0 Likes
on
0 Posts
#7
07-27-2012, 06:25 PM
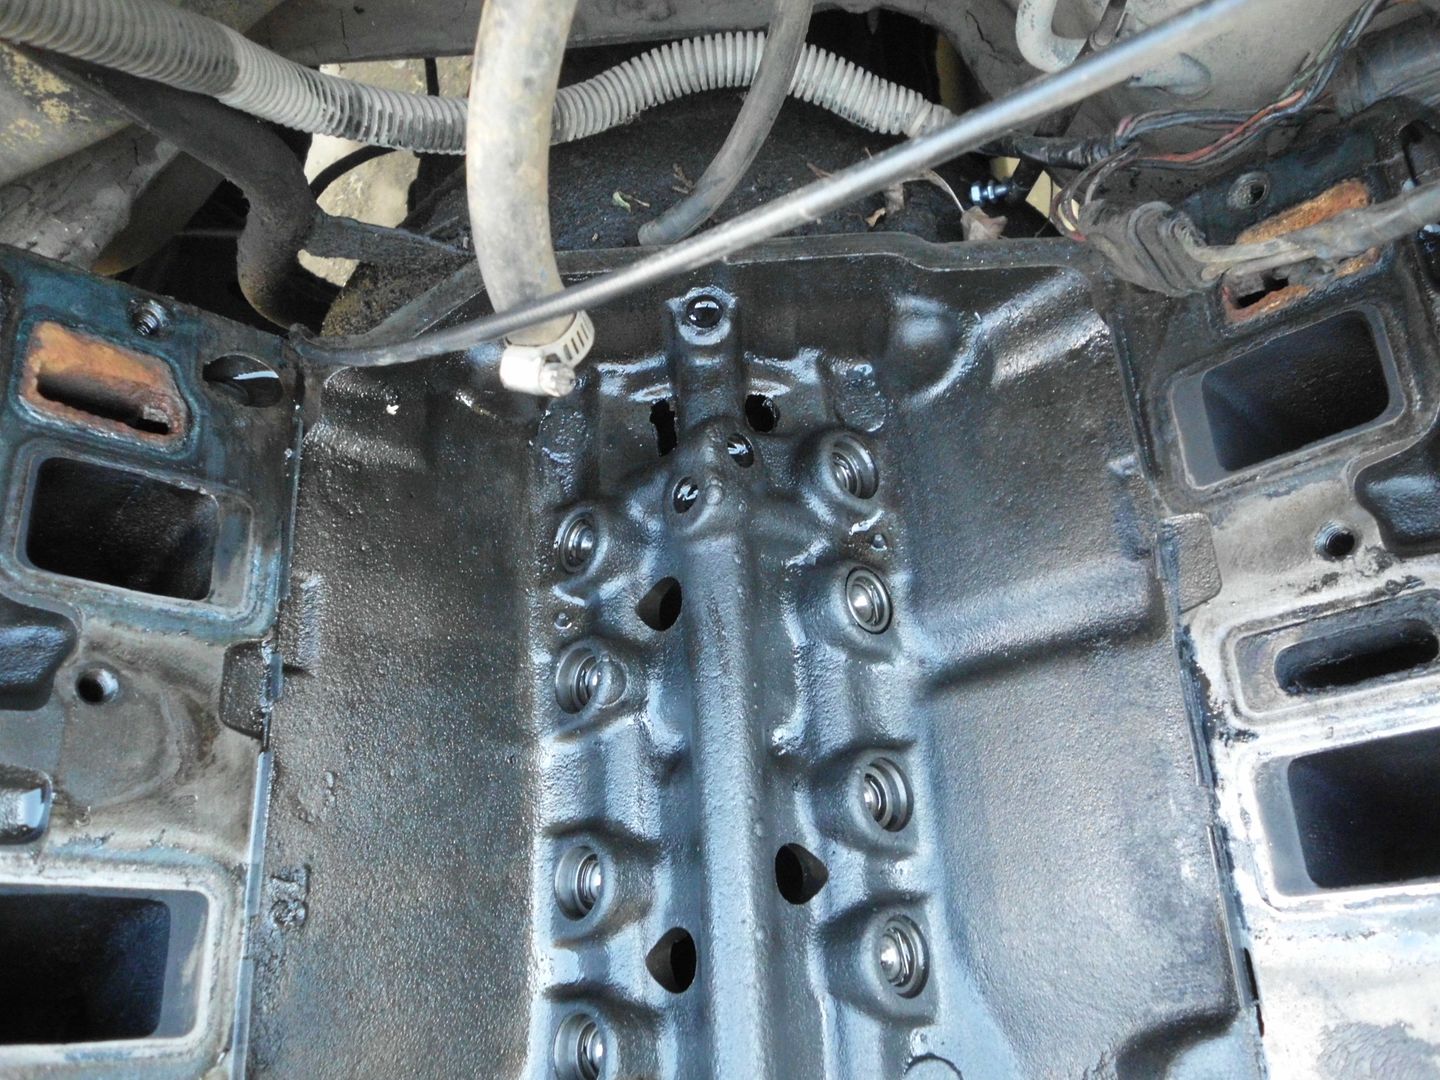
Use either the ultra black or ultra grey on the intake ends. They're specifically designed for contact with oil. Don't use the intake end gaskets. Instead use a 1/4" bead of the rtv. Let it tack up for 10 0r 15 minutes before lowering the intake. Put a thin film of rtv blue around the water passages on both sides of the gasket just for insurance.
Trending Topics
#8
07-28-2012, 01:49 AM
Join Date: Sep 2009
Location: nor cal
Posts: 503
Likes: 0
Received 0 Likes
on
0 Posts
#9
07-28-2012, 11:41 AM
Join Date: Sep 2009
Location: nor cal
Posts: 503
Likes: 0
Received 0 Likes
on
0 Posts

#11
07-29-2012, 11:52 AM

Post Fiend
Another trick to save some cussing. I always take a hacksaw and remove about 1/2 inch from the bypass pipe on the water pump (don't hack up your intake) That way you have room to install the hose after the intake is bolted down. Otherwise you have to try and get the hose on while you are positioning the intake and that's a total PITA>
#13
07-30-2012, 02:09 PM
Join Date: Sep 2009
Location: nor cal
Posts: 503
Likes: 0
Received 0 Likes
on
0 Posts
Another trick to save some cussing. I always take a hacksaw and remove about 1/2 inch from the bypass pipe on the water pump (don't hack up your intake) That way you have room to install the hose after the intake is bolted down. Otherwise you have to try and get the hose on while you are positioning the intake and that's a total PITA>

yes I did
#14
08-12-2012, 10:49 PM

FE INTAKE TRICK
End strips, especially rear, can slip out of location while lowering and locating that great big casting, most usually iron. Early H-P engines (390) had aluminum, perhaps others did later, but alum. were scarce in mid-60s.
Clean block surface, (end strip surfaces) with solvent, use 3-M Super Weather Strip Adhesive to attach end strips. They won't move!
A carefully-built and cared-for FE will just about run forever!
impish
Clean block surface, (end strip surfaces) with solvent, use 3-M Super Weather Strip Adhesive to attach end strips. They won't move!
A carefully-built and cared-for FE will just about run forever!
impish
#15
08-13-2012, 11:39 PM
End strips, especially rear, can slip out of location while lowering and locating that great big casting, most usually iron. Early H-P engines (390) had aluminum, perhaps others did later, but alum. were scarce in mid-60s.
Clean block surface, (end strip surfaces) with solvent, use 3-M Super Weather Strip Adhesive to attach end strips. They won't move!
A carefully-built and cared-for FE will just about run forever!
impish
Clean block surface, (end strip surfaces) with solvent, use 3-M Super Weather Strip Adhesive to attach end strips. They won't move!
A carefully-built and cared-for FE will just about run forever!
impish