My 55 F-100 Project
#91
 01-11-2013, 01:09 PM

Project 55, great work and is looking awesome.... I am no professional but am impressed in your progress. We have a lot of truck/mechanical gurus here on FTE and I would say with what you are doing and the pace at which you are working you fall in that category for me.
The cab, suspension and drivetrain fab work look real nice.
Congrats and keep us posted. The people who build at VERY slow rates like me enjoy seeing this all happen...
The cab, suspension and drivetrain fab work look real nice.
Congrats and keep us posted. The people who build at VERY slow rates like me enjoy seeing this all happen...
So I began with the small stuff that required mostly labor and little cash. Stuff like fabbing a new battery box, bead blasting/painting the heater and lubing the fan motor.
Then I kinda stumbled upon the cv IRS and got it cheap and was able to adapt it to the truck cheap too. And even the T bird IRS was a cheap dollar investment (until I overhauled it), it just required more labor than money.
I probably could have saved a little cash if I had spent the time with a dolly and hammer to make repair patches for the cab corners but it for what LMC wanted for new sections I buckled and bought them instead.
It's like the 87 van steering column I pulled from a wrecking yard, it's the right length, has tilt, column dimmer, etc. All it needs is some TLC and a new paint job and I didn't spend mega cash to Ididit or someone else.
This beast may be a frankinstein when I'm done but my plan is to keep it an all Ford Frankintruck,,,hehe.
Gary
#92
01-11-2013, 06:17 PM


#93
01-12-2013, 03:25 PM
Welcome to FTE Gary . Don't be bashful about asking questions . Everyone on here has been in probably the same spot somewhere in their builds at one time or another . WE do like pics too ,so keep us updated as things move along . Take your time and if you get discouraged walk away from it . These trucks take time , money and lots of busted knuckles to get them back to where you want them .
#94
01-12-2013, 07:29 PM
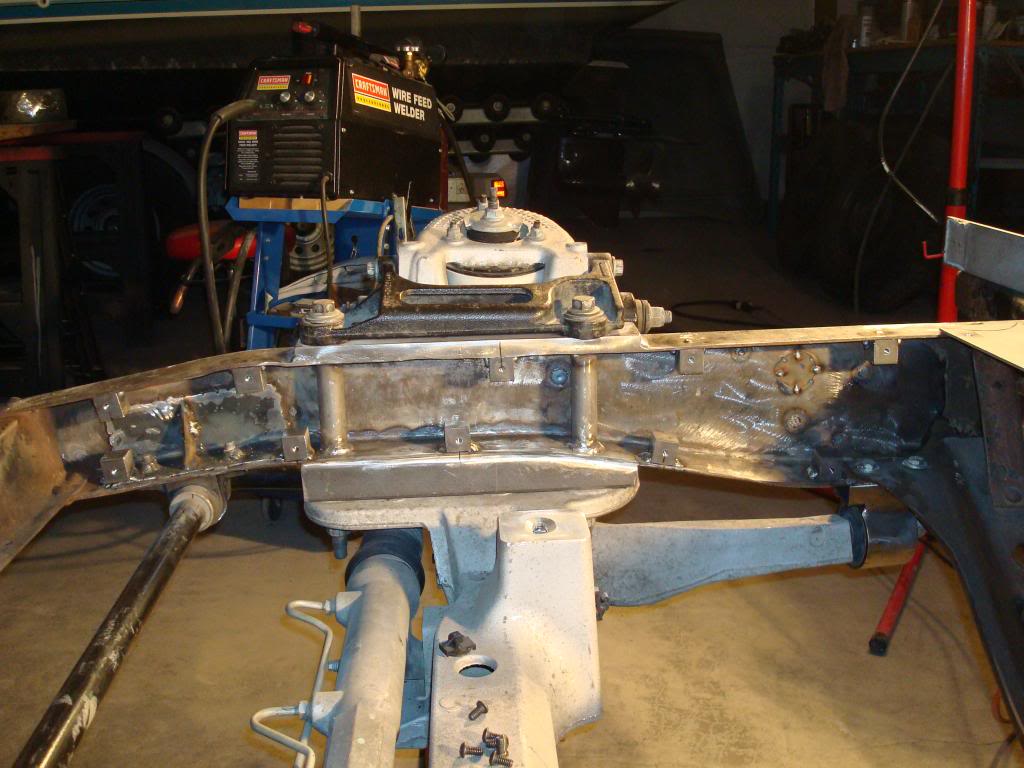
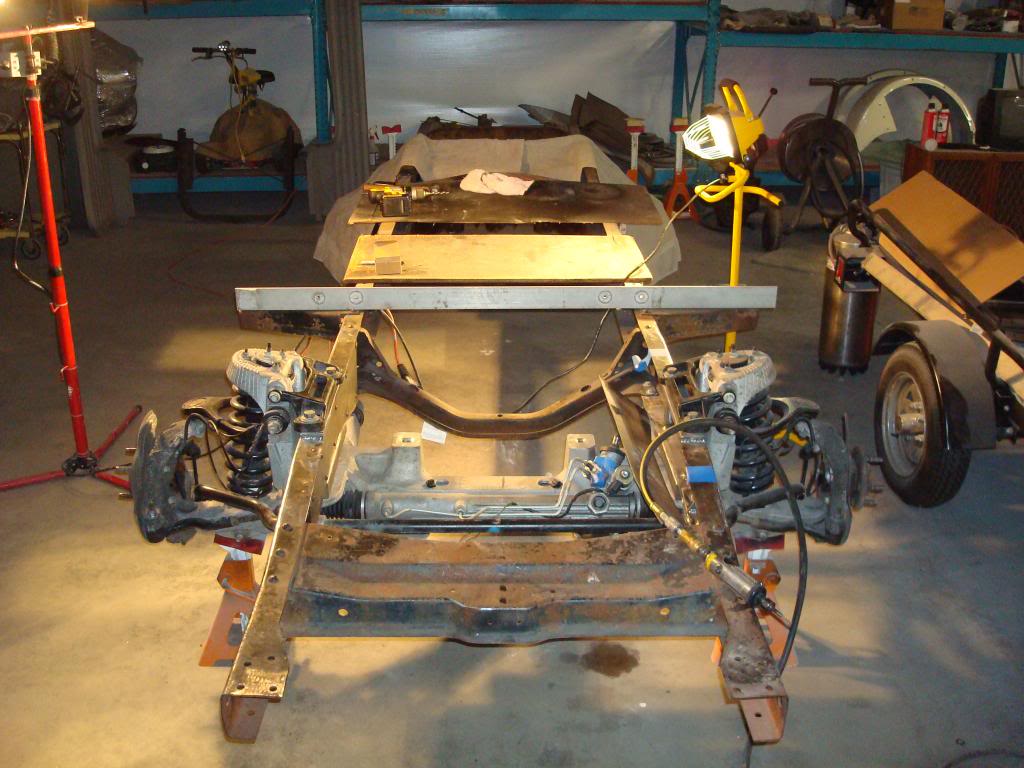
I needed to be around the airport today so I decided to get off my a*s and get the front boxing plates installed.
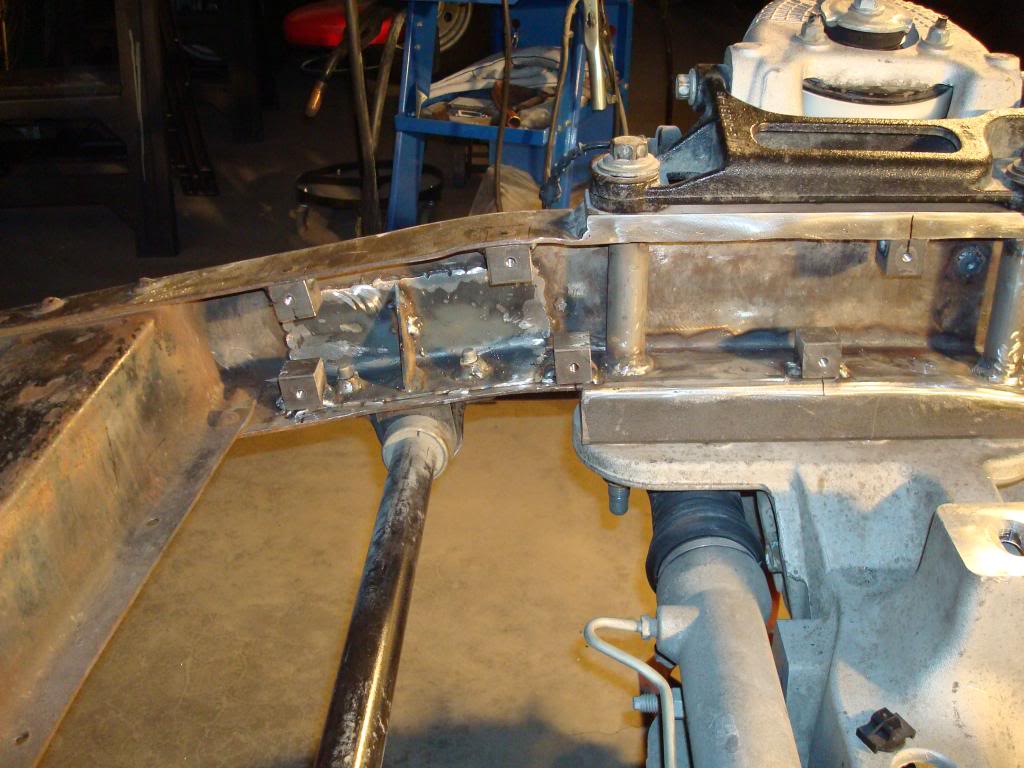
Because I want all my fuel / oil lines and wireing inside the frame rails but want to add strength to the front end, I decided to make structural yet removable access plates like aircraft use.
I drilled and tapped 1 inch blocks and welded them to the inner frame rails.
Once I finally got all of those little suckers positioned and tack welded in place it was time to drill the plate to match.
I had made a little jig to align the holes for center punching so drilling the plate went pretty smooth,,,,unlike mounting the blocks.
But I finally prevailed over the darn thing and the right side is now all mocked up, it just needs final welding and some plate trimming.
It just sucks that it took me 3 flippin hours to do what I figured would be and hour.
#96
01-12-2013, 11:43 PM
I have been waiting for those grade 8 button head bolts for like 2 weeks, fasteners had to special order them. Then they shipped them by mule train to me.
#97
01-13-2013, 12:12 AM
#98
01-13-2013, 09:27 AM
Hey Gary,
"I couldn't resist the urge to climb up on the frame the other night and feel it cycle, it seemed so nice and smooth, I'm luvin it. "
That sounds like you are beginning to "date" your truck - you might want to slowly back away & take someone else out to the movies or something.... I'm jealous of your rear end as long as we are sounding weird on here.
After spending months tackling the front IFS with lot's of help - we just stuck an Explorer 8.8 under the back complete with springs & disc brakes.
We didn't think through all the stuff you & Ax are talking about - just an axle with some springs & shocks. Now I'm beginning to wonder if there is more to it - we aren't planning to go 100 mph.
Ben in Austin
1950 F1
#99
01-13-2013, 10:33 AM
Hey Gary,
"I couldn't resist the urge to climb up on the frame the other night and feel it cycle, it seemed so nice and smooth, I'm luvin it. "
That sounds like you are beginning to "date" your truck - you might want to slowly back away & take someone else out to the movies or something.... I'm jealous of your rear end as long as we are sounding weird on here.
After spending months tackling the front IFS with lot's of help - we just stuck an Explorer 8.8 under the back complete with springs & disc brakes.
We didn't think through all the stuff you & Ax are talking about - just an axle with some springs & shocks. Now I'm beginning to wonder if there is more to it - we aren't planning to go 100 mph.
Ben in Austin
1950 F1
"I couldn't resist the urge to climb up on the frame the other night and feel it cycle, it seemed so nice and smooth, I'm luvin it. "
That sounds like you are beginning to "date" your truck - you might want to slowly back away & take someone else out to the movies or something.... I'm jealous of your rear end as long as we are sounding weird on here.
After spending months tackling the front IFS with lot's of help - we just stuck an Explorer 8.8 under the back complete with springs & disc brakes.
We didn't think through all the stuff you & Ax are talking about - just an axle with some springs & shocks. Now I'm beginning to wonder if there is more to it - we aren't planning to go 100 mph.
Ben in Austin
1950 F1
LMAO,,, Your beginning to sound like my wife, she seems to think I have some girl friend hidden out at the airport too.
There is always something more out there Ben, you know that but if you like what you have, thats what counts. Theres nothing wrong with the diff you have as far as I can see but my main goal is to end up with a truck that drives like a car so I will want to drive it every day. And I do want it to handle well at a 100 mph if I decide to mat the pedal.
Gary
#100
01-13-2013, 10:52 PM
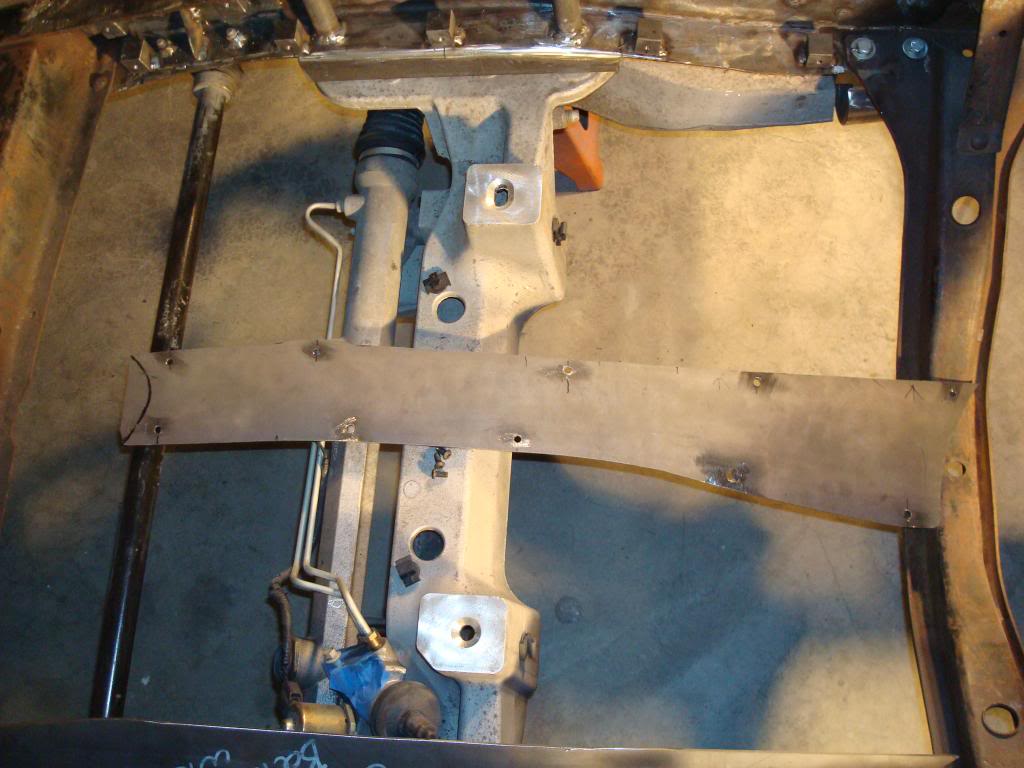
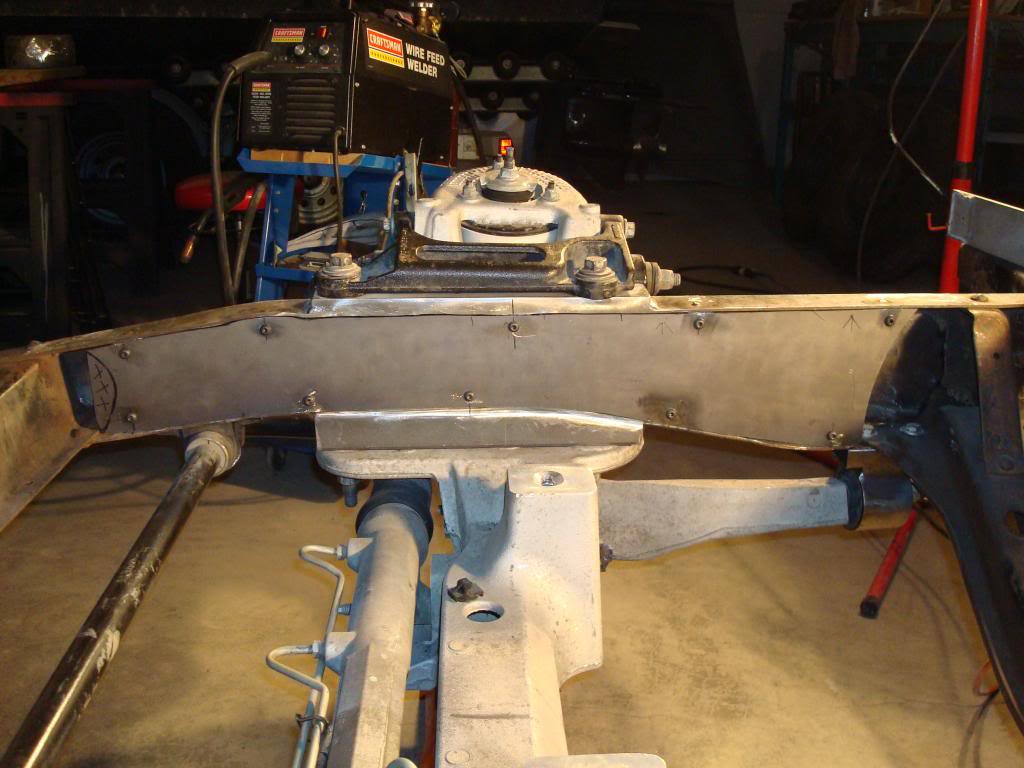
I finished installing the L/H boxing plate today and decided to see how much my cab wings are drooping.
So I laid a straight edge across the frame and wings.
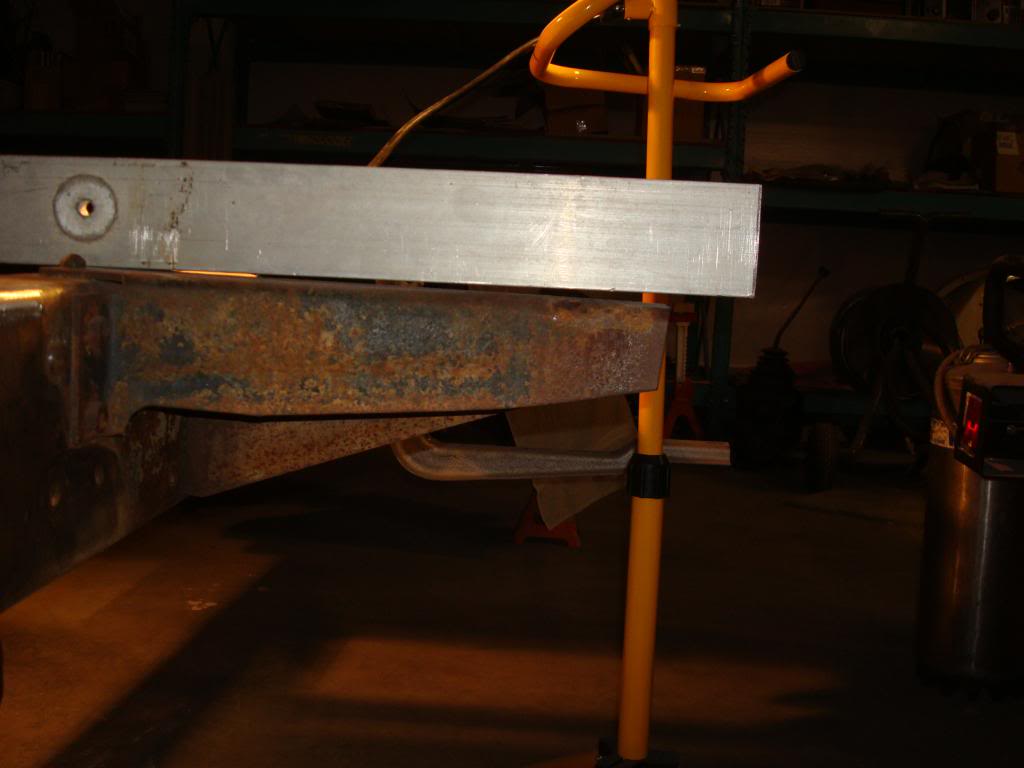
And revealed that the L/H cab mount is about 3/8 inch low.

And that the R/H side is just less than 1/4 inch low too.
So, I guess my question is "do I repair the mounts by some means?" or "do I just add another rubber shim pad between the wing and cab mount when I put the cab back on?"
So I laid a straight edge across the frame and wings.
And revealed that the L/H cab mount is about 3/8 inch low.
And that the R/H side is just less than 1/4 inch low too.
So, I guess my question is "do I repair the mounts by some means?" or "do I just add another rubber shim pad between the wing and cab mount when I put the cab back on?"
#101
01-14-2013, 01:46 AM
Elder User
Join Date: Feb 2012
Location: Central Oregon
Posts: 948
Likes: 0
Received 0 Likes
on
0 Posts
Your skill level is way above mine (love both builds), but if it were mine I would just shim it as long as the arm is structurally sound. I guess you could pie cut a section out near the frame and weld it back up to level, but it seems a lot of work for that small of a difference.
Keep up the great work.
Keep up the great work.
#102
01-14-2013, 06:30 AM
I highly doubt that 1/8" difference side to side (3/8" - 1/4") is significant enough to be concerned about, The hand assembled nature of the the factory build and 60 years of use says to me that only an 1/8" discrepancy is really outstanding! The droop is less than the thickness of the mount biscuits so the cab isn't going to contact the frame, and who's to say it wasn't designed that way? Sometimes we forget what we are working on, that these trucks were not cad cam designed, laser cut and robot assembled, and roads are not billiard table flat. I say relax and don't get caught up in minute insignificant details!  If you must have perfection, you might want to consider a different hobby, like building space rovers. Oh yah, even those aren't perfect.

If you must have perfection, you might want to consider a different hobby, like building space rovers. Oh yah, even those aren't perfect.
#103
01-14-2013, 08:56 AM
Your skill level is way above mine (love both builds), but if it were mine I would just shim it as long as the arm is structurally sound. I guess you could pie cut a section out near the frame and weld it back up to level, but it seems a lot of work for that small of a difference.
Keep up the great work.
Keep up the great work.
I highly doubt that 1/8" difference side to side (3/8" - 1/4") is significant enough to be concerned about, The hand assembled nature of the the factory build and 60 years of use says to me that only an 1/8" discrepancy is really outstanding! The droop is less than the thickness of the mount biscuits so the cab isn't going to contact the frame, and who's to say it wasn't designed that way? Sometimes we forget what we are working on, that these trucks were not cad cam designed, laser cut and robot assembled, and roads are not billiard table flat. I say relax and don't get caught up in minute insignificant details! If you must have perfection, you might want to consider a different hobby, like building space rovers. Oh yah, even those aren't perfect.
If you must have perfection, you might want to consider a different hobby, like building space rovers. Oh yah, even those aren't perfect. I looked through my rubber shim stock this morning and found some 1/4 and 3/8 Buna sheet so I'll make a couple of biscuits to level things out. That way when I bolt the cab down for the chop it will be as true as possible to start.
Gary
#104
01-15-2013, 10:39 AM
Senior User
Join Date: Nov 2005
Location: central texas
Posts: 307
Likes: 0
Received 0 Likes
on
0 Posts
e-brake idea
sorry for not finding your thread sooner.
i have a idea for a remote e-brake actuator.
a small hd truck air brake actuator with a internal spring for when there is no air pressure.. i.e.: no air the actuator pulls on the e-brake.
air pressure over 30-40 lbs (depends on spring rate and air diaphragm size) the e-brake releases.. using a air control valve to prevent air getting to the valve before your ready to drive and to block and release air when parking. the actuator would be connected to the e-brake cables. this system would also self adjust as the cables stretch from age and use..
just another idea to throw at ya..
cc
#105
01-15-2013, 09:06 PM
Hi Tempforce, thats sounds like it would work great on an air ride equiped truck. And air control actuators are cheaper than the powered units. We use air actuators on all of our fuel trucks and they work great and rarely fail.
Thanks for bring them up, I frankly hadn't thought of useing them.
Gary
Thanks for bring them up, I frankly hadn't thought of useing them.
Gary