


Welding Question - Patch Panel

Thread Starter
|
Laughing Gas


Joined: Feb 2006
Posts: 892
Likes: 85
From: Western Massachusetts

Welding Question - Patch Panel
I'm about to mig weld a thin metal patch panel for the first time. I know that I need to make a bunch of small spot welds slowly until it's filled in, then grind smooth. Should the patch be fit to have a gap all around or be tight?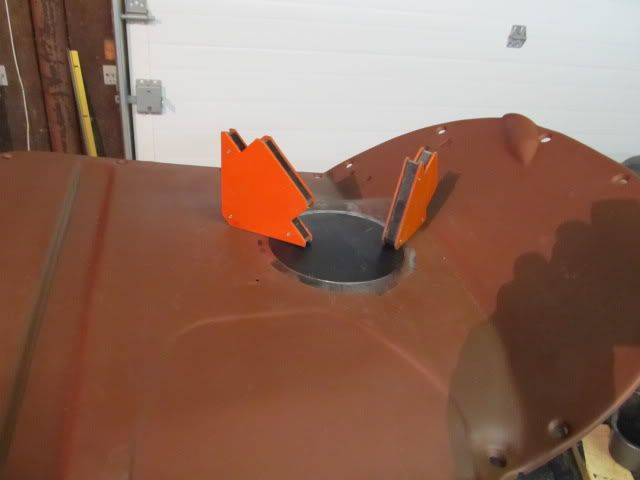
Elder User
Joined: Jun 2010
Posts: 934
Likes: 2
From: Sterling, Virginia
What type of welder are you using? If it's a MIG, I make mine to fit as snug as possible. But so guys like to leave a small gap to accomadate the weld. Ron Covell the expert who writes in Streetroder etc. says to make them fit tight. Just my two cents
oldmerc
Joined: Jul 2011
Posts: 1,538
Likes: 5
From: Edmonton,Alberta

You should have about a .025 " gap for butt welding body metal . Hate to ask but is this your first try at welding body sheet steel ,if so I would strongly recommend a little practice with the same thickness material . No offence intended . 
FTE fan
Joined: Dec 2006
Posts: 3,674
Likes: 11
From: paradise, northern calif.
If you are abel to place some copper behind your weld, it will help prevent blowing thru and leaving a hole. Any copper, a flattend copper pipe ect. You can do it, the more you do, the better you get.Good luck.
Thread Starter
|
Laughing Gas
Joined: Feb 2006
Posts: 892
Likes: 85
From: Western Massachusetts
I'm a novice with my Miller 211. It's a good machine and makes me look better than I am. Still on the original wire spool that came with it. Use 75/25 gas. This is the first attempt at welding body panel but note that it's the transmission cover which will be covered. The truck originally had a 4 speed transmission. I have changed to a 3 speed with OD and column shift so this patch is to fill in the old shifter hole. Thanks for the help.
Trending Topics

Welder User


Joined: Feb 2009
Posts: 5,269
Likes: 50
From: northwest MT
The 211 is a great welder (I have one too) but kinda big for sheetmetal work due to it's larger wire size. You will likely need to use the lowest heat setting and slow the wire way down. Maybe practice on some similar type scraps to get the settings right....
Also as said let each weld cool to prevent warpage. Have fun.
Also as said let each weld cool to prevent warpage. Have fun.
FTE Stories
Ford Trucks for Ford Truck Enthusiasts

10 Best Ford Truck Engines We Miss the Most!
Joe Kucinski
2026 Shelby F-150 Off-Road: Better Than a Raptor R?
Brett Foote
2027 Super Duty Carhartt Package First Look: 12 Things You NEED to Know!
Michael S. Palmer
10 Most Surprising 2026 Ford Truck Features!
Joe Kucinski
Top 10 Ford Trucks Coming to Mecum Indy 2026
Brett Foote
5 Best / 5 Worst Ford Truck Wheels of All Time
Joe Kucinski
Ford Super Duty: 5 Things Owners LOVE, 5 Things They LOATHE!
Joe Kucinski
Every 2026 Ford Truck Engine RANKED from WORST to FIRST!
Michael S. Palmer
The Best F-150 Deal of Every Trim Level (XL through Raptor)
Joe KucinskiHotshot
Joined: Oct 2004
Posts: 15,882
Likes: 88
From: Durham NC
Please take my advice.
First go to your welding supply house or even your local big box DIY store and pick up a spool of 0.023-0.025 wire and package of contact tips. Better yet order online or from your ESAB welding supply dealer a spool of ESAB "Spoolarc Easy Grind" wire (accept NO substitute!)
Joints should butt tight or with no more gap than the thickness of the wire. Penetration of the weld on 14 ga or thinner metal is not a problem of having too little, but having too much! Never try to bridge a gap with the welding wire alone, that's just asking for blow thru. using a copper (split and flattened water pipe) or aluminum (1/8" or thicker) backer is an excellent technique, just hold it tight and flat against the seam. Use spot tacks no longer than 1/2" and alternate sides no closer than 6" apart before allowing the panel to cool completely to room temp. after the first set of tacks cools, do any adjustment of fit needed with hammer and dolly. Now do another set of tacks between each of the previous ones, cool (never quench or use compressed air to cool) and adjust fit. Continue this technique, BEING PATIENT until the seam is completed. Use a 40 grit red fiber disk on an angle grinder to knock down the weld nearly flush, being careful to not heat the panel too hot to touch with a bare hand. Knock down any lumps on the back side as well. Run a hand wire brush over the seam, then dim the shop lights and put a drop light behind the seam looking for pinholes in the seam. Circle any and all with a permanent marker. Using the backer method apply a tack to each pinhole. Grind down the tacks after they cool completely. Now go to the topic "the hood, the bad, and the ugly" and read my posts about how to check for and fix shrinkage along the seam.
Here's a hint I don't think I've posted before: When fitting a patch, try to avoid using sharp outside corners on the patch or the panel. use as large a radius curve as possible instead. I.e. an oval or round patch is better than a rectangular one, an S curve is better than a stair step. Two reasons: 1. a 1/4 round corner requires a shorter bead than a square corner. 2. a square corner concentrates the weld heat at the corner so is much more likely to shrink and/or warp.
Fleet Mechanic
Joined: Mar 2005
Posts: 1,511
Likes: 1
From: peyton, colorado
There's a butt welding clamp on the market that leaves a small, maybe .040 gap. I've had poor luck with them. The gap just makes it to easy to blow a hold through. I've had better luck with as close a gap as I can. Penetration isn't much of an issue with sheet metal and the small gap shrinks less.
Hotshot
Joined: Oct 2004
Posts: 15,882
Likes: 88
From: Durham NC
No change of liner size, just a contact tip with matching hole size, and what ever your machine requires to allow the drive rollers to use the thinner wire. Check your owner's manual to be sure your machine will handle the wire, and what size spools it can use. The easy grind comes on 4", 8# and 8", 20# spools. If you order it from a dealer I thinks there is a min order of 2 spools, or you can order single spools online. I'll need to look at my links for the online dealer. Ron Covell recommended the easy grind.
Senior User

Joined: Dec 2010
Posts: 356
Likes: 0
From: Lethbridge AB
Please post some pics. Although I'm not new to welding, I am new to welding the thin gauge metal for panels. My turn is coming soon enough so to learn from the mistakes made by others is just as important as seeing proper techniques applied.