


It begins.. 'Project Richfield'
Thread Starter
|
Senior User
Joined: Dec 2011
Posts: 353
Likes: 2
From: Scottsdale AZ

OK - got two hours on the truck today - the bed is ready to come off - BUT...
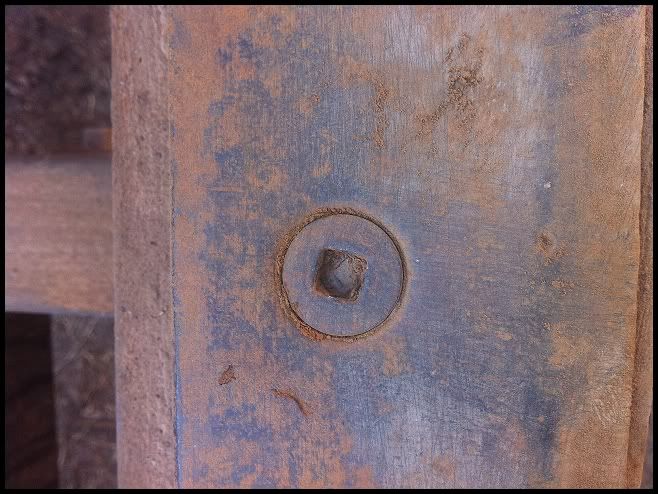
What do I use to get this bolt off? (There are two of them at the rear of the bed by the tailgate).
I know you guys have had to deal with it before!
I know its bigger than a 1/4" shaft but smaller than a 3/8" shaft... HELP!!
Also, I am (2) bolts from getting the cab off. In the meantime - I will pull the doors and start working on them as well.
So... how do I get the handles off?
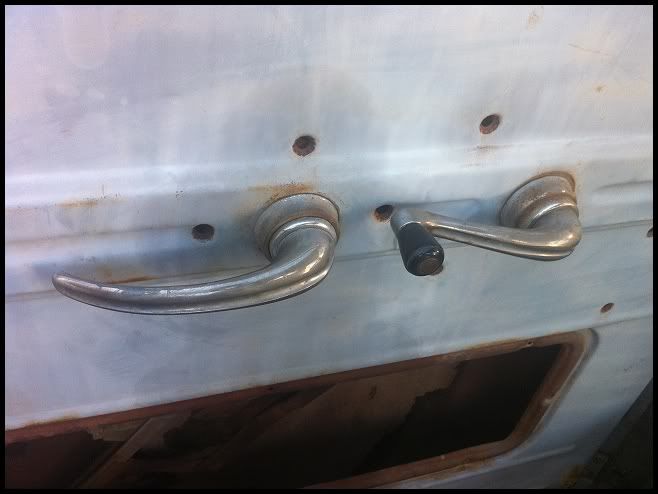
The screws are all out of the door - but are there little screws or something like that on the handles themselves I have to remove for these to come out?
Slowly but surely the truck is coming together. The frame is MINT! I just have to clean it up and spray it black and it is ready to go!!!
What do I use to get this bolt off? (There are two of them at the rear of the bed by the tailgate).
I know you guys have had to deal with it before!
I know its bigger than a 1/4" shaft but smaller than a 3/8" shaft... HELP!!
Also, I am (2) bolts from getting the cab off. In the meantime - I will pull the doors and start working on them as well.
So... how do I get the handles off?
The screws are all out of the door - but are there little screws or something like that on the handles themselves I have to remove for these to come out?
Slowly but surely the truck is coming together. The frame is MINT! I just have to clean it up and spray it black and it is ready to go!!!
Lead Driver

Joined: Dec 2004
Posts: 7,669
Likes: 13
From: San Jose, CA
The handles are each held in by one pin going through the handle and the shaft of the door latch and window regulator. To remove the handles, push down on the the escutcheon at the base of the handle. It's spring activated. Find the pin and use a punch to drive the pin out. I usually use a flathead screwed driver on both sides of the handle where the pin is located in order to push down on the escutcheon top and keep it down, which allows the pin to be punched out easily.


I like to remove the handles first and then unscrew the mechanisms. You may want to screw the mechanisms back in around the handle shaft for leverage when removing the pins through the handles.
Did you remove the lock cylinder on the passenger side door yet? It goes through the door latch and you won't be able to remove the latch until the lock cylinder is removed. Wait until you try to remove the set screw holding the lock cylinder in place. Just hope that it's not rusted shut, otherwise you'll have to drill it out.
Hotshot


Joined: Oct 2009
Posts: 16,174
Likes: 4,781
From: Burbank, WA
For the bed bolt, find an extra 3/8's drive short extension laying around and modify the square end with a grinder or file on all for sides a little bit until the tool fits in the hole. It's always good to have 'special tools' in your tool box.
The door handles and window cranks are a little easier. The round trim piece next to the door shell is two pieces spring loaded. Push the center part that touches the handle into the outer part and you'll see the handle has a small hole on all 4 sides of the boss, which fits over a square shaft on the door latch and/or window regulator. Two of those four sides will be empty, the other two will have a pin through it. While holding the trim ring in, use a punch in your third hand and with a hammer in your other hand, hit it to drive the pin out. The handles will then come right off.
The door handles and window cranks are a little easier. The round trim piece next to the door shell is two pieces spring loaded. Push the center part that touches the handle into the outer part and you'll see the handle has a small hole on all 4 sides of the boss, which fits over a square shaft on the door latch and/or window regulator. Two of those four sides will be empty, the other two will have a pin through it. While holding the trim ring in, use a punch in your third hand and with a hammer in your other hand, hit it to drive the pin out. The handles will then come right off.
Thread Starter
|
Senior User
Joined: Dec 2011
Posts: 353
Likes: 2
From: Scottsdale AZ
Thanks!
Hotshot
Joined: Oct 2009
Posts: 16,174
Likes: 4,781
From: Burbank, WA

Elder User
Joined: Mar 2011
Posts: 935
Likes: 2
From: Vancouver, WA
They make actual sockets for these. Call them square drives or something. I chased down a Snap-on truck and got one to remove plugs from a mopar intake manifold. I'm sure Matco, MacTools, Craftsman, etc... would have something for you, if you desire.
FTE Stories
Ford Trucks for Ford Truck Enthusiasts

10 Things Every Truck Owner NEEDS (2026 Edition)
Michael S. Palmer
Rezvani's Latest Post-Apocalyptic Monster Is a Ford F-150 Raptor Underneath
Verdad Gallardo
Top 10 Most Expensive Ford Trucks Ever Sold on Bring a Trailer
Joe Kucinski
2027 Ford Super Duty Buyer's Guide (Every Model, Engine, & Package)
Brett Foote
Top 10 Ford Truck Tragedies
Joe Kucinski
AEV FXL Super Duty - the Super Duty Raptor Ford Doesn't Make
Brett Foote
Lobo Vs Lobo: Proof the F-150 Lobo Should Be Even Lower!
Michael S. Palmer
Ford's 2001 Explorer Sportsman Concept Looks For a New Home
Verdad Gallardo
10 Best Ford Truck Engines We Miss the Most!
Joe Kucinski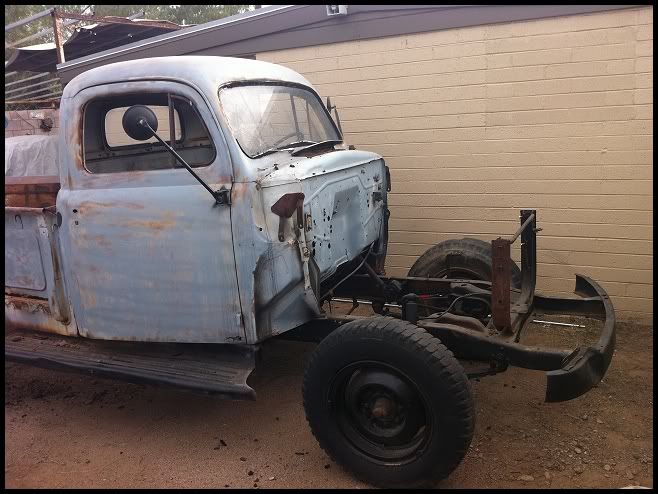
Senior User


Joined: Dec 2010
Posts: 356
Likes: 0
From: Lethbridge AB
I just pulled the box off of my 49 the other day and it wasn't near as bad as I thought it was going to be. I undid all the bolts and pulled the box off the rear of the truck partways. Then I stood it strait up on a couple of 2x4 blocks. From the bottom side I just grabbed it and picked it up and hauled it into the yard and set the front on a sawhorse then lifted the back and slid a sawhorse under it. For more stability I put a couple of long 2 x 4 under each side. It makes a great place to store all the sheetmetal as you tear it apart. Holds it all including the running boards and the hood if you put it in the right way.
Thread Starter
|
Senior User
Joined: Dec 2011
Posts: 353
Likes: 2
From: Scottsdale AZ
Sawzall (check) - Extension Cord (check) - 30 seconds of my time (check) - two bolts who didn't have a chance (double check!!)
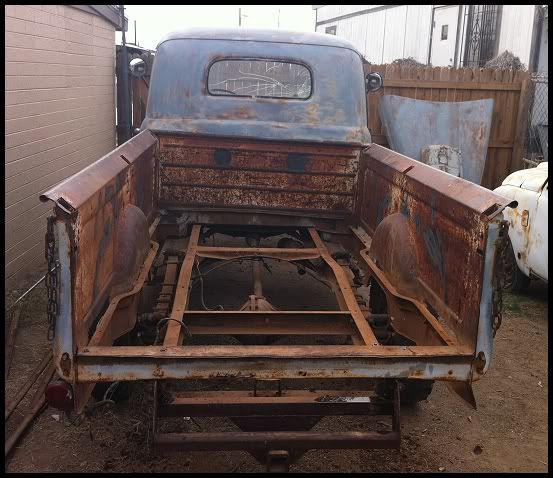
It was too easy - and then for the next 5 minutes, I was able to get the bed off (slowly but surely).

I was able to move it to the (left) side of the truck out of the way.
I then proceeded to take the mirrors off - and had to call it a short day.
I will be back next weekend to finish taking the running board off and then the final (2) bolts which hold the cab to the frame.
The plan is to take the cab and all fenders, hood, metal and get it sandblasted within the next few weeks.
Until the sand blasting happens - I will clean and paint the frame (straight as an arrow BTW) - and pull the tires off and redo the brakes.
FOUND OUT the rims ARE NOT Widow Makers!! (Whew!!) so that is the 'bonus' of the day!!
It was too easy - and then for the next 5 minutes, I was able to get the bed off (slowly but surely).
I was able to move it to the (left) side of the truck out of the way.
I then proceeded to take the mirrors off - and had to call it a short day.
I will be back next weekend to finish taking the running board off and then the final (2) bolts which hold the cab to the frame.
The plan is to take the cab and all fenders, hood, metal and get it sandblasted within the next few weeks.
Until the sand blasting happens - I will clean and paint the frame (straight as an arrow BTW) - and pull the tires off and redo the brakes.
FOUND OUT the rims ARE NOT Widow Makers!! (Whew!!) so that is the 'bonus' of the day!!

Cargo Master


Joined: Sep 2010
Posts: 3,426
Likes: 48
From: Hot AZ (Phoenix Valley)
I used a powder coating company in Tempe and they did my front bumper... I would like to find someone that I can get to media blast my running boards, fenders and then I can do the repairs I want to do. Then have them painted, powder coated or what ever else I decide to do... I'm looking for someone that is good and reasonably priced...