'54 Panel, Road to recovery
#31
 02-15-2012, 10:52 PM

Well you like the way it sounds now? It's been my experience that headers really seem to change the exhaust note and tone quite a bit! Did it get a bit louder?
A bomber clock in with the gauge trio? Hey that's different! Don't think I've seen that done before. I think I'd feel naked without my watch... as for my cell phone... sometimes i wish i never had one.
A bomber clock in with the gauge trio? Hey that's different! Don't think I've seen that done before. I think I'd feel naked without my watch... as for my cell phone... sometimes i wish i never had one.
#32
02-16-2012, 12:12 AM
Join Date: Apr 2009
Location: orange county, ca.
Posts: 746
Likes: 0
Received 0 Likes
on
0 Posts
It is slightly louder then the manifolds, but it has a tinny sounds now from the headers. I found the bomber clock in a friends moms basement, it's at the watch shop getting a tune-up. It's close to this one and fit's the hole nicely:

I'm going to take the bumpers in to get powder coated black (I think it will hold up better then paint on the freeways here).
I think the next major update will be the interior lights and speakers.
I'm going to take the bumpers in to get powder coated black (I think it will hold up better then paint on the freeways here).
I think the next major update will be the interior lights and speakers.


#34
02-16-2012, 08:47 PM
#35
02-27-2012, 12:47 AM
Join Date: Apr 2009
Location: orange county, ca.
Posts: 746
Likes: 0
Received 0 Likes
on
0 Posts
Here's the motor now with a Carter 500 cfm, seems to run better but I had to bend up a new fuel line for it.

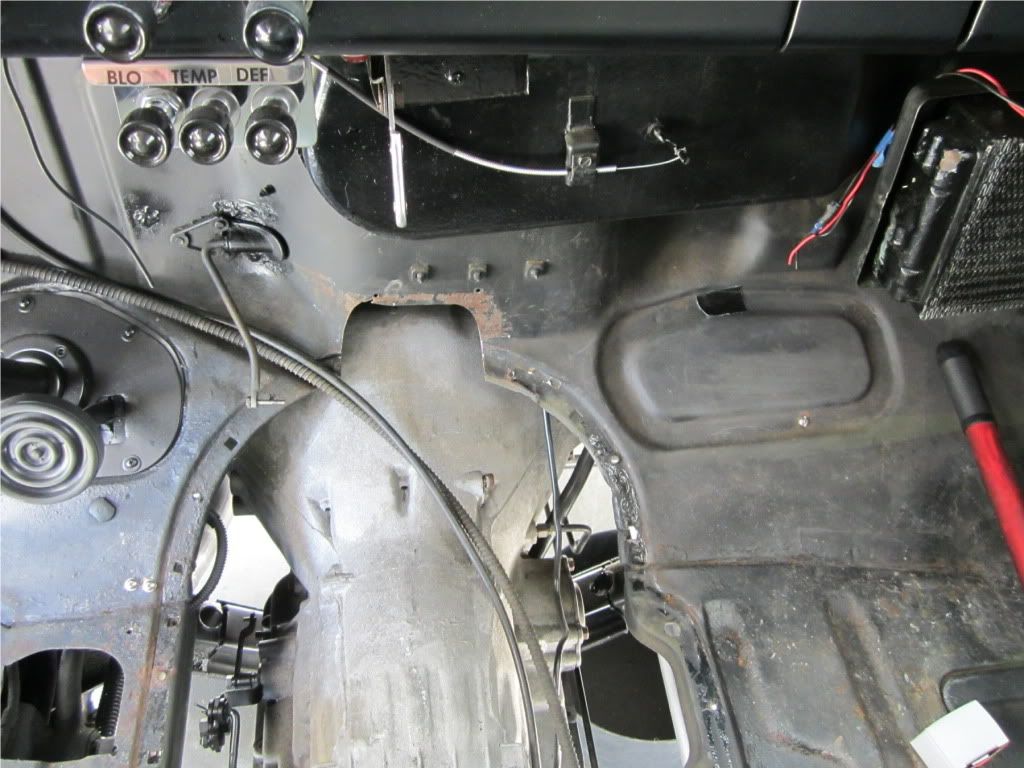
Here's the gauge trio I'm running under the dash. I don't like the colors of the trans temp gauge, so I might try to come up with something else. The clock works like a champ now after the clean-up at the watch shop....I like the idea that it will work without any power (or draining power).

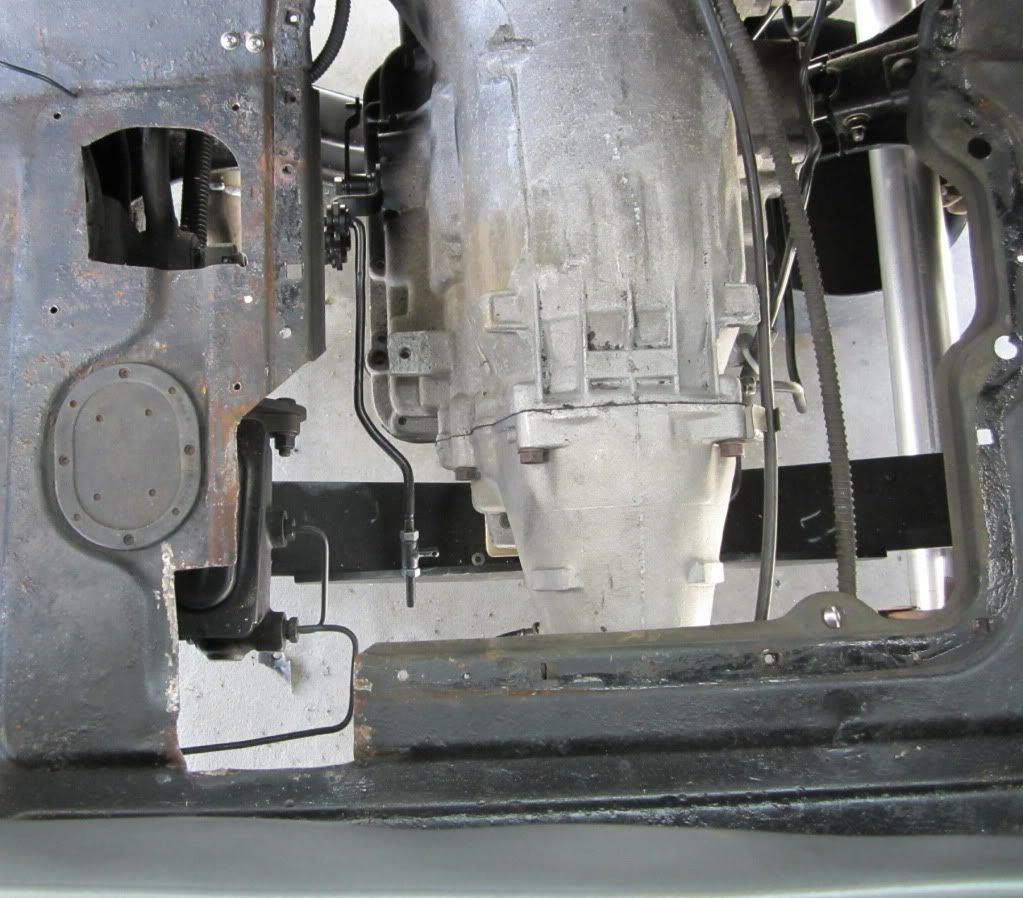
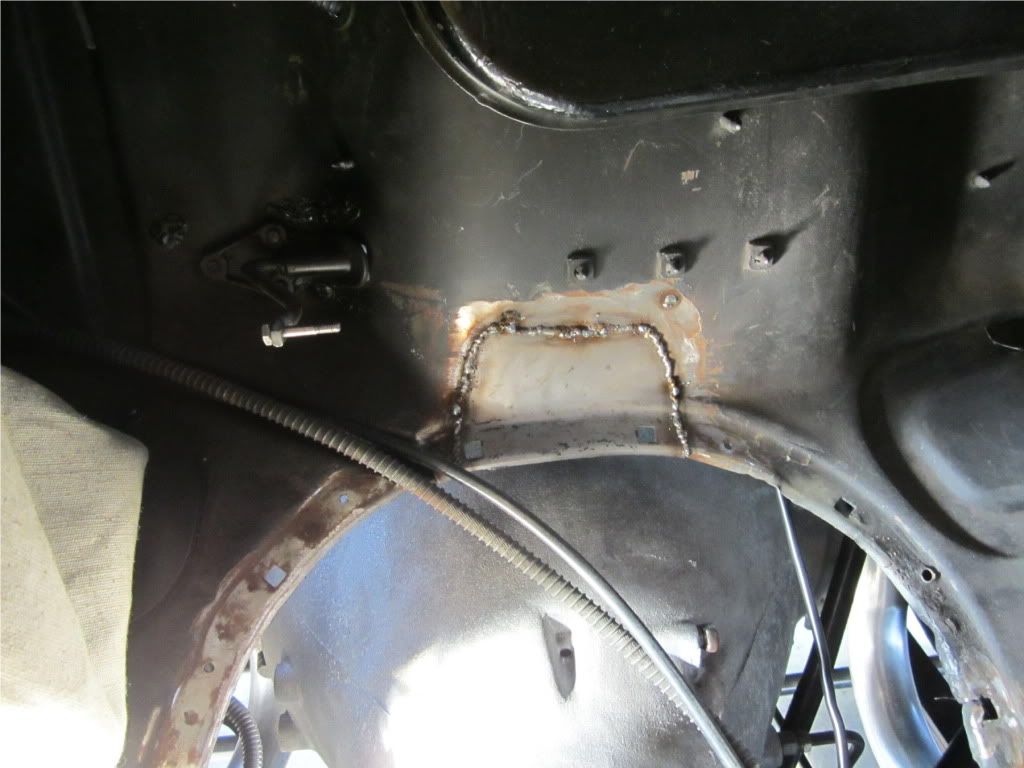
When I was trying to get the gas pedal to work better I pulled up the carpet. I found a holes cut into the floor pan and firewall, now I need to get some pieces to fix them. I the "patches" to cover the holes leaked bad, so air and trash came inside the cab.
Here's the gauge trio I'm running under the dash. I don't like the colors of the trans temp gauge, so I might try to come up with something else. The clock works like a champ now after the clean-up at the watch shop....I like the idea that it will work without any power (or draining power).
When I was trying to get the gas pedal to work better I pulled up the carpet. I found a holes cut into the floor pan and firewall, now I need to get some pieces to fix them. I the "patches" to cover the holes leaked bad, so air and trash came inside the cab.
#37
03-04-2012, 12:45 AM
#38
03-07-2012, 12:14 AM
Join Date: Apr 2009
Location: orange county, ca.
Posts: 746
Likes: 0
Received 0 Likes
on
0 Posts
More random pics until I get more stuff done.
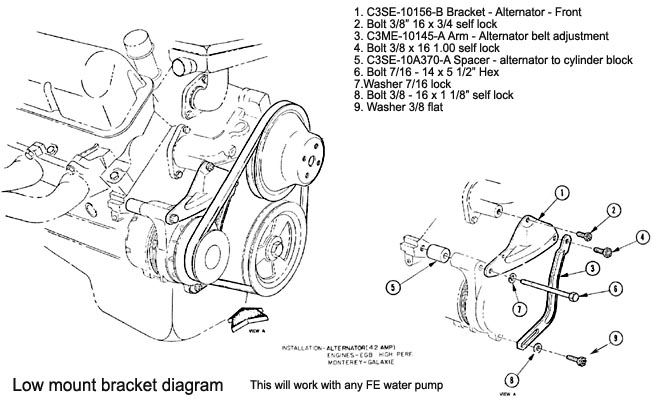
Chevy alt with 64? TBird mounting brackets:

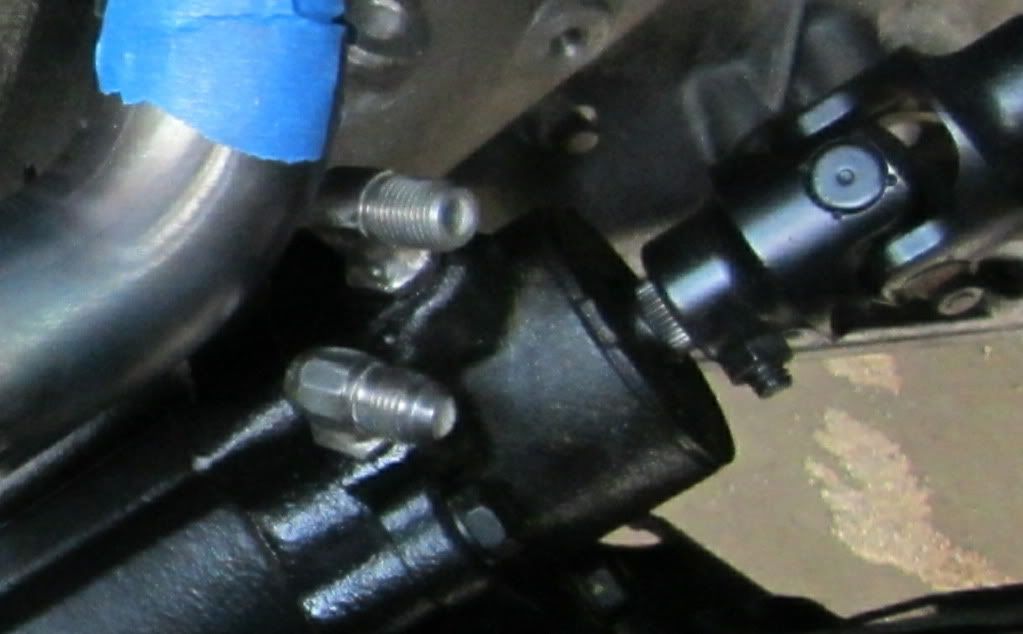
Sadly enough this is the only shot I have of the finished p/s fittings. I bought the fittings from CPP for the toyota box (16 and 17mm steel), found some 90 deg steel fittings to jic and pipe. Cut the heads off all 4 fittings and welded them together (of course you need to clock them first):
I got the bumpers back from the powder coaters, more pics to come.
Chevy alt with 64? TBird mounting brackets:
Sadly enough this is the only shot I have of the finished p/s fittings. I bought the fittings from CPP for the toyota box (16 and 17mm steel), found some 90 deg steel fittings to jic and pipe. Cut the heads off all 4 fittings and welded them together (of course you need to clock them first):
I got the bumpers back from the powder coaters, more pics to come.
#39
03-07-2012, 01:23 AM
More random pics until I get more stuff done.
Chevy alt with 64? TBird mounting brackets:
Sadly enough this is the only shot I have of the finished p/s fittings. I bought the fittings from CPP for the toyota box (16 and 17mm steel), found some 90 deg steel fittings to jic and pipe. Cut the heads off all 4 fittings and welded them together (of course you need to clock them first):
I got the bumpers back from the powder coaters, more pics to come.
Here's the correct orientation of your brackets. Same as i have on my FE.


Your lower pulley looks like it came from a rig that possibly had A/C too. The pulley on the above pictured engine is a non-A/C pulley w/powersteering and single alt/waterpump belt. Some setups had a dual alt/waterpump belt. That could be yours too, hard to tell without looking at the groove alignments with the other pullies. Not sure what your waterpump pulley is, but i don't think it's FE. Could be from a Smallblock or a 385 series (429/460).
I stand corrected. That waterpump pulley could be from a 60s ford intermediate or fullsize car. The Casting # on the pulley would tell the tale, same with your crank pulley.
#40
03-09-2012, 07:39 PM
Join Date: Apr 2009
Location: orange county, ca.
Posts: 746
Likes: 0
Received 0 Likes
on
0 Posts
Not sure about the pulleys but the brackets are different, I had the '68 ones with a ford alt when I bought the truck, I searched on the internet for low mount alt and came up with early T birds. The GM alt case was too long and hit the head, so I needed it to mount lower. The adjuster arm is longer and at a slightly different angle at the alt end and the larger bracket is shaped a little different mainly to clear the alt fan I think.
#42
03-29-2012, 08:29 PM
You know, I tore apart a '63-64 Galaxie 352 and didn't even take note of the generator position. I saved the brackets and i think i still have them... somewhere.... Mike have to dig them out and take a look at that. Glad it working for you though.
Wow didn't realize you were running a 500. That 625 should make it run alot better. I've been using 600 Holleys on most the 390s I've had. that cfm seems to work really well, so that 625 should be the ticket.
What floor repairs are you about to tackle?
Mike have to dig them out and take a look at that. Glad it working for you though. Wow didn't realize you were running a 500. That 625 should make it run alot better. I've been using 600 Holleys on most the 390s I've had. that cfm seems to work really well, so that 625 should be the ticket.
What floor repairs are you about to tackle?
#43
03-30-2012, 02:18 PM
Join Date: Apr 2009
Location: orange county, ca.
Posts: 746
Likes: 0
Received 0 Likes
on
0 Posts
I'm trying to squeeze every mpg out of the 390 but the 500 idle circuit is too small (thought I would try since I had the 500 for years anyhow). It was a little difficult to find a 600 or 625 that had the fuel inlet on the drivers side, I found a nos lid for the afb that was drilled for dual inlet if I had to go that way...but I finally found the right one. When I pulled up the carpet there were holes cut into the floor with poor patches screwed to the floor to cover them. One large section was cut into the lip for the trans cover and weakened the floor, a member from here cut out some floor pieces for me to weld in mine.
#44
03-31-2012, 01:16 AM
Join Date: Apr 2009
Location: orange county, ca.
Posts: 746
Likes: 0
Received 0 Likes
on
0 Posts
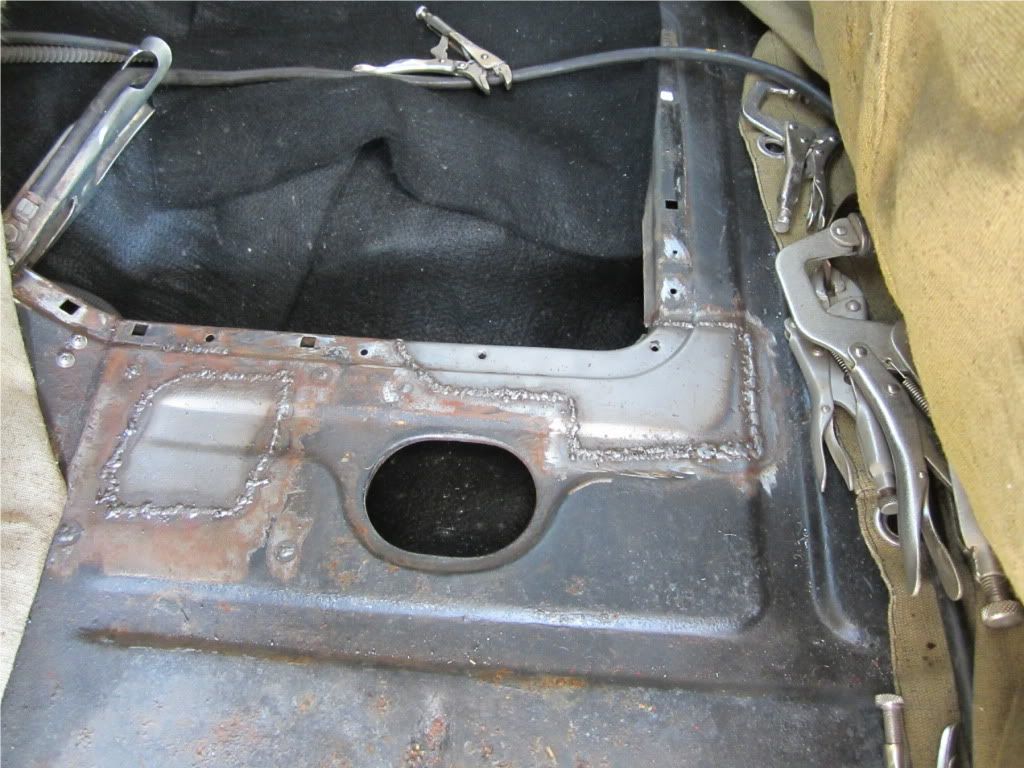
#45
03-31-2012, 01:57 AM
Oh wow! I see what you mean. Swiss cheese. Looks like you took care of that problem! Nice!
I can't recall ever seeing an AFB carb with a driver's side inlet. That'd be a first for me. Not sure about the older AVS carbs either. Only common aftermarket carbs i know of are Holley 4160 model carbs (vac. secondary, single feed) that have driver's side fuel inlets. Otherwise on my two other trucks running AFB's I had to get creative with a bender and fuel line to get them over to the passenger side of the carb.
Nice!I can't recall ever seeing an AFB carb with a driver's side inlet. That'd be a first for me. Not sure about the older AVS carbs either. Only common aftermarket carbs i know of are Holley 4160 model carbs (vac. secondary, single feed) that have driver's side fuel inlets. Otherwise on my two other trucks running AFB's I had to get creative with a bender and fuel line to get them over to the passenger side of the carb.