'70 F100 CV IFS/TBird IRS Build
#166
 08-31-2012, 12:52 PM

#167
09-26-2012, 08:08 AM
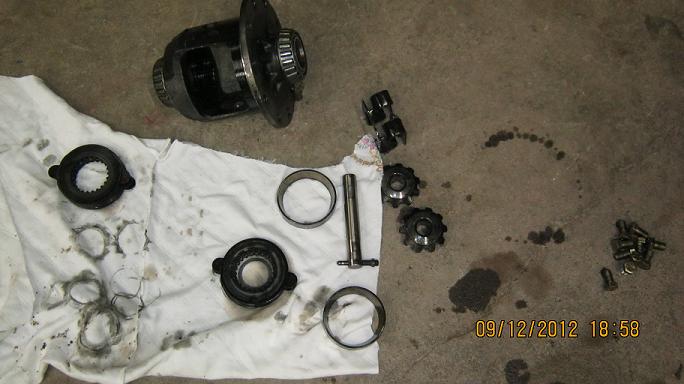
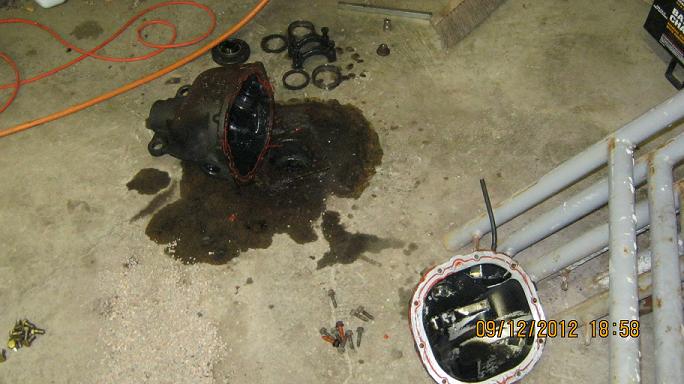
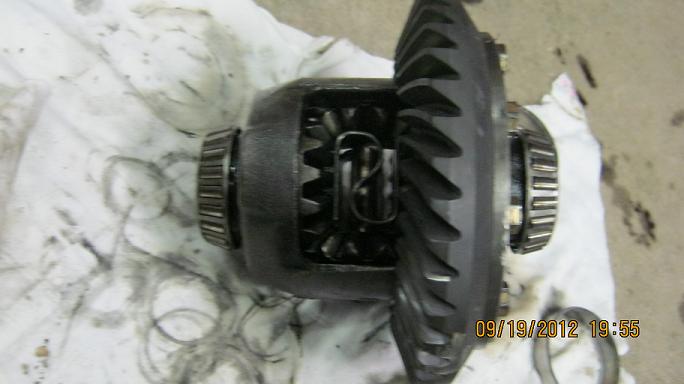
Well the 4.10s are gone. Swapped them & the 31 spline Limited Slip for a 28 spline (for the IRS) Limited Slip & 3.55 gears. Got the Limited Slip tore down & spyders out. Took them & 1 from the open diff to the machine shop to have the groove machined into the Limited Slip gears that I need for the IRS. They told me a week so my little truck sits for a week while we wait impatiently. Bobby is running 3.50s with his 466/C6 so I figure I should be ok with the 3.55s although I really didn't mind the 3.08s.
Just when is the point when you decide this may not have been 1 of your better ideas? :hmm:
Just kidding. It really isn't that bad. It's the wait on the machine shop that has me stalled.
Just when is the point when you decide this may not have been 1 of your better ideas? :hmm:
Just kidding. It really isn't that bad. It's the wait on the machine shop that has me stalled.
#168
09-26-2012, 08:09 AM
Picked up the spyder gears from the machine shop yesterday. They were good to me. Said take them & we will worry about cost later. I had read so much about how difficult it was putting the S Clip back in but it was no big deal. Line it up & give it a good wrap with a decent size hammer & in it went.
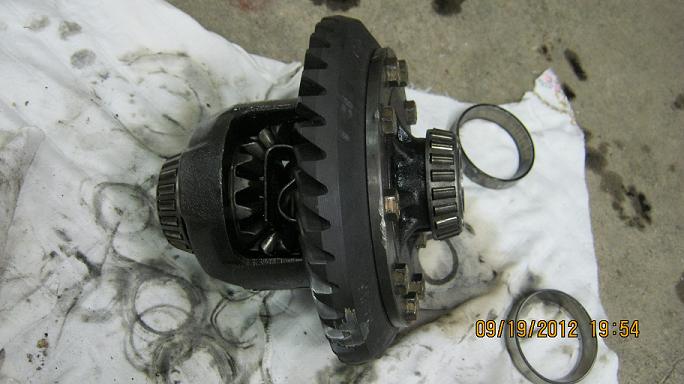
Need to get the pinion bearing finished & then put it all back into the truck.
Need to get the pinion bearing finished & then put it all back into the truck.
#169
09-26-2012, 08:10 AM
Well it's official the 3.55s are in along with Limited Slip & the Holley 4bbl. All I can say is I love it. I don't even have the carb totally dialed in. I will get my wife to take some video. The carb made a big difference. You could hear it in the exhaust as soon as I started it. I think the 3.55s are perfect. My little truck will definitely plant you firmly in the seat.
#170
09-26-2012, 08:10 AM
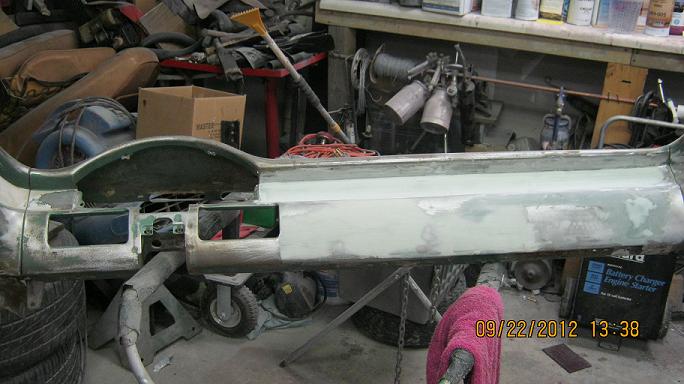
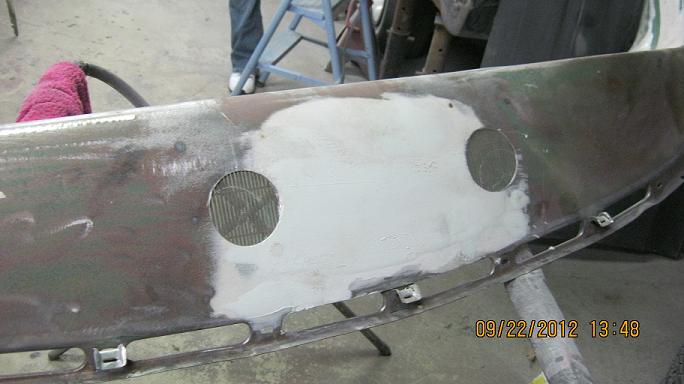
Thought I would post a few pics of the progress on the '57 Fairlane dash modification & swap process. The glove box, ash tray, radio opening, clock opening, heater control opening & factory speaker opening all welded shut & smoothing process started. Building the lower slit that will be used as the vent now.
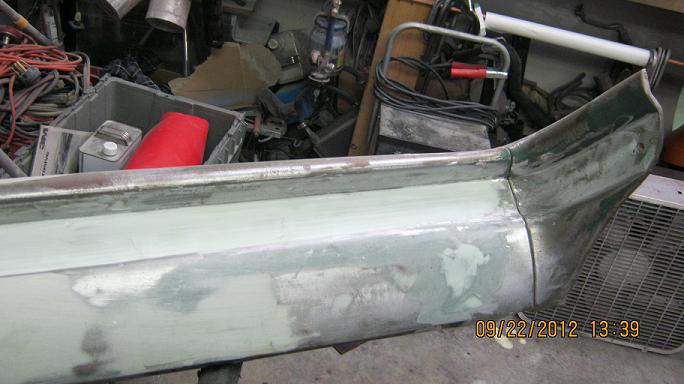
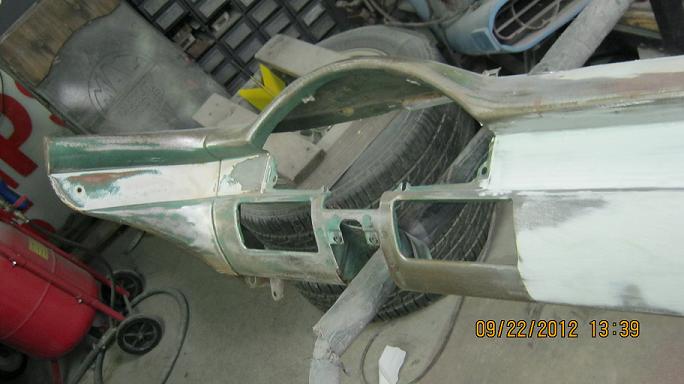
The original speaker hole (rectangular shape) was closed & 2 circular speaker holes created using the original grate as a cover.
The original speaker hole (rectangular shape) was closed & 2 circular speaker holes created using the original grate as a cover.
#171
09-26-2012, 11:25 AM

#172
09-29-2012, 02:57 PM
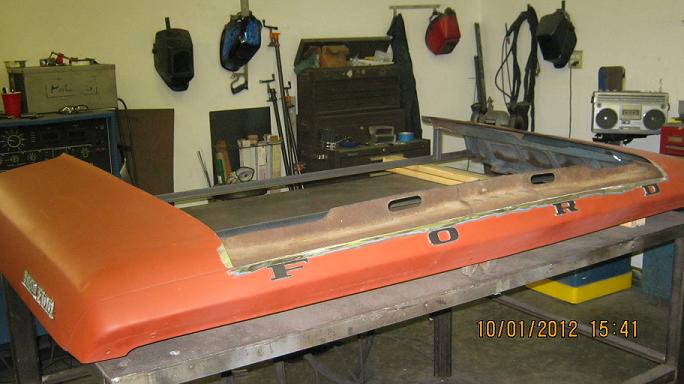
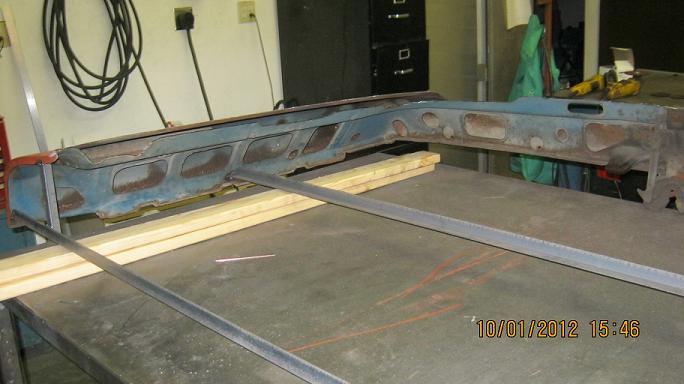
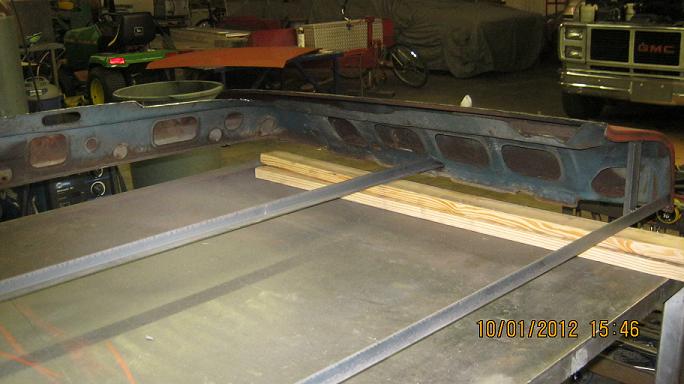
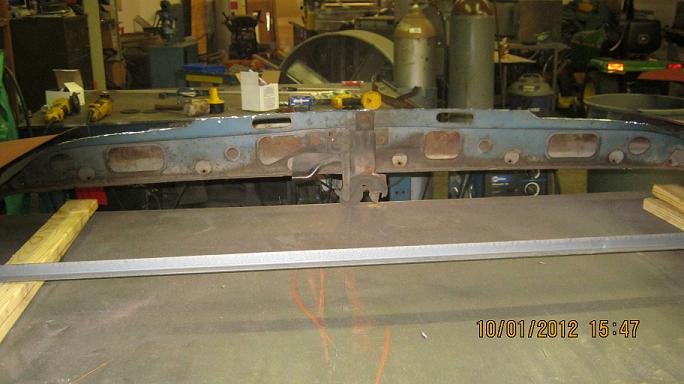
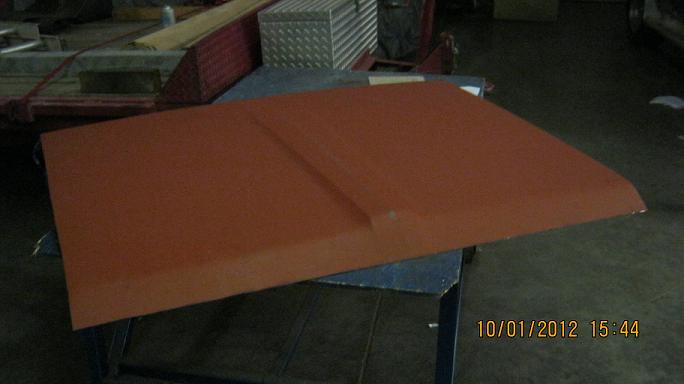
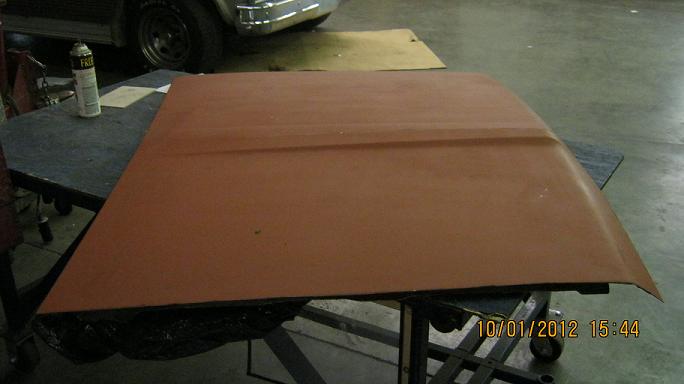
Started on the hood today. Here are a few pics. I started with the original hood.
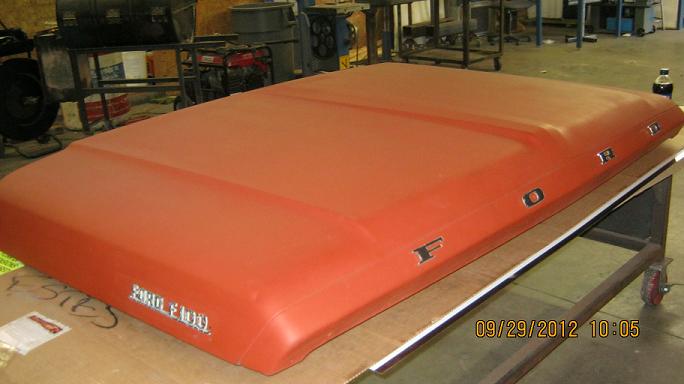
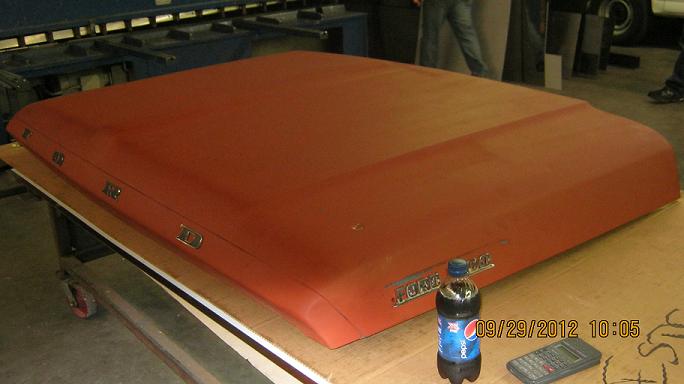
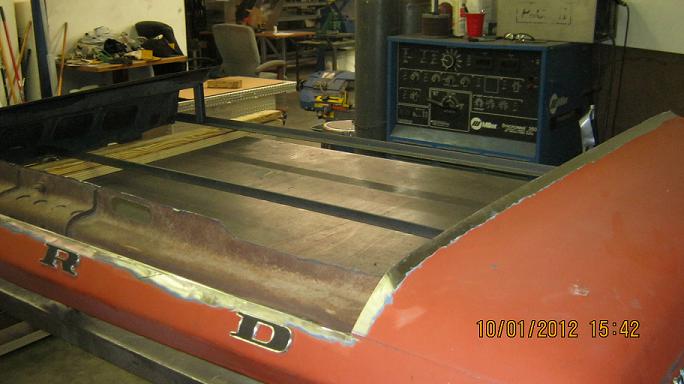
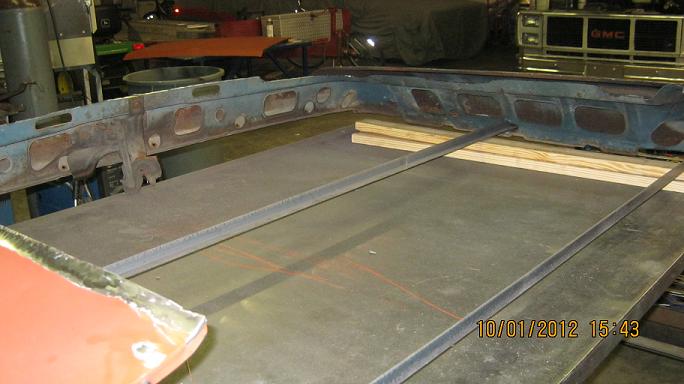
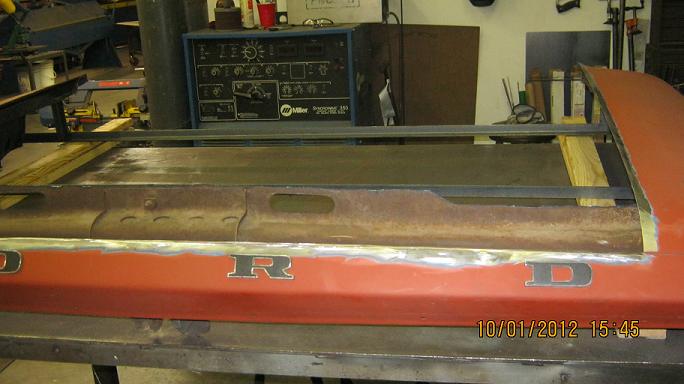
Some shots of how we will be cutting the web structure underneath. I did not get the top side pics today but will have some Monday. Just so everyone knows what the plan is I am raising the portion of the hood that is raised originally another 3/4". This will give the hood a very subtle cowl induction look maintaining all the factory lines. The hope is when finished it might look like Ford did this at the factory.
Across the front of the hood.
Down the left side.
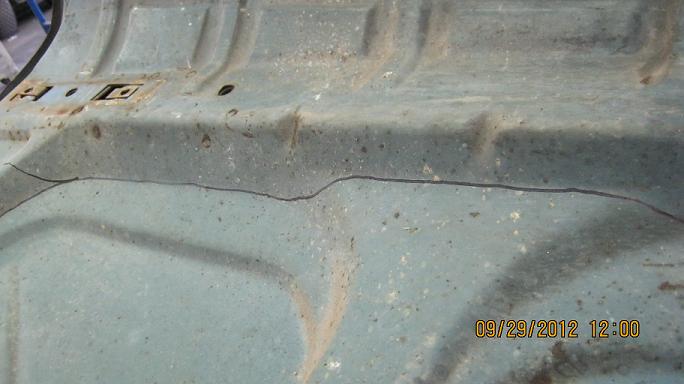
Did get the braces cut today that will be welded in to hold the proper shape of the hood when it is cut apart.
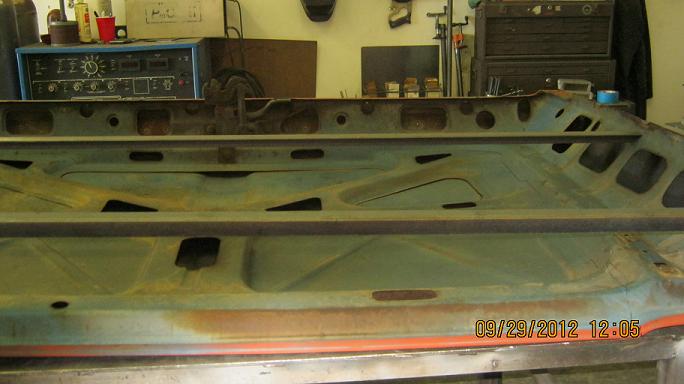
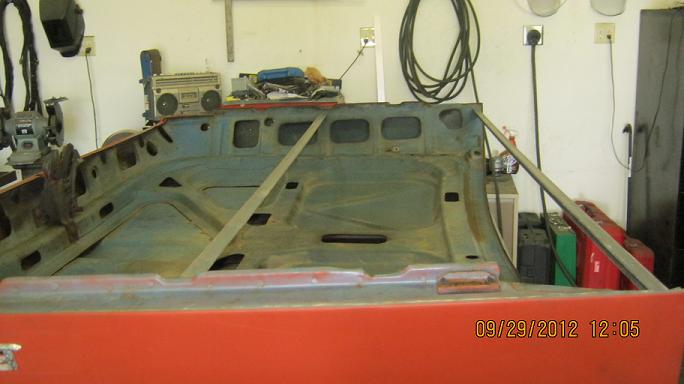
Some shots of how we will be cutting the web structure underneath. I did not get the top side pics today but will have some Monday. Just so everyone knows what the plan is I am raising the portion of the hood that is raised originally another 3/4". This will give the hood a very subtle cowl induction look maintaining all the factory lines. The hope is when finished it might look like Ford did this at the factory.
Across the front of the hood.
Down the left side.
Did get the braces cut today that will be welded in to hold the proper shape of the hood when it is cut apart.
#173
09-29-2012, 07:47 PM

Junior User
Join Date: Sep 2008
Location: Shaunavon, Sk, Canada
Posts: 74
Likes: 0
Received 0 Likes
on
0 Posts
Just so everyone knows what the plan is I am raising the portion of the hood that is raised originally another 3/4". This will give the hood a very subtle cowl induction look maintaining all the factory lines. The hope is when finished it might look like Ford did this at the factory.
 I have been thinking of doing the same thing for over a year now, only I was going to do it on one of my 79 hoods. Well, I guess I get a chance to see now it might look in advance as you get things done much faster than I do.
David.
#174
09-29-2012, 09:01 PM

#175
09-29-2012, 09:15 PM
Junior User
Join Date: Sep 2008
Location: Shaunavon, Sk, Canada
Posts: 74
Likes: 0
Received 0 Likes
on
0 Posts
I hear the voices too. The other idea I had was to take the raised section of another hood, shorten and narrow it up and graft it onto the stock hood, raising it approximately 3/4 to 1". Would also give it a cowl induction look but with the same flow/shape as original. I would graft it on maybe 4-5 inches in from the original raised edges. Probably not explaining it very good.
David.
David.
#176
09-29-2012, 10:09 PM
I hear the voices too. The other idea I had was to take the raised section of another hood, shorten and narrow it up and graft it onto the stock hood, raising it approximately 3/4 to 1". Would also give it a cowl induction look but with the same flow/shape as original. I would graft it on maybe 4-5 inches in from the original raised edges. Probably not explaining it very good.
David.
David.
#177
09-29-2012, 11:12 PM
Junior User
Join Date: Sep 2008
Location: Shaunavon, Sk, Canada
Posts: 74
Likes: 0
Received 0 Likes
on
0 Posts
I see what you mean about supporting the hood, not sure on a solution, will have to sleep on it. Blending in the centre crown was where I was not too sure what to do either. The one idea I did have was to just extend and slope the crown down to the original crown and incorporate dual air openings, one on each side of the crown so the grafted piece looked more like a scoop than cowl induction. This probably wouldn't look as stock as the cowl induction but Ford did have some nice scoop disignes back in the muscle car days. (70 71 Torino, 72 Torino) I wish I had even a little artistic streak, it would make it so much easier to show what is in my mind.
David.
David.
#178
09-30-2012, 07:35 AM
I see what you mean about supporting the hood, not sure on a solution, will have to sleep on it. Blending in the centre crown was where I was not too sure what to do either. The one idea I did have was to just extend and slope the crown down to the original crown and incorporate dual air openings, one on each side of the crown so the grafted piece looked more like a scoop than cowl induction. This probably wouldn't look as stock as the cowl induction but Ford did have some nice scoop disignes back in the muscle car days. (70 71 Torino, 72 Torino) I wish I had even a little artistic streak, it would make it so much easier to show what is in my mind.
David.
David.
 Blending the crown into the lower section was my original plan as well. If you plan on doing scoops cut into the front I am not sure if doing it the way I am would work out that well. It should though as we will be adding material o the front of the hood so it would just be a matter of factoring them in.