'51 F4 project

#752
 04-05-2013, 09:09 PM

Gotta have a bed if I'm gonna be in a parade...
I got started on my "temporary" flat bed today. I've changed my mind about how to build it several times over the past few weeks. But I got it started now, so I better not change my mind again... 
While I was out of town this week, my sweet wife went to the lumber yard with the list I made for the wood. She's cool like that. She bought the wood and I went back today with the Ranger and picked it up from will call.
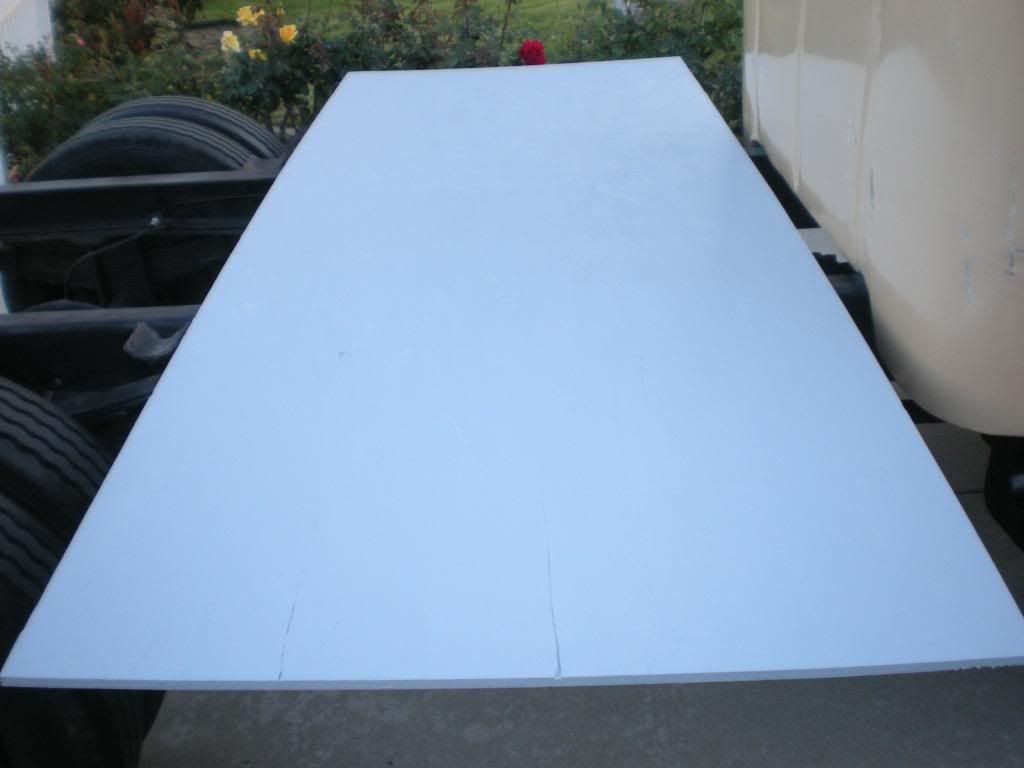
I decided to make part of the final bed and just use plywood for the "parade" bed top. That way I don't have to scrap the whole thing when I get around to finishing the final bed. I'll be flying a bunch of flags in the parade, so I designed this bed for that purpose.
Here's a look at what I got done today. I was really surprised to accomplish this much in one day, but everything just worked out. It took a long time to drill the holes in the brackets, but I got it done.
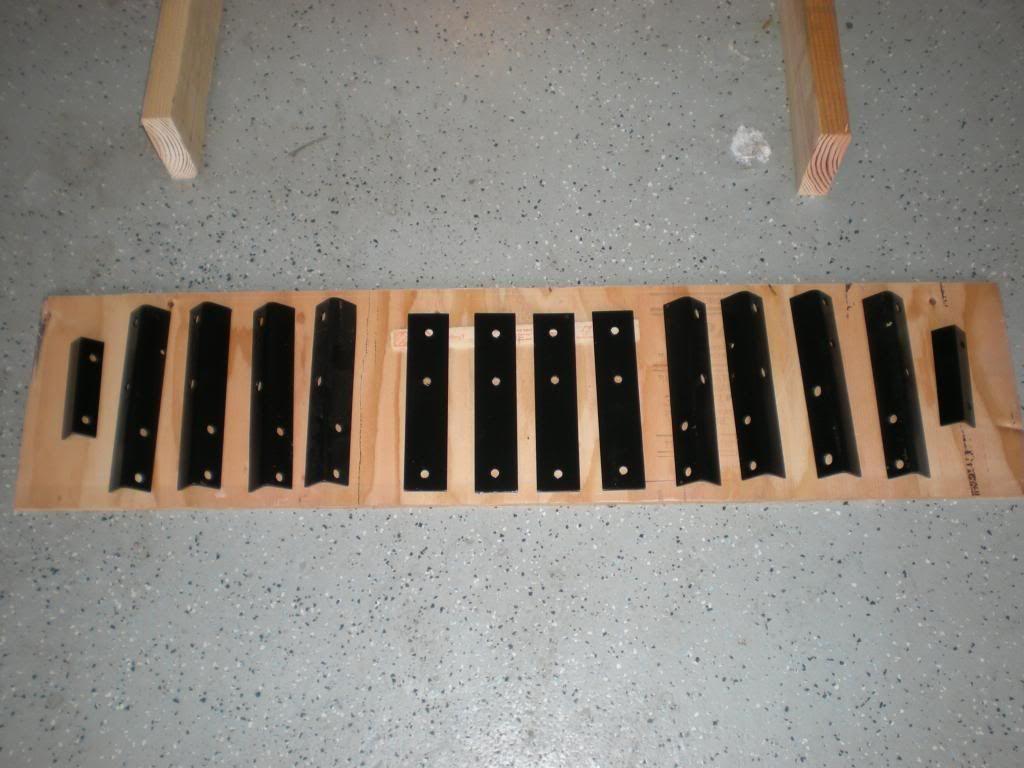
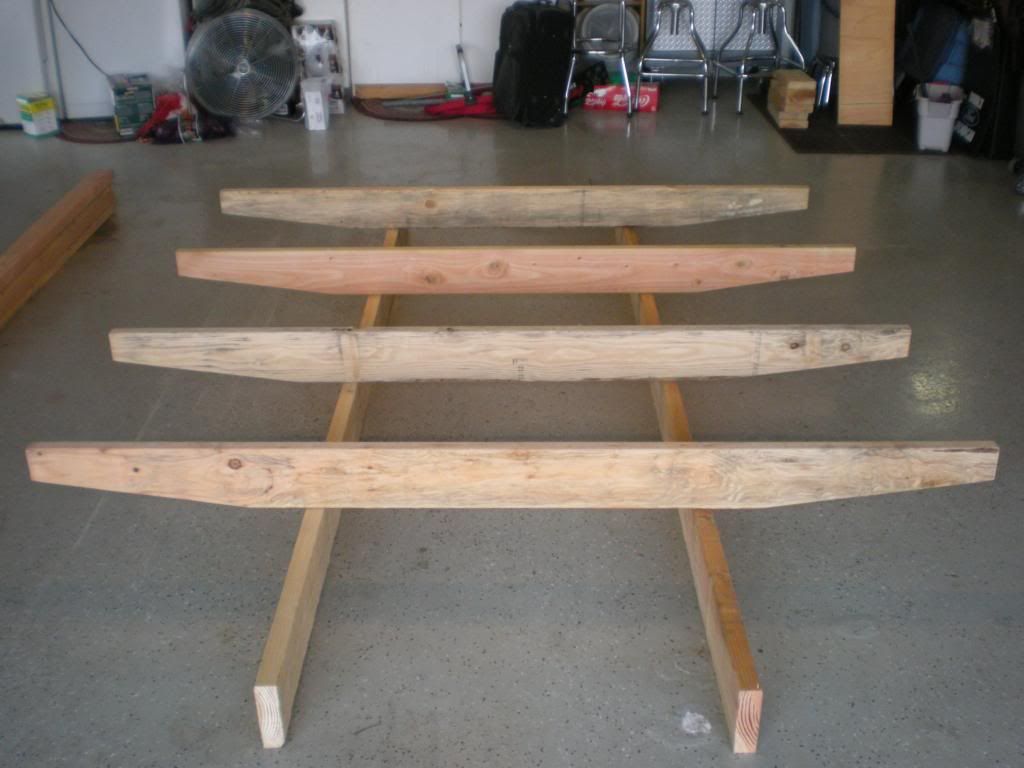
All the wood is cut. I didn't take a picture of the plywood yet, but I will tomorrow.
I'm kinda excited to have this much completed in one day. Actually, I didn't get started until 11:00 since my granddaughter was here for breakfast and I still hadn't picked up the wood. So, all in all, I'm a happy camper.
And the final bed will have another 2x6 for the front and probably a 2x12 for the back.
While I was out of town this week, my sweet wife went to the lumber yard with the list I made for the wood. She's cool like that.
She bought the wood and I went back today with the Ranger and picked it up from will call.I decided to make part of the final bed and just use plywood for the "parade" bed top. That way I don't have to scrap the whole thing when I get around to finishing the final bed. I'll be flying a bunch of flags in the parade, so I designed this bed for that purpose.
Here's a look at what I got done today. I was really surprised to accomplish this much in one day, but everything just worked out.
It took a long time to drill the holes in the brackets, but I got it done.All the wood is cut. I didn't take a picture of the plywood yet, but I will tomorrow.
I'm kinda excited to have this much completed in one day. Actually, I didn't get started until 11:00 since my granddaughter was here for breakfast and I still hadn't picked up the wood. So, all in all, I'm a happy camper.
And the final bed will have another 2x6 for the front and probably a 2x12 for the back.
#754
04-06-2013, 07:11 AM

Lead Driver
Looks great! Be sure to post lots of pictures, so when it's my turn I don't have to reinvent the wheel.
Do you know about Joe's (Harleymsn) bed on Edith? His album has some great stuff.
1950 Ford F450 4x2 - 1950 F5
Edit: Is it a requirement to be named Joe to be planning on an all wood flatbed?
Do you know about Joe's (Harleymsn) bed on Edith? His album has some great stuff.
1950 Ford F450 4x2 - 1950 F5
Edit: Is it a requirement to be named Joe to be planning on an all wood flatbed?
#755
04-06-2013, 10:28 AM

Joe, it appears to me that you have the basis of a good permanent bed.  It should not take much more time to do it once the way you want it. Use screws and bolts for assembly and it can be taken apart for minor changes later if so desired. Keep up the good work.
X===========X===========X===========X============= X
While I was out of town this week, my sweet wife went to the lumber yard with the list I made for the wood. She's cool like that. She bought the wood and I went back today with the Ranger and picked it up from will call.
And Joe, any wife that would do this deserves a dinner out or some such favor
It should not take much more time to do it once the way you want it. Use screws and bolts for assembly and it can be taken apart for minor changes later if so desired. Keep up the good work.X===========X===========X===========X============= X
While I was out of town this week, my sweet wife went to the lumber yard with the list I made for the wood. She's cool like that.
She bought the wood and I went back today with the Ranger and picked it up from will call.And Joe, any wife that would do this deserves a dinner out or some such favor
#756
04-06-2013, 10:32 AM
Thanks guys.
Yes, my inspiration for making this wood bed came from seeing Edith's pics on Joe's (Harleymsn) website. My work will not equal his craftsmanship, but it will be a functional bed. I won't be using such beautiful wood.
Over a year ago, I downloaded a set of PDF drawings which I think originally were drawn up by Bob (bobj49f2) showing everything needed to build a wood bed. I'm changing the dimensions to better fit my truck, but these drawings are a great help to visualize what I'm doing.
FTE FTW!!!
EDIT: I went looking for the source of the PDF drawings I got a long time ago. I was right. They were on Bob's website here http://www.fatfenderedtrucks.com/fla...f_drawing.html
#759
04-06-2013, 08:13 PM
Posting Guru
#760
04-06-2013, 09:15 PM
Thanks Keith. I'll post some pics of what we got done today. By "we" I mean my wife and me (yes, that's correct grammar).
"We" painted all the wood today with Kilz gray paint. That will seal it and made it look a lot better, since I got the cheaper wood grade. And I figure the part I'm doing now is not going to be nearly as visible as the wood in the finished product.
Now, if you want to know what a real keeper is... it's my wife's birthday, and she helped me put two coats of paint on all that wood. On top of that, she did the majority of the painting, since she was using a bigger brush!
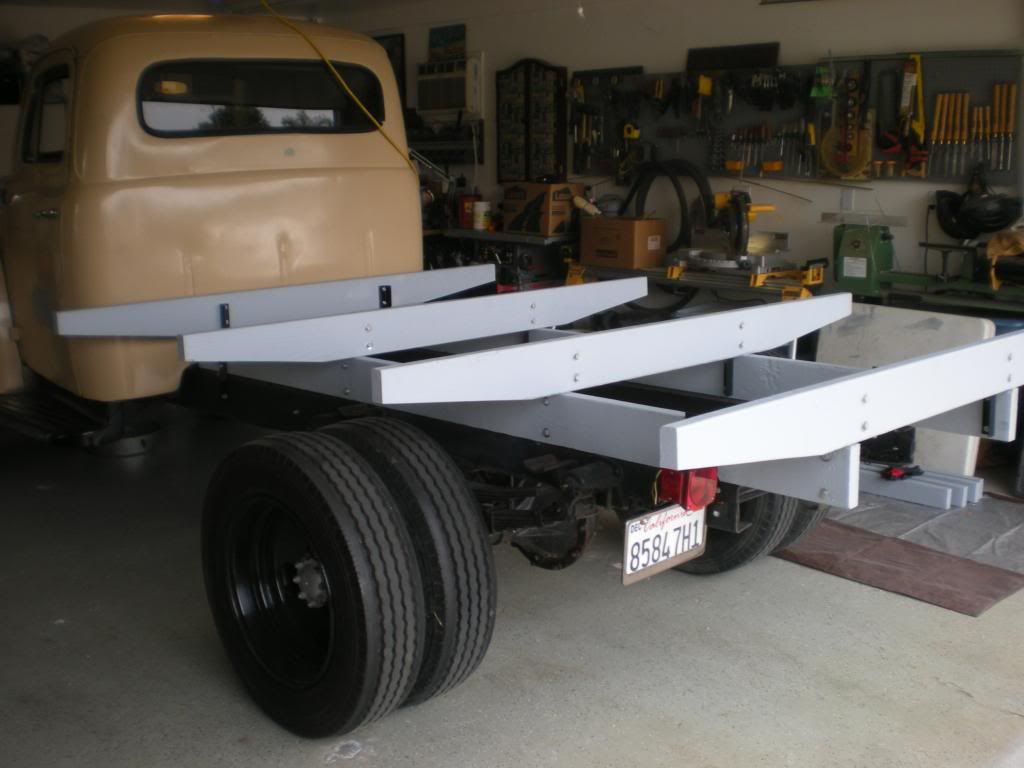
Here are some pics of the wood after paint. In about an hour, it'll be dry enough so we can move it around and put the truck away.
This is after two coats:
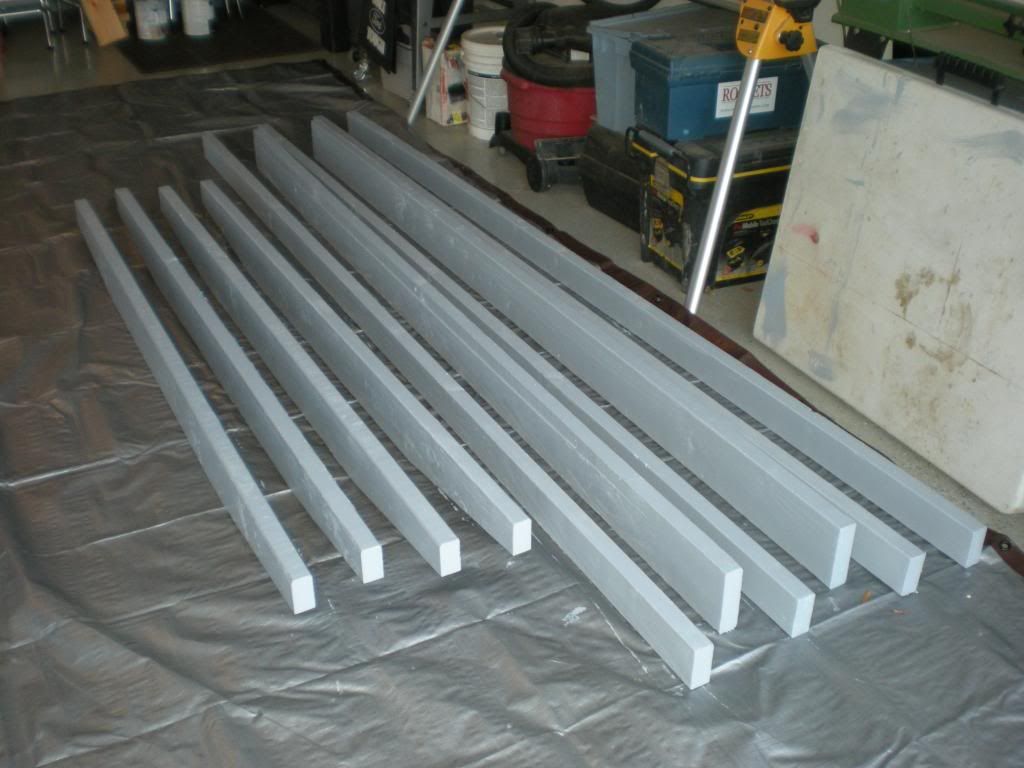
After the second coat dried, I was amazed to see how close this color will be to the Silvertone Gray I plan to paint the truck (someday). At least I think it's close to that color... kind of a blue gray. And, since the original trucks left the factory painted the color of the cab, this may work out very nicely. 
"We" painted all the wood today with Kilz gray paint. That will seal it and made it look a lot better, since I got the cheaper wood grade. And I figure the part I'm doing now is not going to be nearly as visible as the wood in the finished product.
Now, if you want to know what a real keeper is... it's my wife's birthday, and she helped me put two coats of paint on all that wood. On top of that, she did the majority of the painting, since she was using a bigger brush!
Here are some pics of the wood after paint. In about an hour, it'll be dry enough so we can move it around and put the truck away.
This is after two coats:
After the second coat dried, I was amazed to see how close this color will be to the Silvertone Gray I plan to paint the truck (someday). At least I think it's close to that color... kind of a blue gray.
And, since the original trucks left the factory painted the color of the cab, this may work out very nicely.
#761
04-06-2013, 09:26 PM
Elder User
#762
04-06-2013, 09:35 PM
#763
04-07-2013, 10:26 PM
Betsy has a bed... almost
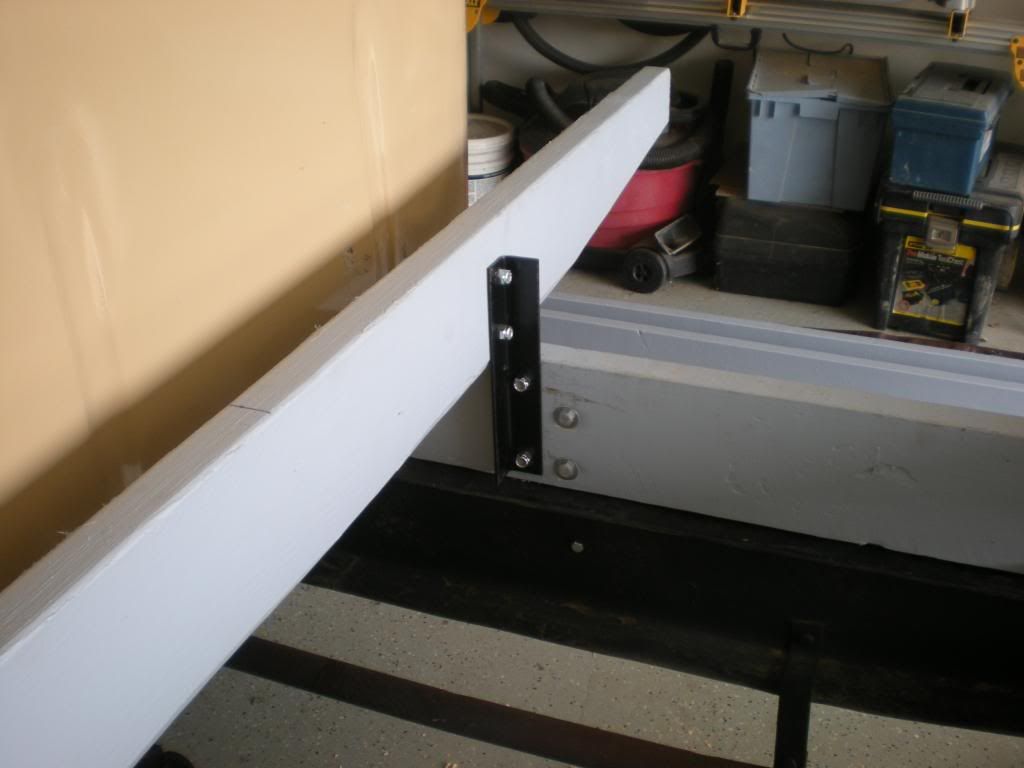
Progress today. I got all of the bed on the truck except for the drivers side hold down and the plywood. I didn't get finished because I had to make two more brackets for the hold down. All I've ever seen used are long u-bolts for this purpose. I bought some allthread rod, thinking I could bend it to the U-bolt shape with heat. Lesson learned... heated allthread will break at the bend. So I went to plan B. I used 2 pieces of allthread with brackets above the wood bed frame, and below the steel truck frame. But since I only made two brackets originally, thinking to use them on the bottom only, I had to make two more. The paint is drying overnight on them, so I should be able to complete the temporary bed tomorrow. Maybe.
More pictures...
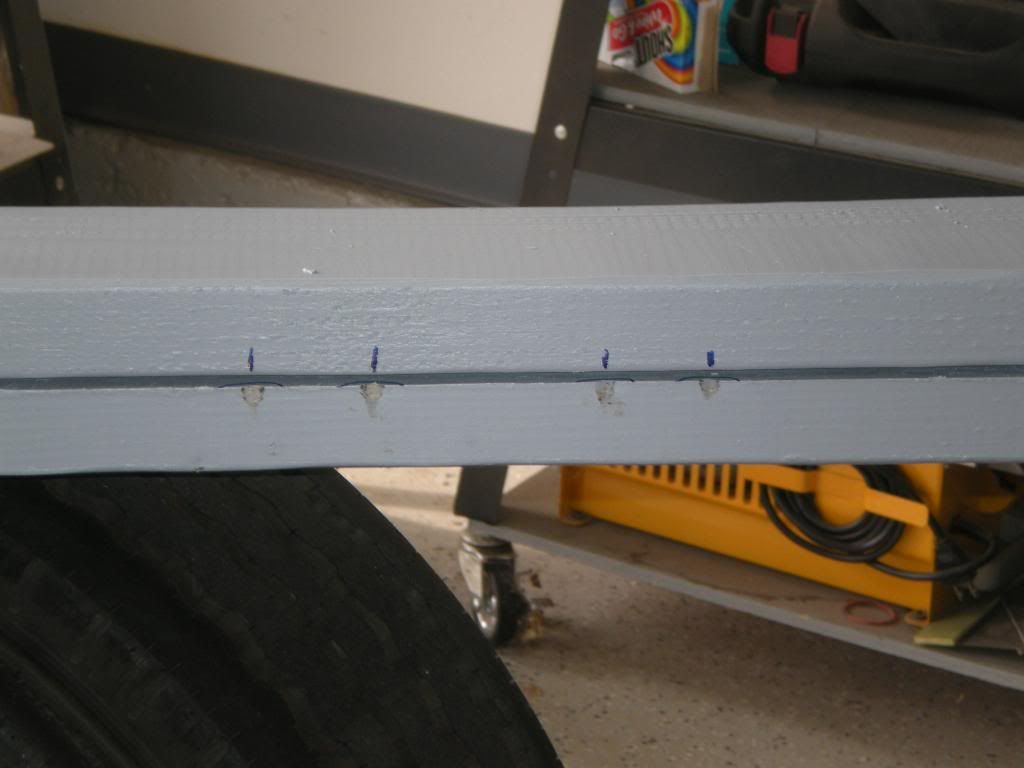
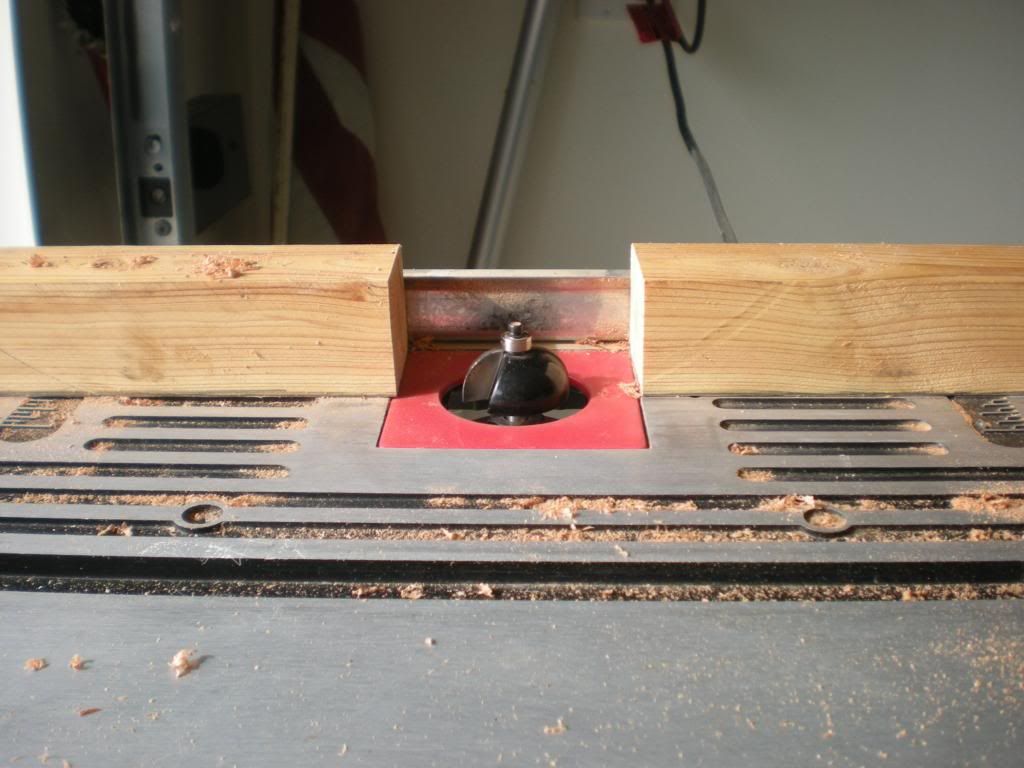
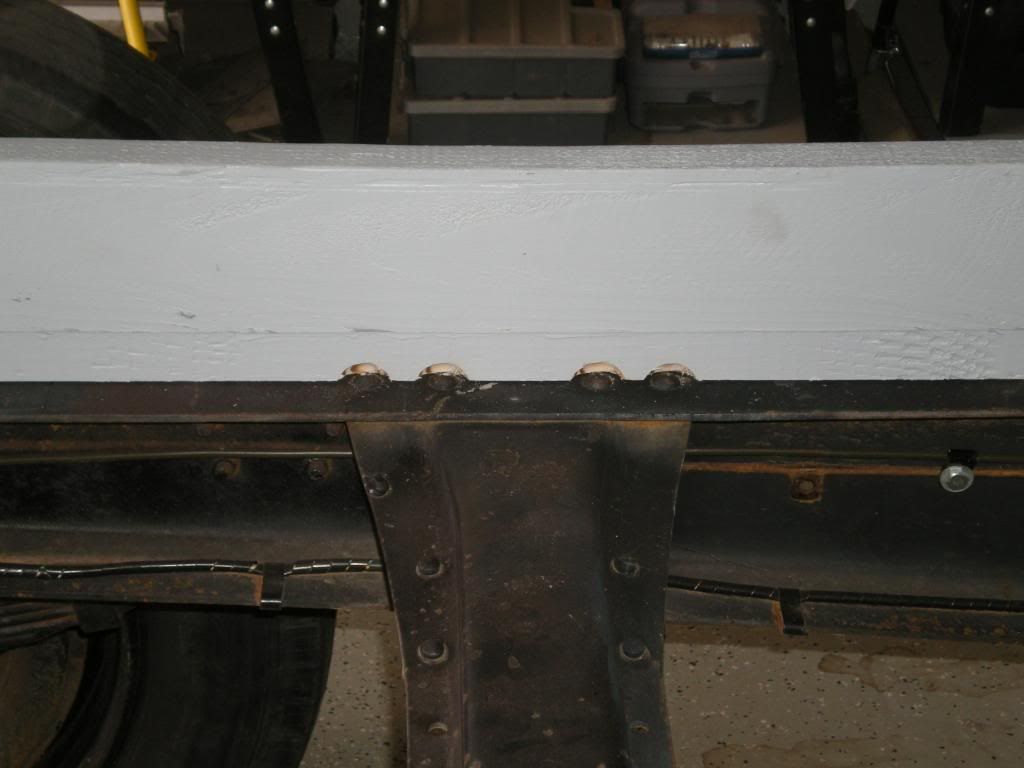
I found the frame rivets were causing the wood frame pieces to "lean" outward, so at my son's suggestion, we used my router table to remove that part of the wood frames.
Once I got over that hurdle (thanks again Charlie) I was able to move ahead with the bed assembly.
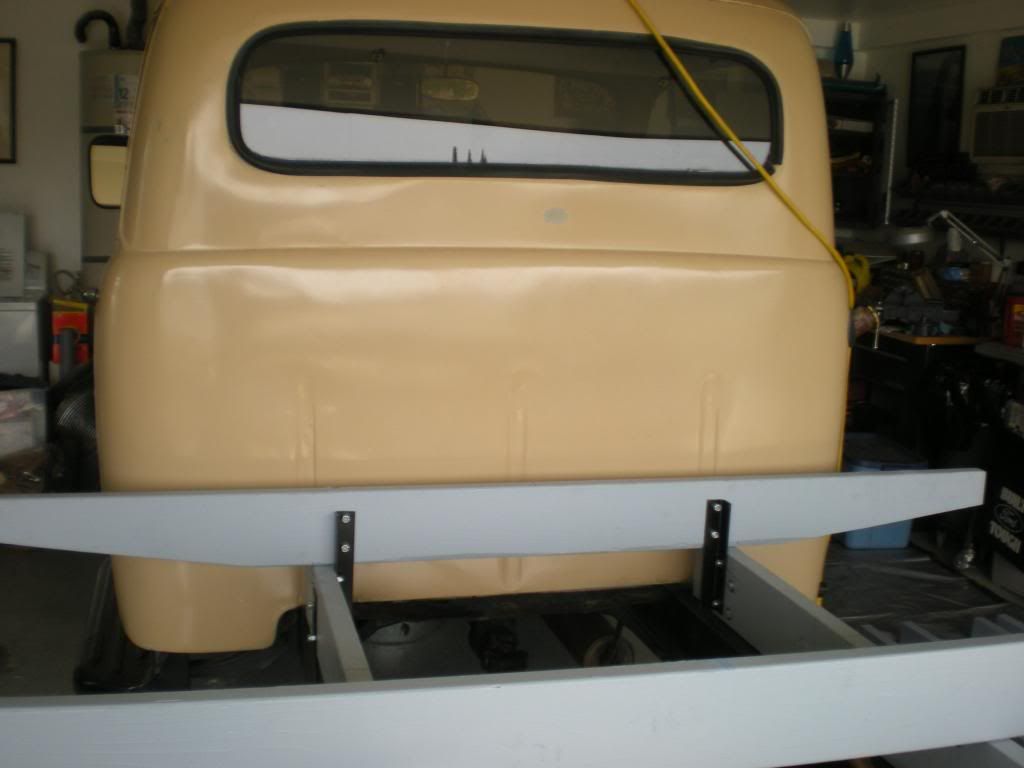
All the cross pieces in place...
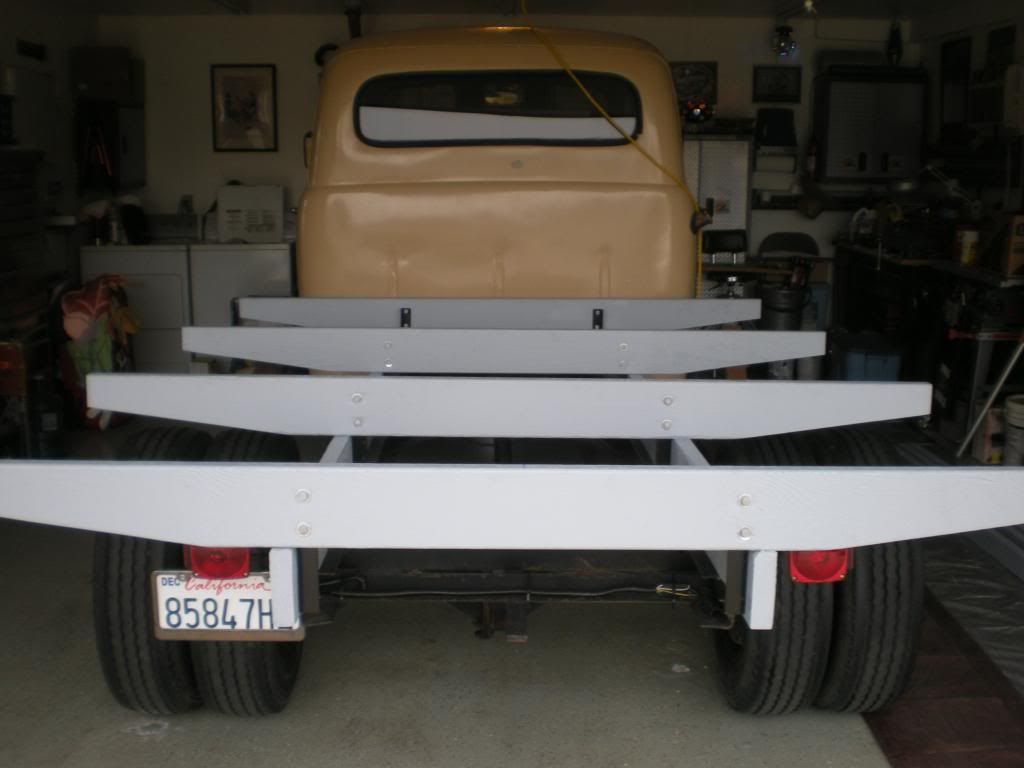
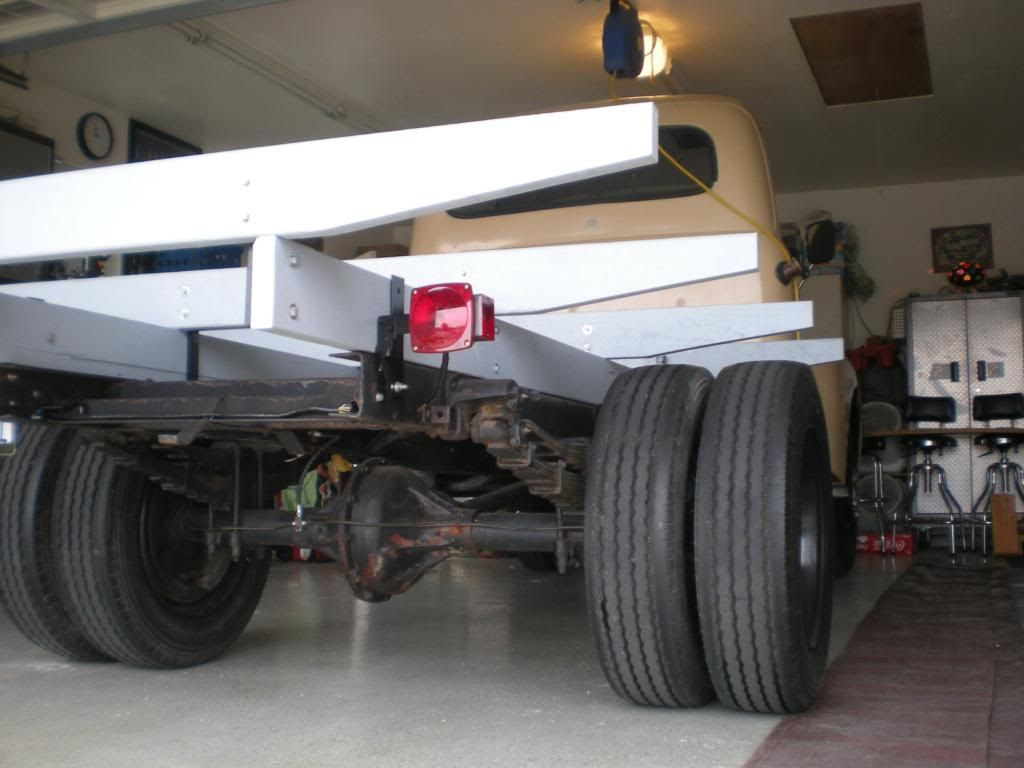

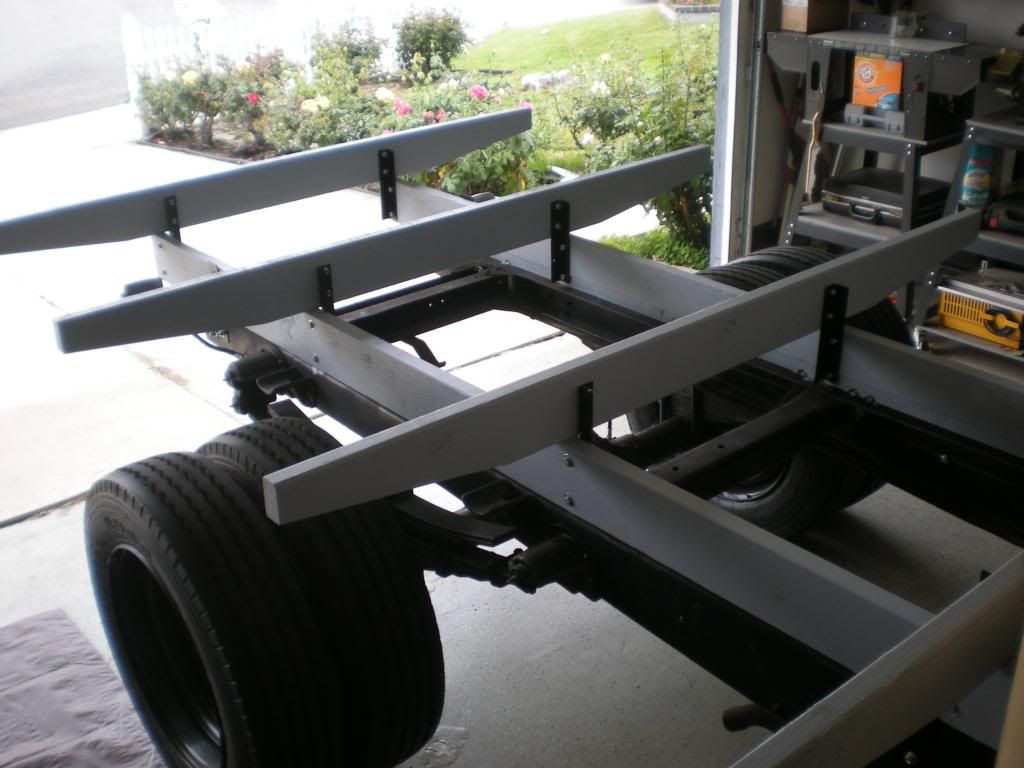
I'm happy with the way it turned out. And it is very strong.
More pictures...
I found the frame rivets were causing the wood frame pieces to "lean" outward, so at my son's suggestion, we used my router table to remove that part of the wood frames.
Once I got over that hurdle (thanks again Charlie) I was able to move ahead with the bed assembly.
All the cross pieces in place...
I'm happy with the way it turned out. And it is very strong.