1952 Ford F-1 build
#121
 04-05-2016, 08:26 PM

Been working on it again on and off. I found yet another Edelbrock 600 cfm Manual choke carb in dads shop off another project I had forgot about. Put it on and it did run better but idle was off.
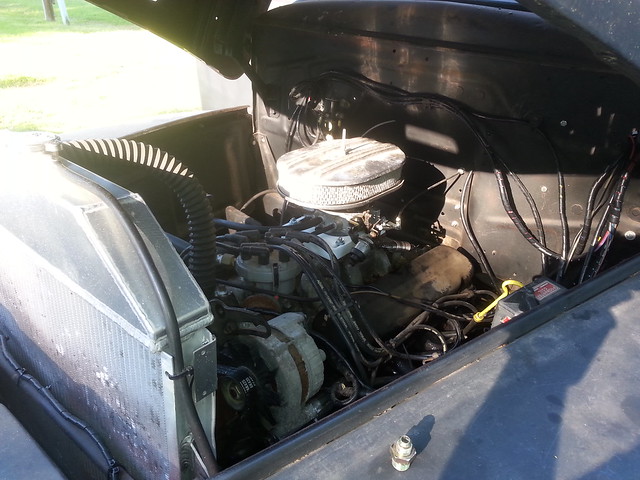
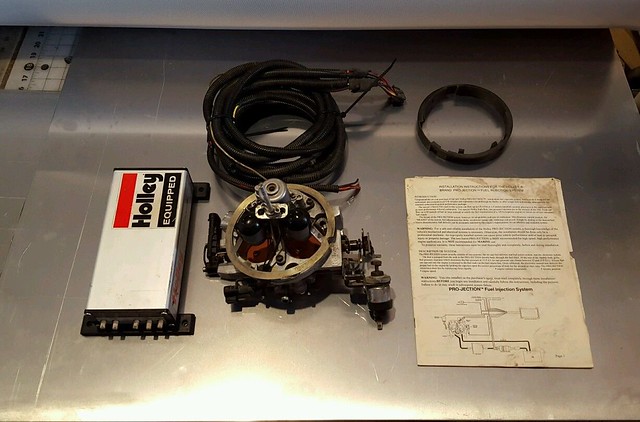
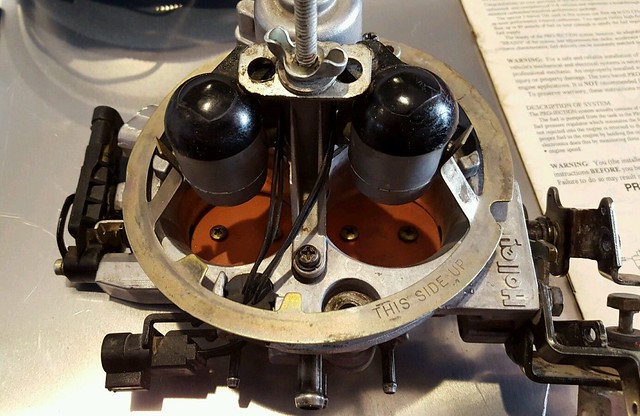
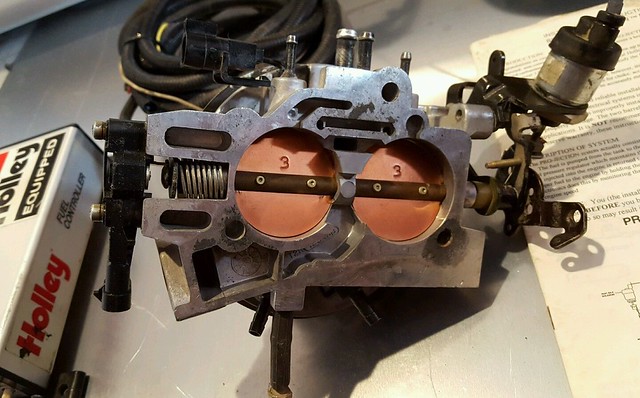
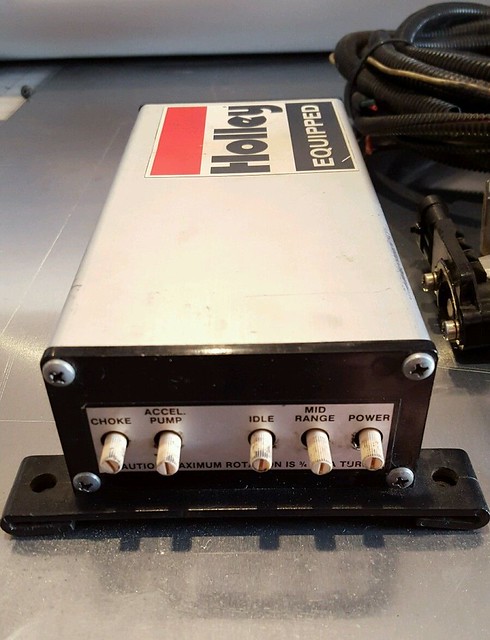
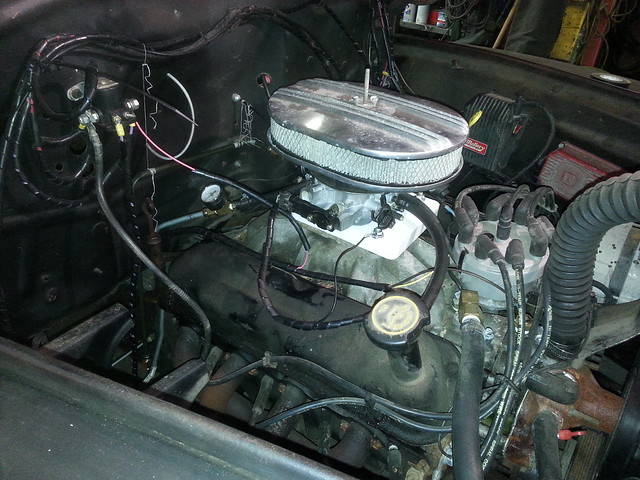
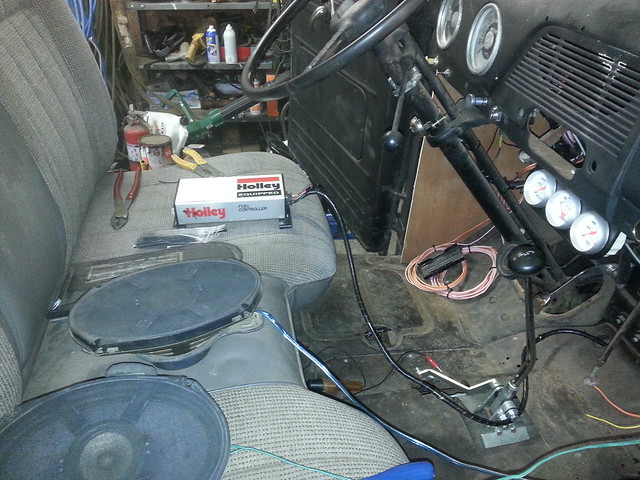
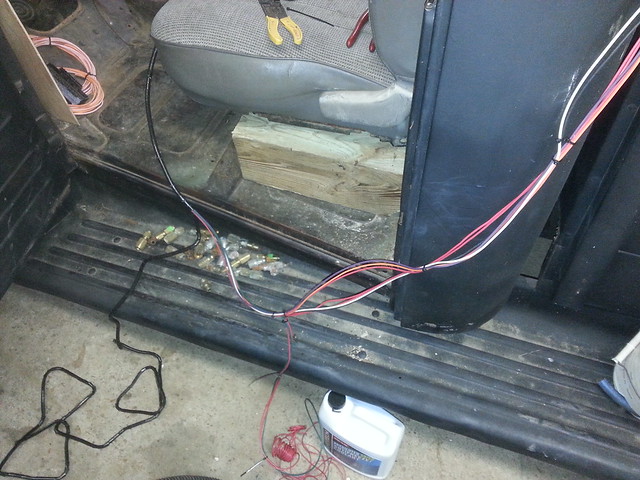
I had just got a older holley Pro-jection and have researched it alot. I have started putting it on. I have removed the carter fuel pump and all fuel lines. Removed the carb and have installed the holley Pro-jection throttle body. My temp sensor came in today so I will be stringing wires for the efi and installing the new fuel system with return line.
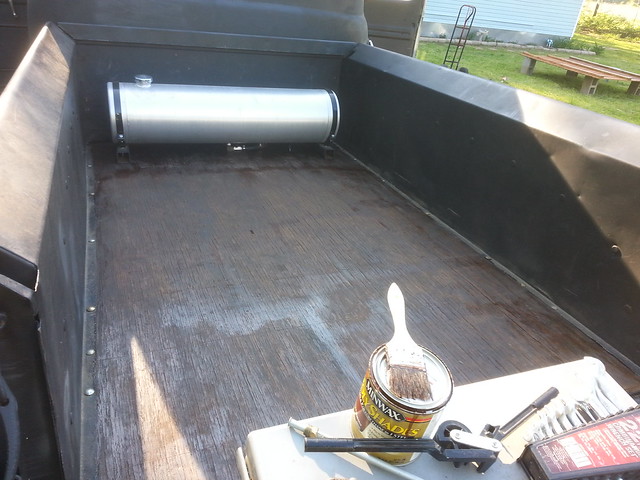
Put a new coat on the wood in the bed. I just had stain originally and it had all but faded. Got a new darker stain and it has the clear built in so I thought I would give it a try. Should be good for a second coat tomorrow.
 20160405_172359 by Safjist Nipnog, on Flickr
 20160405_172406 by Safjist Nipnog, on Flickr
 20160405_172415 by Safjist Nipnog, on Flickr
 20160405_191114 by Safjist Nipnog, on Flickr
 20160405_191108 by Safjist Nipnog, on Flickr
I had just got a older holley Pro-jection and have researched it alot. I have started putting it on. I have removed the carter fuel pump and all fuel lines. Removed the carb and have installed the holley Pro-jection throttle body. My temp sensor came in today so I will be stringing wires for the efi and installing the new fuel system with return line.
Put a new coat on the wood in the bed. I just had stain originally and it had all but faded. Got a new darker stain and it has the clear built in so I thought I would give it a try. Should be good for a second coat tomorrow.
20160405_172359 by Safjist Nipnog, on Flickr20160405_172406 by Safjist Nipnog, on Flickr20160405_172415 by Safjist Nipnog, on Flickr20160405_191114 by Safjist Nipnog, on Flickr20160405_191108 by Safjist Nipnog, on Flickr
#122
04-05-2016, 08:44 PM
A few more pictures to add.
 20160323_181804 by Safjist Nipnog, on Flickr
 1 by Safjist Nipnog, on Flickr
 3 by Safjist Nipnog, on Flickr
 4 by Safjist Nipnog, on Flickr
 7 by Safjist Nipnog, on Flickr
20160323_181804 by Safjist Nipnog, on Flickr1 by Safjist Nipnog, on Flickr3 by Safjist Nipnog, on Flickr4 by Safjist Nipnog, on Flickr7 by Safjist Nipnog, on Flickr
#123
04-10-2016, 12:50 PM
Got it to fire up today. Got lots of wires to wrap and test. I had to bypass the fuel pump for it to run. I will have to check the new relay and wiring to make sure the wiring problem isn't with it. It will run then after a while sounds like it's loading up with fuel. I will be trying to tune it up by the instructions later today.
 20160409_143532 by Safjist Nipnog, on Flickr
 20160409_143540 by Safjist Nipnog, on Flickr
 20160409_143555 by Safjist Nipnog, on Flickr
20160409_143532 by Safjist Nipnog, on Flickr20160409_143540 by Safjist Nipnog, on Flickr20160409_143555 by Safjist Nipnog, on Flickr
#124
04-17-2016, 12:37 AM
I got sidetracked but last two days finished up some stuff on the 52.
First my side track. I got a F150 4x4 that I fixed up years ago as a dependable beater, but doesn't get used a lot. It will soon see action again. I decided Wed to go ahead and fire it up and get it moving. Got a surprise, the bag over the air cleaner was gone (wind or rats not sure). We have had lots of water and as a lot of you know the hood ends right over the air cleaner so water got it. It looked like it was only one cylinder and I had to drain the oil in the pan.
After cleaning and flushing out I got it unstuck and let it soak with some Mystery oil. In the morning flushed it out and then blew it out though the spark plug holes. Fired it up for a few. I will be flushing the gas tank out, etc to get it back up to full. Then mount the winch I have had for years back on it. Now I have a new bag on it with old shocks for weight, lol.
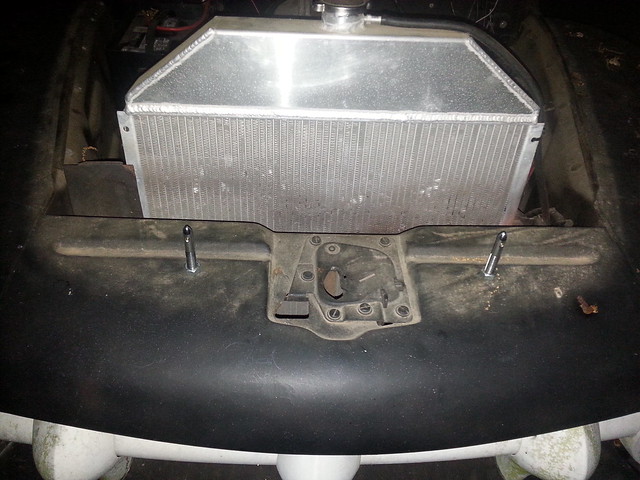
Back to the 52. I have been waiting for some little stuff for the EFI unit and mounted what I could. While draining the cooling system enough so I could install the EFI temp sensor into the manifold I noticed a spring in the top of the radiator. It turns out the spring that was in the top hose had worked it's way out of the hose and into the radiator. It came out with out too much of a problem.
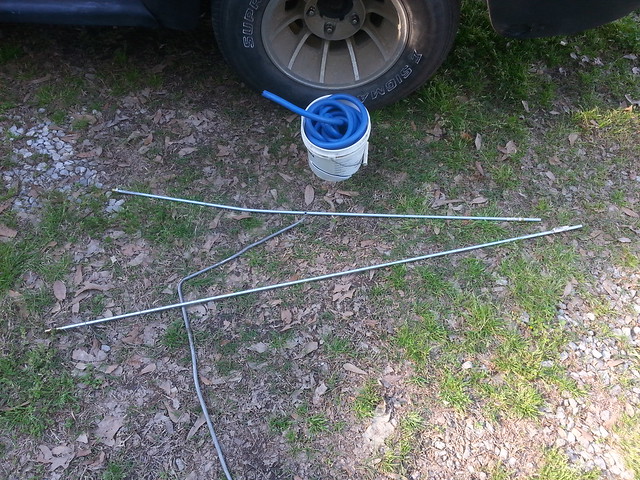
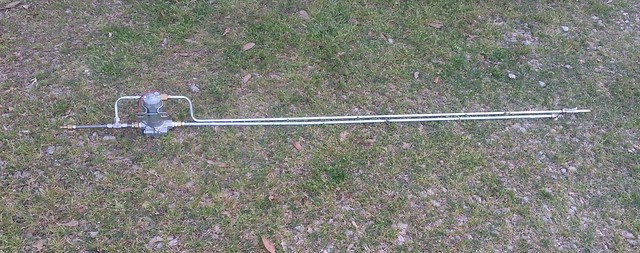
I had decided hard line from the fuelpump to the throttle body. It took some time to bend and fit all of those lines but I finally got the feed and return lines done. I tested the unit and it would fire up but not idle alone. I had to give it gas. By now it was time to go pick up my kids for the weekend. So I looked under the truck and didn't see a leak and then went to go get them. I didn't turn the fuel shut off on the tank off.
When I got back about 3 hours later I went into the shop to lock up and smelled gas everywhere. I looked under the truck to see gas puddled up and the 5 gallons I had in the tank was gone. Looking under the truck good a line was a little loose and had started leaking on the rail. That's why I didn't see anything under the truck before I left. I left the shop doors open and had the big shop fan on to vent it all out over night.
Next day I double checked all of the lines again and tested. All of it went well so I moved on to wiring. I pulled the fuse and looked at how I was going to get it wired up with out splicing into the wire from the fuse box as I didn't really have enough slack to do I like I wanted too.
I would up for full testing putting spade terminals from the relay to the fuse slots and then trying it out. Nothing. I wasn't getting power to the other side of the relay. I have power coming from power wire and into the fuse box but the relay would work. I decided just to bypass it with the fuse for now since the pump would shut off with the key. I got the unit to run, but it still needed tuning. I put it all up for the day.
After this is when I got side tracked on my other truck as I wanted to make sure I could save it's engine. ( I have a spare engine that was put up but it seems it's locked as well and I am going to have to free it up soon as well)
After all of this and working on the wife's car some in between I got back on the 52 and got it to run and did the quick tune method on it. This only adjusts the idle and mid range on the control box using rpm and help from my dad reading the vacuum gauge for me. I still need to tune the rest but I can't until I get it on the open road. By then I hope to have the fuel/air ratio gauge on it for better tuning. The ECU won't tune it but I can see what it needs and make my own changes.
I still need to see if the relay is bad or what the problem is as I got it to work one time, but it failed to work under testing two other times. I am running it bypassed right now.
The wiring was still temp so today I shortened, rerouted and covered the last of the EFI wiring and even got the tach into the truck. I have been needing a new battery as well so I got a new one. Decided to weld a new battery box under the hood and redo some of the battery cables. The battery was under the back bed. I must of had a bad ground as with the shorter cables and the battery directly on the neg side hooked to the engine there is no lag on starting. I am thinking now part of my starting problems may have been from a bad ground and it loosing power at the MSD box and not giving out full spark sometimes.
About a week ago I got my truck seat cover in. I just wanted a cheap one for now. This was the best looking one I could find. It was only 25 dollars shipped.
I tried it on the mini truck seat but it wouldn't fit right. It fits fine on the original seat so I put that back into the truck. I still need to put all the holders on it to get it to hold to the seat tight. I also need to do the new seat bottom I have hand planned for awhile now.
 20160416_223706 by Safjist Nipnog, on Flickr
 20160416_223718 by Safjist Nipnog, on Flickr
Now I just need to get some cheap white matching material for the trim work.
The test drive today went well. Went a short trip up the road with no problems. Dropped it into reverse several times to see if it would bog. It all starts fine. I can turn the key and it cranks as fast and well as my 2005 now.
First my side track. I got a F150 4x4 that I fixed up years ago as a dependable beater, but doesn't get used a lot. It will soon see action again. I decided Wed to go ahead and fire it up and get it moving. Got a surprise, the bag over the air cleaner was gone (wind or rats not sure). We have had lots of water and as a lot of you know the hood ends right over the air cleaner so water got it. It looked like it was only one cylinder and I had to drain the oil in the pan.
After cleaning and flushing out I got it unstuck and let it soak with some Mystery oil. In the morning flushed it out and then blew it out though the spark plug holes. Fired it up for a few. I will be flushing the gas tank out, etc to get it back up to full. Then mount the winch I have had for years back on it. Now I have a new bag on it with old shocks for weight, lol.
Back to the 52. I have been waiting for some little stuff for the EFI unit and mounted what I could. While draining the cooling system enough so I could install the EFI temp sensor into the manifold I noticed a spring in the top of the radiator. It turns out the spring that was in the top hose had worked it's way out of the hose and into the radiator. It came out with out too much of a problem.
I had decided hard line from the fuelpump to the throttle body. It took some time to bend and fit all of those lines but I finally got the feed and return lines done. I tested the unit and it would fire up but not idle alone. I had to give it gas. By now it was time to go pick up my kids for the weekend. So I looked under the truck and didn't see a leak and then went to go get them. I didn't turn the fuel shut off on the tank off.
When I got back about 3 hours later I went into the shop to lock up and smelled gas everywhere. I looked under the truck to see gas puddled up and the 5 gallons I had in the tank was gone. Looking under the truck good a line was a little loose and had started leaking on the rail. That's why I didn't see anything under the truck before I left. I left the shop doors open and had the big shop fan on to vent it all out over night.
Next day I double checked all of the lines again and tested. All of it went well so I moved on to wiring. I pulled the fuse and looked at how I was going to get it wired up with out splicing into the wire from the fuse box as I didn't really have enough slack to do I like I wanted too.
I would up for full testing putting spade terminals from the relay to the fuse slots and then trying it out. Nothing. I wasn't getting power to the other side of the relay. I have power coming from power wire and into the fuse box but the relay would work. I decided just to bypass it with the fuse for now since the pump would shut off with the key. I got the unit to run, but it still needed tuning. I put it all up for the day.
After this is when I got side tracked on my other truck as I wanted to make sure I could save it's engine. ( I have a spare engine that was put up but it seems it's locked as well and I am going to have to free it up soon as well)
After all of this and working on the wife's car some in between I got back on the 52 and got it to run and did the quick tune method on it. This only adjusts the idle and mid range on the control box using rpm and help from my dad reading the vacuum gauge for me. I still need to tune the rest but I can't until I get it on the open road. By then I hope to have the fuel/air ratio gauge on it for better tuning. The ECU won't tune it but I can see what it needs and make my own changes.
I still need to see if the relay is bad or what the problem is as I got it to work one time, but it failed to work under testing two other times. I am running it bypassed right now.
The wiring was still temp so today I shortened, rerouted and covered the last of the EFI wiring and even got the tach into the truck. I have been needing a new battery as well so I got a new one. Decided to weld a new battery box under the hood and redo some of the battery cables. The battery was under the back bed. I must of had a bad ground as with the shorter cables and the battery directly on the neg side hooked to the engine there is no lag on starting. I am thinking now part of my starting problems may have been from a bad ground and it loosing power at the MSD box and not giving out full spark sometimes.
About a week ago I got my truck seat cover in. I just wanted a cheap one for now. This was the best looking one I could find. It was only 25 dollars shipped.
I tried it on the mini truck seat but it wouldn't fit right. It fits fine on the original seat so I put that back into the truck. I still need to put all the holders on it to get it to hold to the seat tight. I also need to do the new seat bottom I have hand planned for awhile now.
20160416_223706 by Safjist Nipnog, on Flickr20160416_223718 by Safjist Nipnog, on FlickrNow I just need to get some cheap white matching material for the trim work.
The test drive today went well. Went a short trip up the road with no problems. Dropped it into reverse several times to see if it would bog. It all starts fine. I can turn the key and it cranks as fast and well as my 2005 now.
#125
04-25-2016, 09:12 PM
I still got my 4x4 in the shop trying to get it to run and idle so we will see how that goes tomorrow. I have a few minor things to do on it as well.
I haven't started the 52 for about 4 days or more so I thought I would see if it still cranks up like it was. I am happy to report after the second try it cranked right up and idled like it was suppose to. In a few more days I will be back on the 52 and start working on the interior some to get that sorted back out and get some white painted to off set the black in the cab.
I haven't started the 52 for about 4 days or more so I thought I would see if it still cranks up like it was. I am happy to report after the second try it cranked right up and idled like it was suppose to. In a few more days I will be back on the 52 and start working on the interior some to get that sorted back out and get some white painted to off set the black in the cab.
#126
04-28-2016, 08:36 PM
Junkyard victory today. From the only v8 explorer to be in the yard I finally got the F4TE camshaft I have been wanting. I will be double checking the lift on it tonight to make sure but as I was the one who pulled the gt40 heads and intake that should be it.
 20160428_081403 by Safjist Nipnog, on Flickr
So in the future I will be swapping from a .379/.395 244/256 roller cam to a .422/.448 256/266 roller cam. This will extend my RPM top end some. This will work well later on when I can swap some different pistons in or flycut them and put the gt40 heads on with 1.7 roller rockers.
20160428_081403 by Safjist Nipnog, on FlickrSo in the future I will be swapping from a .379/.395 244/256 roller cam to a .422/.448 256/266 roller cam. This will extend my RPM top end some. This will work well later on when I can swap some different pistons in or flycut them and put the gt40 heads on with 1.7 roller rockers.
#127
03-04-2017, 08:35 PM
Progress has been slow, but I am slowly getting to where I want. I have picked up two more aftermarket EFI for the 52. One is just the ECM. It's a Holley Pro jection 2 MPI. It's pretty much a factory MPI 4Di. I think I have the wiring sorted now but need to test it. The ones that I am going though the wiring now is a Holley Commander 950. It's just the harness and ECM. I may be running it alpha-N to start with but will be adding a oxygen sensor. For now I will be using the 2v throttle body that is on it, but I am on the look out for a Holley 4v throttle body. I haven't had my CF-29 Toughbook going in a while either. I just reloaded XP on it so it can be used just for tuning on the two new ECU I have.
by https://www.flickr.com/photos/safjist_nipnog/, on Flickr

#128
04-05-2017, 09:14 PM
Got a little bit done the last few days. Finally got the bottom seat cover firmly on and the seat bolted down with new bolts, cleaned out everything that has been stacked in it and in the back of it.
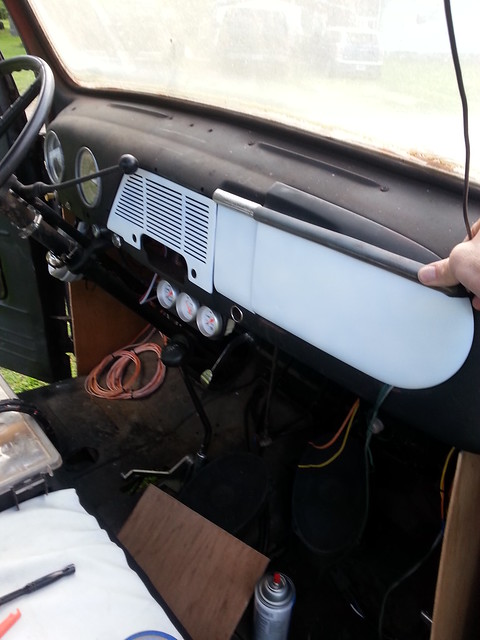
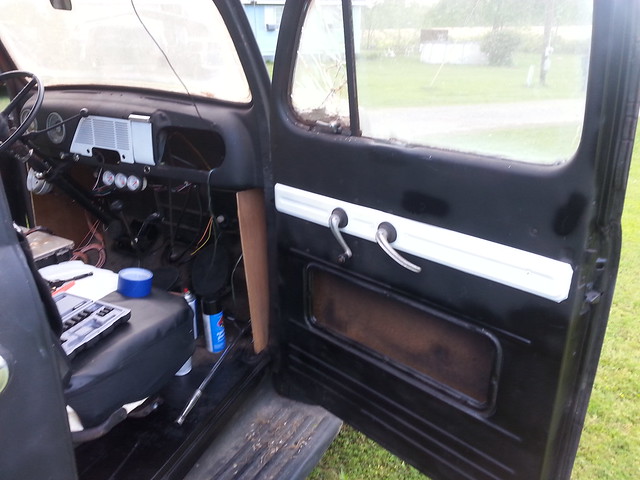
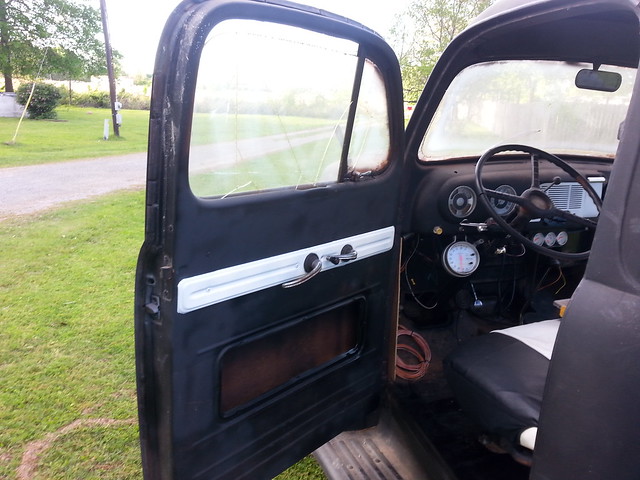
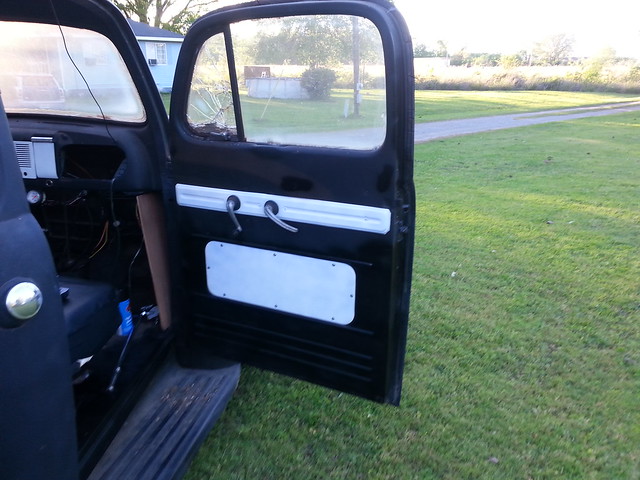
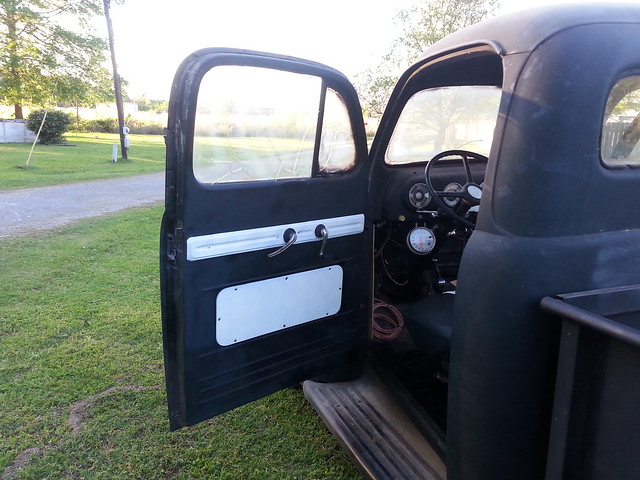
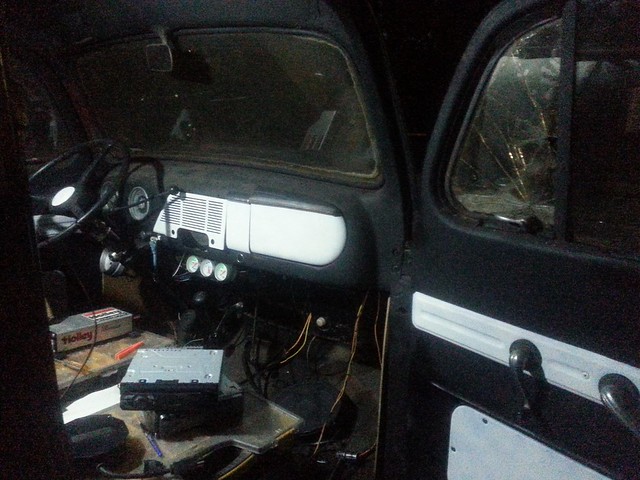
Today I decided to paint the inside the way I have been thinking about doing it to throw as little color in the interior. I painted some parts on the dash white and on the doors. Once I get my white shift **** in there that will help break up the black some too. I put the removable door panels back on with new stainless screws that were slightly oversized. The original screws seemed to have a slight wobble to them.
by https://www.flickr.com/photos/safjist_nipnog/, on Flickr
by https://www.flickr.com/photos/safjist_nipnog/, on Flickr
by https://www.flickr.com/photos/safjist_nipnog/, on Flickr
by https://www.flickr.com/photos/safjist_nipnog/, on Flickr
by https://www.flickr.com/photos/safjist_nipnog/, on Flickr
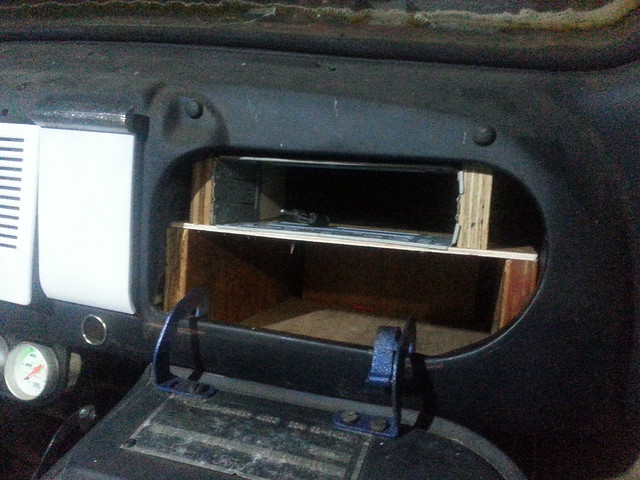
Tomorrow I will be finishing the wood glove box. It will be two levels. Lower level for paperwork, etc. Top will hold the radio.
Then it will be on to installing the plates around the steering box and brake pedal. And getting my aluminum plate out and finishing out the transmission tunnel cover with pop rivets and master cylinder holes that swings out of the way. Fitting the carpet and padding over all of that. Going with a grey color. Have to cut the 6 x 9 speaker holes in the kick panel wood and mounting the speakers after covering the wood in carpet.
Today I decided to paint the inside the way I have been thinking about doing it to throw as little color in the interior. I painted some parts on the dash white and on the doors. Once I get my white shift **** in there that will help break up the black some too. I put the removable door panels back on with new stainless screws that were slightly oversized. The original screws seemed to have a slight wobble to them.
Tomorrow I will be finishing the wood glove box. It will be two levels. Lower level for paperwork, etc. Top will hold the radio.
Then it will be on to installing the plates around the steering box and brake pedal. And getting my aluminum plate out and finishing out the transmission tunnel cover with pop rivets and master cylinder holes that swings out of the way. Fitting the carpet and padding over all of that. Going with a grey color. Have to cut the 6 x 9 speaker holes in the kick panel wood and mounting the speakers after covering the wood in carpet.
#129
04-17-2017, 10:39 PM
More done.
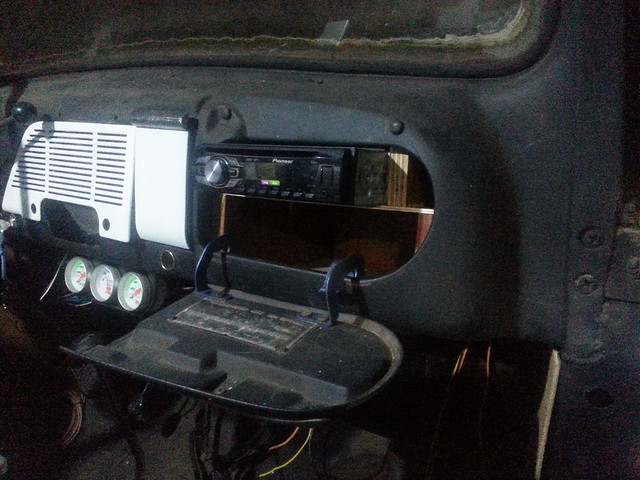
This is the glove box I have been working on. Got a main box with the radio up top. Didn't want to butcher the dash. I put a Pioneer speaker where the original speaker was at on the dash. It's tested but not hooked up yet. I still got to cut the speaker holes for the 6 x 9 for the wood kick panels and then cover them in the white material I have. It will have a total of four 6 x 9's, one 4 x 6 and under the seat later on one Pioneer comp 10" with Sony Amp.
by https://www.flickr.com/photos/safjist_nipnog/, on Flickr
by https://www.flickr.com/photos/safjist_nipnog/, on Flickr
by https://www.flickr.com/photos/safjist_nipnog/, on Flickr
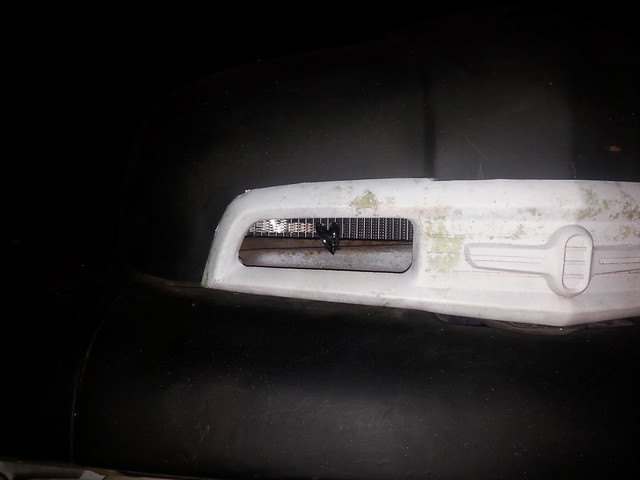
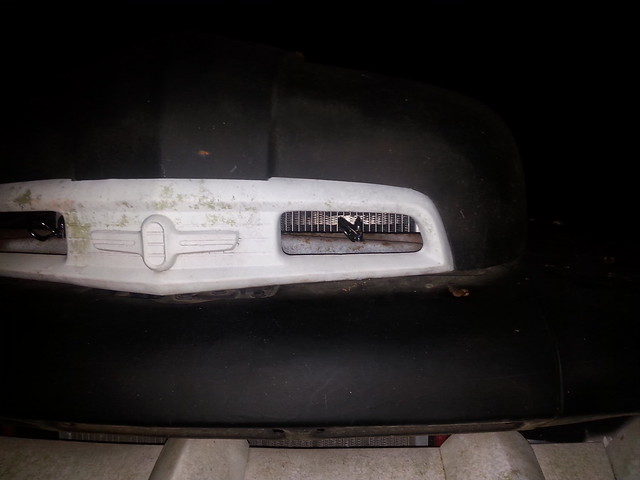
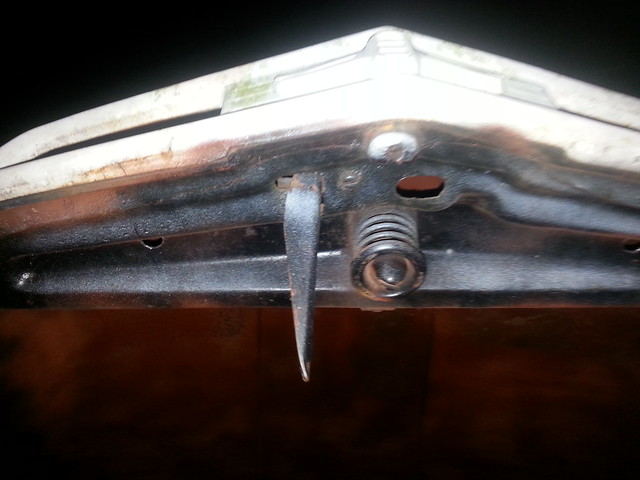
Another project on the truck was finally getting the Hood Pins drilled. Another member at one time sent me pictures of how he did his hood pins and I like it. Mine are done similar (Thanks DW SD , for the idea) I still need one spring for the original latch but I feel much better with them on when I finally drive her down the road at speed.
by https://www.flickr.com/photos/safjist_nipnog/, on Flickr
by https://www.flickr.com/photos/safjist_nipnog/, on Flickr
by https://www.flickr.com/photos/safjist_nipnog/, on Flickr
by https://www.flickr.com/photos/safjist_nipnog/, on Flickr
by https://www.flickr.com/photos/safjist_nipnog/, on Flickr
by https://www.flickr.com/photos/safjist_nipnog/, on Flickr
I still have more I want to do before I go to work but not sure if it's going to happen this time home.
This is the glove box I have been working on. Got a main box with the radio up top. Didn't want to butcher the dash. I put a Pioneer speaker where the original speaker was at on the dash. It's tested but not hooked up yet. I still got to cut the speaker holes for the 6 x 9 for the wood kick panels and then cover them in the white material I have. It will have a total of four 6 x 9's, one 4 x 6 and under the seat later on one Pioneer comp 10" with Sony Amp.
Another project on the truck was finally getting the Hood Pins drilled. Another member at one time sent me pictures of how he did his hood pins and I like it. Mine are done similar (Thanks DW SD , for the idea) I still need one spring for the original latch but I feel much better with them on when I finally drive her down the road at speed.

I still have more I want to do before I go to work but not sure if it's going to happen this time home.
#130
12-03-2019, 09:58 PM
Right now i am working on rebuilding the wiper assembly. I had a original dual vacuum assembly. I bought the speedway kit to convert it to electric. The bolting up part went easy. But the sweep of the arm still is wrong. It is going too far and binding both ways. Got to figure it out more tomorrow.


Just about had a fire on my first drive out. The main feed fuel gauge vibrated two screws out of the back of it and it started pouring gas on the exhaust. More to come tomorrow
#131
12-04-2019, 11:36 AM

Fleet Owner
Right now i am working on rebuilding the wiper assembly. I had a original dual vacuum assembly. I bought the speedway kit to convert it to electric. The bolting up part went easy. But the sweep of the arm still is wrong. It is going too far and binding both ways. Got to figure it out more tomorrow.
#132
12-04-2019, 05:30 PM
I am thinking I will have to cut the weld on the arm on mine and lower it down. Making the arm shorter and making the radius of the strokes shorter. The arm is only welded on one side so that part will be easy. Other than that, it all looks well.
I have tried the arm in the up position and down position on the motor and by hand. The electric motor is just sweeping it too much and binding it. Binding so much it bends both ends with it goes past the stops. There is a nut on the side of the electric motor. I may play with it first to see if adjusting it will stop the sway amount.
I have tried the arm in the up position and down position on the motor and by hand. The electric motor is just sweeping it too much and binding it. Binding so much it bends both ends with it goes past the stops. There is a nut on the side of the electric motor. I may play with it first to see if adjusting it will stop the sway amount.
#133
12-04-2019, 09:03 PM
After lots of testing and checking I have it broke apart for welding tomorrow. The sweep on the arm I needed with the arms connected and the base loose so it would turn freely was 3.2 cm (only handy tape I had only had clear metric, lol) The sweep I measured when it was with out the arms and bolted down was 4.7 cm. A diference of 1.5 cm. I divided that by 2 and drew a new mark on the arm and used the tape as a reference point. Turning it on it looks like it's dead on.
I have since broke the weld loose on the wiper arm and will be welding it .75 cm lower that it currently tomorrow. I will just do a spot weld to test it first. Only want to have to do this once.
I had thought about playing with the bolt with locking nut on the side of the gear box to see if that would adjust how far it went but decided not to mess with it and just reweld the arm lower on the base circle mount. If I get this done early enough maybe I can go ahead and get my truck inspected. Last thing holding me up. (even though in Louisiana testing of the wipers are not required on cars/trucks that old)
#134
12-04-2019, 10:25 PM
Fleet Owner
I believe the bolt w/lock nut is to adjust the end play on the worm gear inside. The parking position on both of mine is adjusted by rotating the motor to fine tune, or if it's way off, putting the arm on a different spline on the motor.
My advise, test it with wiper arms installed before welding it up final.
My advise, test it with wiper arms installed before welding it up final.
#135
12-07-2019, 08:44 PM
Got the piece yesterday moved and welded down into the new place. Works without binding now, full sweep. I got it installed and wired up, turned it on and nothing. Then it hit me, it wasn't getting a ground. Next on the hit list to do. I didn't get to finish it as I have a Daughter on the homecoming court this year and that stuff to do. I will be driving it some tomorrow to town as a friend has asked for her daughter she wants to use it as a picture backdrop.