


 and opinions... don't forget to share

Head Unit Install - Need Help!

Thread Starter
|
Freshman User
Joined: Nov 2005
Posts: 34
Likes: 0
Head Unit Install - Need Help!
I have an '02 Ford Excursion Limited. It does not have any factory video system and therefore just has the basic radio setup with the rear controls. I have purchased the El Cheapo Chinese Brand head unit on Ebay.

Above you can see the basic wiring output of this radio. My questions are these:
1) I of course do not have an amp nor do i intend on installing one. I also bought a wiring harness through crutchfield. Can I simply install rca plugs onto the end of the wiring harness and plug these into the rca plugs on the radio? Or, are these simply the preouts that would not be used in my case (ie: the speaker wires are integrated into the wiring harness)?
2) The excursion has 6 speakers (I think) while this radio has 4x45 Watt output. Can I splice speakers 5 & 6 into speakers 3 & 4 without too many issues? I'm not looking for a super powerful system but just something I can enjoy at a moderate level while driving in town.
3) The headunit says it comes with wiring for the steering wheel controls. Is it as simple as wiring it up or do I still need to purchase some kind of kit?
Thoughts or issues I am not seeing? I know some of you are experts at all of this and I would appreciate any help you can give a newbie. Thanks!
Super Duty
Joined: Oct 2010
Posts: 2,525
Likes: 1
From: NW IN.
1. 1,2,5 and 6 are pre-outs. You won't use them without an amp.Your speaker wires will connect through the Crutchfield harness.
2. You can splice the rear 4 speakers (as long as they are all the same), but you'd have to wire them in series to avoid overloading the head unit. Just connecting the positives together and negatives together will decrease the resistance and unless that head unit is 2 ohm stable (which it won't be) you will most likely fry it. Wiring in series will increase the resistance and shouldn't cause any problems.
Here's a link to explain further the series/parallel deal.
3. I'd need more info to tell you for sure about the steering wheel integration, like what it says in the manual about connecting wire #9. You may need an external device to get it to work.

Senior User
Joined: Apr 2009
Posts: 444
Likes: 2
From: Franktown, CO

1. 1,2,5 and 6 are pre-outs. You won't use them without an amp.Your speaker wires will connect through the Crutchfield harness.
2. You can splice the rear 4 speakers (as long as they are all the same), but you'd have to wire them in series to avoid overloading the head unit. Just connecting the positives together and negatives together will decrease the resistance and unless that head unit is 2 ohm stable (which it won't be) you will most likely fry it. Wiring in series will increase the resistance and shouldn't cause any problems.
Here's a link to explain further the series/parallel deal.
3. I'd need more info to tell you for sure about the steering wheel integration, like what it says in the manual about connecting wire #9. You may need an external device to get it to work.
2. You can splice the rear 4 speakers (as long as they are all the same), but you'd have to wire them in series to avoid overloading the head unit. Just connecting the positives together and negatives together will decrease the resistance and unless that head unit is 2 ohm stable (which it won't be) you will most likely fry it. Wiring in series will increase the resistance and shouldn't cause any problems.
Here's a link to explain further the series/parallel deal.
3. I'd need more info to tell you for sure about the steering wheel integration, like what it says in the manual about connecting wire #9. You may need an external device to get it to work.
Senior User
Joined: Apr 2010
Posts: 347
Likes: 3
From: Texas
Radio Wiring
I am in the process of doing the same thing however my "head unit" has not shipped yet. I'll keep this thread posted with any results but it will be after 5 Jan before much happens. Send me a PM and I will forward you the picture with the wiring I have unless i can get it posted to the FTE site before then.
D
D

Elder User
Joined: Sep 2009
Posts: 514
Likes: 2
The 4 rear speakers are already connected together, no splicing needed. For the steering wheel control you need one of these Pac-Audio.com Product Details | iPod Integration for your car and More by Pac-Audio - Connecting you to the future , Amazon.com: PAC SWIJACK Steering Wheel Remote Interface: Automotive. Not sure but I dont think you will be able to use your rear radio controls anymore with that radio.
Trending Topics
Thread Starter
|
Freshman User
Joined: Nov 2005
Posts: 34
Likes: 0
So you're saying that all 6 speakers should be wired into the harness already and that the harness from crutchfield will have 8 wires coming out for the 4 speakers? That is good news!
Regarding the steering wheel controls... I emailed the guy selling them on ebay and he said no adapter is needed. He said the headunit comes with all the necessary wiring and I can simply splice the wires together. I guess i will try that first and let you all know.
I am getting the radio tomorrow and will try to take a few pictures as I go. Haven't received the wiring harness yet though so it may be awhile before I get started.
FTE Stories
Ford Trucks for Ford Truck Enthusiasts

10 Best Ford Truck Engines We Miss the Most!
Joe Kucinski
2026 Shelby F-150 Off-Road: Better Than a Raptor R?
Brett Foote
2027 Super Duty Carhartt Package First Look: 12 Things You NEED to Know!
Michael S. Palmer
10 Most Surprising 2026 Ford Truck Features!
Joe Kucinski
Top 10 Ford Trucks Coming to Mecum Indy 2026
Brett Foote
5 Best / 5 Worst Ford Truck Wheels of All Time
Joe Kucinski
Ford Super Duty: 5 Things Owners LOVE, 5 Things They LOATHE!
Joe Kucinski
Every 2026 Ford Truck Engine RANKED from WORST to FIRST!
Michael S. Palmer
The Best F-150 Deal of Every Trim Level (XL through Raptor)
Joe KucinskiCargo Master


Joined: Jan 2008
Posts: 2,566
Likes: 18
From: The Great White North!
So you're saying that all 6 speakers should be wired into the harness already and that the harness from crutchfield will have 8 wires coming out for the 4 speakers? That is good news!
Regarding the steering wheel controls... I emailed the guy selling them on ebay and he said no adapter is needed. He said the headunit comes with all the necessary wiring and I can simply splice the wires together. I guess i will try that first and let you all know.
I am getting the radio tomorrow and will try to take a few pictures as I go. Haven't received the wiring harness yet though so it may be awhile before I get started.
Regarding the steering wheel controls... I emailed the guy selling them on ebay and he said no adapter is needed. He said the headunit comes with all the necessary wiring and I can simply splice the wires together. I guess i will try that first and let you all know.
I am getting the radio tomorrow and will try to take a few pictures as I go. Haven't received the wiring harness yet though so it may be awhile before I get started.
Let us know what you end up doing for the brake check. I assume that it is a dvd player, and it will only work with the E brake on unless you wire around it. I have seen wire kits on ebay to go around this feature, but only for the expensive name brand stereos and don't know if it would work on these.
Senior User
Joined: Apr 2010
Posts: 347
Likes: 3
From: Texas
The research I've done confirms what Wallz has indicated. That the rear most set of speakers are wired in parallel to the middle speakers. The bridge connections for these speakers are indicatd to be in the right front foot well accoridng to the wiring diagram I have (#154367). They also connect to the RICP in the console. I will try and get the wiring diagram posted to the site. If you PM me w/ your e-mail address , I can forward.
I beleive it will be necessary to put jumpers in the connector at the RICP to get the back two sets of speakers to work ( they will act like the "rear channels" only). Alternatively, you will need to run wires from the HU to the Right Front Foot Well to get access to the connections. I think the jumpers at the RICP is a much easier way to go assuming you have an RICP. The RICP will no longer function.
I will not be able to verify until I also get my harness which is sometime next week.
Thread Starter
|
Freshman User
Joined: Nov 2005
Posts: 34
Likes: 0
The research I've done confirms what Wallz has indicated. That the rear most set of speakers are wired in parallel to the middle speakers. The bridge connections for these speakers are indicatd to be in the right front foot well accoridng to the wiring diagram I have (#154367). They also connect to the RICP in the console. I will try and get the wiring diagram posted to the site. If you PM me w/ your e-mail address , I can forward.
I beleive it will be necessary to put jumpers in the connector at the RICP to get the back two sets of speakers to work ( they will act like the "rear channels" only). Alternatively, you will need to run wires from the HU to the Right Front Foot Well to get access to the connections. I think the jumpers at the RICP is a much easier way to go assuming you have an RICP. The RICP will no longer function.
I will not be able to verify until I also get my harness which is sometime next week.
I beleive it will be necessary to put jumpers in the connector at the RICP to get the back two sets of speakers to work ( they will act like the "rear channels" only). Alternatively, you will need to run wires from the HU to the Right Front Foot Well to get access to the connections. I think the jumpers at the RICP is a much easier way to go assuming you have an RICP. The RICP will no longer function.
I will not be able to verify until I also get my harness which is sometime next week.
I think I am beginning to understand... but what exactly is the RICP? Is that the second radio controller on the back of the center console?
So you're saying that in order to use the back four speakers i either tap into that radio controller on the center console by splicing the wires and running new wires to the HU ... or.... I look for 8 wires that end somewhere near the emergency brake and tap into those and run those up to the HU? Any idea on exactly where these wires are near the E-Brake or do I just look around and hope I can find them?
Still unclear on this steering wheel control issue but am hoping that when I get my radio today it will begin to make more sense. I'll try and keep you updated and take a few pics when I get a chance.
Thread Starter
|
Freshman User
Joined: Nov 2005
Posts: 34
Likes: 0
Alright.... I began working on my install today and thought I would try and update as I go. I also came across a couple of unforseen problems and have a few issues that remain. At any rate, here is what I have so far.... with pictures too!
I began by installing the gps antenna. I did some reading online and found a few people who had installed the antenna underneath the hood with few/no problems. I thought I would try this first and if all else fails it can go underneath the dash. I would install it on the roof and run the wire through the brake light in the back lift gate but the cord is much too short for that. I installed it here:

I routed the wire along the body and through the molding here:

After this I removed the dash. To do this simply pull the radio out and look for the two bolts/screws in the radio cavity. With those two screws out there are about 6-8 clips holding it in place. Just be sure to pull the dash straight back towards the driver seat and you will have no problems. I thought I got all the clips out and unfortunately I broke one of them. After this I started trimming.

In the first picture I have two arrows pointing to where I trimmed. If you grind the plastic flat to match the middle section it should be perfect. Just grind the top portion of the plastic to match the lip of the bottom. In the end it should have about a 1/8" lip on the top and bottom and it will fit nicely. I wish, however, that I had ground the four supporting pieces off first using a angle grinder. This is my second picture. it probably doesn't make much sense here but when you take it apart you will understand. On the dash, on the top part of the radio housing where you will be grinding. There are four little plastic supporting pieces that will need to get ground first. if I had to do it again, I would start by grinding those flat.
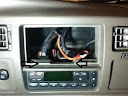
This is about as far as i have gotten. The additional problems that popped up however, are this. I don't know how to attach the radio to the vehcile. I had intended on making little L brackets that screw to the side of the radio and then on to the plastic housing for the HVAC. however, the front of the radio (the touch screen) is slightly larger than the rest of the radio. Specifically, the top and bottom of the touch screen are bigger. As a result, the dash piece that I removed will not slip over the front of the radio, only the back. I am considering just letting the radio sit in there with no attachments as it is a snug fit. I don't like this though because it would be mighty easy to steal.... Just slide it right out and you're done. Thoughts???
The other issue concerns the width of the radio. It is a good 1/2" - 3/4" narrower then the old one. When the radio is in there is a noticeable gap on either side that is not very attractive. the radio itself shipped with a trim piece. This trim piece doesn't fit in the radio slot however. It is too tall and now wide enough. I wound up cutting this trim piece up and just stuck in the two vertical plastic pieces where the gaps were. It looked great in my opinion, like a professional install really. I think I will probably just use some double stick tape to hold them in place that way they won't fall out and can still be removed if needed.
Finally, I still don't know what to do with the rear speakers and steering wheel controls. I looked for the rear speaker terminals near the e-brake as one of you suggested but found nothing. Does this mean I am going to have to cut the wiring harness the second radio controller in the middle seat and tap a wire off of that?
The steering wheel controls.... In the radio manual it says that you can program the radio to respond to the steering wheel controls. Simple press the steering wheel control button for 6 seconds and then touch the corresponding function you would like the radio to do on the touch screen. Repeat as necessary. I don't know which wires are for the steering wheel controls however. Does anyone have a wiring diagram to help with this?
I am considering taking it to a professional installer for help... thoughts?
thanks for all the help!
I began by installing the gps antenna. I did some reading online and found a few people who had installed the antenna underneath the hood with few/no problems. I thought I would try this first and if all else fails it can go underneath the dash. I would install it on the roof and run the wire through the brake light in the back lift gate but the cord is much too short for that. I installed it here:
I routed the wire along the body and through the molding here:
After this I removed the dash. To do this simply pull the radio out and look for the two bolts/screws in the radio cavity. With those two screws out there are about 6-8 clips holding it in place. Just be sure to pull the dash straight back towards the driver seat and you will have no problems. I thought I got all the clips out and unfortunately I broke one of them. After this I started trimming.
In the first picture I have two arrows pointing to where I trimmed. If you grind the plastic flat to match the middle section it should be perfect. Just grind the top portion of the plastic to match the lip of the bottom. In the end it should have about a 1/8" lip on the top and bottom and it will fit nicely. I wish, however, that I had ground the four supporting pieces off first using a angle grinder. This is my second picture. it probably doesn't make much sense here but when you take it apart you will understand. On the dash, on the top part of the radio housing where you will be grinding. There are four little plastic supporting pieces that will need to get ground first. if I had to do it again, I would start by grinding those flat.
This is about as far as i have gotten. The additional problems that popped up however, are this. I don't know how to attach the radio to the vehcile. I had intended on making little L brackets that screw to the side of the radio and then on to the plastic housing for the HVAC. however, the front of the radio (the touch screen) is slightly larger than the rest of the radio. Specifically, the top and bottom of the touch screen are bigger. As a result, the dash piece that I removed will not slip over the front of the radio, only the back. I am considering just letting the radio sit in there with no attachments as it is a snug fit. I don't like this though because it would be mighty easy to steal.... Just slide it right out and you're done. Thoughts???
The other issue concerns the width of the radio. It is a good 1/2" - 3/4" narrower then the old one. When the radio is in there is a noticeable gap on either side that is not very attractive. the radio itself shipped with a trim piece. This trim piece doesn't fit in the radio slot however. It is too tall and now wide enough.
I wound up cutting this trim piece up and just stuck in the two vertical plastic pieces where the gaps were. It looked great in my opinion, like a professional install really. I think I will probably just use some double stick tape to hold them in place that way they won't fall out and can still be removed if needed. Finally, I still don't know what to do with the rear speakers and steering wheel controls. I looked for the rear speaker terminals near the e-brake as one of you suggested but found nothing. Does this mean I am going to have to cut the wiring harness the second radio controller in the middle seat and tap a wire off of that?
The steering wheel controls.... In the radio manual it says that you can program the radio to respond to the steering wheel controls. Simple press the steering wheel control button for 6 seconds and then touch the corresponding function you would like the radio to do on the touch screen. Repeat as necessary. I don't know which wires are for the steering wheel controls however. Does anyone have a wiring diagram to help with this?
I am considering taking it to a professional installer for help... thoughts?
thanks for all the help!
Cargo Master
Joined: Jan 2008
Posts: 2,566
Likes: 18
From: The Great White North!
Flyin;
With the research that I have done so far, you can get the gps wire in another way. If you look at the fire wall from the engine comp on the drivers side below the power St pump you should see a diamond shape pc of black plastic. That has a large hole behind ie, enough for the plug and wire.
For the deck itself, guys have used a 2 din install kit that covers the sides up nicelly.
The speakers should only have enough wires at the old deck for 2 sets. The rear most are wired in with the middle set. You only have to hook up what is at the old deck now, and as long as you don't un hook or remove the rear radio controls you should have all speakers work.
When I do mine I'm planning in running new speaker wire and hooking the back 4 together, either parrallel or series, don't know yet.
I don't have steering controls now, so I can't help you there.
As for fastening the deck, you might be able to add brackets thru the bottom portion of the dash. Might need to take out hvac controls and the lower dash to create some space for that tho.