Ford F-150: How To Perform Transmission Line Pressure Test
Like an engine, a transmission needs to maintain the proper fluid pressure. If it's too high, your shifts will be harsh and erratic. Too low, and your transmission will miss shifts and feel like it's slipping. A line pressure test will help pinpoint the conditions that are causing your F-150 or F-250 to misbehave.
This article applies to the Ford F-150 (2004-2014).
The transmission in your vehicle is one of the most costly components to replace; therefore, it is really important to properly diagnose the problems you are having with your transmission. Replacing the line or draining and replacing the transmission fluid may be all that is needed. Bad transmission fluid can cause more air to enter the system and cause a low pressure situation. Many transmission systems are controlled electronically, and the culprit may be a bad transmission control module. Line pressure testing can help identify any one of these systems. Testing the line pressure of your transmission is a very easy, relatively inexpensive process, and can save you from a very expensive transmission replacement if one is not needed.
Materials Needed
- 7/16 inch (11mm) socket with extension
- Open ended wrenches
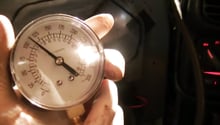
- Pressure gauge that reads up to 300 PSI
- Shop rags
- Open area with plenty of unobstructed space in front and rear of vehicle
Step 1 - Park the vehicle on a flat, open surface
Your truck should be cooled and parked on a flat, level surface. Throughout the testing process, it is important to keep the emergency brake engaged. Make sure the area is well ventilated. The idle portion of the test can be performed in the garage, but the wide open throttle portion must be done outside with no obstructions in the front or rear of the vehicle for safety precautions.
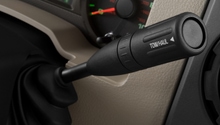
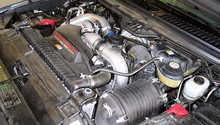
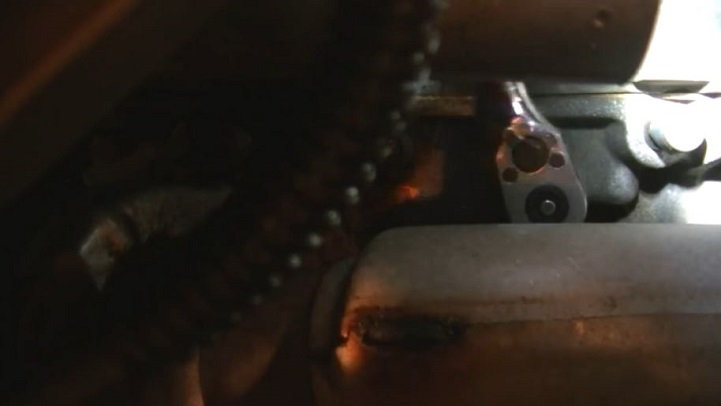
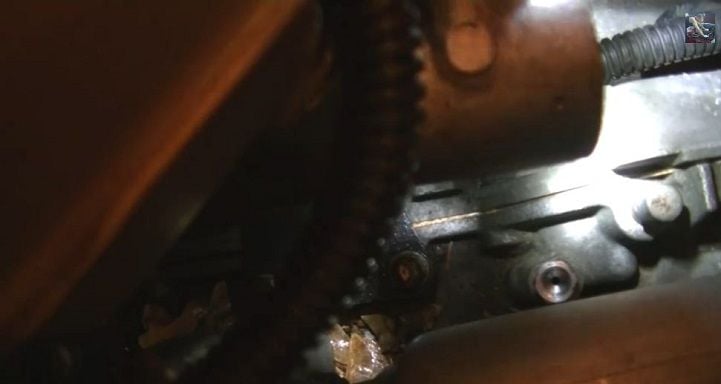
Step 2 - Locate the transmission line pressure test port
The test port is located on the driver's side a few inches in front of the range sensor (the lever and cable that lead up your you gear shifter). Be careful when removing this plug as a little transmission fluid may leak; it will easily wipe clean with a shop rag. The threads can be stripped as well and this will lead to a very expensive repair.

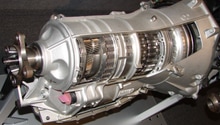
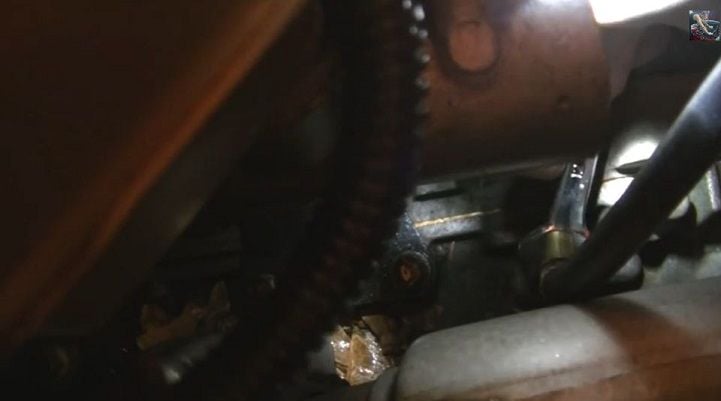
Figure 2. These are the pressure taps on a Ford 4R75E transmission. Other transmissions from the 4R7xx family are similar.
1 - Direct clutch pressure tap
2 - Forward clutch pressure tap
3 - Electronic Pressure Control (EPC) pressure tap
4. Intermediate clutch pressure tap
5 - Line Pressure tap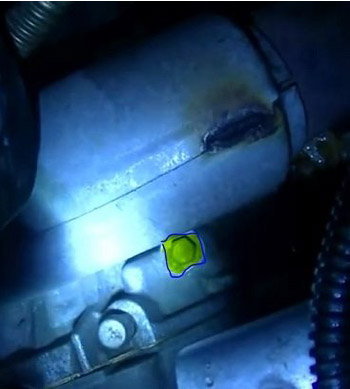
Figure 3. Transmission line pressure test port (in yellow).
Step 3 - Remove the test port plug
Use a 7/16 inch or 11 mm socket and carefully remove the port plug. You may or may not need an extension with the ratchet, depending on your access point.
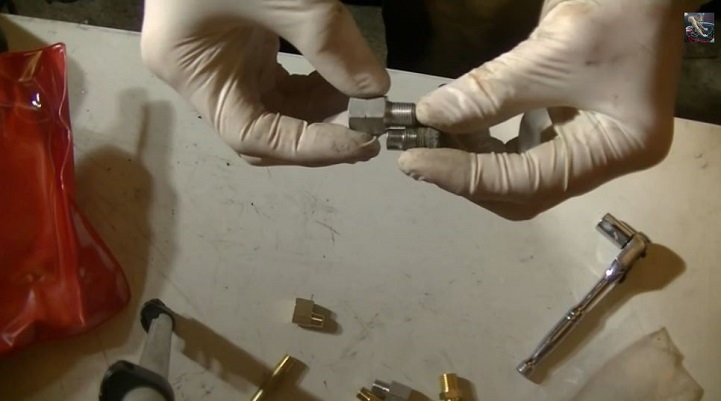
Step 4 - Match the correct fitting size from the gauge kit
Use a transmission pressure gauge test kit and select the correct fitting size for your transmission test port. Kits can be purchased for around $35 from such sources as Amazon.com. These kits will come with a wide variety of fitments. Match the correct size to the plug that you removed in step 3. It is imperative that you use the correct size fitment to avoid stripping the threads in the transmission line.
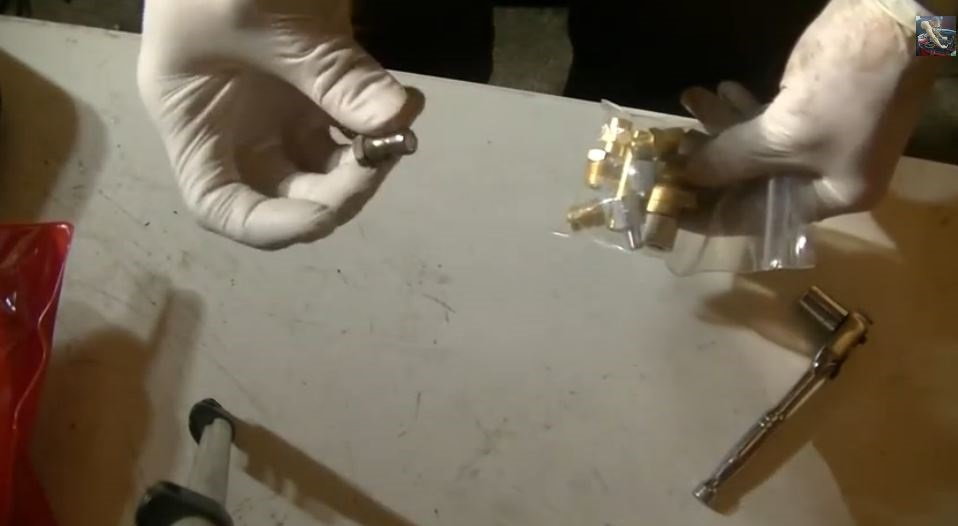
Pro Tip
Find the correct fitment by matching it up with the plug. Do not try various fitments directly into the transmission line. You can easily strip the threads and that will be a very expensive repair.
Step 5 - Hand thread the fitment into the transmission test port
Hand thread the fitment into the port first, then tighten with your wrench. Do this first before you thread the gauge hose into the fitment.
Pro Tip
Because of the tight space, the fitment should go in first. Hand tighten first and then ratchet in place. It is better to strip threads from fitment while attaching the gauge hose rather than trying to attach the hose and fitment into the transmission port, and stripping those threads.
Step 6 - Attach the gauge hose to the fitment
Thread the hose into the fitment and then use an open ended wrench to tighten the hose to the fitment.
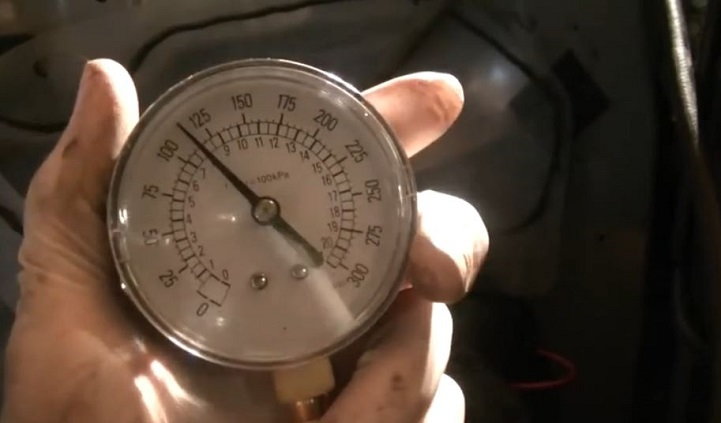
Step 7 - Start your vehicle and test pressure under idle
The hose should be long enough to reach inside the driver side window. Sit in the truck, start the vehicle, and record the pressure while in park first. While the emergency brake is engaged and stepping firmly on the brake, put the truck in reverse and record the pressure. Repeat this again while in neutral. Do this while manually shifting through the gears (or use D,2 and 1 for automatic transmissions).
Pro Tip
After you start the engine while in park, check the connection at the fitment and at the hose to make sure there are no leaks. Tighten the connections where leaks are present and check the pressure reading again. Use the maintenance manual for your model and year for the correct pressure settings.
| Application | Transmission Range | Idle | |
|---|---|---|---|
| EPC | Line Pressure | ||
| All | P, N | 5-40 psi (34-276 kPa) | 40-100 psi (276-689 kPa) |
| (D) 2, 1 | 5-40 psi (34-276 kPa) | 40-100 psi (276-689 kPa) | |
| R | 25-30 psi (172-207 kPa) | 70-125 psi (483-862 kPa) | |
Step 8 - Test pressure under wide open throttle
You will need to move your vehicle in an open area with no obstructions in the front or the rear to prevent any damage to your truck or to the object should you run into it. This portion of the test must be done precisely in order to not permanently damage the transmission. You will need to make sure the emergency brake is engaged before completely stepping on the brake pedal as hard as possible. For each gear, you will floor the gas pedal for no longer than 1 or 2 seconds. Depressing the gas pedal for any longer will result in permanent damage to the transmission system. You need a wide open area in case the vehicle lunges forward or backward and you can stop it without damaging your truck, a building, or any other obstruction. The pressure recorded is your pressure under wide open throttle. For automatic transmissions, you will need to drive the vehicle and record the pressure as it shifts from gear to gear. The pressure should be much higher than at idle.
Pro Tip
The WOT test should indicate much higher PSI readings.
| Application | Transmission Range | WOT | |
|---|---|---|---|
| EPC | Line Pressure | ||
| All | P, N | N/A | N/A |
| (D) 2, 1 | 100-115 psi (689-793 kPa) | 170 - 230 psi (1172-1586 kP) | |
| R | 85-95 psi (586-655) kPa | 250-300 psi (1124-2068 kPa) | |
Additional Advice
If your pressure readings are slightly off, check your transmission fluid. Extremely dark or black transmission fluid could indicate a more serious transmission problem. If it is slightly dirty or reads low (take the reading while the engine is hot), consider draining and replacing the fluid or adding more if it is the correct color and just low. After changing, do the pressure test again to see if the values fall within the correct ranges for your vehicle. If they still read low, or if they are considerably far out of range, your transmission should be checked by a professional. Early detection can result in minor repairs or adjustments, a considerable cost savings from more expensive repairs from driving under incorrect pressure and causing more damage.
Featured Video: How to Measure Transmission Line Pressure
Related Discussions and Sites
- Transmission Diagrams, Line Pressure Data - AllData.com
- Transmission Pressure Port Location - F150online.com
- How to Test Your Transmission Line Pressure - YouTube.com
- 05 F150 Shifting Woes - 4R75E w/70,000 mi. - ExplorerForum.com