Ford F150 (1997-2003): How to Repair Steering Box Leak
Does your truck give you a total upper body workout in the parking lot? Do you leave puddles of power steering fluid everywhere you go? It may be time to replace your steering box, or if you are lucky, replace the seals in it.
This article applies to the Ford F-150 (1997-2003).
While Ford F-150 pickups made after 2003 used a rack and pinion power steering system, the tenth generation (1997-2003) of the venerable pickup line—like every generations before it—used a recirculating-ball steering box to turn the front tires, and deliver power assistance. Anyone who has lost their power steering knows how big a help these systems are, especially on a 4WD vehicle. While there are many different ways things can go wrong internally, the most common issue is simply fluid leaking out past the seals at the input or output shaft.
If you are taking out the whole box and getting it rebuilt, or replacing it, these instructions still apply, but we are only going to cover replacing the seals. If the leak appears to be coming from the inlet or outlet ports, or behind the sector shaft cover, or between the box itself and the control valve housing, you may be able to dig deeper and replace the gaskets or seals there as well. But be careful you don't get in over your head and take something apart you can't put back together. It is not just a clever name, there are a bunch of large steel balls inside that can fall out and roll away if you are not careful taking something apart. Be aware that these gear boxes, though small, contain a lot of moving parts. Read on and we'll help you remove the box and replace the seals.


Materials Needed
- Big hammers (a 32oz ball peen will do it)
- Ratchet set (3/8" and 1/2" drive plus extensions)
- Line wrenches
- Open end wrenches (metric and inch sizes)
- 12" adjustable wrench
- Flat blade screwdrivers (large and small)
- Needle nose pliers
- Floor jack and jack stands
- Funnel and pan for draining fluids
- Two-jaw puller, Pitman arm puller, or pickle fork
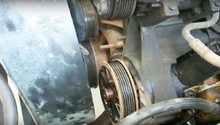
The power steering gear box transfers your efforts behind the steering wheel to the steering knuckles and tires, with the help of hydraulic pressure from the engine driven vane pump. Typical power steering issues arise from a pump that stops pumping, or a hose that springs a leak, but the seals which keep the pressurized oil inside the pump, where it helps you turn steer, can and do go bad. These seals are easily replaced, but getting to them requires taking the box out of the truck, which requires disconnecting quite a bit of stuff.
Warning
When working with Pitman arm or bearing pullers or on hydraulic systems, it’s important to remember to wear eye protection and heavy gloves. Removing the arm puts a lot of force into the metal, and things can break or fly off. The hydraulic system also put the oil at a high pressure and you can get sprayed when disconnecting hoses, so be careful.

Figure 2. Power steering gear box and connections. 
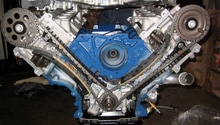
Figure 3. A typical power steering gear box has many complicated internal components.
Step 1 – Preparation
- Raise the front of the vehicle with a floor jack, and secure it with jack stands.
- Turn the ignition key to the “on” position to unlock the steering wheel, and point the tires straight ahead.
- Turn off the key, and tie off the steering wheel in its center location with a bungee cord to the brake pedal.
- The steering wheel should not be turned once the steering column is disconnected, as this can damage the steering column wiring.
- Disconnect the negative (black) battery cable.
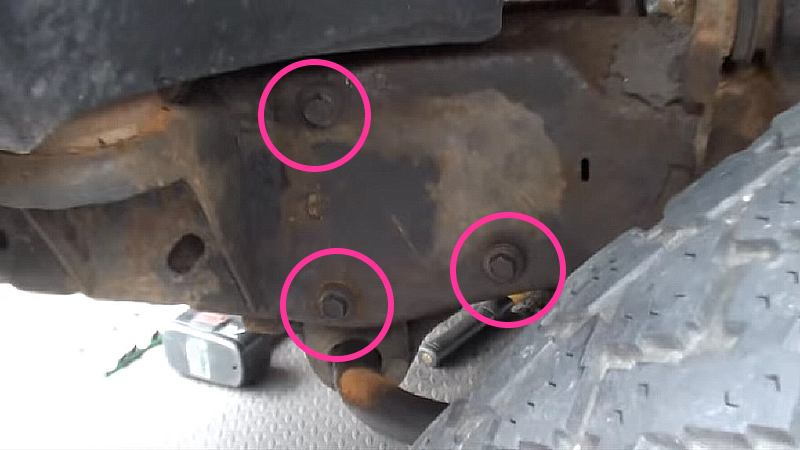
- Remove the six 10mm bolts holding the skid plate under the front of the truck (if it is equipped with one) to access the Pitman arm.
- Disconnect the radiator hoses, and drain the coolant, then remove the fan and fan shroud to allow easier access to the power steering pump and hoses.
- it’s also a good idea to remove the intake filter housing/box from the throttle body (13mm screws).
- You will need to unplug your IAT sensor and MAF sensor in order to move the air intake housing out of the way.

Figure 4. F-150 clockspring steering column wiring harness. 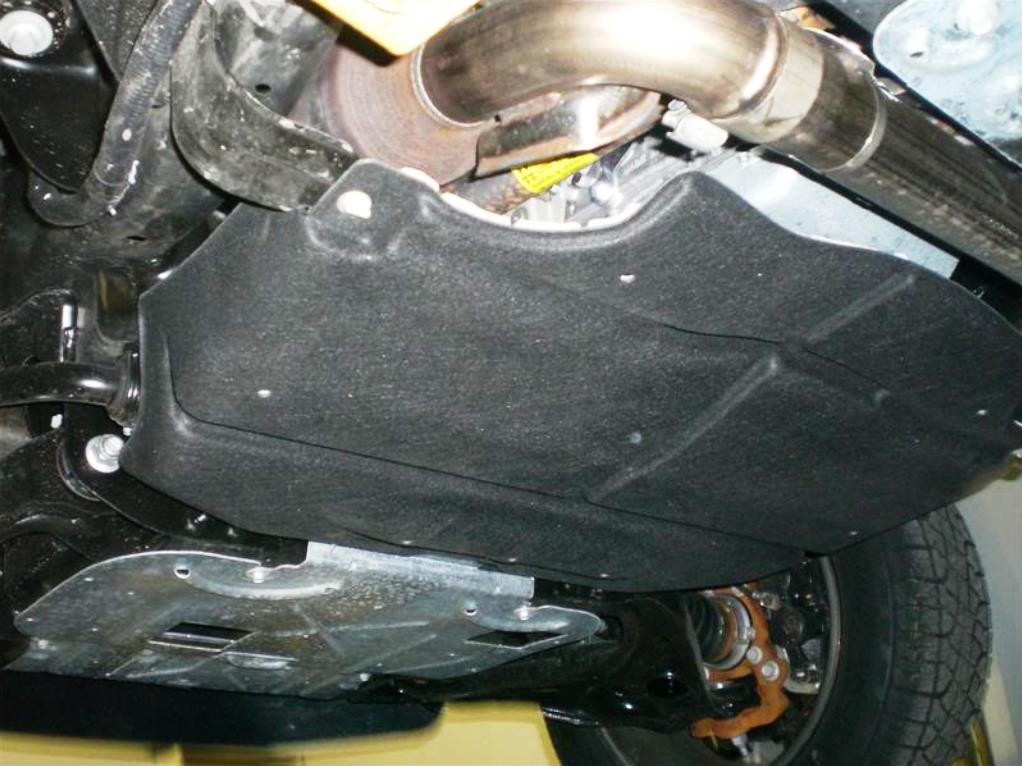
Figure 5. The silver skid plate covers and protects the engine and steering. 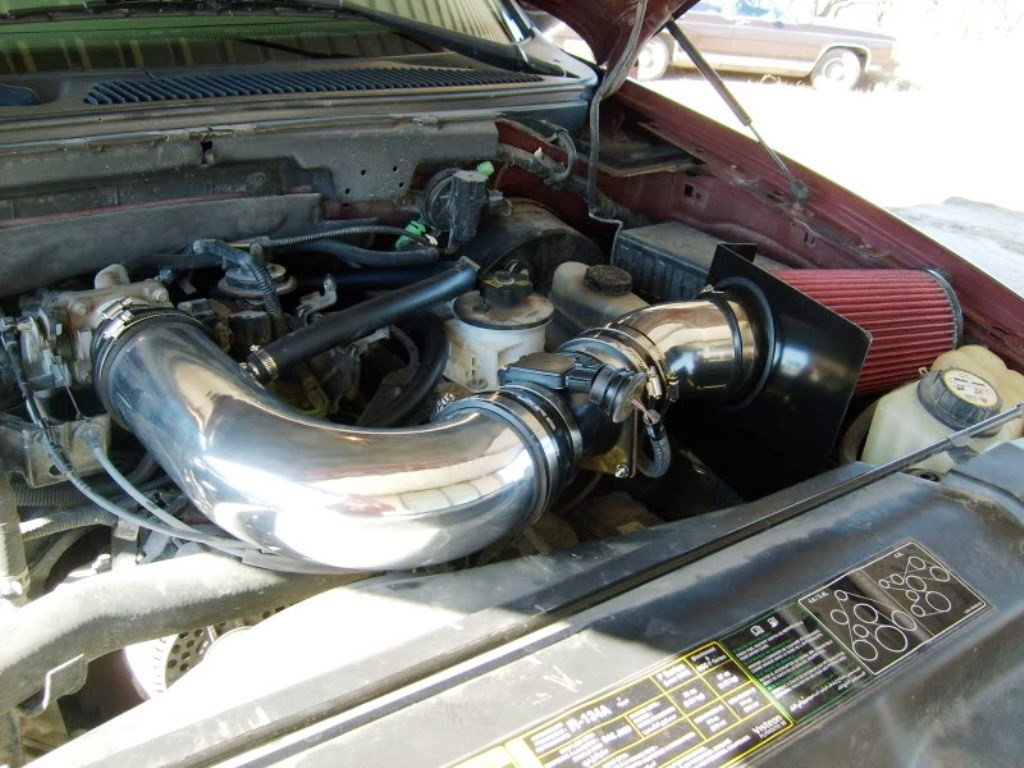
Figure 6. The F-150 intake plumbing (here with CAI).
Step 2 – Drain the power steering fluid
To drain the power steering fluid, place a pan or container under the power steering pump/reservoir hose going from the reservoir to the pump. Loosen the clamp by squeezing it with pliers, then pull the hose and connection off. Loosening the power steering reservoir cap can help speed up the draining. Once the fluid stops dripping, follow the hoses from the pump to the power steering box and disconnect them at that end. There may still be some fluid that leaks out. Don’t forget to save or replace the O-rings used at each fluid connection when reconnecting them.
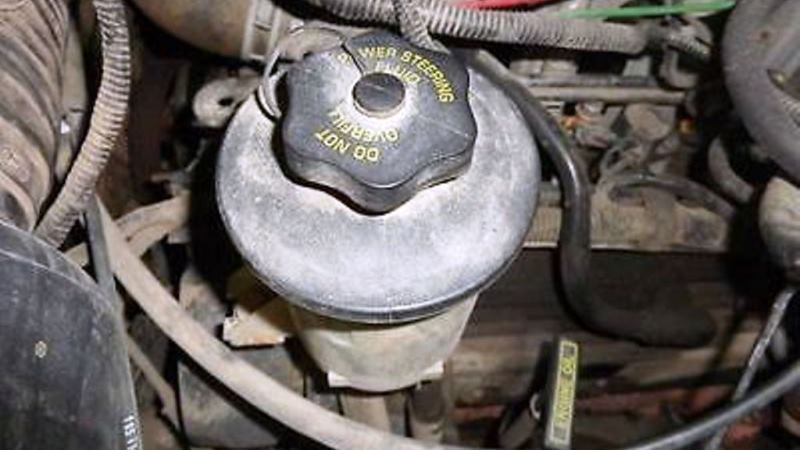
Figure 7. Typical F-150 power steering fluid reservoir. 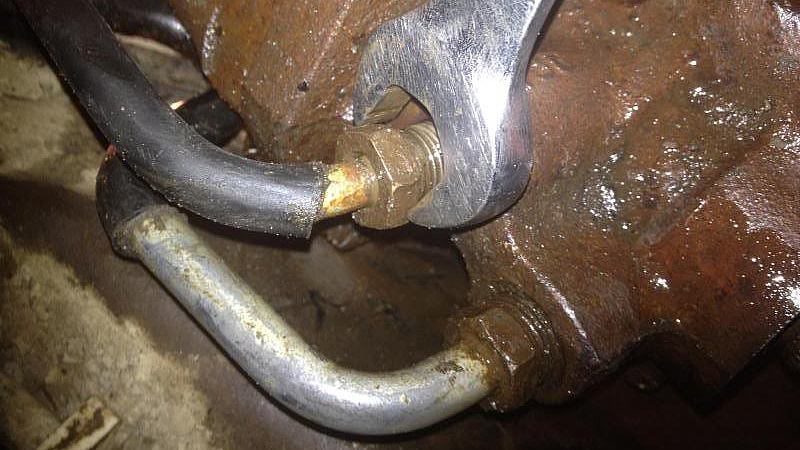
Figure 8. Power steering line fluid fittings on the steering box.
Step 3 – Disconnect the steering shaft from box
The next step in removing the steering box is disconnecting it from the steering shaft that goes to the wheel inside the cab. Close to where the fluid lines connect to the steering box is a 13mm pinch bolt that holds the intermediate steering shaft’s splined flex coupling, onto the steering box input shaft. Getting to it requires a few extra steps.
- First remove the plastic outer dust shield that snaps onto the inner dust shield to protect the intermediate steering shaft’s flex coupling.
- Disconnect the inner dust shield from the coupling (a large tab on the steering box control valve housing).
- Slide both dust shields up the steering shaft and out of the way.
- Due to space limitations, you’ll need to use a wrench to remove the pinch bolt.
- With the pinch bolt removed, use a small pry bar or large flat head screwdriver to open the gap.
- Wiggle the joint up off of the input shaft, being careful not to rotate either piece.
- Mark, with a scribe or punch, on the steering box the direction the flat side of the input shaft points to.

Figure 9. Move the plastic dust shield up over the intermediate steering shaft flex coupling. 
Figure 10. Connection between the input shaft and intermediate steering shaft flex coupling. 
Figure 11. Flat spot on input shaft.
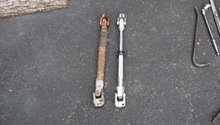
Step 4 – Disconnect the drag link from Pitman arm
Many DIYers have found it much, much easier at this point to remove the power steering box with the Pitman arm still attached (as shown in the attached photos), because removing the Pitman arm from the steering box output shaft typically takes a great deal of effort and elbow room—it’s put on solidly for a reason.
- Disconnect the drag link by first removing the cotter pin in the castle nut on the Pitman arm.
- Remove the 21mm nut.
- Use a two-jaw puller, ball joint separator, or pickle fork to separate the drag link from the Pitman arm.
- Take care not to harm the ball joint connection on the end of the drag link.
- Tie the end of the drag link to the tie rod to keep it out of the way.
To remove the Pitman arm, remove the 34mm nut holding it onto the output shaft with a long breaker bar. Then use a Pitman arm puller to press it off the shaft. Mark with a scribe or punch the orientation of the Pitman arm, output shaft, and steering box housing. Like the steering wheel and tires, it’s very important that the power steering box, Pitman arm, and steering linkage maintain their “centered” position.
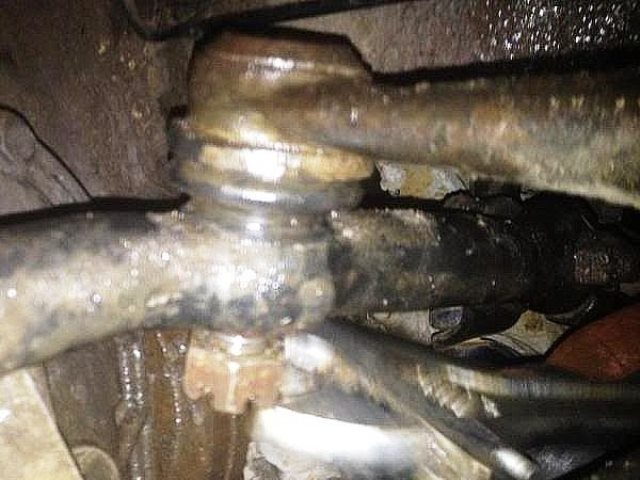
Figure 12. Remove the drag link. 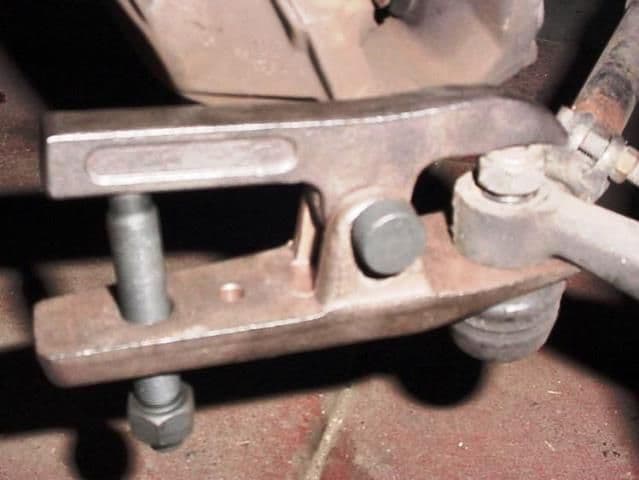
Figure 13. Ball joint separator.
Step 5 – Remove the steering gear box
Loosen and remove the three 5/8-inch bolts holding the power steering box onto the truck’s frame just below the fender well. The box is not light, so use a floor jack to hold it, or an assistant, while the bolts are being removed.
Step 6 – Inspect the power steering gear box
With the box on a bench, ideally in a large vise, inspect it for obvious signs of leakage and their source. Clean the steering gear box with a solvent-based cleaner. At this point you need to decide if the whole box should be replaced, or sent out to be rebuilt, or if you just want to replace the seals and reinstall it. For more on rebuilding it, you should check out this step-by-step how-to: Rebuilding Your Power Steering Box.
Step 7 – Replace the input/output shaft seals
Although the power steering box is complex and has a lot going on inside of it, often there is only one leak location, and often it’s the the shaft seal on either the input shaft side or sector/output shaft side. For this article, we’ll describe only the procedure for replacing the power steering box’s input shaft seal.
- With a small pick or hook tool, punch through the rubber shaft seal attached to the inner diameter of the nylon end cap, and carefully pry the nylon end cap ring out.
- With small needle nose pliers or a snap ring too, remove the snap ring holding the inner seal in.
- Drill two (or three) little holes through the inner seal, but not into the steering box itself.
- Drill the point of two (or three) drywall screws, screw them into the holes to push the inner seal out.
- Alternate between the screws to pull the seal straight out.
- The input shaft seals are now removed.
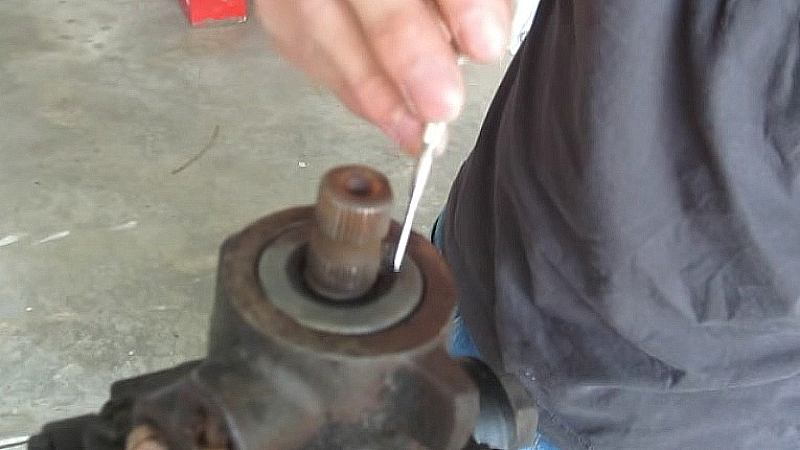
Figure 15. Pry the nylon end cap out of the input shaft seal. 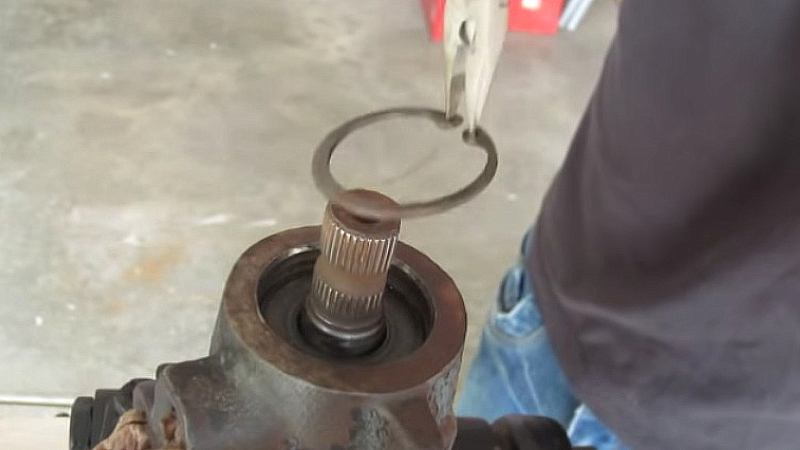
Figure 16. Remove the snap ring. 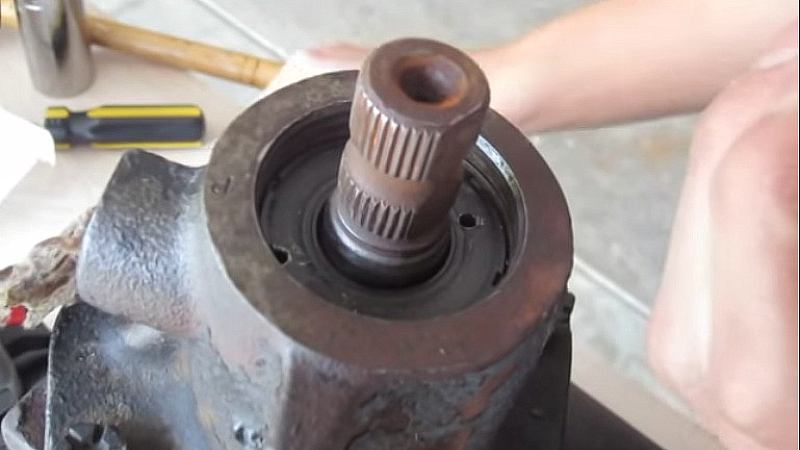
Figure 17. Holes drilled in inner seal. 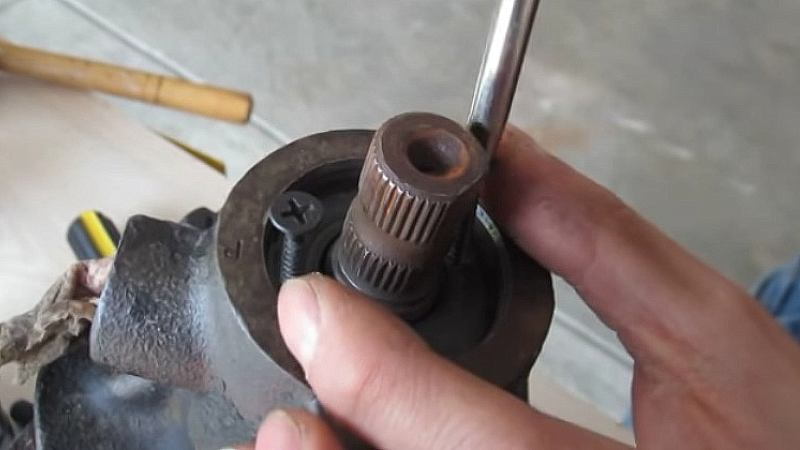
Figure 18. Tighten the screws to push the inner nylon seal ring out.
Step 8 – Seal installation
To reinstall the input shaft seal, first pound the inner seal it in with a rubber hammer and large socket or piece of pipe. The socket must be large enough to not contact the input shaft or neck of the control valve housing. A 1 1/8-inch socket is shown being used for this. Then replace the snap ring, then with the socket pound the outer seal down into place.
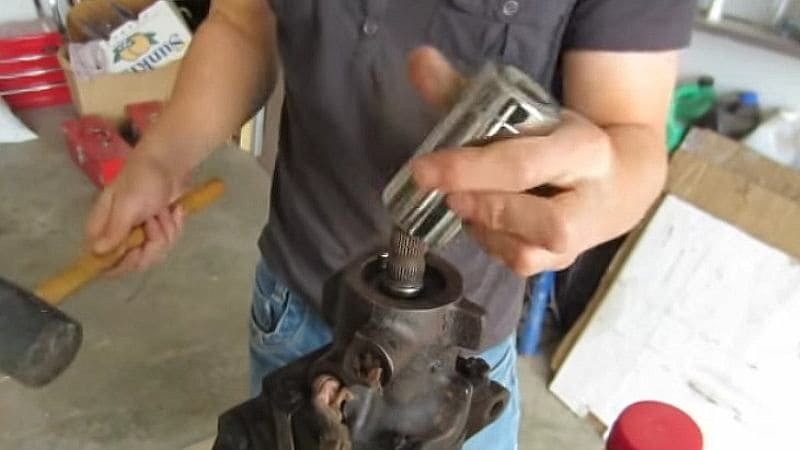
Figure 19. Using a large socket to replace the inner shaft seal. 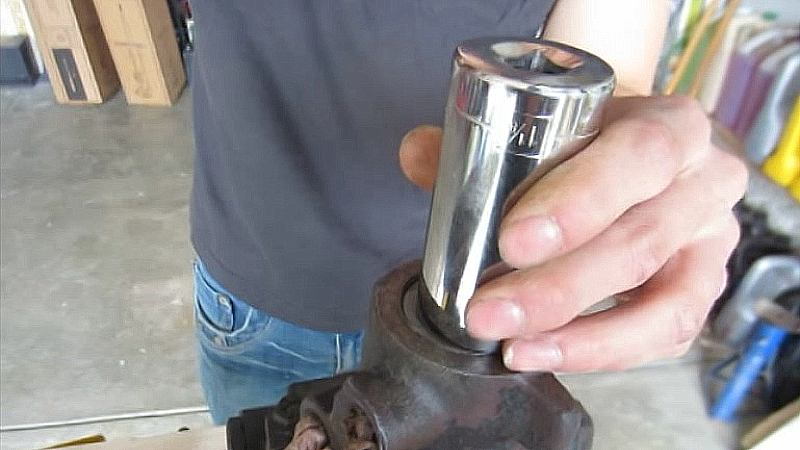
Figure 20. Pushing the outer shaft seal into place.
Step 9 – Reinstall the steering box
If you removed the Pitman arm on the workbench, tap the arm back onto the output shaft, being sure to align the marks and keep it centered. Apply thread lock to the output shaft, tap the arm back onto the shaft, then replace the lock washer and 34mm nut. You need a large torque wrench to get to 199 lb-ft (270 Nm), the recommended tightness, or just tighten it as best you can using the bench vise and a long breaker bar.
To reinstall the power steering gear box in the truck:
- Reinstall the gear box to frame and tighten the three bolts, starting with the bottom bolt and then pivoting the box start the other bolts. Torque bolts to 59 lb-ft (80 Nm).
- Tap the Pitman arm back into place on the drag link stud.
- Line up the input shaft flat spot with the mark on the steering box, and the steering shaft.
- Reconnect the input shaft to the steering joint and tighten the 13mm pinch bolt to 36 lb-ft (49 Nm).
- Reinstall the power steering box input and output hoses, connected to the proper inlet. Make sure each line has a small O-ring at the seat.
- The outlet port is the closest to the tip of the input shaft on the control valve housing. The inlet hose comes directly from the power steering pump. The outlet hose goes to the power steering cooler.
- Reinstall the dust shield/splash cover that snaps onto the control valve housing and covers the intermediate steering shaft’s flex coupling.
- Reattach the reservoir hose to the steering pump with the squeeze-type hose clamp. Make sure it’s snug and doesn’t leak.
- Replace the radiator hoses, and don’t forget to refill the radiator.
- Replace the air intake and fan.
- Reattach the negative battery lead.
Step 10 – Prime and test the power steering system
With front of the truck still off the ground:
- Fill power steering reservoir.
- Cycle front wheels several times.
- Start truck to prime the steering lines.
- Now repeat the previous steps 1 through 3.
- Cycle the steering several times.
- Shut off the truck and check the level of the power steering reservoir again.
- If the fluid lowered, repeat the prime and test procedure.
Featured Video: Steering Box Removal and Installation
Related Discussions, Sites, and Video
- 2000 Ford F150 Power Steering Box Reconditioning - YouTube.com
- Steering Box Leak Removal Fix Install - F150Forum.com
- Leaking Power Steering Fluid Out of Box - Ford-Trucks.com
- Steering Box Works but Leaks - Ford-Trucks.com
- Leaking Steering Gear Box - Ford-Trucks.com
- Fixing Ford F-150 Power Steering Box - FourWheeler.com