
my Rustoleum paint job
#1
 07-06-2013, 07:43 AM

my Rustoleum paint job
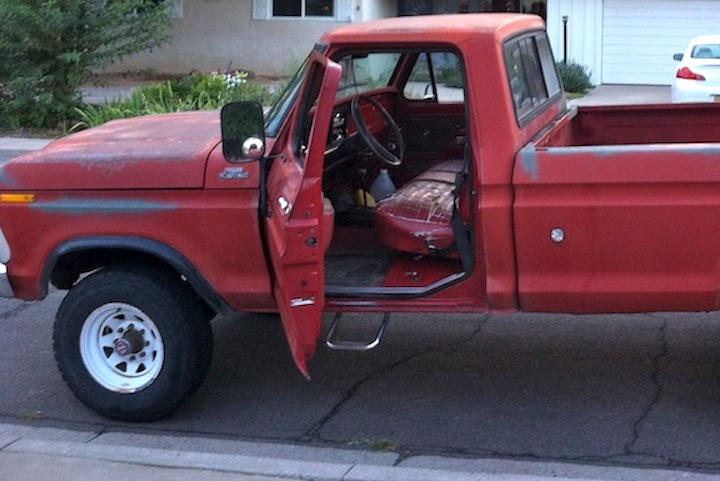
Since I've learned so much from FTE, I thought I would chronicle my effort repainting my truck. The idea here evolved from seeing how many have been successful in rolling with Rustoleum. Since I already had a compressor and did some painting in the past, I thought I'd try a spraying version. Plus, I didn't want to put a lot of $ in the paint, have to do it in the driveway, and found just the perfect color I was looking for. Here's what I started with - 77.5 F250 4X4 with 69,974 original miles. The hood and roof had no paint left - just lots of surface rust.

#2
07-06-2013, 07:52 AM
my Rustoleum paint job
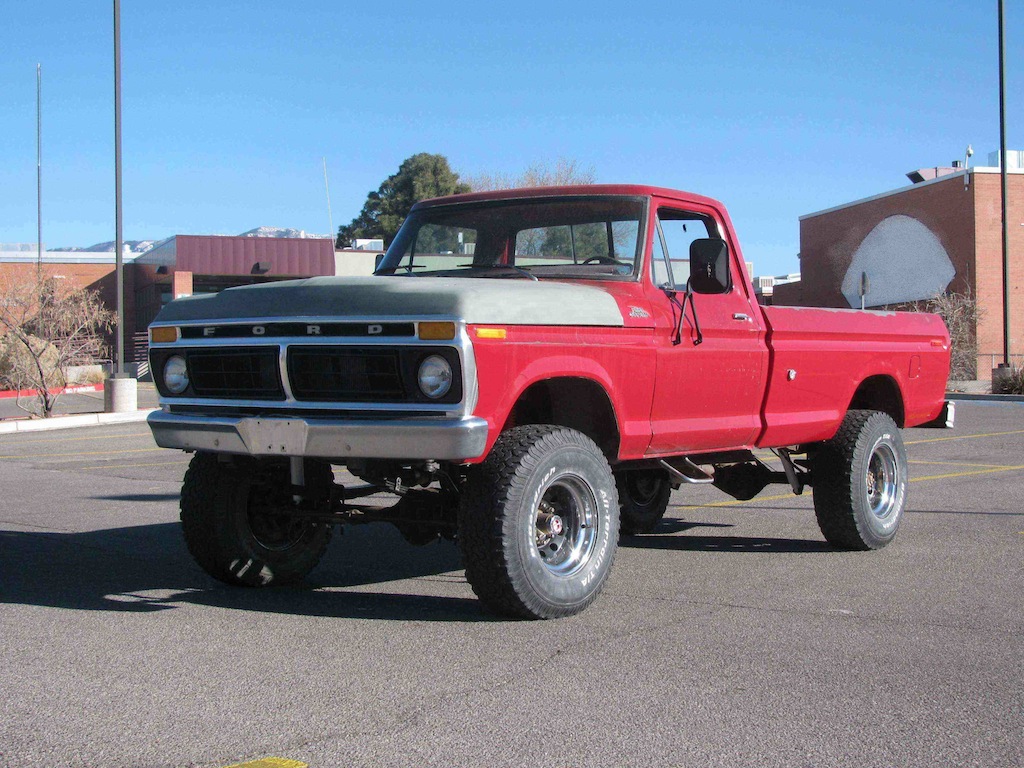
Long before I figured out this path forward, I tackled removing the rust on the hood and roof. After some trial and error, the most efficient method was to wet sand with 120 grit and get the bulk of it off. Then I took Evapo-Rust and let it do its magic - amazing stuff I have to say. I just kept the surface wet with some light Scotch-Brite scrubbing and after an hour or so, I had clean metal. On top of this, I applied Rustoleum self-etching primer from a rattle can. I drove around for a while looking like this:

#3
07-06-2013, 07:59 AM
my Rustoleum paint job
It took me quite some time to settle on a color - I have many, many types of red spray paint on my work bench. The original color code specifies Candy Apple Red. Duplicolor offers this, but it's not too my liking and doesn't match well anyhow to the places that were not cooked in the sun. I did spend some time buffing out and waxing what paint was in decent shape. It's a bit more on the orange side of the Candy Apple which set the quest to find something similar. This happened to be Rustoleum Regal Red - almost a perfect match.
#4
07-06-2013, 08:07 AM
my Rustoleum paint job
I did lots of internet shopping and ultimately settled on the Kobalt 45-piece Spray Gun Kit from Lowe's. Decent reviews and the price was right for 2 spray guns that I have other uses for. Also I wasn't totally committed to doing the paint job myself. Lowe's also fortuitously offers the Regal Red in the Professional High Performance Enamel version in quarts. Maybe I'm suppose to go down this road . . .
The instructions say to only use Acetone as a thinner. After some experimenting, I just couldn't get rid myself of orange peel. My first approach was to try a slower, higher-viscosity thinner. I called Rustoleum and they recommended Mineral Spirits. This made the difference and I was ready to tackle the hood.
The instructions say to only use Acetone as a thinner. After some experimenting, I just couldn't get rid myself of orange peel. My first approach was to try a slower, higher-viscosity thinner. I called Rustoleum and they recommended Mineral Spirits. This made the difference and I was ready to tackle the hood.
#5
07-06-2013, 08:13 AM
my Rustoleum paint job
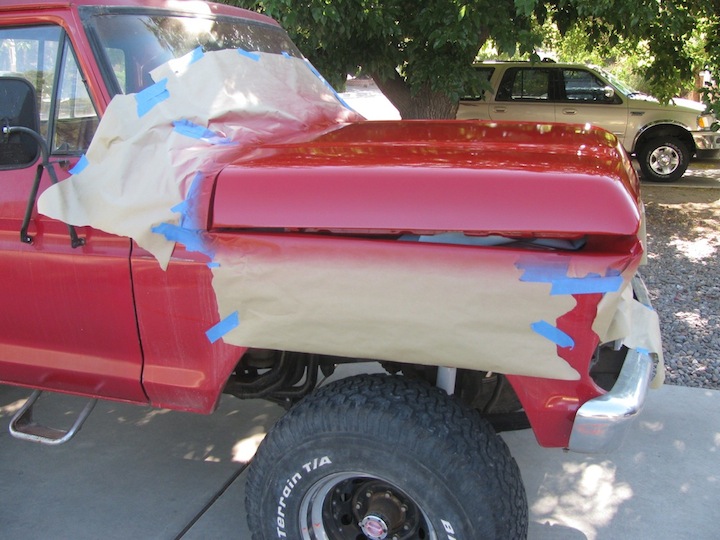
Here's a picture of the hood just after I sprayed it. Came out reasonably well. It was a challenge to reach out to the center of the hood and make sure I didn't get the air hose in the paint. One advantage of using this color is that it also comes in spray cans. I used one to spray the edge on the underside prior to the top coat with the gun. One key I learned the hard way - let the paint dry 48 hours before putting more paint on top.

#6
07-06-2013, 08:22 AM
my Rustoleum paint job
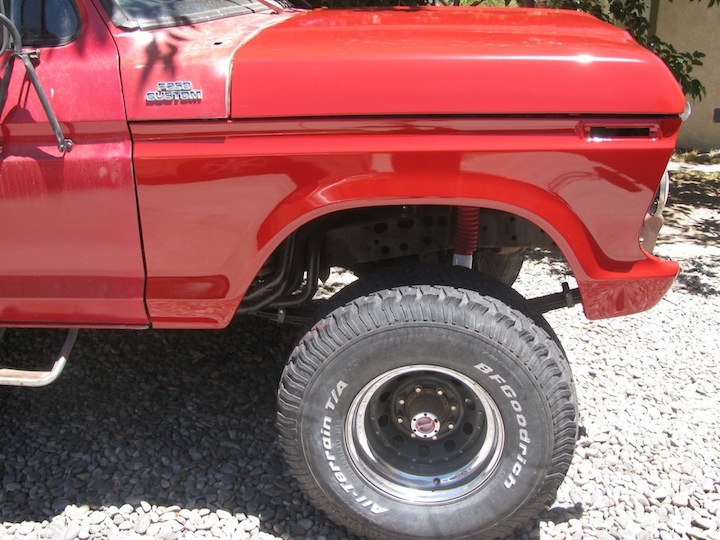
The fenders still had reasonable paint on them with rust in some places. Most notably lots of rock chips down low that resulted in light rust pits under the paint. In these places I took it down to bare metal and used the rust remover again. Other places I also found some small rust spots under the paint (just black dots at this pint) so I ended up sanding most of the fender down to at least the original primer.
With a bit more practicing, I still wasn't totally happy with the orange peel. My next step was to actually measure the pressure at the gun. I had previously just set it at 45 psi via the compressor regulator. Well, this only got me ~30 psi at the gun. Setting the compressor to ~55 got me ~40 at he gun which made a difference.
With a bit more practicing, I still wasn't totally happy with the orange peel. My next step was to actually measure the pressure at the gun. I had previously just set it at 45 psi via the compressor regulator. Well, this only got me ~30 psi at the gun. Setting the compressor to ~55 got me ~40 at he gun which made a difference.

#7
07-06-2013, 08:30 AM
my Rustoleum paint job
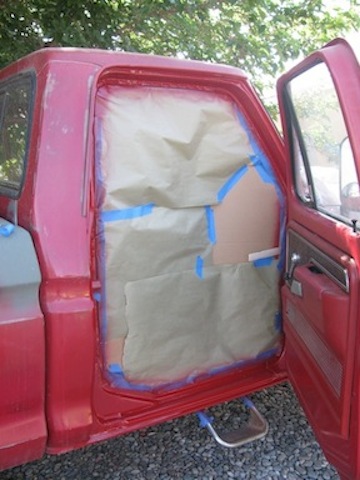
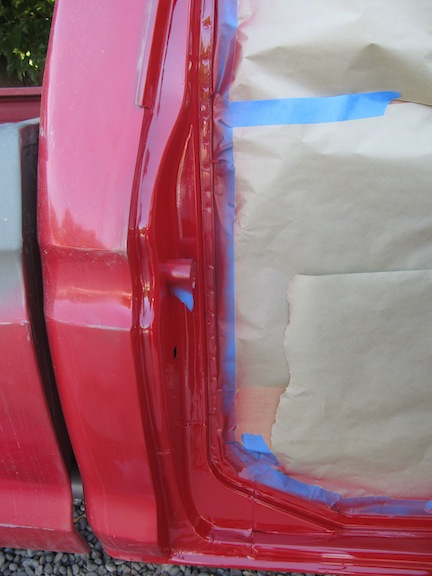
Started tackling the cab. First up was to paint the door jambs. Unfortunately this just requires a lot of elbow grease given all the corners due to the various sheet metal bends. 3M pads help here quite a bit. Another lesson learned here. So far I hadn't bothered to wipe down surfaces with any sort of degreaser as I pretty much had started with bare metal or sanded so much I didn't think it was an issue. Well, not so with mostly scuffing the surfaces. The driver side has a few fisheyes - maybe I'll fix them down the road. So I made a point to wipe down the passenger side real well with mineral spirits. Here are a couple of pics:


Trending Topics

#9
07-06-2013, 09:09 AM

That looks great. I'm a mechanic and I abhor doing any sort of paint and body work. That said, I painted the fender in the foreground with a Rustoleum rattle can. Took a lot of coats, about 1 and 1/2 cans worth, and a lot of wet sanding. Its the best looking paint on the car now. (Which isn't saying much)

#11
07-06-2013, 11:21 AM


#13
07-06-2013, 06:03 PM

Freshman User
Join Date: Apr 2013
Location: Reno, NV
Posts: 33
Likes: 0
Received 0 Likes
on
0 Posts
I'm doing the same to my 75 F100
My hood and cab roof were terrible, I sanded them down 2 weeks ago and it hasn't stopped raining since here in GA. I looked at the Candy Apple Red also, but I think I'm going to use the Majic Implement Paint from Tractor Supply. Anyone used it before? The International Harvester Red is a pretty close match to the non faded red left on mine. I did get the hood primed during a dry spell, so it looks like yours with the hood painted. Hows the rest of yours going, are you doing the inside of the cab also?
#14
07-06-2013, 06:41 PM

Freshman User
Join Date: May 2013
Location: Middle TN
Posts: 42
Likes: 0
Received 0 Likes
on
0 Posts
#15
07-07-2013, 01:56 AM

Devils advocate here...it wont last. I know it looks awesome now, and it really does..but it will dry out and oxidize. Pay a few dollars more for even cheap single stage or BC/CC paint for all the hard prep work you have done. The poor soul trying to get a decent paint job after this one fades is going to have to go to the bare metal.