
DFA RR upgrade from CCK Installed! Pics
#1
 08-12-2009, 02:49 AM


Join Date: Aug 2003
Location: Killeen TX
Posts: 1,109
Likes: 0
Received 0 Likes
on
0 Posts
Well I got my RR upgrade from Dino Fuel Alternatives a few days back. Decided to get off my lazy **** and install it.
Start to finish took about 15min, thats WITH my already installed CCK from DFA
If you have a DFA CCK and havnt installed it yet, and are thinking about waiting to get the RR from DFA I say wait till you get the upgrade BEFORE you install the CCK. It took me 10min just to get that short lil hose out of the cross connect to remove the brass orfice. It would be ALOT easier to have both kits there ready for install.
You'll Need:
1/2, 9/16(for the orfice on the CCK, instructions says just unscrew the hose but that dont work) and 5/8, 11/16(for the vibra-lock fitting on both kits)
Small pipe cutter
Perm-marker
Before beginning always make sure all the parts are there and tools
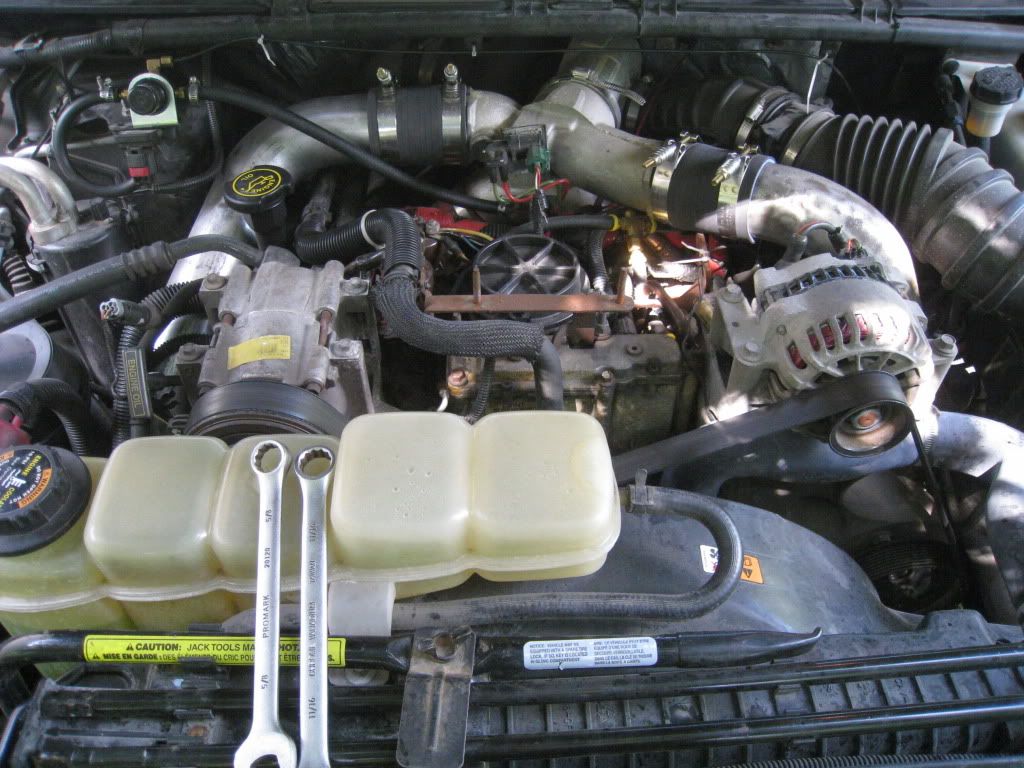
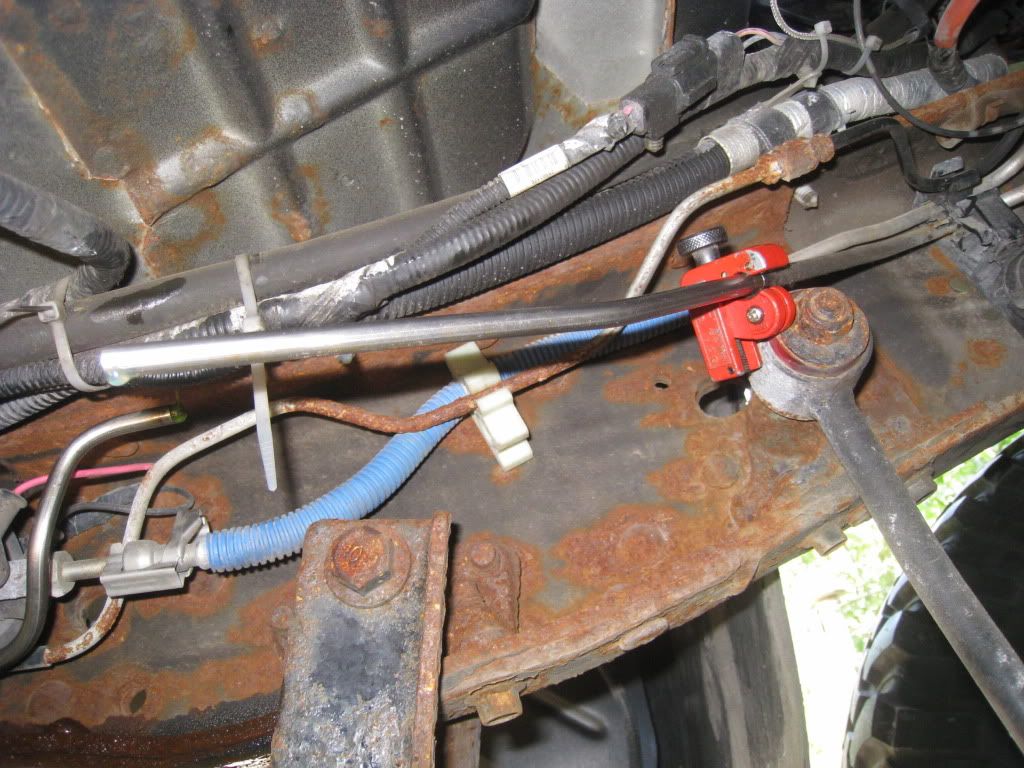
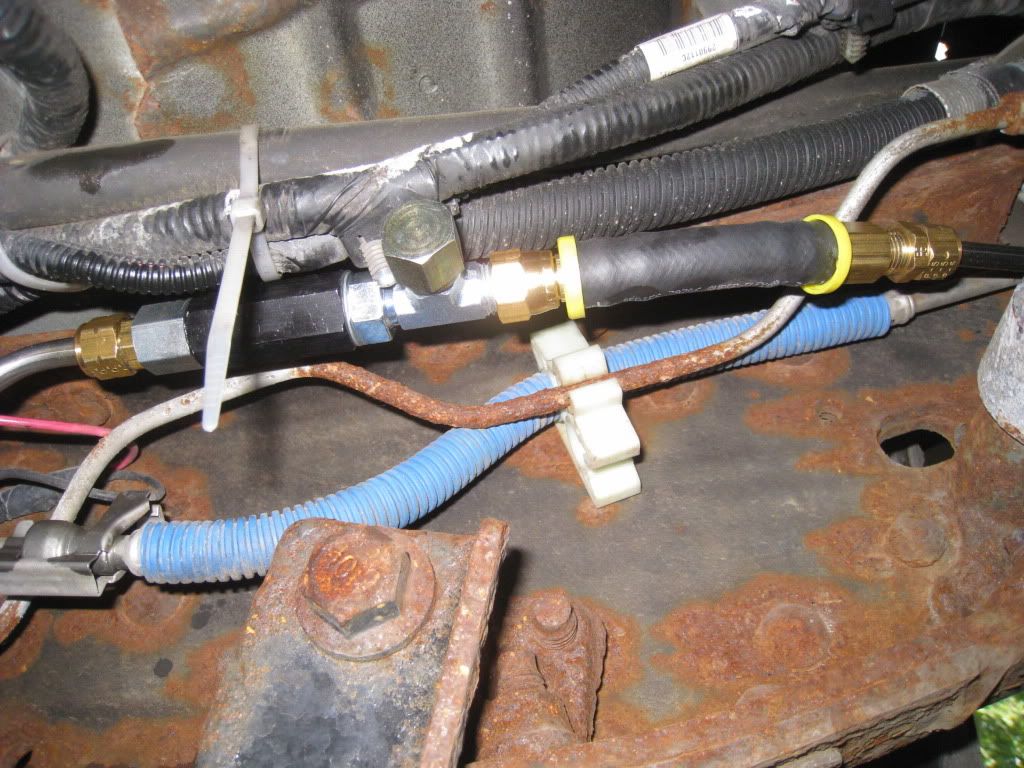
This is what an already CCK looks like installed. Notice the orfice at the cross connect with short rubber hose and the stock return line from fuel bowl.
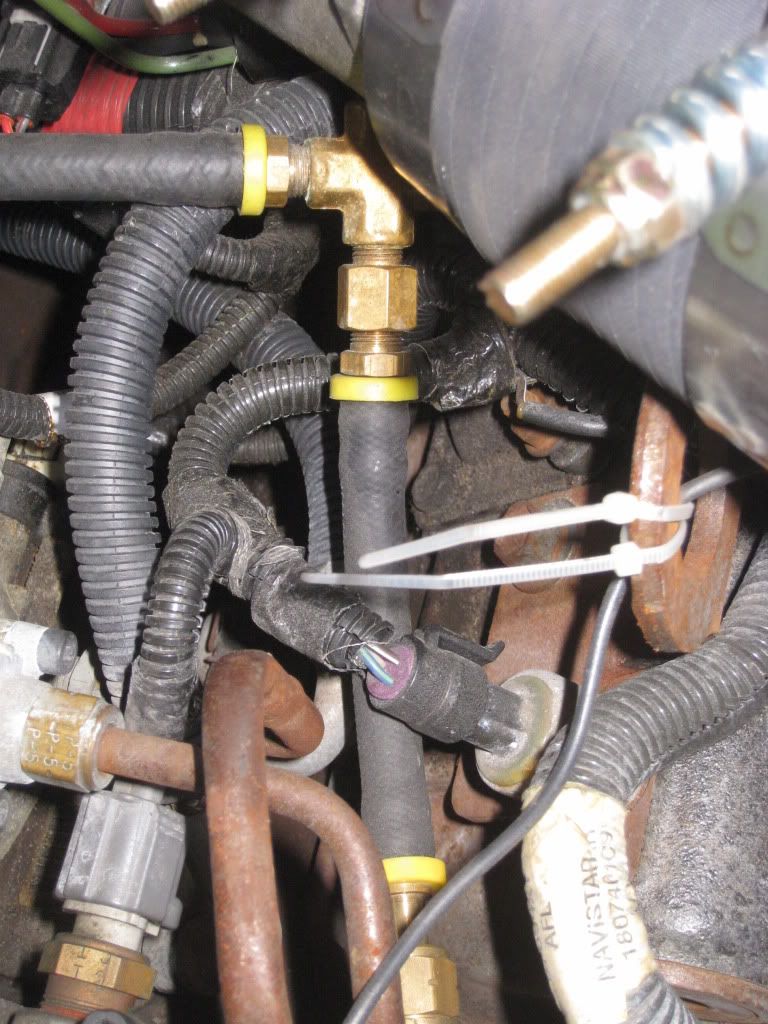
Caps installed on fuel bowl and the Vibra-lock T and orfice removed from the cross connect.
Same picture as above but angled
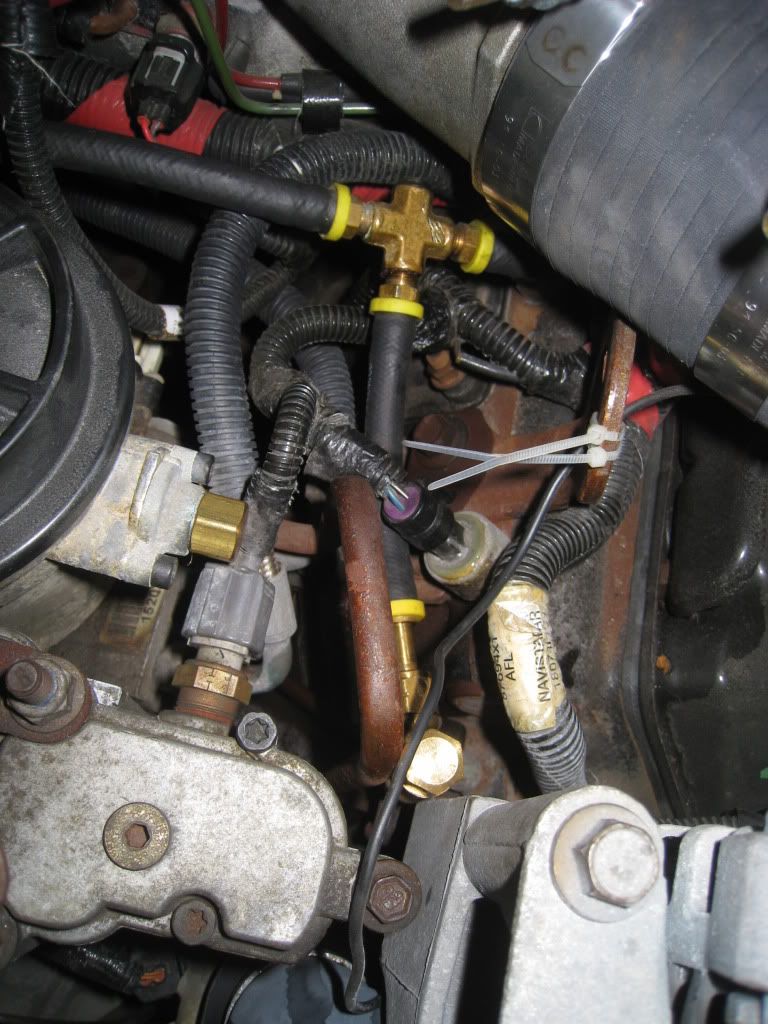
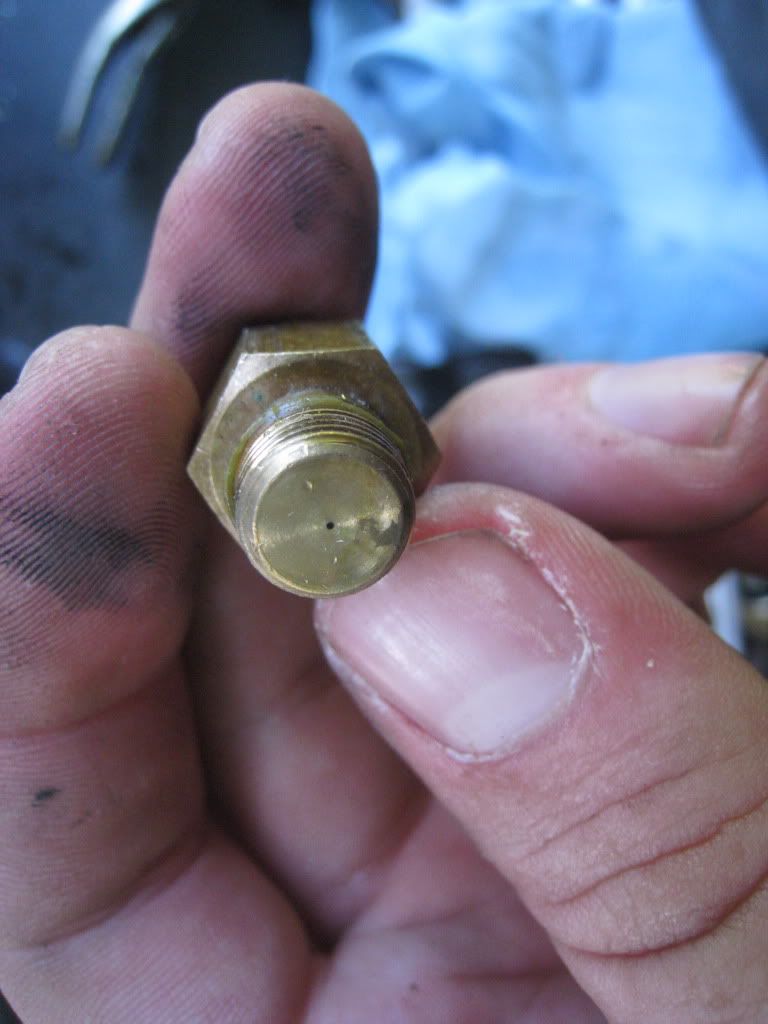
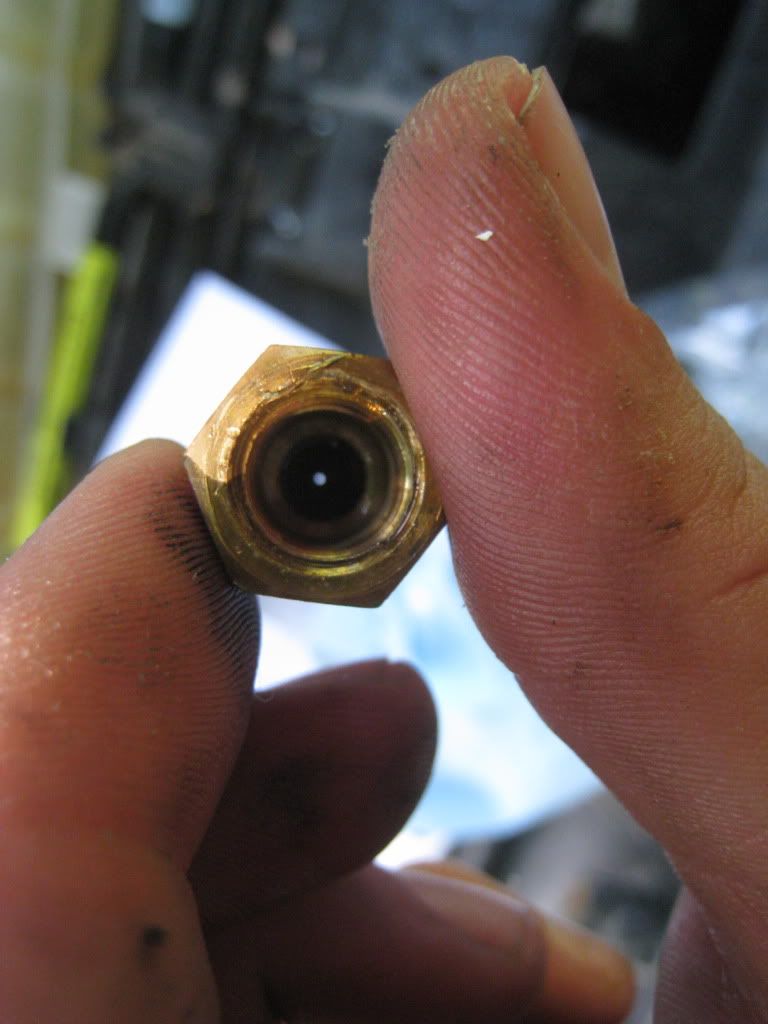
Picture of the orfice that needs to be removed
Next is time to cut the return fuel line from under the truck. Make sure to cut short...cant glue this fuel line back together! The instructions says to measure twice cut once.
Notice the line I cut is shorter than the RR peices? Because of the bend in the pipe.
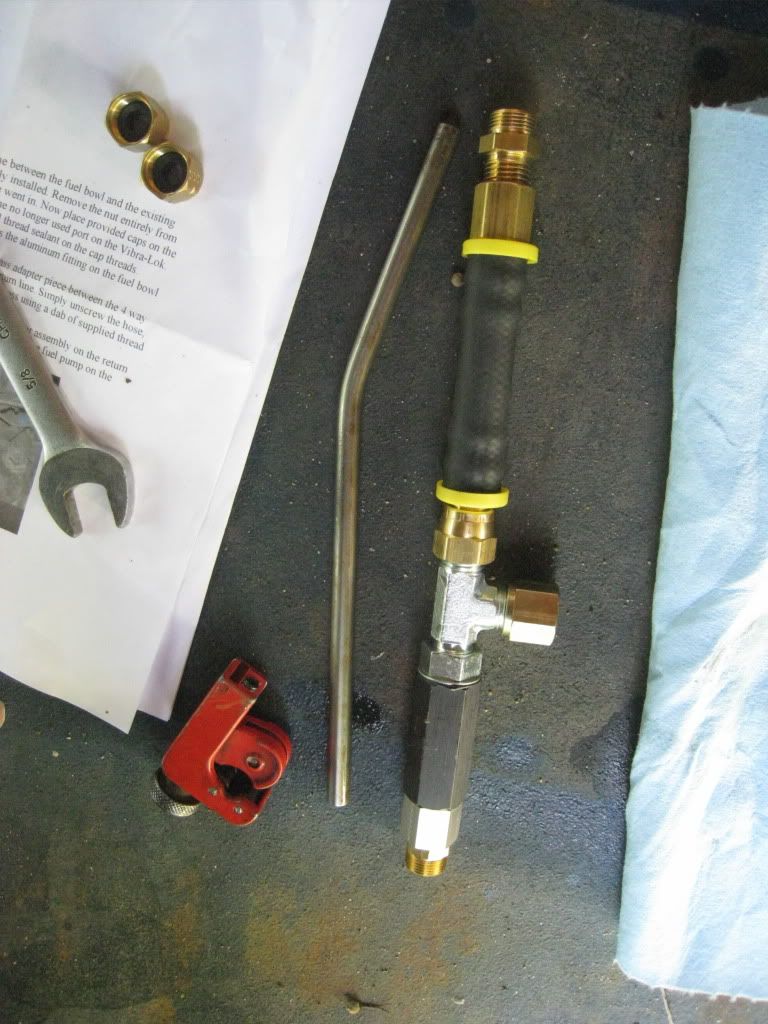
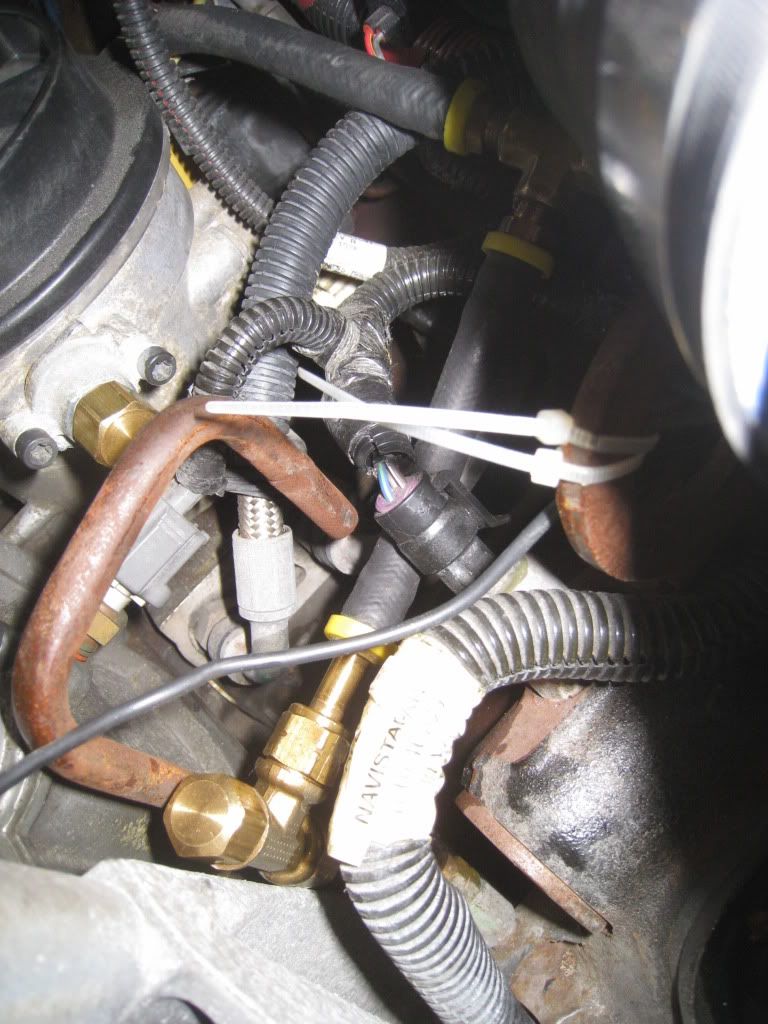
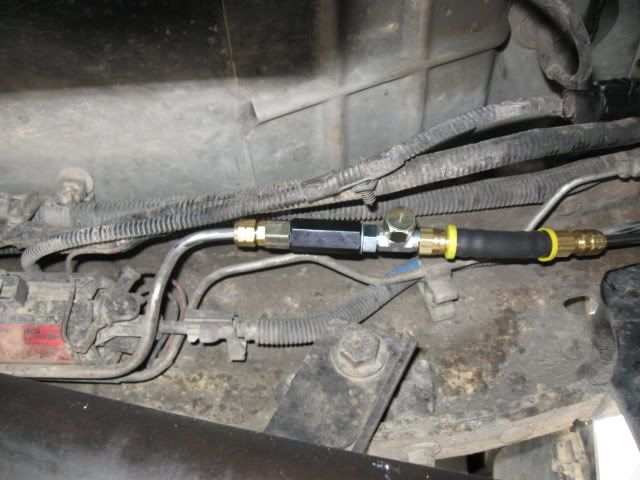
Here the RR kit fully installed.
Be sure to check for leaks: at the caps, especially the vibra-lock T Cap. Mine leaked after a few mins of operation, had to take it off and resuse one of the old rubber gromets used for the original return line from the fuel bowl and threw on some more thread sealent. Im not sure if I didnt use enough locktite or if it was because the threads on the cap deadheaded on the T rather than the thread on the T deadheading on the inside of the cap.
Turn Key ON and you can hear it working
All in all it was easy as hell to put in, upgrade was 70 bucks less than the full kit would be and my throttle is a little more responsive! Good parts, good instructions(make sure you read them, understand them, then go threw it in your head) to make it a peaceful install.
I give it a 4/5 GoodJob DFA!
Start to finish took about 15min, thats WITH my already installed CCK from DFA
If you have a DFA CCK and havnt installed it yet, and are thinking about waiting to get the RR from DFA I say wait till you get the upgrade BEFORE you install the CCK. It took me 10min just to get that short lil hose out of the cross connect to remove the brass orfice. It would be ALOT easier to have both kits there ready for install.
You'll Need:
1/2, 9/16(for the orfice on the CCK, instructions says just unscrew the hose but that dont work) and 5/8, 11/16(for the vibra-lock fitting on both kits)
Small pipe cutter
Perm-marker
Before beginning always make sure all the parts are there and tools
This is what an already CCK looks like installed. Notice the orfice at the cross connect with short rubber hose and the stock return line from fuel bowl.
Caps installed on fuel bowl and the Vibra-lock T and orfice removed from the cross connect.
Same picture as above but angled
Picture of the orfice that needs to be removed
Next is time to cut the return fuel line from under the truck. Make sure to cut short...cant glue this fuel line back together! The instructions says to measure twice cut once.
Notice the line I cut is shorter than the RR peices? Because of the bend in the pipe.
Here the RR kit fully installed.
Be sure to check for leaks: at the caps, especially the vibra-lock T Cap. Mine leaked after a few mins of operation, had to take it off and resuse one of the old rubber gromets used for the original return line from the fuel bowl and threw on some more thread sealent. Im not sure if I didnt use enough locktite or if it was because the threads on the cap deadheaded on the T rather than the thread on the T deadheading on the inside of the cap.
Turn Key ON and you can hear it working
All in all it was easy as hell to put in, upgrade was 70 bucks less than the full kit would be and my throttle is a little more responsive! Good parts, good instructions(make sure you read them, understand them, then go threw it in your head) to make it a peaceful install.
I give it a 4/5 GoodJob DFA!
#2
08-12-2009, 03:34 AM
Join Date: Jul 2004
Location: Yuba City, CA.
Posts: 3,156
Likes: 0
Received 0 Likes
on
0 Posts
#3
08-12-2009, 03:57 AM
Join Date: Apr 2009
Location: Man Cave
Posts: 2,135
Likes: 0
Received 0 Likes
on
0 Posts

#5
08-12-2009, 09:40 AM
Posting Guru
Join Date: Sep 2007
Location: Knoxville, TN
Posts: 2,121
Likes: 0
Received 0 Likes
on
0 Posts
#6
08-12-2009, 09:59 AM
Fleet Mechanic
My exact words too! Me and rusty/tarnished parts just don't get along. Yeah, how do you know what pressures you are running.
#7
08-12-2009, 10:14 AM
Senior User
Join Date: Mar 2006
Location: San Antonio, Tx.
Posts: 434
Likes: 0
Received 0 Likes
on
0 Posts
Trending Topics
#8
08-12-2009, 10:15 AM
Join Date: Feb 2004
Location: IOWA
Posts: 2,365
Likes: 0
Received 0 Likes
on
0 Posts
The "regulators" are preset to 65psi.
I looked into it but ended up taking their CCK and making it into a true RR and am waiting for my regulator to show up to get it put on.
It does look like a very simple install. Any reason that they have you put the regulator in the line on the frame rail? Just because there's more room instead of trying to cram it all in the engine valley?
#9
08-12-2009, 10:38 AM
Posting Guru
Join Date: Sep 2007
Location: Knoxville, TN
Posts: 2,121
Likes: 0
Received 0 Likes
on
0 Posts
The "regulators" are preset to 65psi.
I looked into it but ended up taking their CCK and making it into a true RR and am waiting for my regulator to show up to get it put on.
It does look like a very simple install. Any reason that they have you put the regulator in the line on the frame rail? Just because there's more room instead of trying to cram it all in the engine valley?
I looked into it but ended up taking their CCK and making it into a true RR and am waiting for my regulator to show up to get it put on.
It does look like a very simple install. Any reason that they have you put the regulator in the line on the frame rail? Just because there's more room instead of trying to cram it all in the engine valley?
I figured that the regulators were probably preset, just thought I would ask. I have my regulator set at 65 as well.
#11
08-12-2009, 04:31 PM
Join Date: Aug 2003
Location: Killeen TX
Posts: 1,109
Likes: 0
Received 0 Likes
on
0 Posts
No Problem guys!
The reg is preset to 65PSI, but is adjustable to 80PSI(says the instruction) Its mounted on the frame rail because the space needed.
As for a gauge, i guess you can hook one up to the vibra-lock T thats under the hood if you wanted, or there is a T on the frame rail mounted setup.
My truck is slowing rusting away, its sad ;( but hopfully i can get some por-15 on there before my doors and cab corners fall off.

#14
08-12-2009, 06:27 PM
Went and read up on it... It is adjustable and comes pre-set at 65 psi. So the adjustablilty is something the FPR shim does not get you. Seems a guy could try out a bunch of shims for the $120 bucks it costs for just the regulator part of the kit. I'm thinking there is not much need to vary fuel pressure once you find teh pressure your truck likes..? Not sold on it yet...
#15
08-12-2009, 06:49 PM
Join Date: Aug 2003
Location: Killeen TX
Posts: 1,109
Likes: 0
Received 0 Likes
on
0 Posts
Per the instructions: The regulator assembly come preset to ~65psi but can be adjusted up or down as needed. To adjust the pressure simply loosen the locknut at the front end of the regulator and turn fitting closkwise for higher pressure, or counterclockwise for lower pressure. You may use the extra JIG fitting for connectiong a pressure gauge to if needed.