
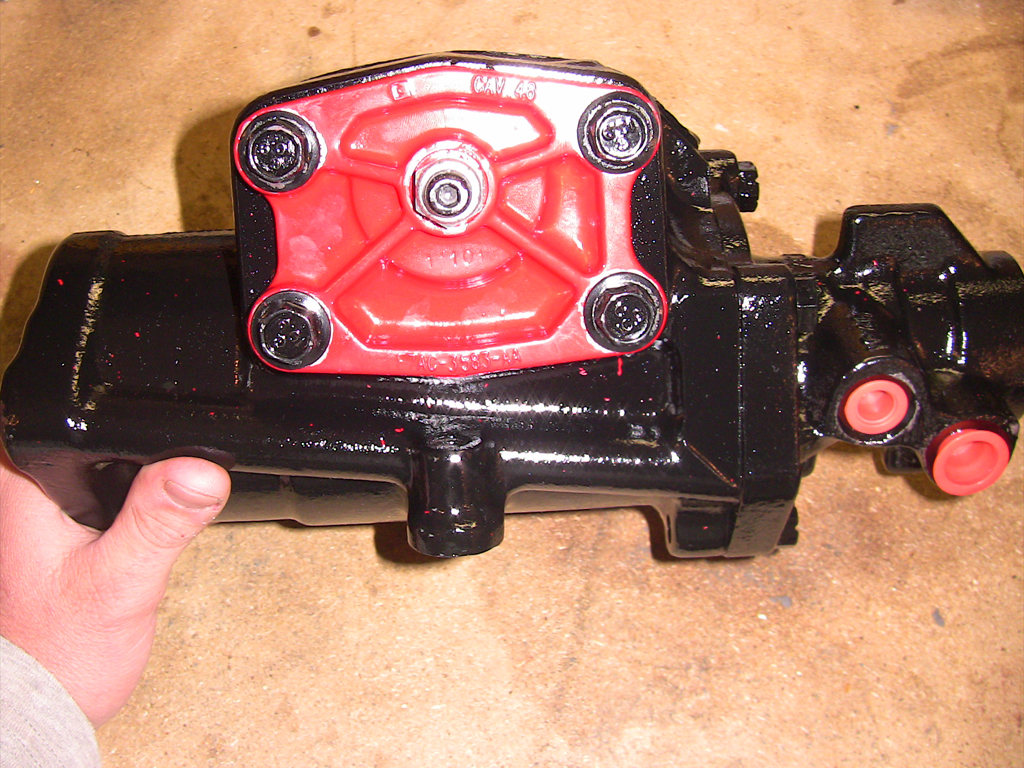
Red Head Steering gear box installed
#1
 06-05-2009, 10:39 PM

Red Head Steering gear box installed
Getting tired of the slopping steering and adjusting the steering gear box all I could (or dared) I decided to install a new steering box from Red Head Steering (Red-Head Steering Gears, Seattle WA - Red-Head Steering Gears Home ).
After installation there was a huge improvement in steering. I'm happy that I can finally go down the road and not weave all over the place.
I wrote up a removal installation article with pics if anyone is interested.
After installation there was a huge improvement in steering. I'm happy that I can finally go down the road and not weave all over the place.
I wrote up a removal installation article with pics if anyone is interested.
#2
06-05-2009, 11:38 PM

Mountain Pass
Join Date: Jul 2006
Location: ILL relocated to Ozarks
Posts: 225
Likes: 0
Received 4 Likes
on
4 Posts
Great to hear that we have another choice for the gear boxes. I have a '05 F350 6.0L PS with a gear box that first went out at 25,000 mi and now again at 91,000 the second FORD gear box is going out again. Most of these miles are easy hwy miles with only a few city pot hole miles.
Keep us updated as to the long term reliability.
Can you post the link to the install/removal article?
Keep us updated as to the long term reliability.
Can you post the link to the install/removal article?
#3
06-06-2009, 01:24 AM

Senior User
Join Date: Jul 2008
Location: So. Cal
Posts: 117
Likes: 0
Received 0 Likes
on
0 Posts
#4
06-06-2009, 06:14 AM

Senior User
#5
06-06-2009, 07:05 AM
Great to hear that we have another choice for the gear boxes. I have a '05 F350 6.0L PS with a gear box that first went out at 25,000 mi and now again at 91,000 the second FORD gear box is going out again. Most of these miles are easy hwy miles with only a few city pot hole miles.
Keep us updated as to the long term reliability.
Can you post the link to the install/removal article?
Keep us updated as to the long term reliability.
Can you post the link to the install/removal article?
The removal and install is straight forward since the box is a stock housing. I figured alot of guys get to the point of needing to replace theirs as well so this will give you an idea of what to do even if you buy a different box. I'll post it in this thread soon.
Price was $305. The 32 spline box was less but I don't remember the price. Out the door price was $476 with a $100 of that the core charge. I also asked for return shipping of the core to be prepayed.
#6
06-06-2009, 07:43 AM
Below are the removal and installation steps I did for my 2000 F250 but should apply to all 1999-2004 F250/F350/Excursion as well.
Ordering:
When I placed my order with Red Head Steering (1-800-808-1148) they stated some 1999 and 2000 Model Year trucks came with either 32 or 36 spline output shafts. They asked which one I had and of course I had no idea. They suggest the easiest way to tell is count the number of teeth between the wide pitman arm alignment gaps (there are two) of the output shaft. 8 teeth indicates it 32 spline and 9 indicates it’s 36. I was easily able to do this with the steering box in the truck and the pitman arm mounted by turning the steering wheel all the way to the right and using a small pick to count the teeth.

Materials:
Besides the steering box the material list is rather small.
2 quarts ATF fluid
Red thread lock
Cotter pin
Zip ties
Small length of hose (about the size to fit over the input and return lines)
Tools:
The tools needed are also pretty minimal. Some of the socket sizes are based on aftermarket replacement parts (such as the drag link) so they may be different in your case.
Jack and jack stands
13MM socket
14MM socket
21MM socket
34MM socket (for pitman arm nut which is actually SAE but I did not have the right size)
16MM flare nut wrench (a regular wrench will work fine as well)
Pitman arm puller (you’ll need proper socket or wrench size for your puller)
Breaker bar
Torque wrench
Bench vise
Needle nose pliers
Side cuts
Hammer
Removal:
Removal is pretty straight forward.
1.) Lift front tires off the ground and support each side with a jack stand. Do not work under or around truck if not properly supported by jack stands!
2.) Remove negative battery cable.
3.) Turn ignition key to “run” position so the steering wheel is unlocked.
4.) Loop seat belt through lower part of steering wheel and buckle it to keep the wheel from moving while the steering shaft is in hooked from the steering box. WARNING: The clock spring can be damaged if you have the steering shaft disconnected and the steering wheel is turned too much in one direction. This is why it is important to immobilize the steering wheel as much as possible to avoid turning it.
5.) Remove and discard cotter pin from crown nut on the top of the pitman arm that holds the drag link. Remove nut with 21MM socket.

6.) Slide the Pitman arm puller over the arm and center it over the drag link bolt/pin. Crank down on the puller and the drag link will pop off. To keep the drag link off the floor and out of the way I zip tied it to the tie rod.
7.) Remove air intake filter housing using 13mm socket.
8.) Remove shield over steering shaft by popping it off the return line and up the steering shaft.

9.) Removed steering shaft pinch bolt using 13mm socket.

10.) Slide up lower steering shaft up and off of steering box input shaft. I had to prying between the gear box and the end of the steering shaft to get it to come off.
11.) Place oil pan under the truck and position it under the steering box.
12.) Loosen and slide up the nuts on the input and return lines using 16MM flare nut or regular wrench. Do not pull the lines out of the steering box until you have both nuts loosened. I made this mistake and got fluid all over. Once they are both loose pull one line out and slide the hose over it. Pull the other line out and slide the other end over it. Zip tie the hose on to make sure it doesn’t slide off. This will keep fluid from leaking all over the place.

13.) Remove two of the three bolts on the driver’s side frame that hold the box in place using 14MM socket. Loosen the remaining bolt but do not remove it until you are in place to support the steering box. If you are not prepared to support the box it can drop to the floor! Once the last bolt is removed the box will drop down and slide out from the bottom.

14.) Remove the Pitman arm by mounting the steering box by the Pitman arm in a bench vise. Use a breaker bar and a 34MM socket (or equivalent SAE socket) and remove the nut holding the arm on. You can also use an air impact like I did instead of a breaker bar. Save nut and lock washer for installation.
15.) Slide the pitman arm puller over the arm and center over the output shaft. Start cranking down on the puller. Even using an air impact I had to bang on the pitman arm a few times with a hammer while cranking on the puller. With a little bit of work the pitman arm popped off.
Installation:
Before beginning the installation make sure the steering box is centered. I checked with the folks at Red Head Steering and they said the box was already centered. Installation is pretty much the reverse of removal.
1.) Reinstall Pitman arm by tapping the arm back on the output shaft and then remounting it in a bench vise by the arm. Apply red thread lock to the output shaft and reinstall lock washer and nut and torque nut to 199 ft-lbs.
2.) Apply red thread lock to the three bolts that hold the steering box to the frame.
3.) Slide the gear box back into truck from the bottom and support it while you install the bolts. It’s easiest to start with the bottom front bolt and then use this as a pivot point to start the other bolts. Torque bolts to 59 ft-lbs (45 ft-lbs for 1999 MY).
4.) Reinstall the steering shaft by wiggling it onto the input shaft of the steering box as far as you can. Then tapping (hammering) on the back side and top of the rubber spring of the steering shaft. Apply red thread lock to the pinch bolt and torque to 36 ft-lbs.

5.) Before reinstalling the input and return lines check that each line has a small rubber o-ring at the seat near the end of the line. Without these o-rings you may have a leak. Remove the zip ties and hose looping the lines together.
6.) Once you check the o-rings reinstall the lines by pushing the lines on the steering box and tightening the nuts.
7.) Reinstall the steering shaft shield.
8.) Reinstall the drag link to the pitman arm by tapping (hammering) it back into place. Reinstall the crown nut and torque to 66 ft-lbs (60 ft-lbs 1999 MY). Install new cotter pin. You may need to adjust the drag link to center the steering wheel again.
9.) Reinstall air intake filter housing.
10.) Reattach negative battery lead.
11.) Fill the power steering reservoir to the proper level.
12.) Start the engine and bleed the system by cranking the steering wheel from lock to lock several dozen times. Do not hold the steering wheel against the locks for more than several seconds. Recheck fluid level.
13.) Remove jack stands and lower front tires back down.
14.) Look at your pretty new Red Head Steering box and enjoy the slop free steering.

Ordering:
When I placed my order with Red Head Steering (1-800-808-1148) they stated some 1999 and 2000 Model Year trucks came with either 32 or 36 spline output shafts. They asked which one I had and of course I had no idea. They suggest the easiest way to tell is count the number of teeth between the wide pitman arm alignment gaps (there are two) of the output shaft. 8 teeth indicates it 32 spline and 9 indicates it’s 36. I was easily able to do this with the steering box in the truck and the pitman arm mounted by turning the steering wheel all the way to the right and using a small pick to count the teeth.
Materials:
Besides the steering box the material list is rather small.
2 quarts ATF fluid
Red thread lock
Cotter pin
Zip ties
Small length of hose (about the size to fit over the input and return lines)
Tools:
The tools needed are also pretty minimal. Some of the socket sizes are based on aftermarket replacement parts (such as the drag link) so they may be different in your case.
Jack and jack stands
13MM socket
14MM socket
21MM socket
34MM socket (for pitman arm nut which is actually SAE but I did not have the right size)
16MM flare nut wrench (a regular wrench will work fine as well)
Pitman arm puller (you’ll need proper socket or wrench size for your puller)
Breaker bar
Torque wrench
Bench vise
Needle nose pliers
Side cuts
Hammer
Removal:
Removal is pretty straight forward.
1.) Lift front tires off the ground and support each side with a jack stand. Do not work under or around truck if not properly supported by jack stands!
2.) Remove negative battery cable.
3.) Turn ignition key to “run” position so the steering wheel is unlocked.
4.) Loop seat belt through lower part of steering wheel and buckle it to keep the wheel from moving while the steering shaft is in hooked from the steering box. WARNING: The clock spring can be damaged if you have the steering shaft disconnected and the steering wheel is turned too much in one direction. This is why it is important to immobilize the steering wheel as much as possible to avoid turning it.
5.) Remove and discard cotter pin from crown nut on the top of the pitman arm that holds the drag link. Remove nut with 21MM socket.
6.) Slide the Pitman arm puller over the arm and center it over the drag link bolt/pin. Crank down on the puller and the drag link will pop off. To keep the drag link off the floor and out of the way I zip tied it to the tie rod.
7.) Remove air intake filter housing using 13mm socket.
8.) Remove shield over steering shaft by popping it off the return line and up the steering shaft.
9.) Removed steering shaft pinch bolt using 13mm socket.
10.) Slide up lower steering shaft up and off of steering box input shaft. I had to prying between the gear box and the end of the steering shaft to get it to come off.
11.) Place oil pan under the truck and position it under the steering box.
12.) Loosen and slide up the nuts on the input and return lines using 16MM flare nut or regular wrench. Do not pull the lines out of the steering box until you have both nuts loosened. I made this mistake and got fluid all over. Once they are both loose pull one line out and slide the hose over it. Pull the other line out and slide the other end over it. Zip tie the hose on to make sure it doesn’t slide off. This will keep fluid from leaking all over the place.
13.) Remove two of the three bolts on the driver’s side frame that hold the box in place using 14MM socket. Loosen the remaining bolt but do not remove it until you are in place to support the steering box. If you are not prepared to support the box it can drop to the floor! Once the last bolt is removed the box will drop down and slide out from the bottom.
14.) Remove the Pitman arm by mounting the steering box by the Pitman arm in a bench vise. Use a breaker bar and a 34MM socket (or equivalent SAE socket) and remove the nut holding the arm on. You can also use an air impact like I did instead of a breaker bar. Save nut and lock washer for installation.
15.) Slide the pitman arm puller over the arm and center over the output shaft. Start cranking down on the puller. Even using an air impact I had to bang on the pitman arm a few times with a hammer while cranking on the puller. With a little bit of work the pitman arm popped off.
Installation:
Before beginning the installation make sure the steering box is centered. I checked with the folks at Red Head Steering and they said the box was already centered. Installation is pretty much the reverse of removal.
1.) Reinstall Pitman arm by tapping the arm back on the output shaft and then remounting it in a bench vise by the arm. Apply red thread lock to the output shaft and reinstall lock washer and nut and torque nut to 199 ft-lbs.
2.) Apply red thread lock to the three bolts that hold the steering box to the frame.
3.) Slide the gear box back into truck from the bottom and support it while you install the bolts. It’s easiest to start with the bottom front bolt and then use this as a pivot point to start the other bolts. Torque bolts to 59 ft-lbs (45 ft-lbs for 1999 MY).
4.) Reinstall the steering shaft by wiggling it onto the input shaft of the steering box as far as you can. Then tapping (hammering) on the back side and top of the rubber spring of the steering shaft. Apply red thread lock to the pinch bolt and torque to 36 ft-lbs.
5.) Before reinstalling the input and return lines check that each line has a small rubber o-ring at the seat near the end of the line. Without these o-rings you may have a leak. Remove the zip ties and hose looping the lines together.
6.) Once you check the o-rings reinstall the lines by pushing the lines on the steering box and tightening the nuts.
7.) Reinstall the steering shaft shield.
8.) Reinstall the drag link to the pitman arm by tapping (hammering) it back into place. Reinstall the crown nut and torque to 66 ft-lbs (60 ft-lbs 1999 MY). Install new cotter pin. You may need to adjust the drag link to center the steering wheel again.
9.) Reinstall air intake filter housing.
10.) Reattach negative battery lead.
11.) Fill the power steering reservoir to the proper level.
12.) Start the engine and bleed the system by cranking the steering wheel from lock to lock several dozen times. Do not hold the steering wheel against the locks for more than several seconds. Recheck fluid level.
13.) Remove jack stands and lower front tires back down.
14.) Look at your pretty new Red Head Steering box and enjoy the slop free steering.
#7
06-06-2009, 09:49 AM
Trending Topics
#9
06-06-2009, 05:49 PM
Thanks guys! Hope some of find it helpful when you go to replace your steering boxes. A correction: Removal step 12 ignore where it says see photo in step 8. I was going to do one photo for both step 8 and 12 but I ended up doing one for step 12. I forgot to change the text after I did.
Spent the day today running around getting mulch, hauling dirt and other tasks. I would normally dread driving around that much since my truck wondered so much. Now it's a pleasure to drive around. It's like having a different truck. I wish I would have done this a long time ago.
Spent the day today running around getting mulch, hauling dirt and other tasks. I would normally dread driving around that much since my truck wondered so much. Now it's a pleasure to drive around. It's like having a different truck. I wish I would have done this a long time ago.


#12
06-08-2009, 07:59 PM
To be safe you can go about a 1/8 to 1/4 turn at a time until it feels tighter. After a few of these turns it stops making any differance. You'll also get to a point where the adjustment bolt will turn stiffer and that means you gone a little to far.
Adjusting a steering box is just a band-aid. You'll eventually need to replace the box.
Adjusting a steering box is just a band-aid. You'll eventually need to replace the box.


#15
06-09-2009, 02:14 AM
Posting Guru
Join Date: Dec 2006
Location: NorCal
Posts: 1,391
Likes: 0
Received 0 Likes
on
0 Posts
Great write-up!!! I think my truck might be a candidate for this pretty soon.
Here is the website: Red-Head Steering Gears, Seattle WA - Red-Head Steering Gears Home
Here is the website: Red-Head Steering Gears, Seattle WA - Red-Head Steering Gears Home