My "new" truck
#107
I have another dumb question. I doubt they're ever going to stop.
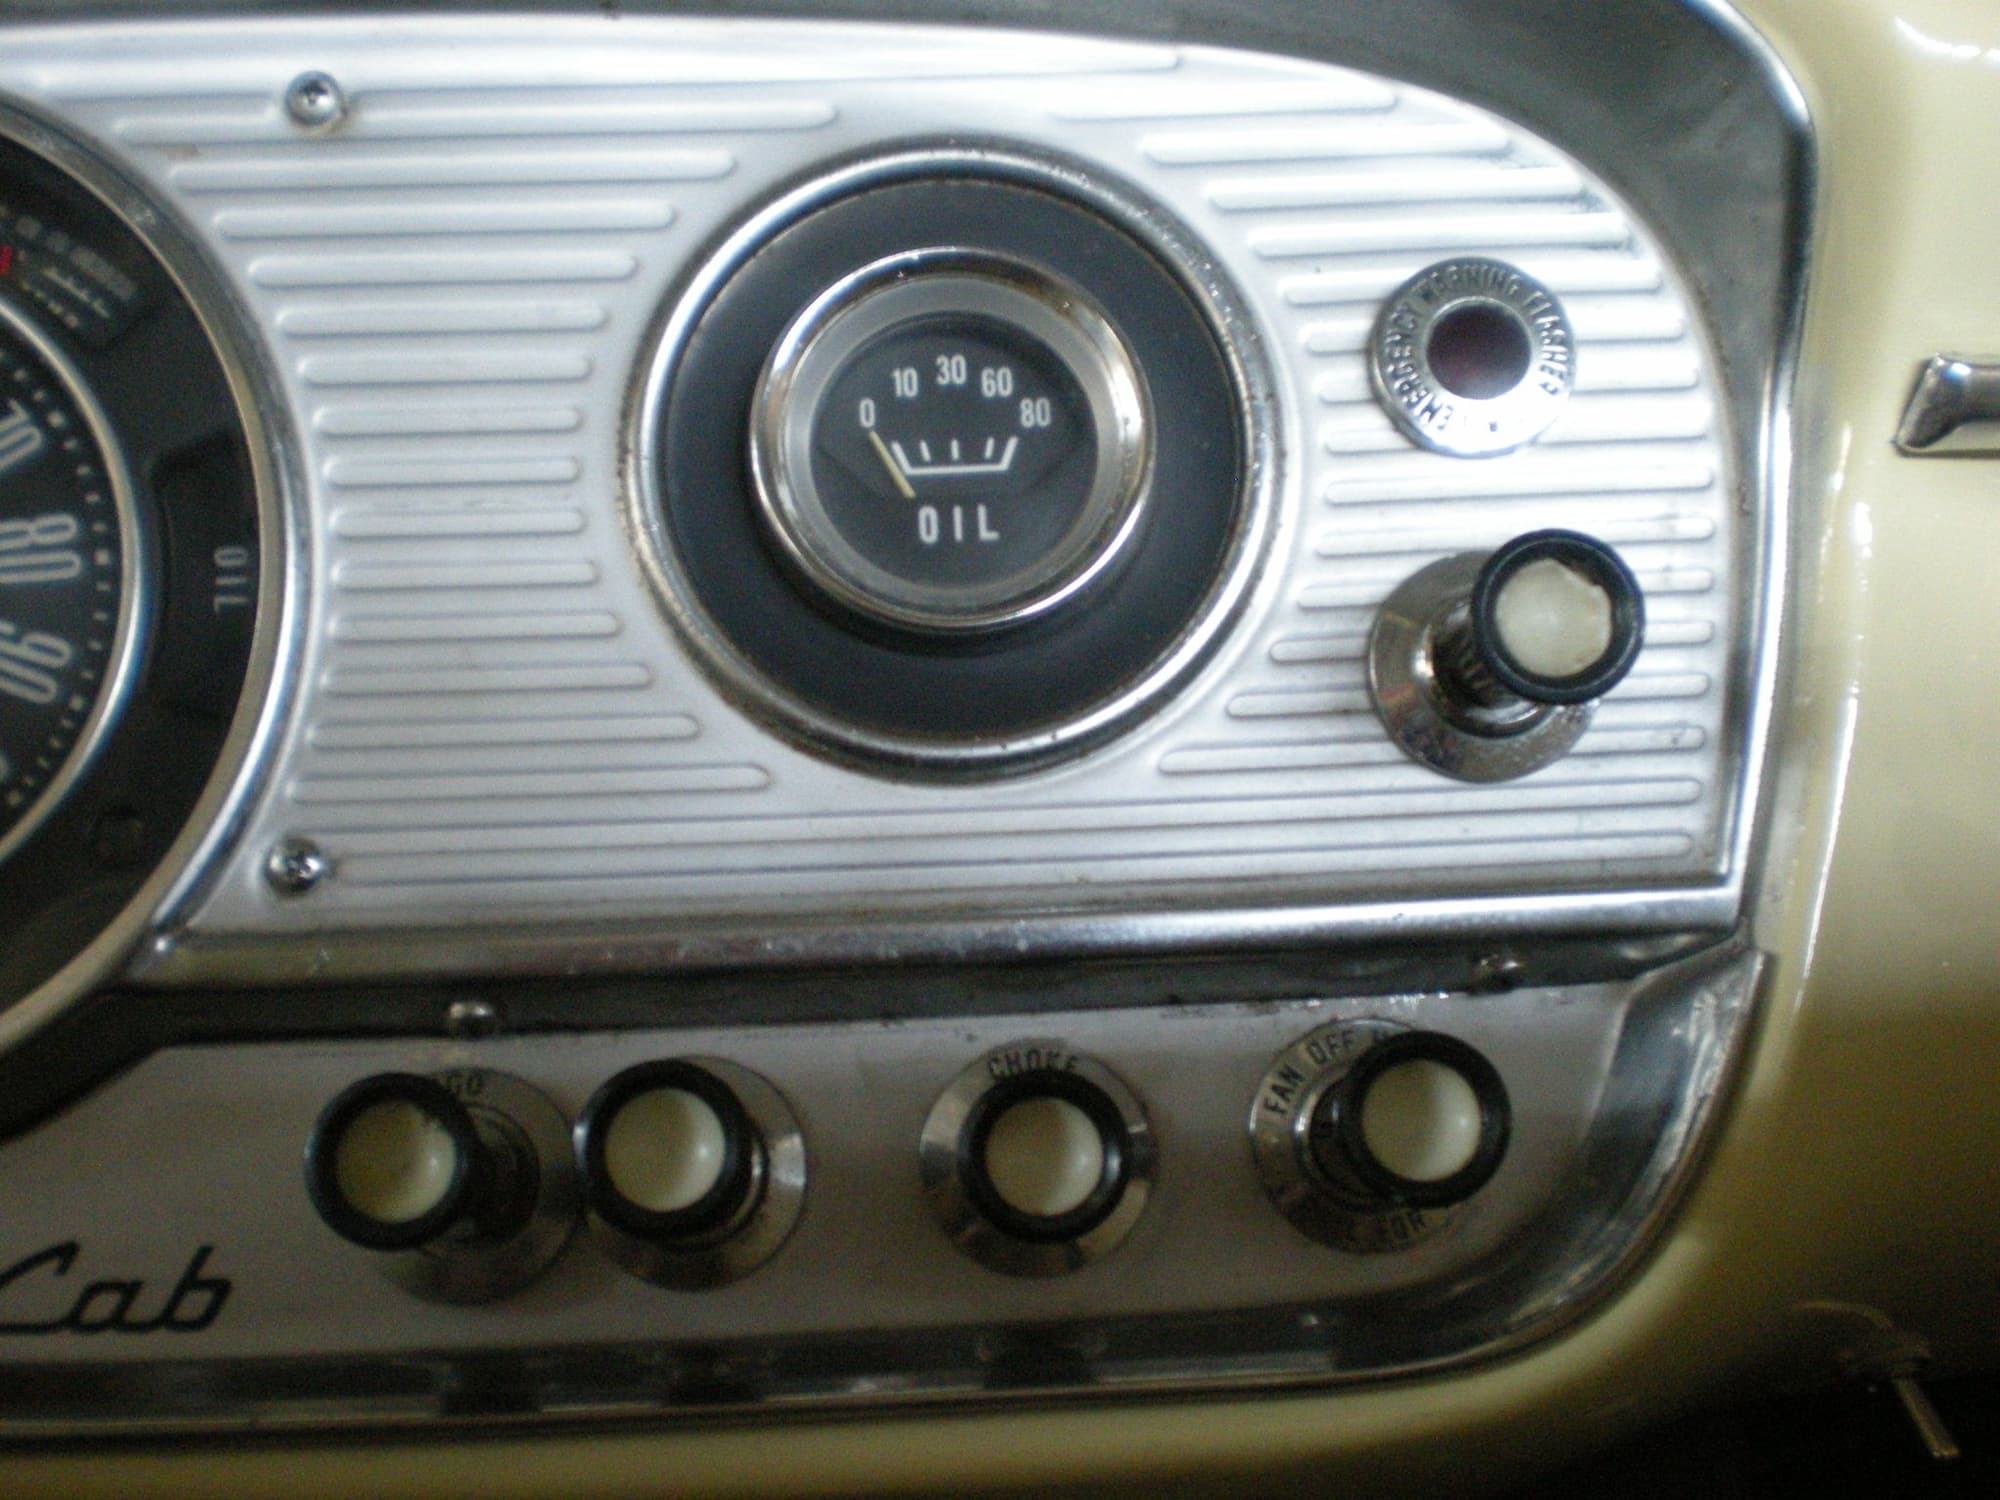
My truck. a 65 Custom Cab, has an extra **** on the right side of the dash (second from the left in the pic). It's like a 2 speed wiper switch, but that one is identified on the bezel. This one has nothing on the bezel, and I can't find a reference to it. It doesn't do anything as far as I can tell.
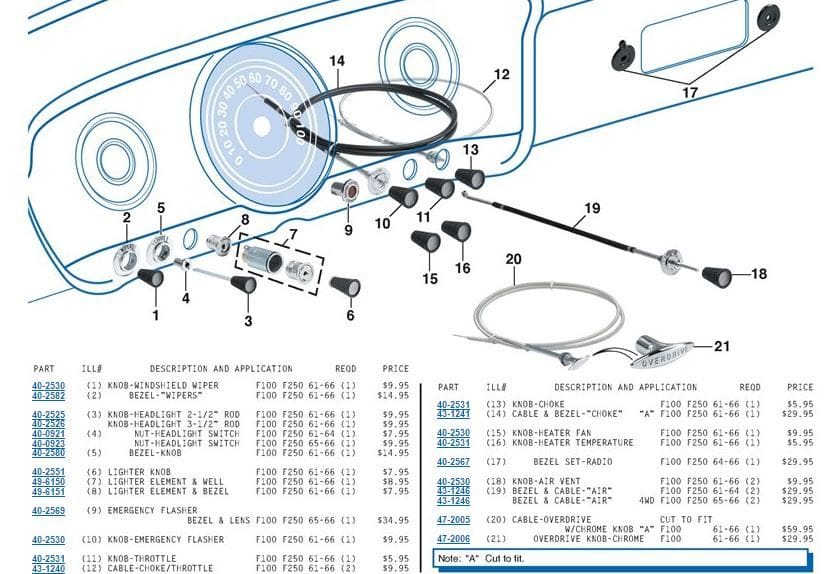
I checked LMC's page and it doesn't look like my dash.
Someone please educate me...


#110
So basically, my truck has very little in common with that drawing. True, I have a choke **** and a fan control ****.
But the two to the left of them are a mystery. One is unmarked and was obviously added by someone for an as yet unknown purpose. Notice how the bezel touches the one to the left of it. And that one's bezel is marked "CARGO", which I would assume turns on lights above the rear window... which the truck does not have... And looking at the 4 right side *****, I would think because of the spacing between the right 3 *****, that the CARGO **** was the one added?
I'm going to have fun under the dash on this one too.
And I don't know yet how it was wired up, but the left turn indicator works correctly, the emergency flasher lights both dash indicators and the red flasher light. But the right turn signal operates the turn signals (front and back) correctly, but lights both dash indicators. Jury rigging at its finest, I assume.
#111
But the two to the left of them are a mystery. One is unmarked and was obviously added by someone for an as yet unknown purpose. Notice how the bezel touches the one to the left of it. And that one's bezel is marked "CARGO", which I would assume turns on lights above the rear window... which the truck does not have... And looking at the 4 right side *****, I would think because of the spacing between the right 3 *****, that the CARGO **** was the one added?
Prior owners tend to install all sorts of non original things that become mysteries to new owners.
Upper pic: 1967/72 Cargo Lamp / Lower pic: 1965 (same as 1964) Thunderbird backup lamp.
#112
Cargo lamp wasn't available for F100/350's until 1967 and thru 1972, it's the same as the 1964/65 Thunderbird back up lamp!
Prior owners tend to install all sorts of non original things that become mysteries to new owners.
Upper pic: 1967/72 Cargo Lamp / Lower pic: 1965 (same as 1964) Thunderbird backup lamp.
Prior owners tend to install all sorts of non original things that become mysteries to new owners.
Upper pic: 1967/72 Cargo Lamp / Lower pic: 1965 (same as 1964) Thunderbird backup lamp.
#113
Should never take this long...
I went out to change the oil and filter this morning. The oil was black. Should be a fairly easy job (famous last words).
I had already read a post on here about the drain plug location over the crossmember so I was prepared for that mess.
What I wasn't prepared for was the un-removable oil filter. I've heard of them being stuck on, but this was ridiculous. I have a filter wrench, but couldn't come close to breaking it loose.
My wife said she wished she had taken a video of how I got it loose. Not sure I can adequately describe the process, but it involved a 10" skinny Phillips screwdriver driven through the filter, a long climbing rope double tied around both parts of the protruding screwdriver, the washing machine protector post in the garage, carefully calculated leverage and most of my 192 pounds of fat a$$ STANDING and bouncing on the rope. Even with all that, it took several attempts to make it budge. I couldn't move it by hand until after 1 full turn! I think somebody used a torque wrench to install it. Pretty sure they didn't coat the seal with oil...
#114
I went out to change the oil and filter this morning. The oil was black. Should be a fairly easy job (famous last words).
I had already read a post on here about the drain plug location over the crossmember so I was prepared for that mess.
What I wasn't prepared for was the un-removable oil filter. I've heard of them being stuck on, but this was ridiculous. I have a filter wrench, but couldn't come close to breaking it loose.
My wife said she wished she had taken a video of how I got it loose. Not sure I can adequately describe the process, but it involved a 10" skinny Phillips screwdriver driven through the filter, a long climbing rope double tied around both parts of the protruding screwdriver, the washing machine protector post in the garage, carefully calculated leverage and most of my 192 pounds of fat a$$ STANDING and bouncing on the rope. Even with all that, it took several attempts to make it budge. I couldn't move it by hand until after 1 full turn!
I think somebody used a torque wrench to install it. Pretty sure they didn't coat the seal with oil...
Hand tighten the new filter, do not use a wrench!
People unaware use a wrench, but once the engine is running, it will suck the filter up tight.
Using a wrench may cause the filter to split open. Not pleasant!
#115
#117
So, anyway, both door locks work, and I have four keys. It'll be nice to only need one key for the doors and ignition.
Since I had to remove the door zippered storage compartments to access the lock mechanism, I finally looked at the "junk" left in there. It's a little unsettling to find a couple dozen different fuses. Makes me wonder how much trouble they were having adding the spaghetti under the dash.

#118
Spicer 60 cover gasket - questions
I'm going to drain the rear end and replace the cover gasket because it appears to be leaking. I've never done this.
The Shop Manual says on page 4-39:
8. Position a new gasket on the rear face of the axle housing and install the rear cover and ratio identification tag. Torque the cap screws to 15-25 ft-lbs.
Will it seal correctly with no sealer, like Permatex? Will it not seep out the threads on the cover cap screws? I just want it to stop leaking.
#119
I'm going to drain the rear end and replace the cover gasket because it appears to be leaking. I've never done this.
The Shop Manual says on page 4-39:
8. Position a new gasket on the rear face of the axle housing and install the rear cover and ratio identification tag. Torque the cap screws to 15-25 ft-lbs.
Will it seal correctly with no sealer, like Permatex? Will it not seep out the threads on the cover cap screws? I just want it to stop leaking.
The Shop Manual says on page 4-39:
8. Position a new gasket on the rear face of the axle housing and install the rear cover and ratio identification tag. Torque the cap screws to 15-25 ft-lbs.
Will it seal correctly with no sealer, like Permatex? Will it not seep out the threads on the cover cap screws? I just want it to stop leaking.
#120


