1973 - 1979 F-100 & Larger F-Series Trucks Discuss the Dentsides Ford Truck
Sponsored by:
Sponsored by: Moser

1974 f100 crown vic swap

Thread Tools
 
Search this Thread
 
  #31  
Old 07-07-2016, 08:57 PM
seancaros's Avatar
seancaros
seancaros is offline
Junior User
Thread Starter
Join Date: Jul 2016
Posts: 80
Likes: 0
Received 0 Likes on 0 Posts
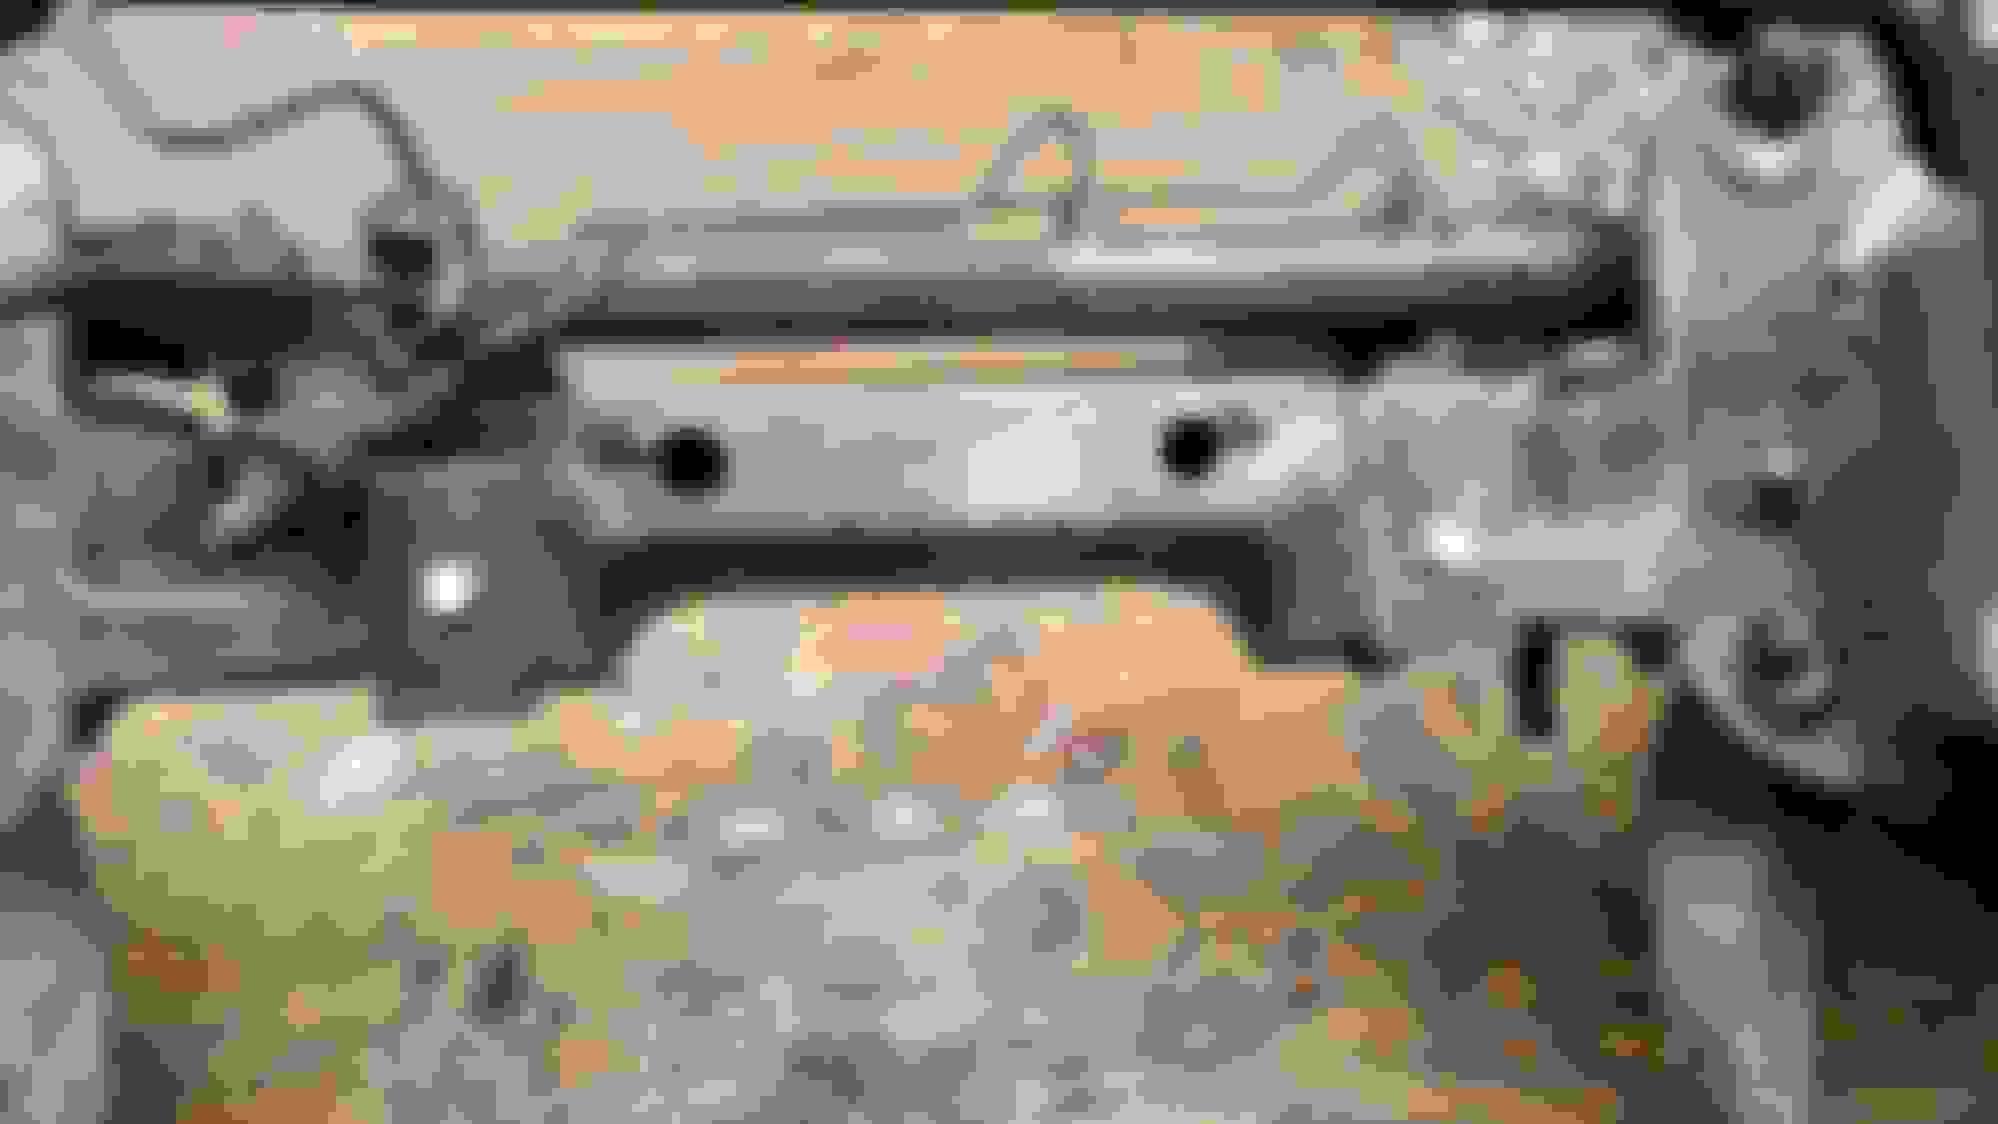
I haven't done too much today but as you can see I got the alignment holes drilled and the front holes drilled and the sleeves are in but not yet welded.


  #32  
Old 07-09-2016, 06:09 AM
seancaros's Avatar
seancaros
seancaros is offline
Junior User
Thread Starter
Join Date: Jul 2016
Posts: 80
Likes: 0
Received 0 Likes on 0 Posts
I got a friend to give me a hand and we go the sleeves drilled and welded, motor mounts in and frame boxed. now I'm going to do some painting before proceeding. for the motor mounts, I drilled the holes for the cv sleeves then I bolted the motor mounts where they were originally riveted then drilled/grinded them to fit around the sleeves. the drivers side may need to be trimmed for the steering later. also, I cut a 1/4" piece of steel for each motor mount to sit on and bolted it to the cv suspension. once I paint ill bolt cv suspension to the truck frame and weld the motor mounts to the steel pieces.


frame boxed pass. side and motor mount cut up a couple inches


frame boxed drivers side and motor mount cut up a couple inches


the two plates bolted


drivers side mount barely had to be cut on the top


passenger side needed a bit more trimmed
 
  #33  
Old 07-09-2016, 03:26 PM
seancaros's Avatar
seancaros
seancaros is offline
Junior User
Thread Starter
Join Date: Jul 2016
Posts: 80
Likes: 0
Received 0 Likes on 0 Posts
got some painting done. I used two coats of por15 then when it was dried but still tacky I used krylon suppermaxx satin black spray paint as a top coat.


  #34  
Old 07-09-2016, 10:17 PM
rustED_'s Avatar
rustED_
rustED_ is offline
Senior User
Join Date: Feb 2015
Location: Washington
Posts: 185
Likes: 0
Received 0 Likes on 0 Posts
Looking good, your making some quick progress on the swap!
 
  #35  
Old 07-10-2016, 06:45 AM
seancaros's Avatar
seancaros
seancaros is offline
Junior User
Thread Starter
Join Date: Jul 2016
Posts: 80
Likes: 0
Received 0 Likes on 0 Posts
Thanks, when I pulled the engine, the trans leaked from the rear, and once its back in, I need to drain and refill it. What kind of fluid do I need and what is the capacity? thanks I have a 360 with 3 speed on the column
 
  #36  
Old 07-10-2016, 10:14 PM
1320stang's Avatar
1320stang
1320stang is offline
Laughing Gas
Join Date: Jul 2003
Location: Edmond, OK
Posts: 755
Received 9 Likes on 9 Posts
Subscribed!!!

What year T-bird seats are those? I DIG 'em!!!
 
  #37  
Old 07-11-2016, 08:37 PM
loudfords's Avatar
loudfords
loudfords is offline
FTE Chapter Leader

Join Date: Sep 2000
Location: Beachville, Ontario
Posts: 3,828
Likes: 0
Received 1 Like on 1 Post
Don't forget to drill the sway bar mounting holes in the frame....
 
  #38  
Old 07-12-2016, 08:30 AM
seancaros's Avatar
seancaros
seancaros is offline
Junior User
Thread Starter
Join Date: Jul 2016
Posts: 80
Likes: 0
Received 0 Likes on 0 Posts
I painted everything, then I bolted the cv sus. in , and I cut the motor mounts on the bottom. I cut a little off at a time until they were just touching the plates I bolted to cv sus. then I cut angle iron and made a bracket for the trailing arms (I think they're called haha).and once those were welded I put the motor into the mounts first before welding them. that way they were lined up perfectly. I then bolted the motor in and touched up the paint where the welds were. next, I put the drive shaft back in, and the speedo cable. I hooked up the linkage, throttle, choke, ect.. next I mounted the sway bar. I ordered a 2000 focus power steering line but its not coming until Friday. I put the brake line from the back to front back in. and I think that's all so far. more to come later.


  #39  
Old 07-12-2016, 08:31 AM
seancaros's Avatar
seancaros
seancaros is offline
Junior User
Thread Starter
Join Date: Jul 2016
Posts: 80
Likes: 0
Received 0 Likes on 0 Posts
And I'm not sure what year seats I didn't ask the guy
 
  #40  
Old 07-12-2016, 09:14 AM
mikeo0o0o0's Avatar
mikeo0o0o0
mikeo0o0o0 is offline
Hotshot
Join Date: Apr 2009
Location: Stanley, VA
Posts: 14,315
Received 203 Likes on 161 Posts
Originally Posted by 1320stang
What year T-bird seats are those? I DIG 'em!!!
Originally Posted by seancaros
And I'm not sure what year seats I didn't ask the guy
I believe those are from a '65 T-Bird. I've always liked how the rear seat wraps around.
 
Attached Images  
  #41  
Old 07-12-2016, 03:59 PM
Aaron-71's Avatar
Aaron-71
Aaron-71 is offline
Logistics Pro
Join Date: May 2010
Location: Regina, Saskatchewan
Posts: 4,436
Likes: 0
Received 13 Likes on 13 Posts
Cool build thread. Everyone whose doing this type of swap keeps making it look super easy.
 
  #42  
Old 07-12-2016, 08:35 PM
seancaros's Avatar
seancaros
seancaros is offline
Junior User
Thread Starter
Join Date: Jul 2016
Posts: 80
Likes: 0
Received 0 Likes on 0 Posts
I got the drive shaft back in, and the brake lines all run, I made a steering shaft with the crown vic one, but idk if I'm happy with it, but its good for now. the exhaust is finished as well, the charcoal canister is on and I made a bracket to mount the brake prop. valve to, originally it bolted to the steering box. also, the brake hoses were almost too short so I made a little bracket to keep them a little away from the frame,


  #43  
Old 07-13-2016, 01:35 PM
seancaros's Avatar
seancaros
seancaros is offline
Junior User
Thread Starter
Join Date: Jul 2016
Posts: 80
Likes: 0
Received 0 Likes on 0 Posts
  #44  
Old 07-13-2016, 01:42 PM
seancaros's Avatar
seancaros
seancaros is offline
Junior User
Thread Starter
Join Date: Jul 2016
Posts: 80
Likes: 0
Received 0 Likes on 0 Posts
I did some painting. aslo bleed the brakes. I had the steering working but I wasn't happy with it, so I ordered new steering parts and pulled the old end of the column off which I showed how in the pictures. I found what steering parts were needed from another persons build but ill post it here anyway incase someone needs it

brg-013452 column to shaft u joint
brg-014955 shaft to rack u joint
brg-450024 steering shaft

I ordered on summit racing
 
  #45  
Old 07-13-2016, 07:06 PM
1985 Bronco's Avatar
1985 Bronco
1985 Bronco is offline
Laughing Gas
Join Date: Nov 2013
Location: Minnesota
Posts: 1,200
Likes: 0
Received 3 Likes on 3 Posts
Looking good! This seems like a very easy swap


Quick Reply: 1974 f100 crown vic swap


All times are GMT -5. The time now is 05:12 AM.