Express Bed Valance, How does it attach?
#1
Express Bed Valance, How does it attach?
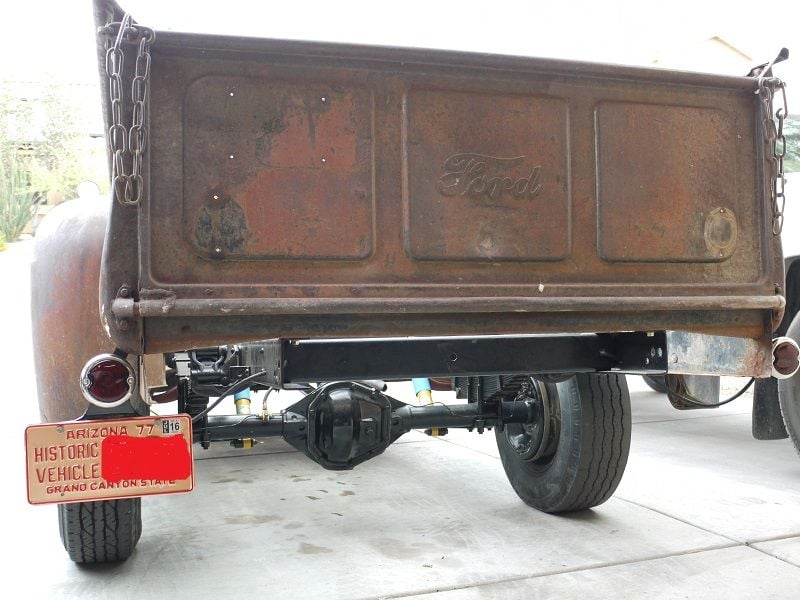
I don't like the way the back of my truck looks without a valance or bumper. I'm going to try to make a valance or whatever it's called and I'm need to know how they were attached?
Dimensions or pics of the back of it would be nice if anybody has them.
Here's a pic of another truck with the valance, roll pan, whatever it's called.
Dimensions or pics of the back of it would be nice if anybody has them.
Here's a pic of another truck with the valance, roll pan, whatever it's called.
#3
#4
Scott, I am in the same predicament as you are. I didn't even know the trim piece belonged there. That being said, I see that I have what I believe are the remnants of the trim piece that was welded to the inside of the bed sides with 3 spot welds. I also found 5 screws in the center of the cross member that sits below the tailgate which I think are the attachment points for the upper part of the trim panel. That cross member though is not flat across the bottom. It is an arc being longer on the sides near the stake pockets and then flattening at the center area (at least mine is). So, the trim piece I am making will hopefully look similar to a box top and be attached along the long length with screws to the cross member and then spot welded to the box sides on the 2 short lengths. I am still working out how to handle the arc though. I saw one at the Supernationals last week on a F3 and this is how his was attached.
#5
Thanks Stu, That helps a lot. I thought it was pretty flat. Now I see otherwise.
Doug, I was also wondering how they handled the gap where it has the arch. Looks like it just shows a gap.
I don't have access to a brake so it's going to be challenging for me to pull this off. I think I can do it though. I have WAY more time than money. I hope.
Doug, I was also wondering how they handled the gap where it has the arch. Looks like it just shows a gap.
I don't have access to a brake so it's going to be challenging for me to pull this off. I think I can do it though. I have WAY more time than money. I hope.
#6
Since the bed panel sits farther out (towards the rear of the truck) my idea is to make the trim panel "box" so it is tall enough to cover the gap created by the "arc" of the crossmember. The panel then is essentially positioned behind the crossmember and not under it. To attach the panel to the crossmember in the center (where the crossmember is flat and I found the 5 mounting screws) I will spot weld an angle piece to the back of the trim panel which extends back to the screw hole locations. Hard to describe but I think it will work and look good. Once I get it done I can shoot some pictures which should make my verbiage above make some sense I hope.
#7
I think it could be garage fabbed to look factory correct. Create the bottom edge first by clamping and hammering along a piece of angle iron, then clamp the upper edge to a piece of 3/4" black pipe and gradually roll and work the rounded edge. Glad all I will need to do is straighten mine. Stu
Trending Topics
#9
#10
#13
Scott, glad you and Stu got this thing worked out. Mine will be very similar but not exactly factory. I think that will work for me. Looking forward to seeing your pictures which should help out anyone else with this question. To keep from confusing anyone, I won't post my pictures which may lead someone astray. Good luck!
#15
Doug, I hope you DO post pics. Mine wont be factory either. I have to pull off the truck project for a little while to get some Honey-do's done. It'll be a while before I do this.
Stu, You are one of the most informative people on here. It just sucks when new guys like me spend a lot of time searching threads and get nowhere because there is no follow up. It starts out promising and ends up a dead end thread.
I really try to go back and update my threads whenever possible. Try to make my titles easy to search for also.
Scott


