Ford Releases TSB 15-0088 For 2015 Active Regeneration Jackhammer Valves Issue


#482
 03-26-2016, 01:08 PM


<table width="96%" border="3" cellspacing="0" cellpadding="3"><tbody><tr><td bgcolor="#0000ff" colspan="2"> [************]Printable View[/COLOR][************][/COLOR] </td></tr><tr><td width="25%" align="center" bgcolor="#ffffff">TSB 16-0041
</td><td width="65%" align="left" bgcolor="#ffffff">PICKUP - 6.7L DIESEL ENGINE - RUNS ROUGH DURING EXHAUST REGENERATION PROCESS - BUILT ON OR BEFORE 2/23/2016
</td></tr><tr><td bgcolor="#0000ff" colspan="2">[************]Publication Date: March 7, 2016 [/COLOR]</td></tr></tbody></table>
<table width="100%" border="0"><tbody><tr><td width="7%">FORD: </td><td>2015-2016 F-250, F-350, F-450
</td></tr></tbody></table>This article supersedes TSB 15-0106 to update the Issue Statement, Service Procedure and Part List.
ISSUE:
Some 2015-2016 F-Super Duty 250-450 Pickup vehicles equipped with a 6.7L diesel engine and built on or before 2/23/2016 may exhibit a runs rough/misfire condition only during the exhaust regeneration process. This condition typically occurs on light throttle tip in between 64-113 Km/h (40-70 MPH) and will not set diagnostic trouble codes (DTCs). The concern may be intermittent and a knocking noise may be present during the concern. ACTION:
Follow the Service Procedure steps to correct the condition. SERVICE PROCEDURE
<table border="1" cellspacing="0" cellpadding="3"><tbody><tr><th class="bottomborder">OPERATION</th><th class="bottomborder">DESCRIPTION</th><th class="bottomborder">TIME</th></tr><tr><td class="noborder">160041A</td><td class="noborder">2015-2016 F-Super Duty 250-450 Pickup 6.7L: Reprogram The PCM (Do Not Use With Any Other Labor Operations)</td><td class="noborder">0.4 Hr.</td></tr><tr><td class="noborder">160041B</td><td class="noborder">2015-2016 F-Super Duty 250-450 Pickup 6.7L: Reprogram The PCM And Replace Eight (8) Exhaust Valves In The Left Cylinder Head (Can Be Claimed With Operation C OR D) (Do Not Use With Any Other Labor Operation Outside Of This Article)</td><td class="noborder">15.4 Hrs.</td></tr><tr><td class="noborder">160041C</td><td class="noborder">2015-2016 F-Super Duty 250-450 Pickup 6.7L: If Required, Additional Time To Remove And Install Fuel Shield To Access Lifting Points (Can Be Claimed With Operation B) (Do Not Use With Any Other Labor Operations Outside Of This Article)</td><td class="noborder">0.1 Hr</td></tr><tr><td class="noborder">160041D</td><td class="noborder">2015-2016 F-Super Duty 250-450 Pickup (FX4 Model) 6.7L: If Required, Additional Time To Remove And Install Fuel Shield To Access Lifting Points (Can Be Claimed With Operation B) (Do Not Use With Any Other Labor Operation Outside Of This Article)</td><td class="noborder">0.3 Hr.</td></tr></tbody></table>
WARRANTY STATUS
Eligible Under Provisions Of New Vehicle Limited Warranty Coverage And Emissions Warranty Coverage.
Warranty/ESP coverage limits/policies/prior approvals are not altered by a TSB. Warranty/ESP coverage limits are determined by the identified causal part and verified using the OASIS part coverage tool.
DEALER CODING
<table border="1" cellspacing="0" cellpadding="3"><tbody><tr><th class="bottomborder">BASIC PART NO.</th><th class="bottomborder">CONDITION CODE</th></tr><tr><td class="noborder">6505 </td><td class="noborder">42 </td></tr></tbody></table>
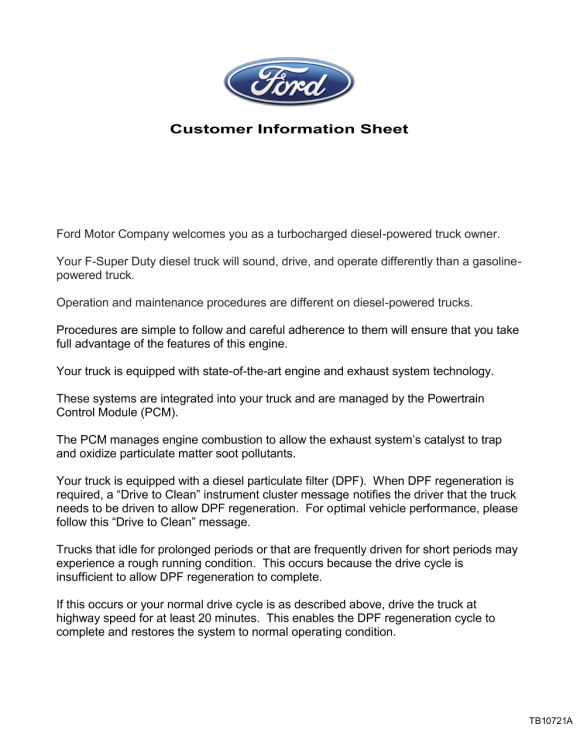
Figure 1 - 16-0041
NOTE: The information in Technical Service Bulletins is intended for use by trained, professional technicians with the knowledge, tools, and equipment to do the job properly and safely. It informs these technicians of conditions that may occur on some vehicles, or provides information that could assist in proper vehicle service. The procedures should not be performed by "do-it-yourselfers". Do not assume that a condition described affects your car or truck. Contact a Ford or Lincoln dealership to determine whether the Bulletin applies to your vehicle. Warranty Policy and Extended Service Plan documentation determine Warranty and/or Extended Service Plan coverage unless stated otherwise in the TSB article. The information in this Technical Service Bulletin (TSB) was current at the time of printing. Ford Motor Company reserves the right to supercede this information with updates. The most recent information is available through Ford Motor Company's on-line technical resources.
Copyright � 2016 Ford Motor Company
[************]Printable View[/COLOR][************][/COLOR] </td></tr><tr><td width="25%" align="center" bgcolor="#ffffff">TSB 16-0041</td><td width="65%" align="left" bgcolor="#ffffff">PICKUP - 6.7L DIESEL ENGINE - RUNS ROUGH DURING EXHAUST REGENERATION PROCESS - BUILT ON OR BEFORE 2/23/2016
</td></tr><tr><td bgcolor="#0000ff" colspan="2">[************]Publication Date: March 7, 2016 [/COLOR]</td></tr></tbody></table>
<table width="100%" border="0"><tbody><tr><td width="7%">FORD: </td><td>2015-2016 F-250, F-350, F-450
</td></tr></tbody></table>This article supersedes TSB 15-0106 to update the Issue Statement, Service Procedure and Part List.
ISSUE:
Some 2015-2016 F-Super Duty 250-450 Pickup vehicles equipped with a 6.7L diesel engine and built on or before 2/23/2016 may exhibit a runs rough/misfire condition only during the exhaust regeneration process. This condition typically occurs on light throttle tip in between 64-113 Km/h (40-70 MPH) and will not set diagnostic trouble codes (DTCs). The concern may be intermittent and a knocking noise may be present during the concern. ACTION:
Follow the Service Procedure steps to correct the condition. SERVICE PROCEDURE
- Reprogram the powertrain control module (PCM) to the latest calibration using Integrated Diagnostic System (IDS) release 99.03 or higher. Make sure you are connected to the internet when entering module programming to obtain the latest updates. Calibration files may also be obtained at www.motorcraftservice.com
- Did the customer indicate the message center displayed a Cleaning Exhaust Filter message prior to the concern?
- Yes - proceed to Step 3.
- No - proceed to Step 6.
- Remove the left cylinder head. Refer to Workshop Manual (WSM), Section 303-01.
- Replace all eight (8) exhaust valves and valve seals. Refer to WSM, Section 303-01. (Figure 1)

Figure 1 - 16-0041
- Install the left cylinder head. Refer to WSM, Section 303-01.
- Provide the customer with a copy of the attached customer information sheet. (Figure 2)
<table border="1" cellspacing="0" cellpadding="3"><tbody><tr><th class="bottomborder">OPERATION</th><th class="bottomborder">DESCRIPTION</th><th class="bottomborder">TIME</th></tr><tr><td class="noborder">160041A</td><td class="noborder">2015-2016 F-Super Duty 250-450 Pickup 6.7L: Reprogram The PCM (Do Not Use With Any Other Labor Operations)</td><td class="noborder">0.4 Hr.</td></tr><tr><td class="noborder">160041B</td><td class="noborder">2015-2016 F-Super Duty 250-450 Pickup 6.7L: Reprogram The PCM And Replace Eight (8) Exhaust Valves In The Left Cylinder Head (Can Be Claimed With Operation C OR D) (Do Not Use With Any Other Labor Operation Outside Of This Article)</td><td class="noborder">15.4 Hrs.</td></tr><tr><td class="noborder">160041C</td><td class="noborder">2015-2016 F-Super Duty 250-450 Pickup 6.7L: If Required, Additional Time To Remove And Install Fuel Shield To Access Lifting Points (Can Be Claimed With Operation B) (Do Not Use With Any Other Labor Operations Outside Of This Article)</td><td class="noborder">0.1 Hr</td></tr><tr><td class="noborder">160041D</td><td class="noborder">2015-2016 F-Super Duty 250-450 Pickup (FX4 Model) 6.7L: If Required, Additional Time To Remove And Install Fuel Shield To Access Lifting Points (Can Be Claimed With Operation B) (Do Not Use With Any Other Labor Operation Outside Of This Article)</td><td class="noborder">0.3 Hr.</td></tr></tbody></table>
WARRANTY STATUS
Eligible Under Provisions Of New Vehicle Limited Warranty Coverage And Emissions Warranty Coverage.
Warranty/ESP coverage limits/policies/prior approvals are not altered by a TSB. Warranty/ESP coverage limits are determined by the identified causal part and verified using the OASIS part coverage tool.
DEALER CODING
<table border="1" cellspacing="0" cellpadding="3"><tbody><tr><th class="bottomborder">BASIC PART NO.</th><th class="bottomborder">CONDITION CODE</th></tr><tr><td class="noborder">6505 </td><td class="noborder">42 </td></tr></tbody></table>
Figure 1 - 16-0041
NOTE: The information in Technical Service Bulletins is intended for use by trained, professional technicians with the knowledge, tools, and equipment to do the job properly and safely. It informs these technicians of conditions that may occur on some vehicles, or provides information that could assist in proper vehicle service. The procedures should not be performed by "do-it-yourselfers". Do not assume that a condition described affects your car or truck. Contact a Ford or Lincoln dealership to determine whether the Bulletin applies to your vehicle. Warranty Policy and Extended Service Plan documentation determine Warranty and/or Extended Service Plan coverage unless stated otherwise in the TSB article. The information in this Technical Service Bulletin (TSB) was current at the time of printing. Ford Motor Company reserves the right to supercede this information with updates. The most recent information is available through Ford Motor Company's on-line technical resources.


#484
03-26-2016, 01:21 PM
#485
03-26-2016, 02:13 PM
#486
03-26-2016, 02:19 PM
#487
03-26-2016, 03:19 PM

I notice the valve replacements are rev B. Different material, specs? Also there is a date certain after which they don't think this is a problem. B rev valves as of that date?
#489
03-26-2016, 04:35 PM
#490
03-27-2016, 12:36 PM
#491
03-27-2016, 12:39 PM
Right, I get that regen occurs on that side. But why does jackhammering on regen mean they need to be replaced, and jackhammering without that message means they don't?
What about the old PCM calibration is damaging valves?
Paging @Pocket.
What about the old PCM calibration is damaging valves?
Paging @Pocket.
#492
03-27-2016, 02:38 PM
Originally Posted by TSB 16-0048
Provide the customer with a copy of the attached customer information sheet. (Figure 2)
#493
03-27-2016, 03:21 PM
Mine hasn't acted up since October. I think I'll see how it does as it warms up this spring. I'm not wild about having a new truck torn down and I sure don't want to be first. Hopefully it worked itself out... For those of you that have his issue I would defiantly pursue an extended warranty from Ford. If anything it will give more time to see if the bug is really worked out. Will this TSB apply to trucks outside of factory warranty periods. Would it be covered under the engine portion? I've got a buddy with the issue over 36k miles.

#495
03-28-2016, 01:09 PM

As suspected, there is no PCM 'Recalibration' Fix for this issue, it is a complete rebuild of the head, and if you are going to go that route, you best insist on an entirely new head to save yourself further grief.
I still have suspicion that the 20,000 early 2015 engines that showed up defective during testing around the factory in January 2014 is related to this issue. Per my source that is both trustworthy and reliable, Ford pulled engines out of trucks awaiting shipment and replaced them and those along with others that were rebuilt prior to being added back to the manufactured truck pool. Ford obviously was smart enough not to add all of these engines back in at once, but instead, gradually has been adding them back to the pool. Truck manufacturer date can not be used to pin this down.
For myself, my issue was one if not the first to be reported in September 2014 2.5 months in at 4100 miles. The issue continued for 14 months. Starting around 29,000 miles in November 2015 (5 months ago), my issue has not reoccurred and I have recently tried to force the issue with low tip-in during regeneration and it does not re-occur for now. Will that hold? I can only hope so. Some have theorized the issue is more prevalent with warm temperatures. I have no certain proof that ambient temperature has anything to do with it.
What has changed? My assumption is that perhaps my valves and/or valve guides have perhaps gradually worn in to help with the issue. Other than that, I have tried everything:
Ford Motorcraft Cetane Additive
Archoil AR6200 Diesel Fuel Catalyst
Archoil AR9200 Oil Additive
Full Synthetic 5w-40w Motorcraft Oil
Opti-Lube Cetane Additive
Opti-Lube Summer and Winter Formula
If someone has access to the PDF for the TSB, could you please post it?
I have asked my purchasing dealer to get a PDF copy of it.
Good luck to everyone dealing with this issue.
I enjoy my Ford Truck but this issue has been a tough one for those that have gotten an engine that has head/valve issues causing this problem.
Also, strength and honor goes to give credit where credit is due. Maryland Dieselnick has been providing consulting services to some owners and to some Ford dealerships dealing with this issue. Nic has been spot on since day one that this is a valve issue and that only replacing the complete head/valve assembly provides hope of actually fixing the mechanical issue. Other individuals have been of help also, but Nic has been stellar in helping some of us with this issue.
Updated:
I have updated my post with the actual PDF of the TSB that clears up confusion on the Steps to Follow.
Regarding the PCM reprogramming part of the steps, the TSB, as generally expected, does not say what the PCM reprogramming actually does. If anyone has any knowledge of this on this TSB, could it be posted.
It is apparent there are 2 paths:
1: If a truck has not exhibited the valve condition, the PCM Strategy Change may prevent it from occurring (Just how, the TSB does not say) (This information is critical but not provided)
2: If the truck currently has the valve issue, apply the PCM change AND rebuild the valves in the head. However, I would push to get a complete new head even if you have to pay for it yourself.
Thanks