
6.9L IDI Diesel Install in an F150
#1
 05-17-2015, 06:14 PM

6.9L IDI Diesel Install in an F150
Evenin folks!
So I see this question float around here everynow and then, about how much work is it to put an IDI Diesel in an F150/Bronco.
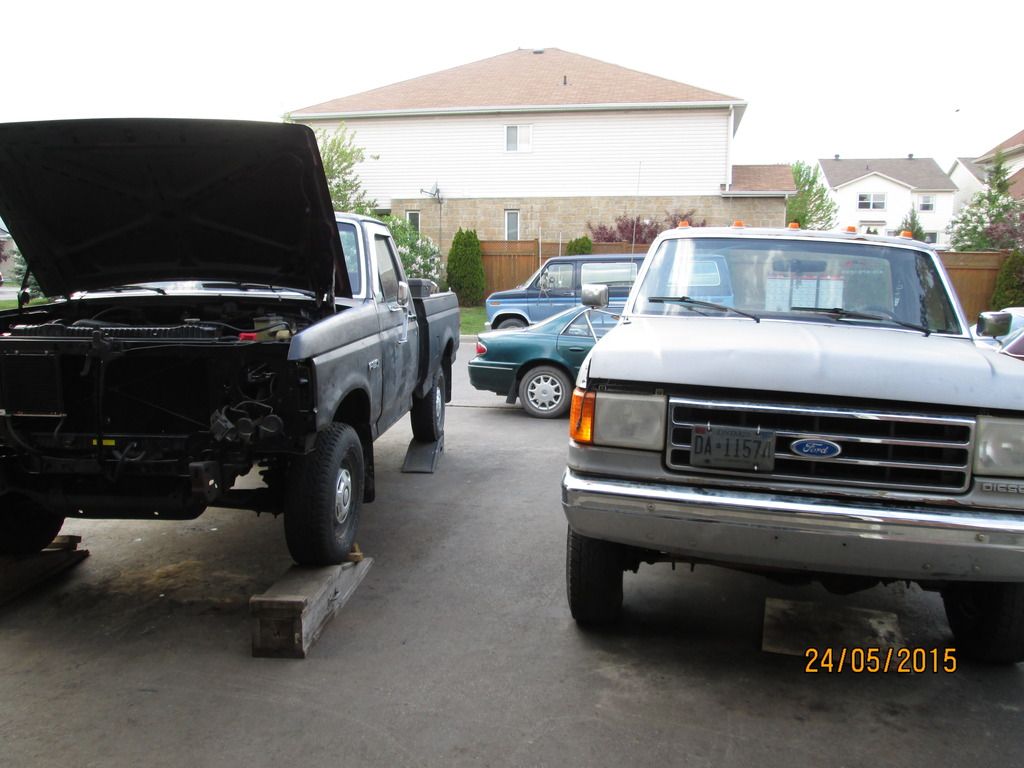
Well you're in luck, me and my dad are in progress of doing it.
Couple details first,
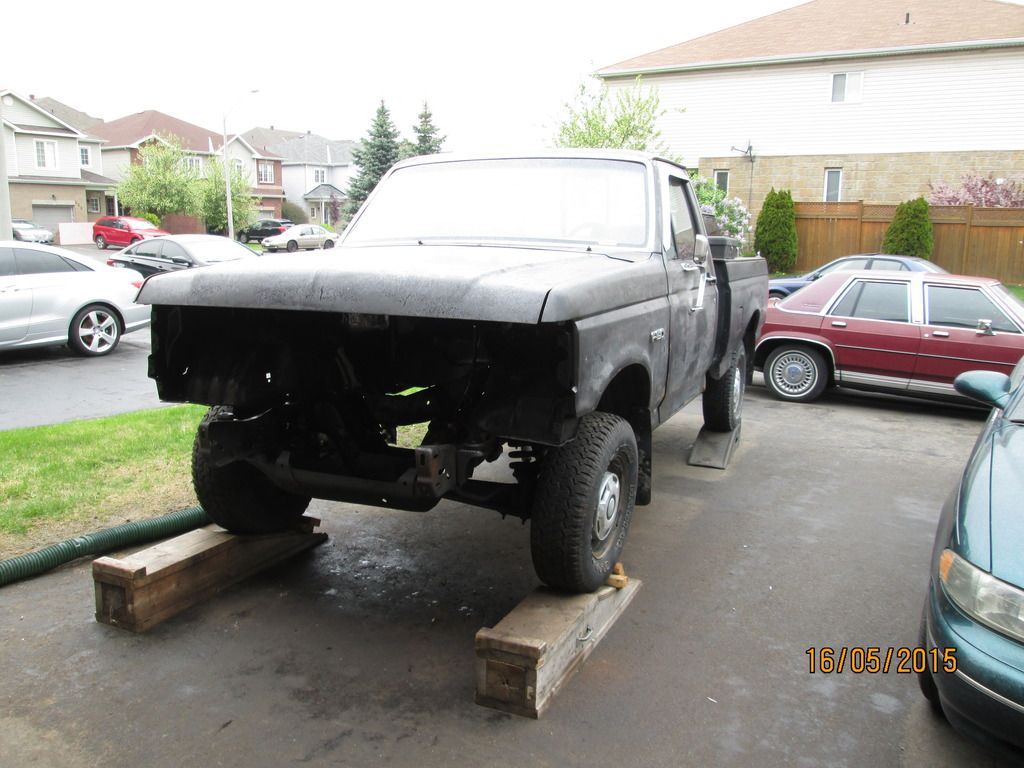
The engine is a 6.9L out of a 1986 F250 4x4, C6 auto. It is unrebuilt. Only 100% resealed and re-painted, only has 203,000km (126k miles) on it, and looked brand new on the inside, so no rebuilt needed.
The truck that the engine is going in, is a 1989 F150, 2wd, that originally had a 300 Straight 6, C6 auto.
Now before we start, it's not that hard of a project, and infact, 90% of it is all bolt in stuff. It does take time though.
I didn't take any pics when we pulled the 6cyl out of it, but nothing to see there, disconnect all engine bat wiring from cab, throw over engine, unbolt mounts, and tranny mounts, and pull it out as one piece, engine and tranny.
Remove front clip and hood ofcourse. This truck needed a new rad support anyways, the new one, witch is a gasser one, is modified to fit a Diesel radiator, from down south. I will post pics later on, on how to mod a gas rad support to fit a diesel rad, it's very easy actually.
Here we go!
Here is the truck with the engine bay all empty and ready to receive it's new heart and soul!
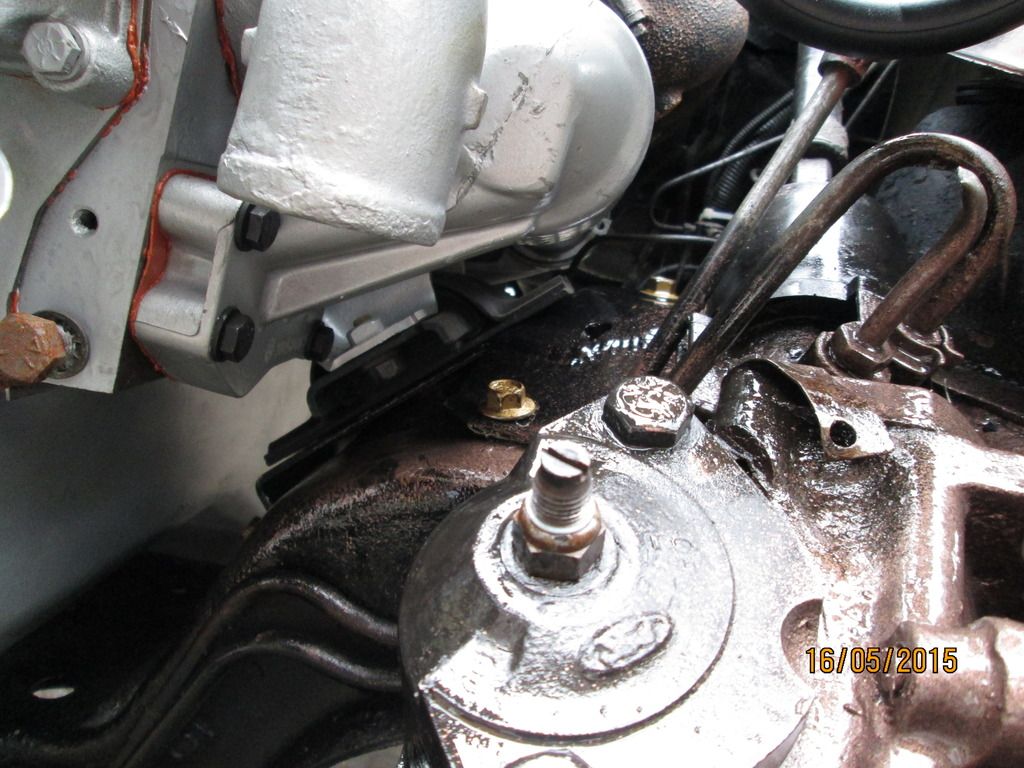
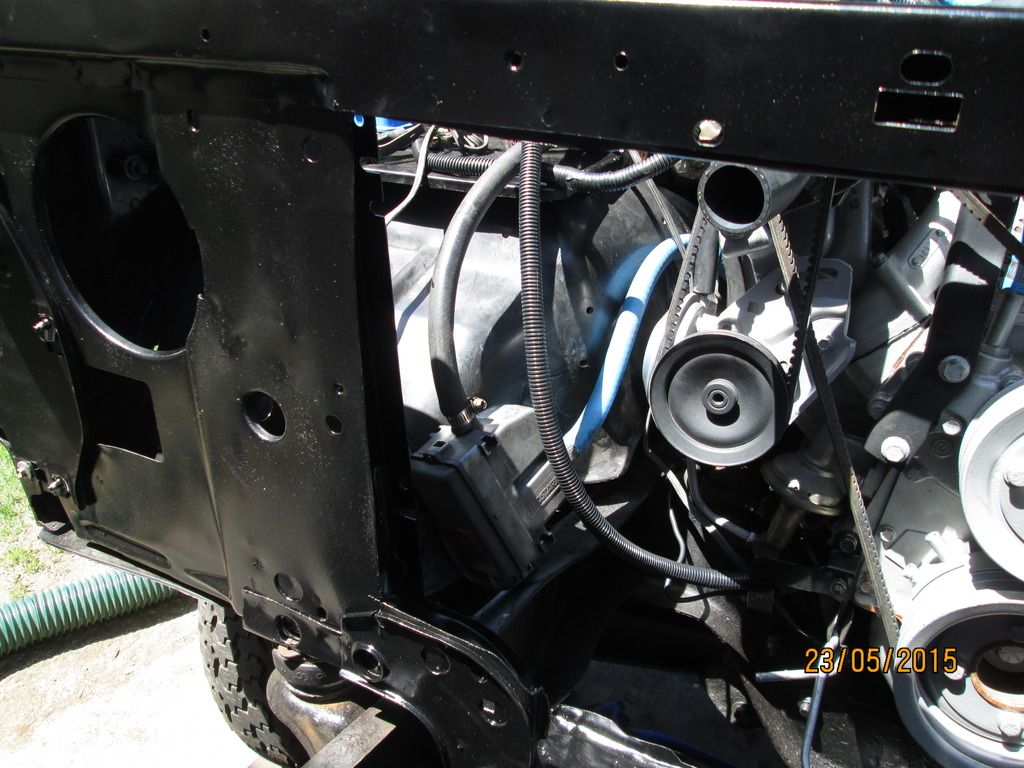
You will need the Diesel engine frame Perches, for the motor mounts from the diesel donor truck. On the passengers side, it's a direct bolt in to the gas frame.
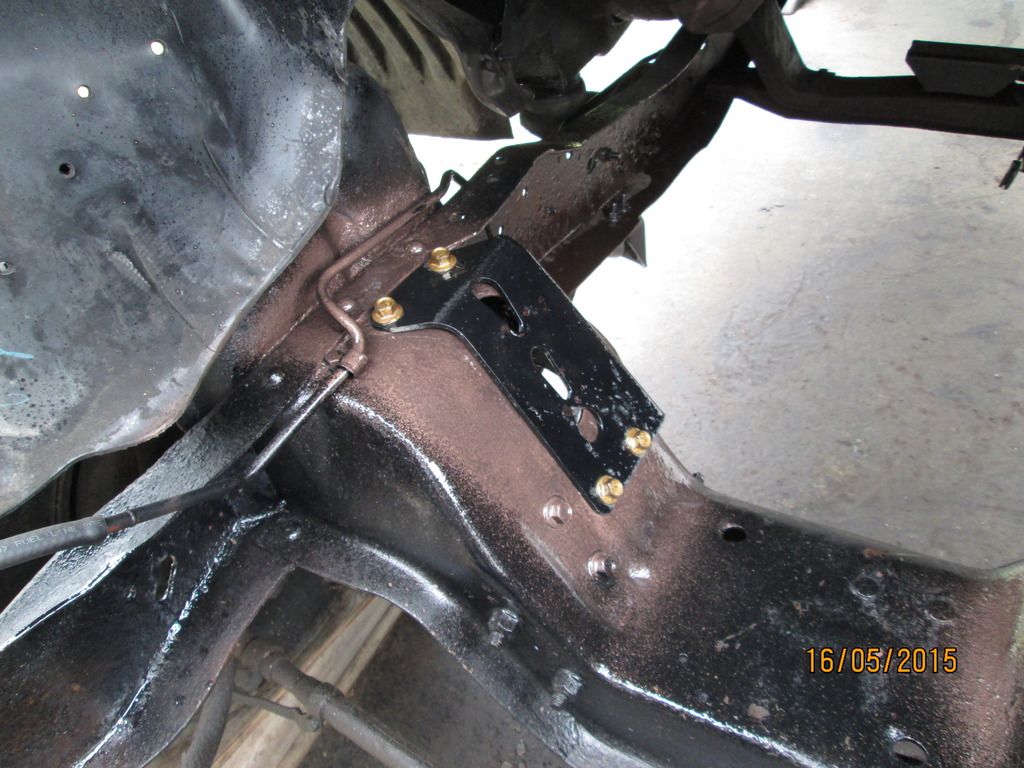
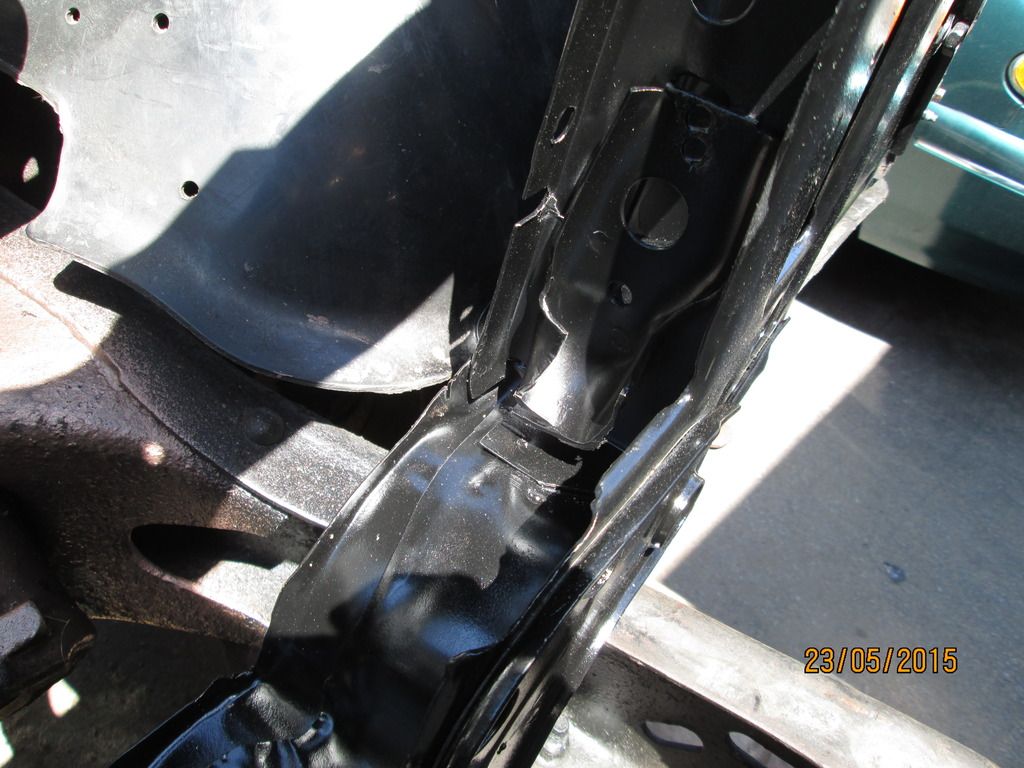
Now on the drivers side, only the top bolt lines up, you will need to drill out the 2 bottom holes in the gas frame, and also weld/add a plate to the engine perch, to cover up the V8 gasser oil filter access hole in the frame, and add another bolt like I did here. I used 1/4 thick steel plate. Do not cheap out on this, the diesels use 4 bolts per perch, make sure you have 4 per perch, lots of Torque to hold down!
Heres a close up of the plate,

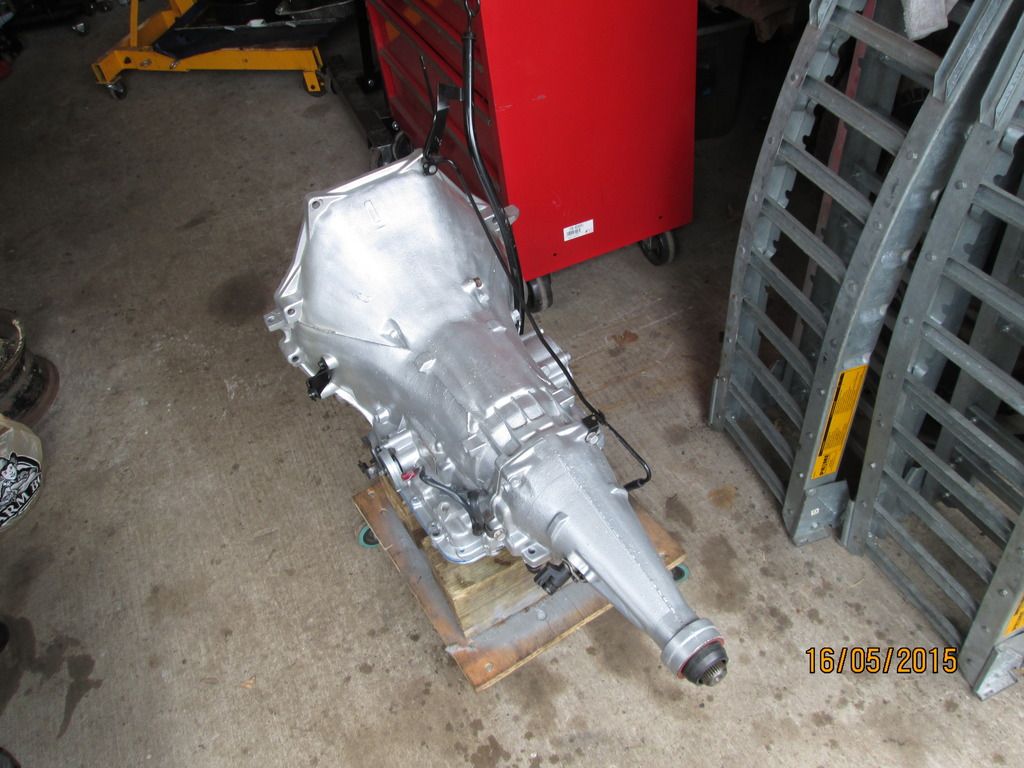
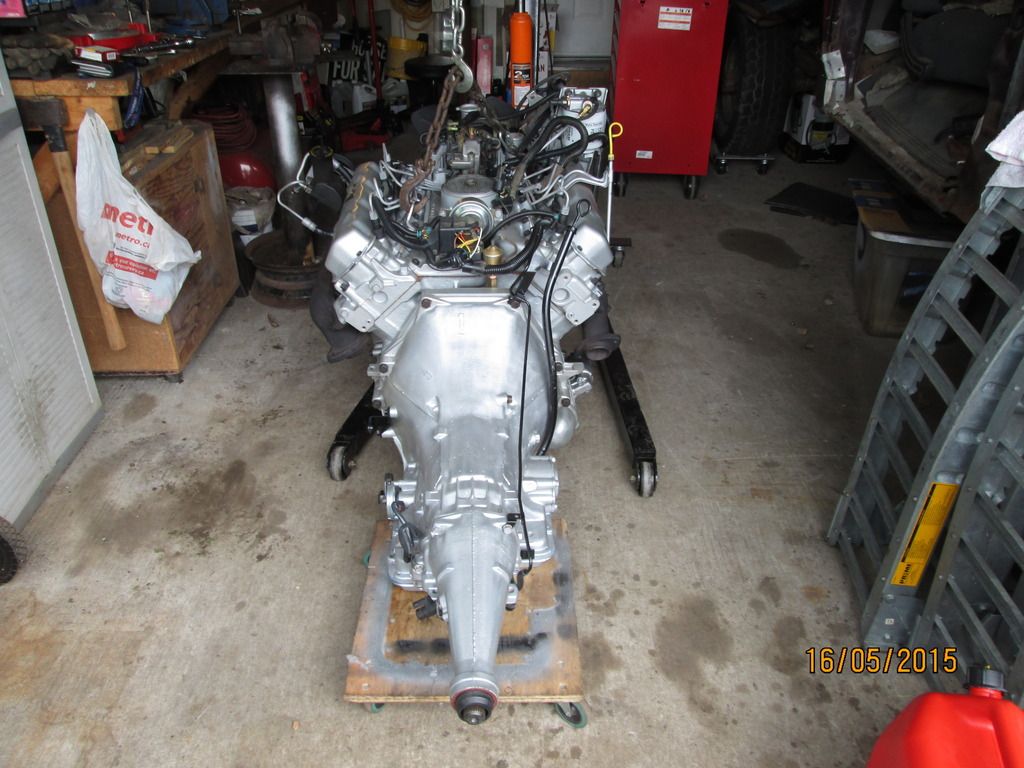
And the tranny I am using, is a U-Haul rebuilt 2wd C6. Yes i'm using a 3 speed C6, because I want a cheap, but reliable driveline.
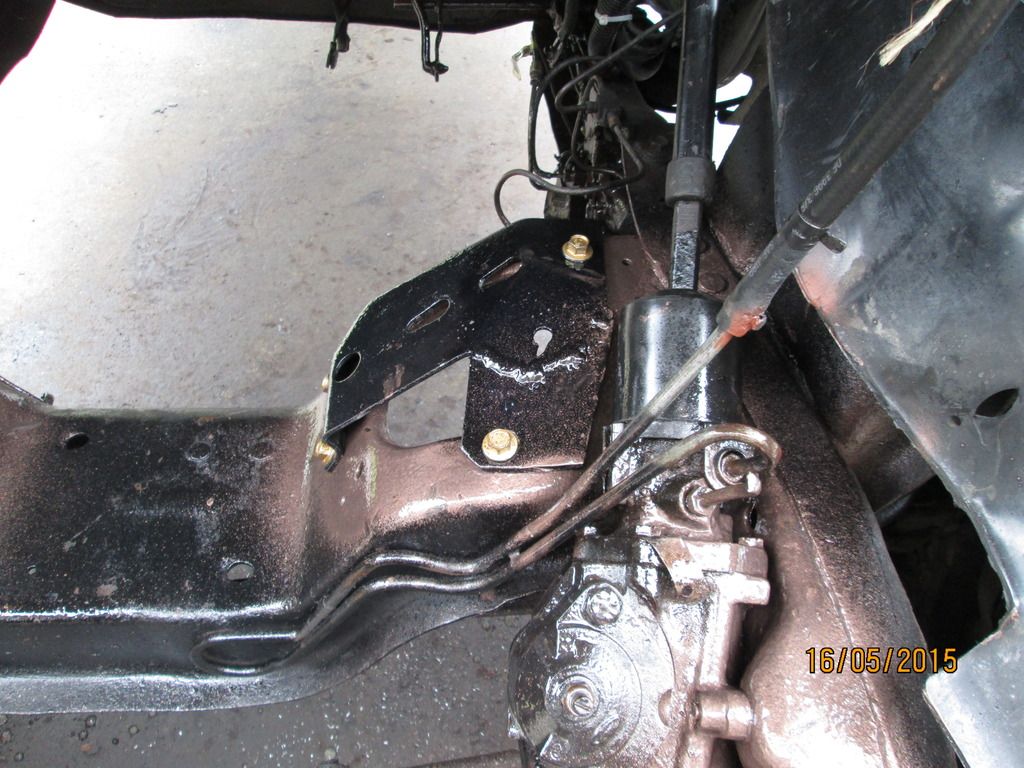
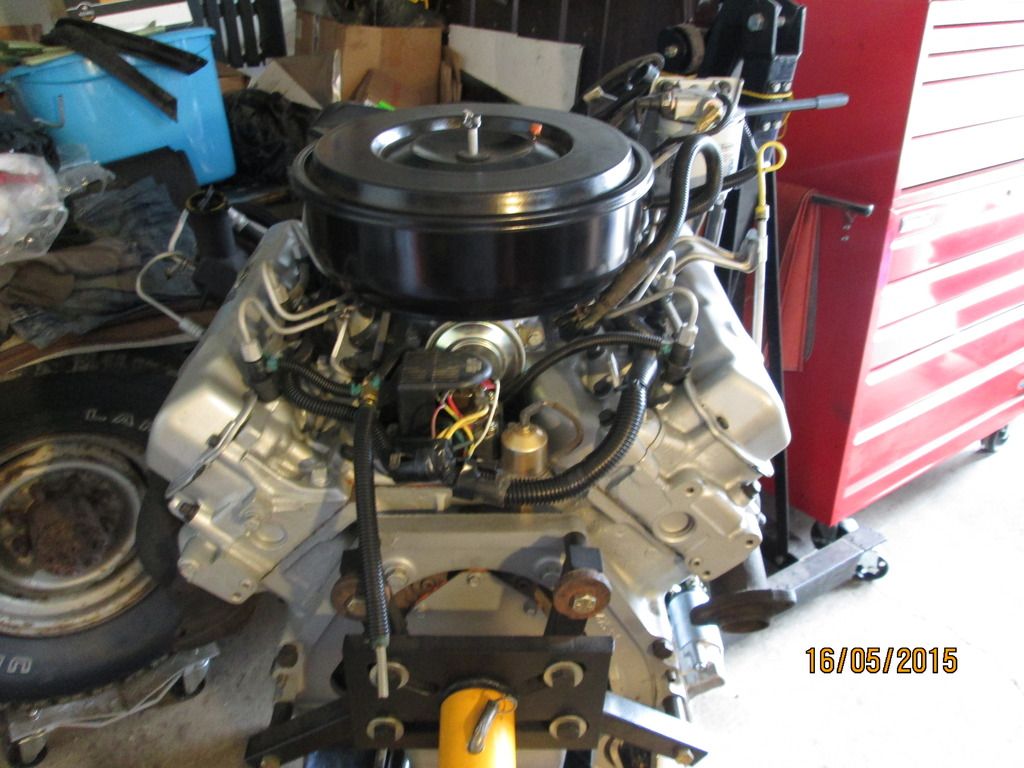
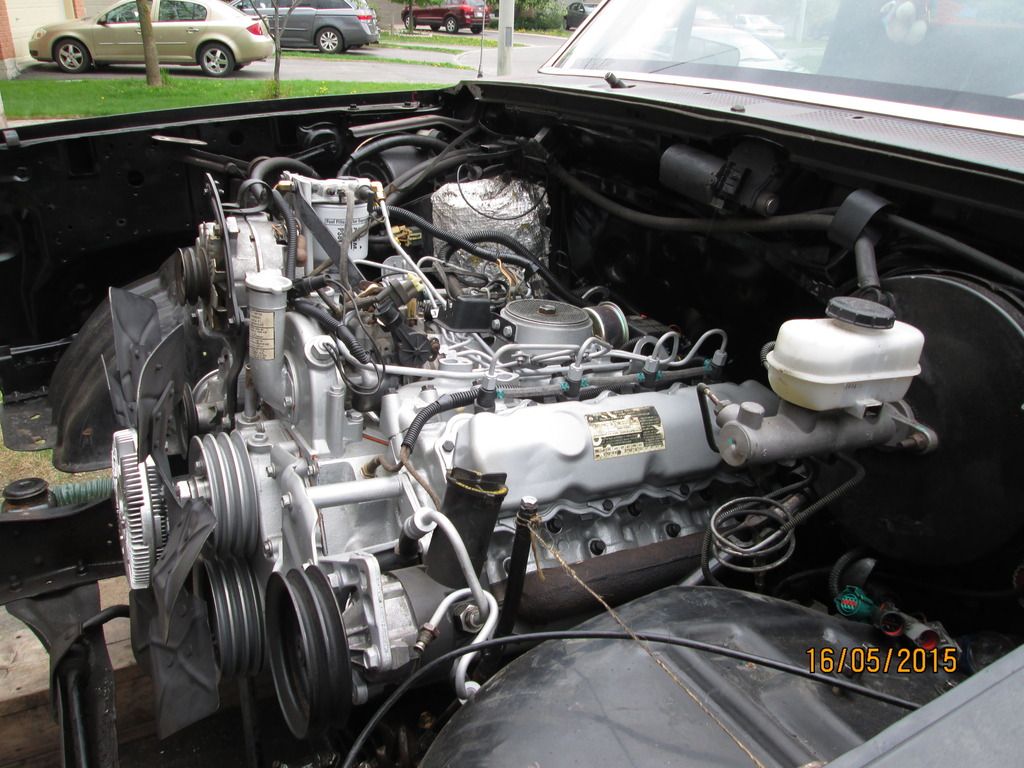
Heres the engine, I put all new injectors and glow plugs on it. Pump and starter was already new when I bought it. I upgraded to the 7.3 IDI Solid State glow plug system, and 7.3 rocker arms, they are better design than the 6.9 ones.
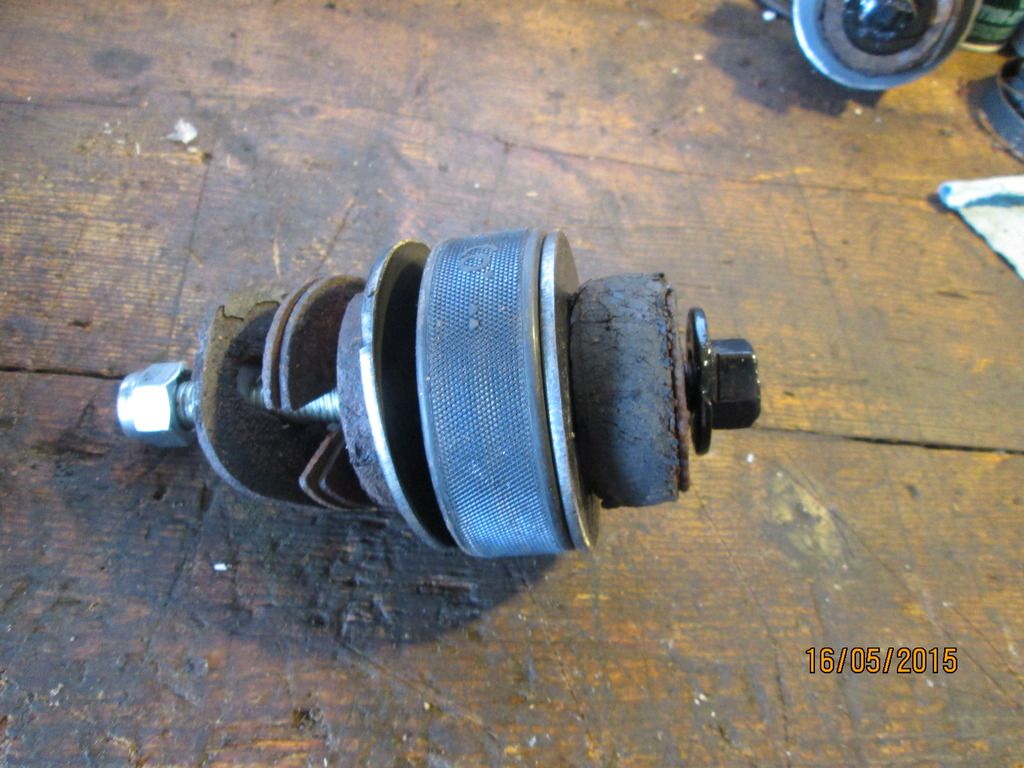
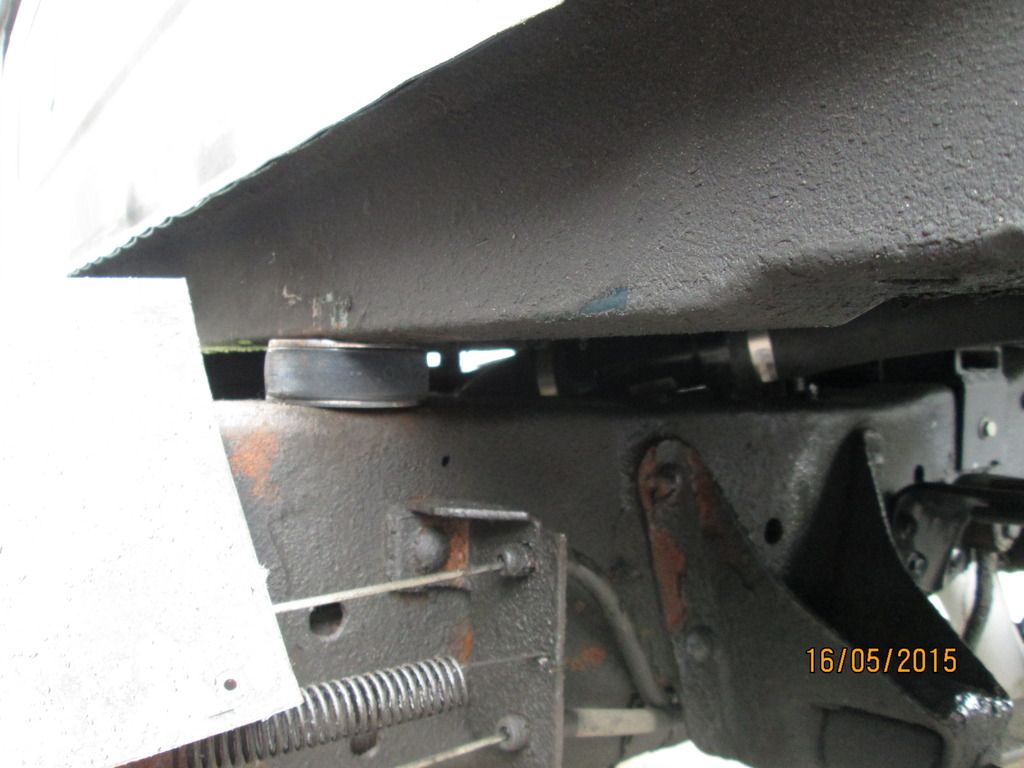
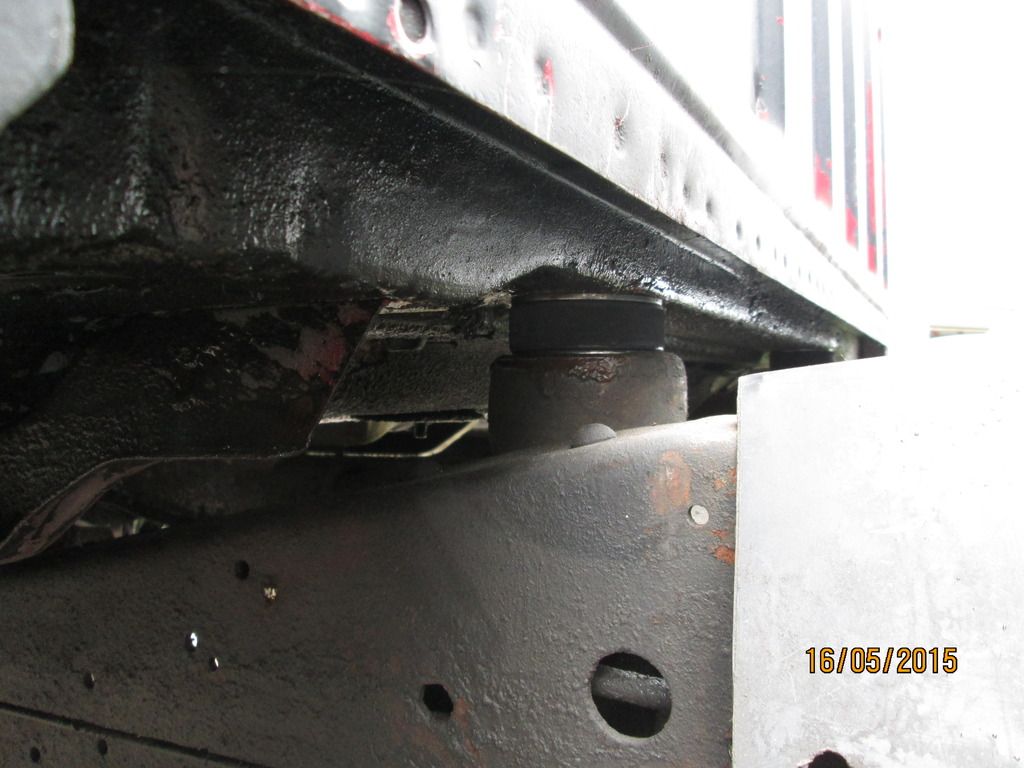
My dad also made a home made cheap 1" body lift using hockey pucks. Incase in the future he wants to add a turbo to it, gives more room between the engine and firewall for the downpipe.
These are for the rad support.
Transmission mated up to the engine, ready to drop in, in one piece.
And shes bolted in!
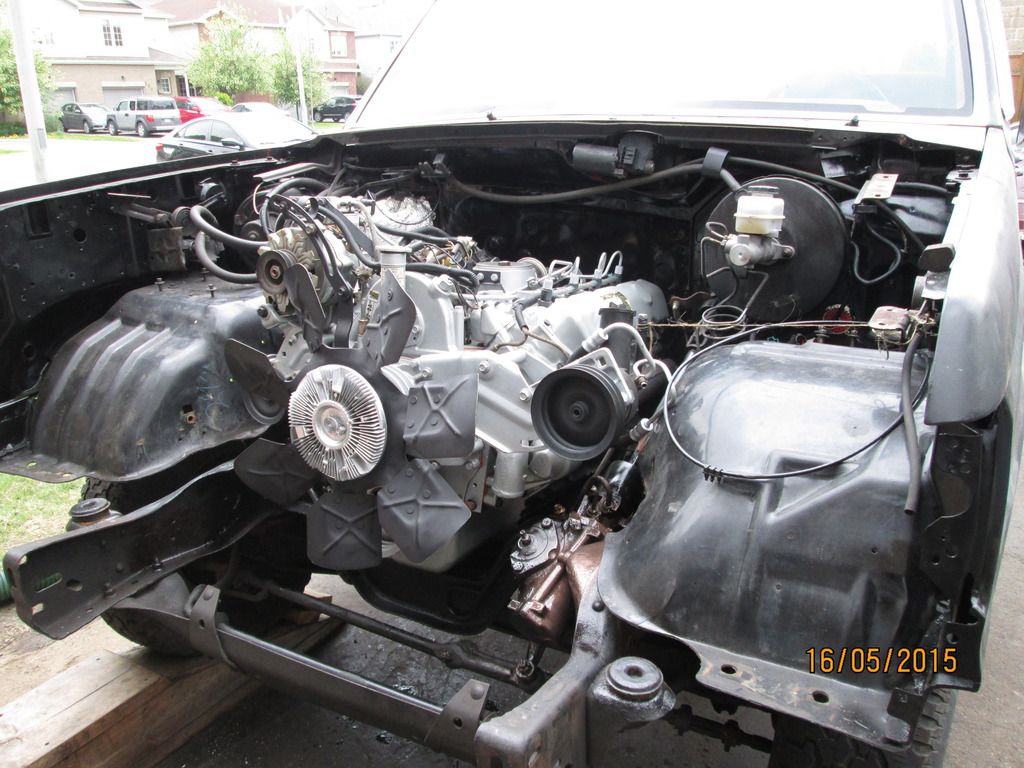
Nothing needed to be done for transmission cross member or mounts for me, as this truck originally had a C6 behind the 6cyl gas job, so the diesel C6 slipped right in the original spot.
And thats as far as were at right now.
Suspension is all done as well. Installed some used 1 ton coil springs, from a 1990 F350 2wd flat bed Diesel truck, they are a direct bolt in place of the original half ton springs.
And the fuel system is all done, Diesel sender units in the tanks, kepted the original front gasser tank, and installed a Bronco, 38 gallon rear tank.
This truck is a 1 tank truck, and still is, but has an added rear Bronco 38 gallon tank, witch is NOT connected to the engine, I installed a diesel electric fuel pump, and lines, going into the front tank. So when the front tank runs low, I just flick a switch, and fuel will transfer from the big rear tank, into the front one. It was easier in my situation to do this, than finding a real original dual tank fuel system from a donor truck.
That's it for now, I will update this as I go along. Now my dad will be making progress without me, i'm an OTR truck driver, and i'm only home on weekends.
So I see this question float around here everynow and then, about how much work is it to put an IDI Diesel in an F150/Bronco.
Well you're in luck, me and my dad are in progress of doing it.
Couple details first,
The engine is a 6.9L out of a 1986 F250 4x4, C6 auto. It is unrebuilt. Only 100% resealed and re-painted, only has 203,000km (126k miles) on it, and looked brand new on the inside, so no rebuilt needed.
The truck that the engine is going in, is a 1989 F150, 2wd, that originally had a 300 Straight 6, C6 auto.
Now before we start, it's not that hard of a project, and infact, 90% of it is all bolt in stuff. It does take time though.
I didn't take any pics when we pulled the 6cyl out of it, but nothing to see there, disconnect all engine bat wiring from cab, throw over engine, unbolt mounts, and tranny mounts, and pull it out as one piece, engine and tranny.
Remove front clip and hood ofcourse. This truck needed a new rad support anyways, the new one, witch is a gasser one, is modified to fit a Diesel radiator, from down south. I will post pics later on, on how to mod a gas rad support to fit a diesel rad, it's very easy actually.
Here we go!
Here is the truck with the engine bay all empty and ready to receive it's new heart and soul!

You will need the Diesel engine frame Perches, for the motor mounts from the diesel donor truck. On the passengers side, it's a direct bolt in to the gas frame.

Now on the drivers side, only the top bolt lines up, you will need to drill out the 2 bottom holes in the gas frame, and also weld/add a plate to the engine perch, to cover up the V8 gasser oil filter access hole in the frame, and add another bolt like I did here. I used 1/4 thick steel plate. Do not cheap out on this, the diesels use 4 bolts per perch, make sure you have 4 per perch, lots of Torque to hold down!

Heres a close up of the plate,

And the tranny I am using, is a U-Haul rebuilt 2wd C6. Yes i'm using a 3 speed C6, because I want a cheap, but reliable driveline.

Heres the engine, I put all new injectors and glow plugs on it. Pump and starter was already new when I bought it. I upgraded to the 7.3 IDI Solid State glow plug system, and 7.3 rocker arms, they are better design than the 6.9 ones.

My dad also made a home made cheap 1" body lift using hockey pucks. Incase in the future he wants to add a turbo to it, gives more room between the engine and firewall for the downpipe.
These are for the rad support.


Transmission mated up to the engine, ready to drop in, in one piece.

And shes bolted in!


Nothing needed to be done for transmission cross member or mounts for me, as this truck originally had a C6 behind the 6cyl gas job, so the diesel C6 slipped right in the original spot.
And thats as far as were at right now.
Suspension is all done as well. Installed some used 1 ton coil springs, from a 1990 F350 2wd flat bed Diesel truck, they are a direct bolt in place of the original half ton springs.
And the fuel system is all done, Diesel sender units in the tanks, kepted the original front gasser tank, and installed a Bronco, 38 gallon rear tank.
This truck is a 1 tank truck, and still is, but has an added rear Bronco 38 gallon tank, witch is NOT connected to the engine, I installed a diesel electric fuel pump, and lines, going into the front tank. So when the front tank runs low, I just flick a switch, and fuel will transfer from the big rear tank, into the front one. It was easier in my situation to do this, than finding a real original dual tank fuel system from a donor truck.
That's it for now, I will update this as I go along. Now my dad will be making progress without me, i'm an OTR truck driver, and i'm only home on weekends.
#2
05-17-2015, 08:51 PM

Posting Guru
#3
05-18-2015, 07:33 AM
Nice...
Fwiw, the "laycock" od unit can be found on old square body volvos. It's almost identical to the gear vendor, and gear vendor services them and sells parts for them. All you'd need is an adapter from gear vendor, and run your own switch for the od unless you want to buy a controller also from gv. Controller isn't really necessary, so for a few hundred bucks you can have od w/ your strong c6. That doesn't include shortening your driveshaft of course.
Fwiw, the "laycock" od unit can be found on old square body volvos. It's almost identical to the gear vendor, and gear vendor services them and sells parts for them. All you'd need is an adapter from gear vendor, and run your own switch for the od unless you want to buy a controller also from gv. Controller isn't really necessary, so for a few hundred bucks you can have od w/ your strong c6. That doesn't include shortening your driveshaft of course.
#4
05-24-2015, 05:34 PM
#5
05-24-2015, 06:31 PM
So heres how to modifie a GAS Rad support, to fit a DIESEL radiator.
You can only use the 2nd style of diesel rad, the short, wide one.
You must cut off the front plate off all the way to the mount tower, like so, if you look closer, you see the cuts.
Then cut off the gasser rad drop in brackets, where the gasser rad would normally slide down into.
And last thing, bend up the top lip of the support like so, if you do not do this, the rad will still drop in, but it's so tight, the radiator rubs on the lip, and will eat through or form rust/corrosion at the long run.
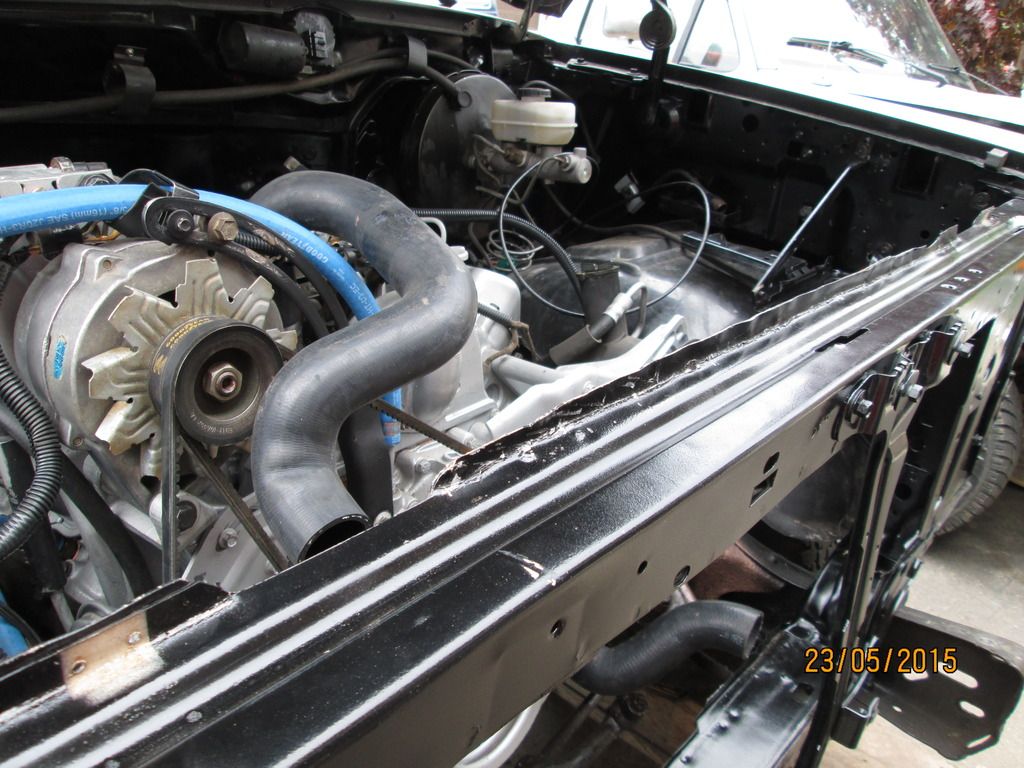
And voila! Radiator dropped right no effort needed.
Tranny cooler for my C6!
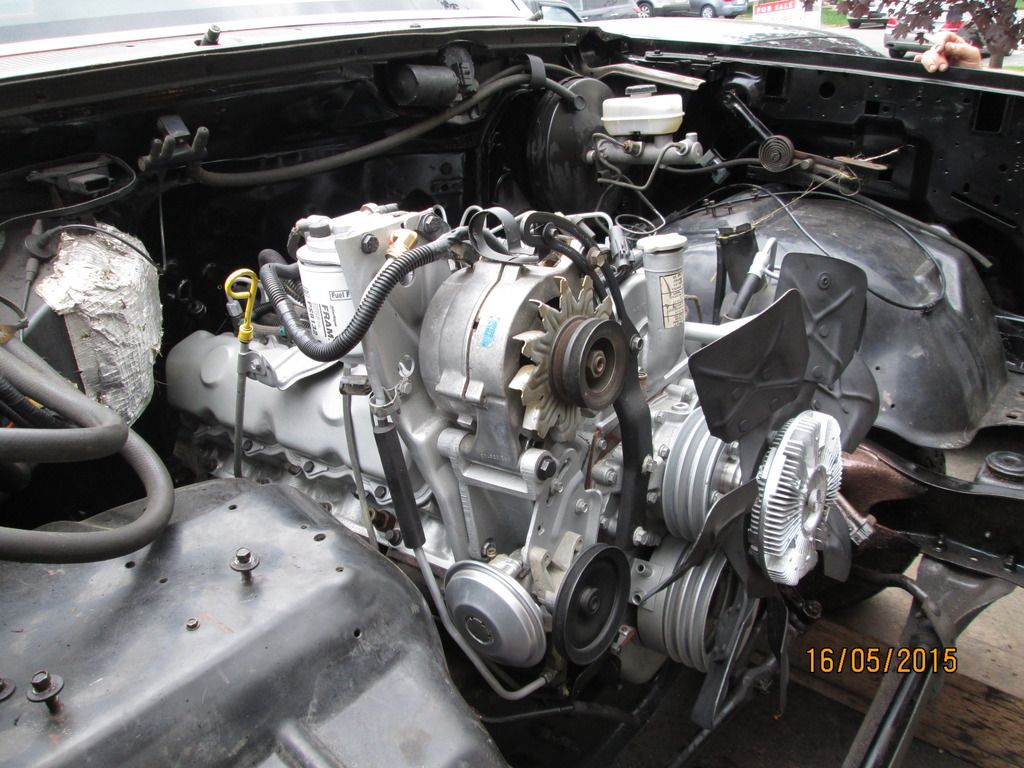
And engine bay is complete now, only got a few little wires here and there to finish plugging and hooking up, but everything is there, and fits.
Also got brand new positive battery cables, and ground cables.
Now what helps alot, is having another truck right beside the project truck, to help see where everything plugs and goes. During the whole time I had my '91 F350 4x4 7.3 right beside, it was a big help.
So now, all there is to do, is fuel it up, fill the transmission, engine, and cooling system with fluids, and get 2 new batteries, I'll be doing that this week along with putting the bumper and lights back on, and next weekend, prime it, fire it up and go for a rip!
You can only use the 2nd style of diesel rad, the short, wide one.
You must cut off the front plate off all the way to the mount tower, like so, if you look closer, you see the cuts.

Then cut off the gasser rad drop in brackets, where the gasser rad would normally slide down into.

And last thing, bend up the top lip of the support like so, if you do not do this, the rad will still drop in, but it's so tight, the radiator rubs on the lip, and will eat through or form rust/corrosion at the long run.

And voila! Radiator dropped right no effort needed.

Tranny cooler for my C6!

And engine bay is complete now, only got a few little wires here and there to finish plugging and hooking up, but everything is there, and fits.

Also got brand new positive battery cables, and ground cables.

Now what helps alot, is having another truck right beside the project truck, to help see where everything plugs and goes. During the whole time I had my '91 F350 4x4 7.3 right beside, it was a big help.

So now, all there is to do, is fuel it up, fill the transmission, engine, and cooling system with fluids, and get 2 new batteries, I'll be doing that this week along with putting the bumper and lights back on, and next weekend, prime it, fire it up and go for a rip!
#6
06-06-2015, 04:46 PM
Ok so first week report!
Some small issues, witch i've finished fixing today. Had to replace all the seals and O-rings, including the tire valve in the fuel filter head. Was sweating there, and loosing prime. Also, a damaged injector return line O-ring was leaking, also causing to loose prime.
And now, something I completely forgot about, I'm stuck fueling up the truck by jerry can, as I didn't replace the smaller gasser filler hole in the bed.
And I will need a wheel alignment, my front wheels are just a little like this \--/ the 1 ton springs are exactly the same height as the half ton ones, I did put them side by side to see, but I guess the axle has a slightly different bend on the 1 ton than the half ton. The stock Camber adjusters should be enough to bring them back straight though.
Otherwise, runs great, drives great, feels really heavy now compared to before. I am still running on P rated car tires, stock size 235/75R15 witch are 28" tall.
Need a new tach sensor, as my tach reads to low. Still revving around 2k RPM at 55-60mph, with 2.73 gears, but don't forget 28" tall tires...
Also, for those curious, the GAS CLUSTER WORKS with diesel wiring. I DID NOT do any wiring work at all in the cab, I simply hooked up everything on the firewall from the diesel harness in the engine bay, and everything inside the cab works just like before. I do have the proper diesel cluster, but the gas cluster does work, including the tach!
Only thing is, I have no working WTS Light or water in fuel, but the glow plugs and everything works, I hear the click when I turn the key on, and after 10-15 seconds. I just have to figure out now how to hook up the WTS light to work when the glow plugs are warming up.
I was told the WTS harness was in the dash, and I did find it, but it isn't the same connector as the dash trim piece I have. This F150 is an 89, and the WTS dash piece I have, is from an 87. But the wiring is all there, just not the same connectors, guess they changed it around abit through the years.
#7
06-06-2015, 05:01 PM


Trending Topics
#8
06-07-2015, 02:31 AM
Laughing Gas

#10
06-08-2015, 12:59 PM
Senior User
Join Date: Apr 2003
Location: Wanatah In,
Posts: 376
Likes: 0
Received 0 Likes
on
0 Posts
Nice work, I'm with dixie460 though, I wouldn't risk all the work you've done to that alternator. I almost lost my 94 f150 to a fire due to that thing.


#12
06-13-2015, 10:57 PM
#13
06-14-2015, 11:52 AM
Loving the way this build turned out, makes me want to find a short bed F-150 somewhere and steal a working engine/tranny to do this sort of swap. But need to finish my own little projects first  . Loving it though and I can't wait to see the toolbox you setup for this truck, been waiting years for it.
. Loving it though and I can't wait to see the toolbox you setup for this truck, been waiting years for it.
#15
06-20-2015, 04:36 PM