When you click on links to various merchants on this site and make a purchase, this can result in this site earning a commission. Affiliate programs and affiliations include, but are not limited to, the eBay Partner Network.
Howard I checked the headlights and they appear to be a normal bulb with no ballast. Mine is a 94 so maybe they were a later update. I am using the harness and I've spent hours pulling almost the whole thing and man I can't believe how much wiring there is in that car. I've got a wiring diagram for the car and after looking at this harness i will be using just the engine and trans management and making a harness for everything else
48 Steel I've been watching your thread for since i joined. Great build and one of the reasons i keep considering using the IRS. I have it posted for sale and if I can get a little money out of it i'll take it but if not i'll probably just the axle and have full independent suspension
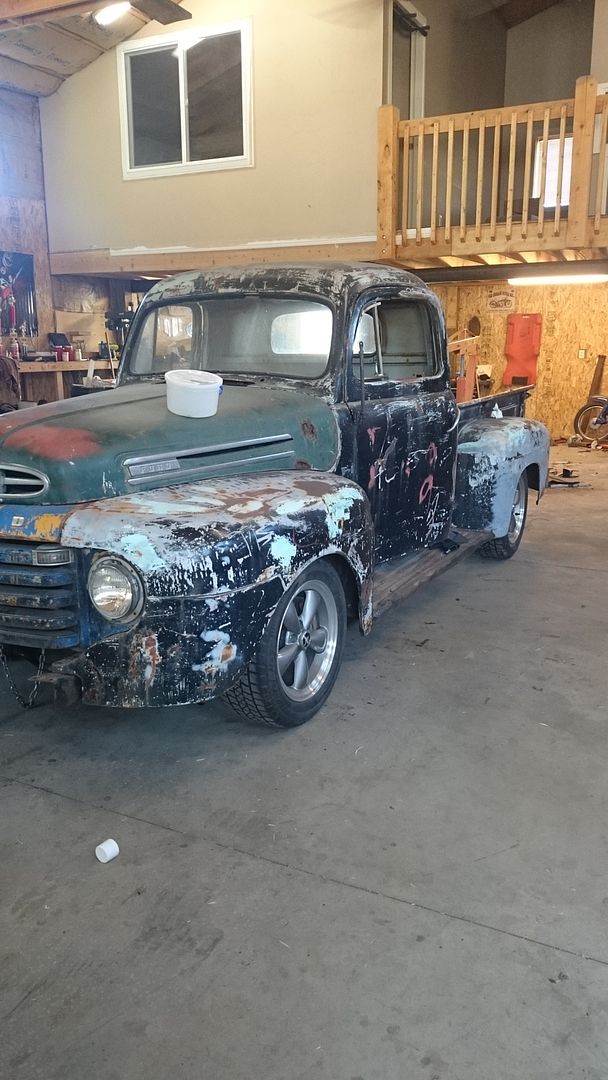
Sort of. I'll start a build thread once I actually get the truck in the shop and start actually working on it but figured everyone like pics.
bought the F1 a few months ago but didn't want to start it till my other project was finished. But i did start gathering parts like this Mark viii donor and a lexus IFS
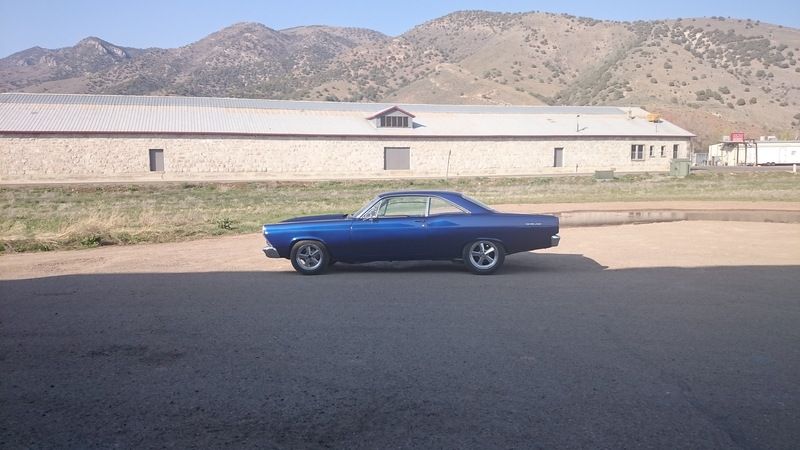
Finally got my car finished for the 2nd time
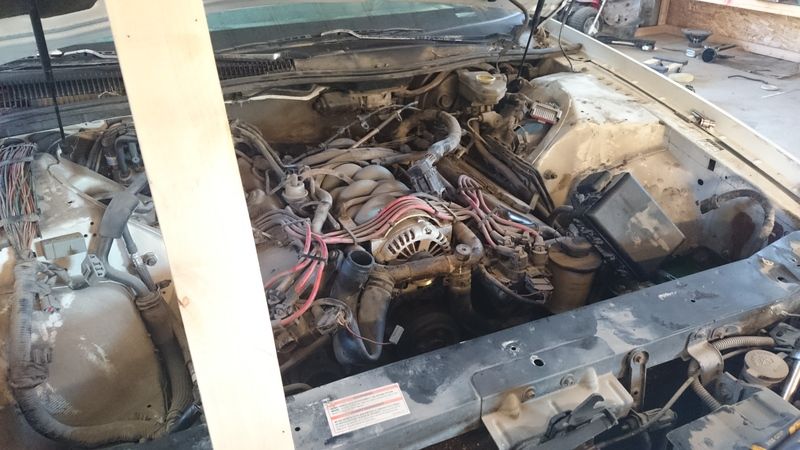
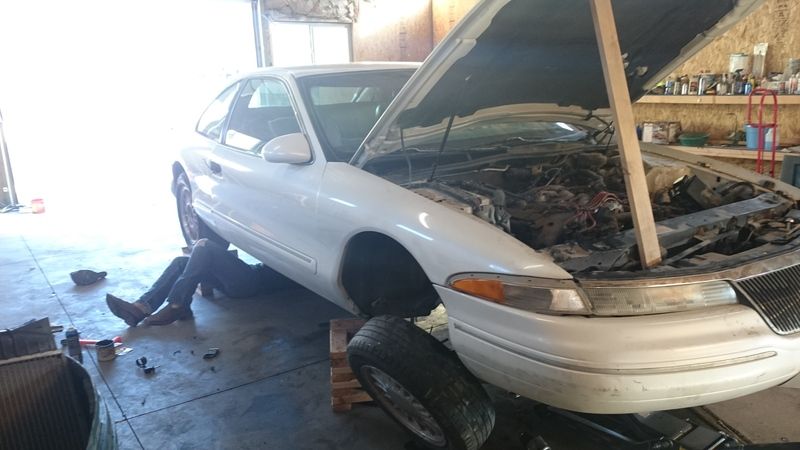
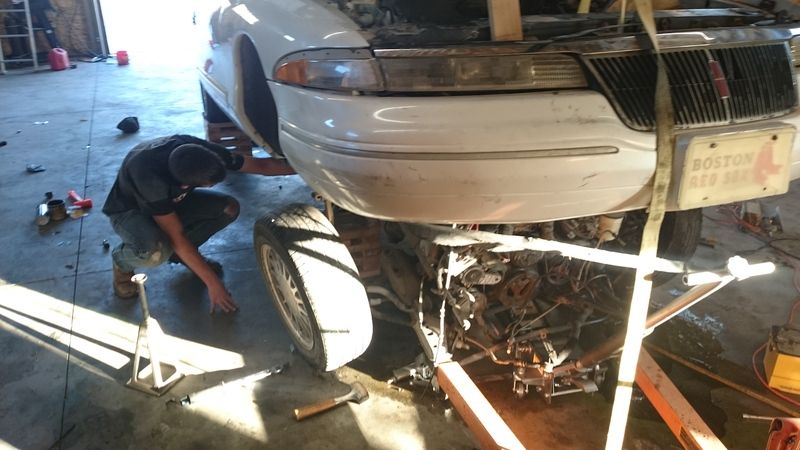
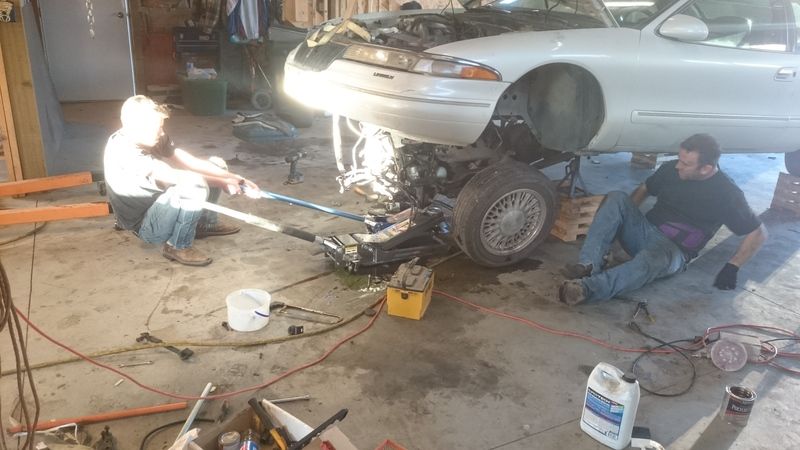
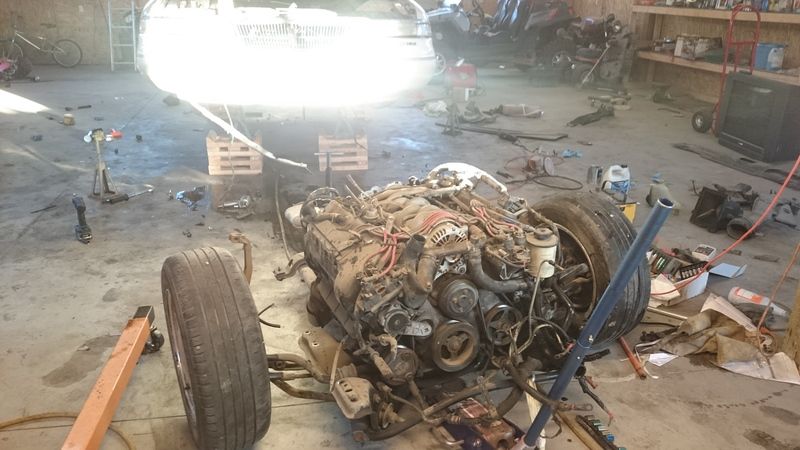
I've had this donor car in my yard for a month or so and 2 days ago decided to get the drivetrain out. This was my first time pulling a motor from the bottom and it was a little sketchy
100k mile Aluminum 4.6 DOHC with 4r70w for $500
Believe it or not my shop was clean before I started on this. Still thinking about using the IRS 8.8 but its something like a 3.08 ratio and thats way too tall with a 4r70w overdrive so by the time i add gears and install i could have just bought a explorer 8.8 and build a 4 link plus I've been wanting to build a watts link instead of the triangulated 4 link that i've built before. Anything you guys can think of that i should snag off the donor before taking it to the scrapper.
Njce project you got going there. If the transmission is working ok it would be nice to replace the torque converter before putting it in another vehicle. Usually those start the famous shuttering around 75,000 to 100,000 miles. My 48 F1 has a SOHC with the 4R70W. Love it.
I wasn't aware of that problem. Thanks for letting me know. I wasn't even going to split the trans and engine but now that i'm thinking about it i might as well throw a new converter in there.
Yeah I just suck at taking pictures and forgot about this thread
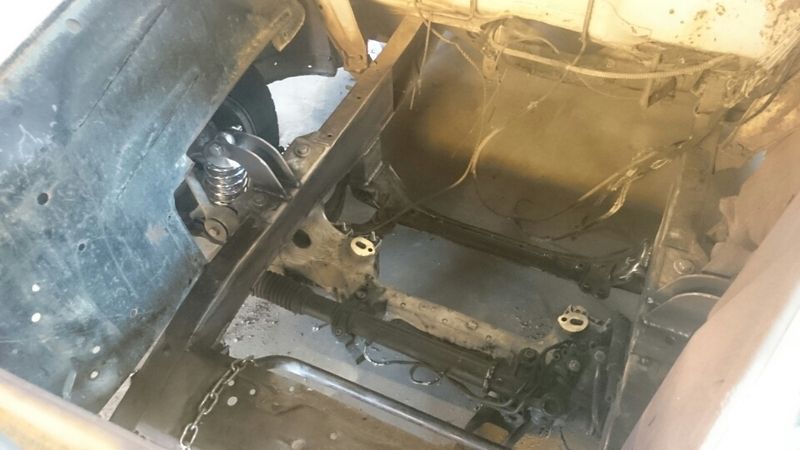
Lexus suspension is in and finished for the most part just need to finish welding and boxing in the shock mounts
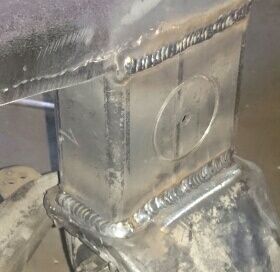
This was the worse part of the Lexus setup. I had to drop this mount down 3 1/2" and it just looks weird hanging down by itself. I added 2 degrees of caster when I shaved the mounts to get to 4-5 degrees when combined with the caster built into the lexus unit. People may disagree and figure lexus/toyota knew what they were doing but I prefer extra caster in these old vehicles. The circle is from my whole saw not all the way through yet. Gonna be welding in 2" tubing
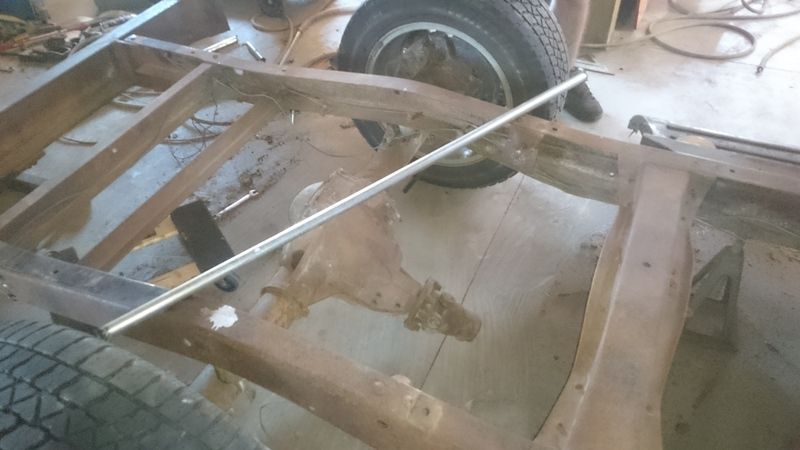
I used the stock rear LCA crossmember. It has brackets that mount to the aluminum crossmember and ties everything together.
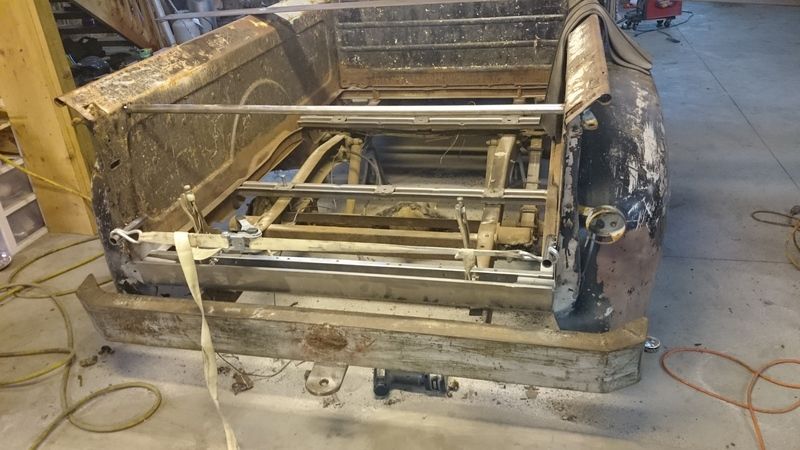
Then I replaced all 4 crossmembers on the bed as only the front was not rusted through or broken.
had to use a ratchet strap to pull in the bottom
Then this happened
And somehow I didn't take a pic while building the 4 link but here it is. I just ordered the rear coilovers so this is with 1" tubing as struts... You can see the rear wheels are not going to work as they are just too far tucked in with the explorer 8.8... and this is with 2" spacers.
So i need to throw a small notch in the frame and finish welding all the 4 link brackets.
Looks good, you could fit some monster wide tires on the back no problem!
The plan is a bw s366 turbo so I may need some meets in the back. Turbo is only happening If I have the room for it. First option is mounted high on the passenger side and the other is under the cab with an STS pump feeding oil back the pan and filter in the bed. If either is a plumbing nightmare I'll just run NA
I used 18 x 10" rears with +24 (1 inch) offset. I guess that is about 6 inch back space. and used 1.75" spacers with the same 8.8. I think you must have the high offset wheels from a 05+ mustang? about an inch or two different. Also watch the inner clearance to the bed, my wheels sometimes rub the bed going around corners with about 1/2 inch clearance.
Yeah wheels are tricky for my setup and i'm sure others. I've got around 2" to the inside lip of the fender so I can go with less offset but i like it tucked in a little. Perfect world i could find some 8" +24 for the front and 9 or 10" 0 or - offset for the rear. I'll probably end up with either 17x7 front and 18x9/10 rear or possible just keep the front and get a 17x8 0 offset rear in a bullitt replica
Did some finish welding on the crossmember I built for the front of the upper links. Cycled the suspension and I need to make the driveshaft relief taller. Should have done that before I welded it. Raising the relief caused me to have to raise the mounts on the crossmember forcing me to build new taller mounts for the axle to keep to keep the angle I need on the upper links... so 1 step forward and 2 steps back. Also learned that welding in a circle is harder than you think
Nice work! With a complicated project like yours a few mistakes along the way are normal, I find it nice to be able to recognize my mistakes and fix them before it goes too far. Sounds like you stay ahead of the game. Good luck with it, I love to see the great work on this forum.
Nice work! With a complicated project like yours a few mistakes along the way are normal, I find it nice to be able to recognize my mistakes and fix them before it goes too far. Sounds like you stay ahead of the game. Good luck with it, I love to see the great work on this forum.
Angle grinder bit me. Hard to tell but the dark part goes all the way through and cut part way through the bone. Gonna have to take a a few days out of the shop
 05-03-2015, 05:30 PM