52 F1 New Bed Wood Project, will need all the help I can get
#16
 03-19-2015, 01:22 PM

Thanks AXracer for answering my question. Particularly in detail, that's what newby's need. Sounds great, pay a little more for the paint and not have to sand all the rust off. I knew there was a good answer out there. Am I correct that these products are about $130/gallon? Is this commonly used on the insides of the fenders, too? Engine compartment?
Thanks again
Thanks again
Put the top on the can loosely and purge all the air/moisture out by lifting one side of the lid and blowing in shielding gas from your MIG welder under the lid for a few seconds then quickly closing and sealing the can. Turn the can upside down on the shelf.
If buying POR15, I'd buy a couple quarts rather than a full gallon and only open 1 at a time.
#17
03-24-2015, 07:27 PM
Join Date: Feb 2015
Location: Clearwater, FL
Posts: 61
Likes: 0
Received 0 Likes
on
0 Posts
I've read up on rust converters and decided to go with Por 15. It seems like Por 15 is the safest bet and most reliable. I'm planning on black, either satin or gloss. I have to decide what to coat with it. I'm sure about doing the underside of the fenders, the entire frame, cross-members for attaching wood to, inside the rear sill the wood goes into, Por 15 says to do the tailpipes from the mufflers back. What I'm not sure about is the rear end and axle and the wheels (inner and outer). I've read only use something flexible to coat the leaf springs, not por 15.
While wirebrushing I ran across a couple things: On the left side of the rear of the bed, I'm missing a square piece of metal that the very back fender bolt attaches to. I don't know the name for it or if one can be obtained, or make one. The other thing I never saw before is the looped bolt under the frame toward the rear left and right. Next I'll post pictures of the square metal piece and the loop, since I don't know how to add photos at the bottom of my post.
While wirebrushing I ran across a couple things: On the left side of the rear of the bed, I'm missing a square piece of metal that the very back fender bolt attaches to. I don't know the name for it or if one can be obtained, or make one. The other thing I never saw before is the looped bolt under the frame toward the rear left and right. Next I'll post pictures of the square metal piece and the loop, since I don't know how to add photos at the bottom of my post.


#20
03-24-2015, 09:17 PM


#22
03-24-2015, 10:56 PM

A much cheaper option for treating the rust is phosphoric acid.$15.60 a GALLON at home depot.remove loose rust with a wire brush,brush or spray the phosphoric,cure 24hrs,then use your favorite chassis paint.por15 is fine,but i wont pay that price for a product that may or may not work much better in the long haul.the phosphoric will neautralize the rust just fine. i guarantee,YOU will do a helluva lot better job painting the chassis than henry ever dreamed about!!
#23
03-24-2015, 11:28 PM
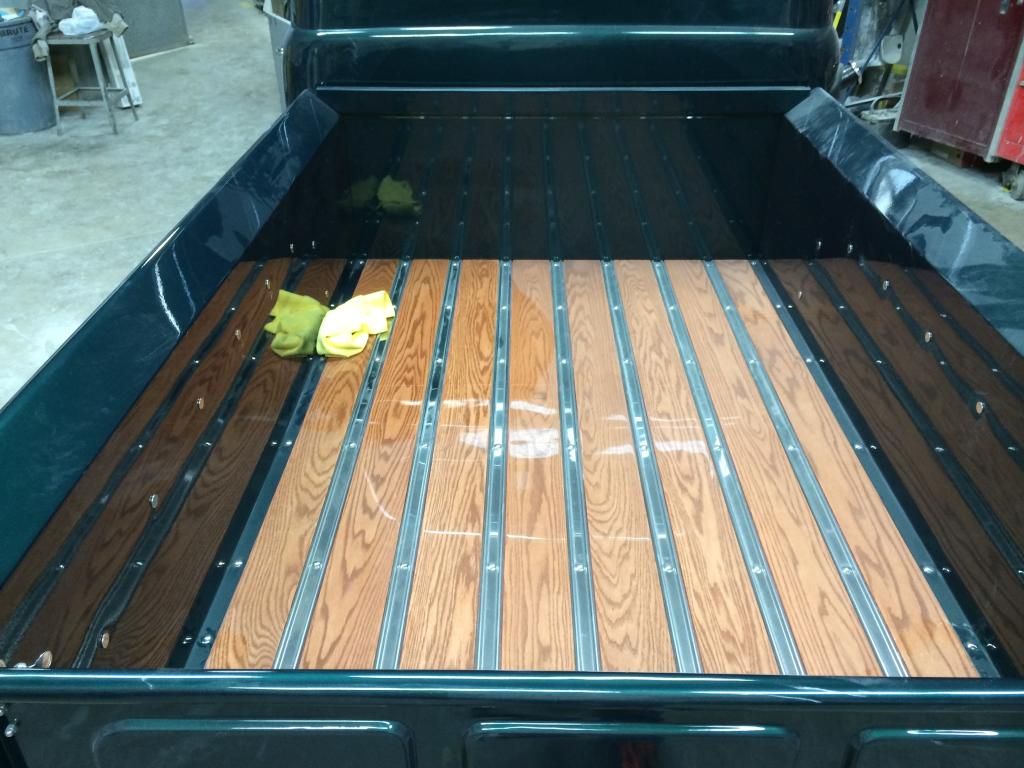
This is red oak with 3 coats of WEST system saturating epoxy followed by 3 coats of marine varnish and a final cut and buff. 80 hours of finishing. I was recently at the world of wheels auto show and I can say for sure, nobody had a wood bed that looked this good.
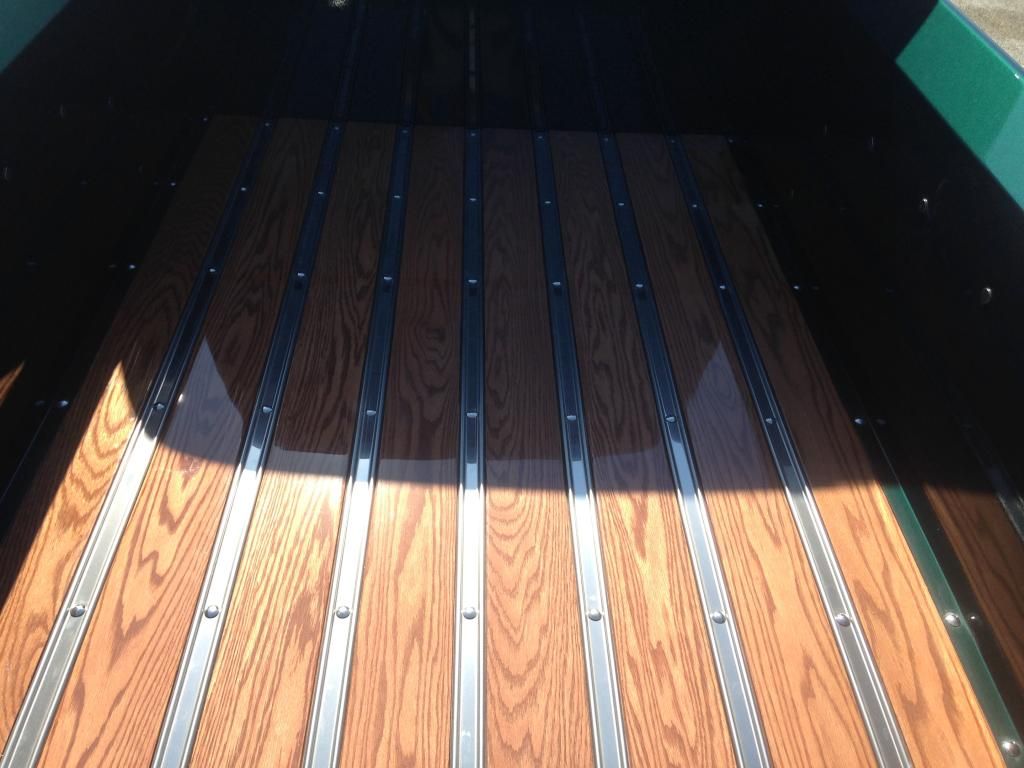
Dusty in this pic, but you get the idea
Sanding and water based tint
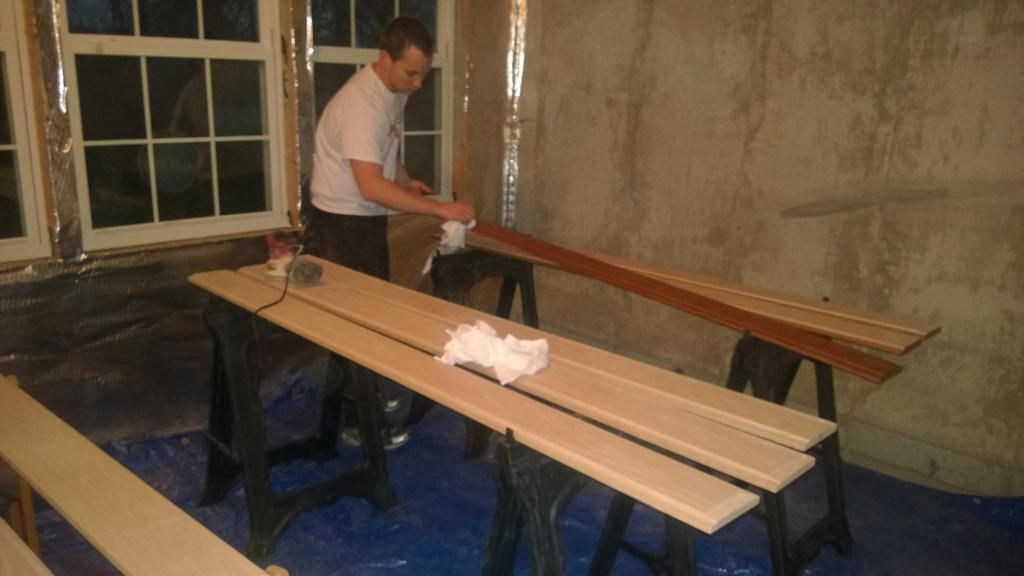
after epoxy
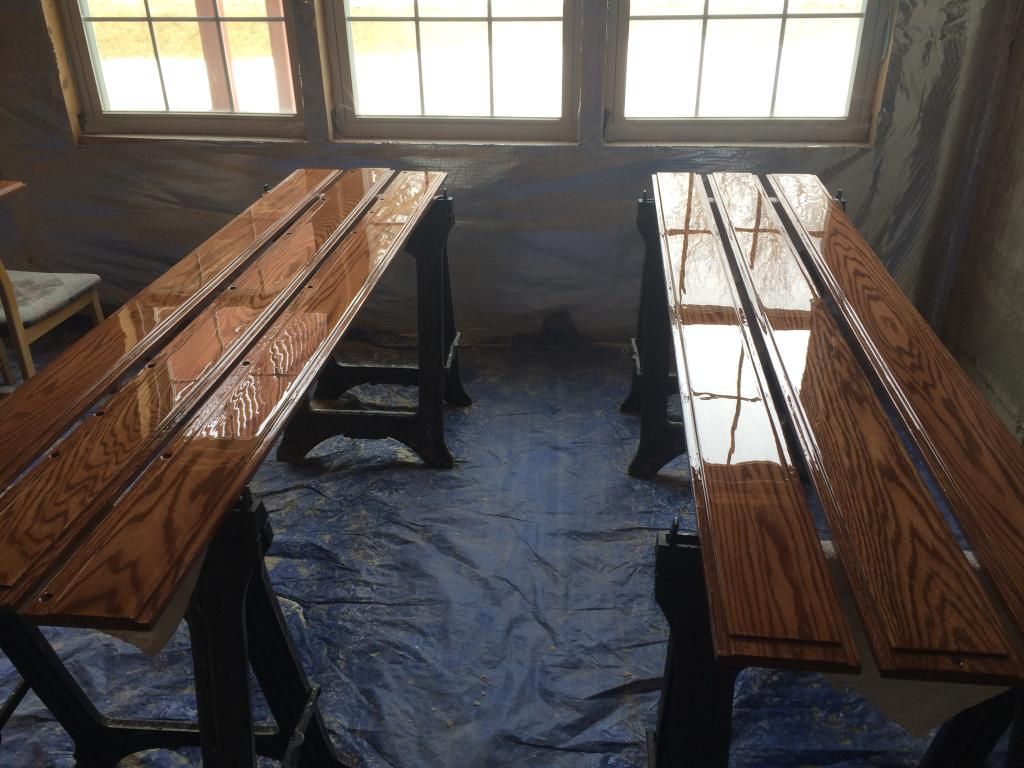
Final product
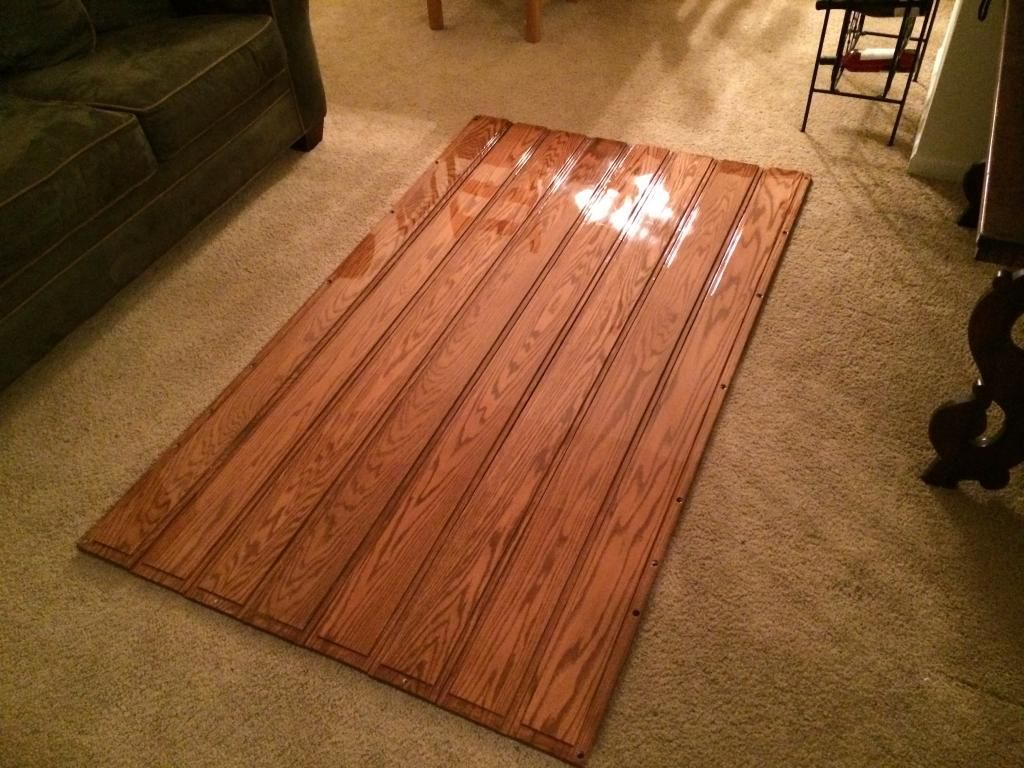
If you are going to use it to haul a lot of stuff, I might not invest this kind of time. But after epoxy, the wood should last forever as it is basically now a wood plastic composite sealed off from moisture, dirt, etc...

Dusty in this pic, but you get the idea

Sanding and water based tint

after epoxy

Final product

If you are going to use it to haul a lot of stuff, I might not invest this kind of time. But after epoxy, the wood should last forever as it is basically now a wood plastic composite sealed off from moisture, dirt, etc...
#24
03-25-2015, 08:46 AM
Join Date: Feb 2015
Location: Clearwater, FL
Posts: 61
Likes: 0
Received 0 Likes
on
0 Posts
Gorgeous bed, no doubt. No stain, correct? I think the lighter (not stained) wood color contrasts best when surrounded by the darker paint. Where did you get the red oak? I see you rabbeted the ends. What thickness were the planks to start with and what thickness are the rabbeted ends. I plan to have some temporary protection while hauling, maybe a rubber mat.
#25
03-25-2015, 09:58 AM
It has a water based dye to bring out the wood grain a little bit. Not an oil based stain. Most oil based stains will cause issues with epoxy saturation. I bought my wood precut and rabbited from midwest early ford. The wood was very nice, flat, smooth, looked like it had already been 220 sanded. And really wasn't that expensive. If you want to make your own i think the boards are 3/4" and not sure on the bed strip parts. 1/2" i think and maybe 5/8" on the bed sides and bottom trim.
#28
03-25-2015, 03:34 PM

Tuned
#29
03-25-2015, 08:33 PM