When you click on links to various merchants on this site and make a purchase, this can result in this site earning a commission. Affiliate programs and affiliations include, but are not limited to, the eBay Partner Network.
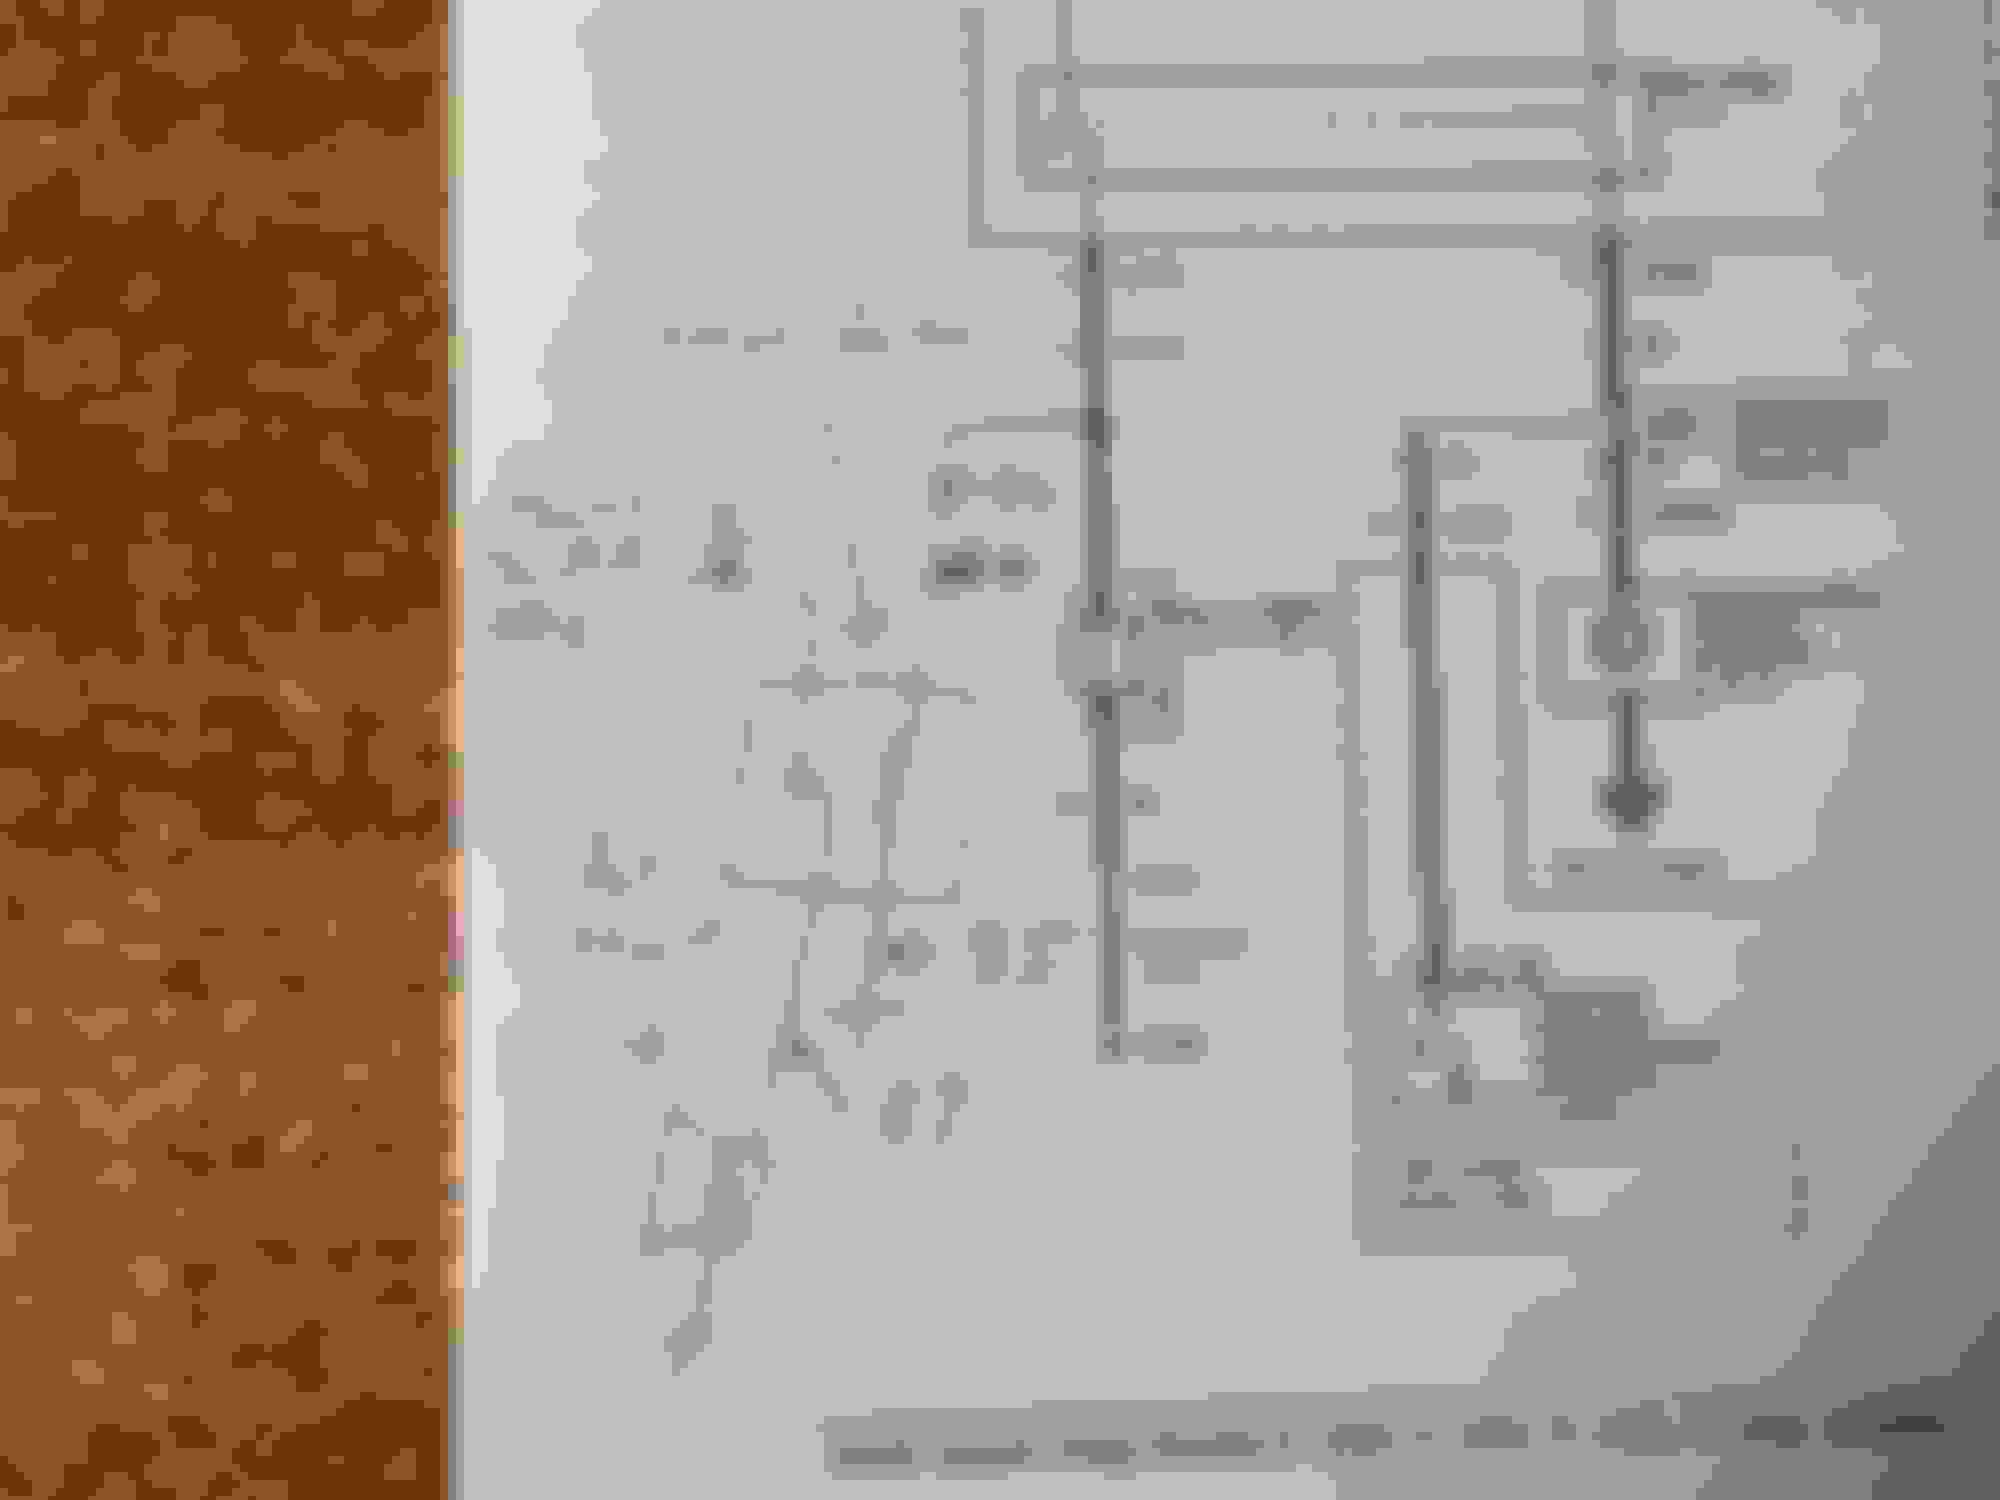
On the relay
85 goes to ground
86 Yellow/ Light Green
30 to the Power from upfitter switch #4
87 goes to the air horn.
OK I updated the drawing to include the relay location numbers for you.
Like I said the only tap to the horn is under the hood. The wires in the column
don't give you power at the right time. The ONLY reason to work in the column
would be if you rewired the whole thing and that would make a PITA. and you would loose the factory horn. The way I set this up is you keep the factory horn and is sounds
all the time when you hit the horn button and you get air and factory when you flip
the switch on. That way you only have the 2 things coming out of the cab. Compressor
power and air horn on power.
So, if I'm accessing the horns from under the hood, where the heck is that wire located? I've tried accessing the factory horns behind the fender in the past, but had no luck. Is the wire you're speaking of located physically separate from the factory horns? Thanx again.
P.S. I'll definitely make a YouTube video of the finished product, including audio from the air horn!
Just got home. So I'll have to go take a look and see where else you can get to it at.
Oh what fun at the Dr today. Looks like more back surgery is in the crystal ball.
Been dealing with this for some time. Just have to wait and see what comes up. Sean
OK I got you some photos. One problem on engine bay setup. I don't know
what is over behind the passenger side headlight for you. So with that in mind
I had to pull some things out to get a clear view and hopefully you would have to
go quite a far. The one thing you will need to pull is the windshield washer fluid
bottle if it's where I hope it is. Once you get down there there is a bundle that has
the wires for the lights,washer pump and horn. In one of the last photos I placed
a white wire tie on the one you want. I took the cover off to check the colors and
BINGO I got them. So here you go for photos.
More exposed than needed . Just to give some<br/>landmarks for you,
See the horn in there and the wires?
This is the horn power and ground wire you can check with a tug on it.
When you get down to the point where you have the wire start to branch just look
where they go. The one you want goes down and then out to the horn. I think at this
point you can do a few things. One do your tap down there or tow go back up that
harness where it runs down the inside of the bay and open up the plastic cover and
then find and tap it there.
BTW Tge harness bundle you want will be the large one little over 3/4" there about.
In the 2nd image you see my fingertips right near the hole that at the bottom in the
first image below the round opening for the back of the main lamp.
Let me know if this gets you in the right location of if not show me an image of
your engine bay and the the area right behind the passenger headlight.
First of all, I hope you're okay. A back injury is serious business. Take care of yourself. IN addition, thank you so very much for the assistance with this mod of mine. You've gone above and beyond to help and I appreciate it immensely. I will work on this first thing tomorrow and let you know how it goes. Thank you again!
Good to hear. I needed an excuse to pull the battery and top the water anyway.
It was down quite a bit so it got put on the charger for a while. Guess I have to
do the other side now.
When I did my 4 trumpet install, I just hooked up compressor power to upfitter 1 and the horn solenoid to upfitter 2. really simple they way they have it pre wired
Okay, just finished wiring everything to your specs (will upload pics later), but every time I have upfitter #4 on and I press the horn, the upfitter #4 fuse blows. Suggestions?
Some thing is grounded that should not be is my guess.
When does it blow right when you flip the switch on or
when you hit the horn?
If you just remove the wire from the relay that goes to the
new horn and turn on the #4 switch does the fuse hold?
If it holds then take your volt meter and place it on term
#87 you should see 0V and when you turn on the #4 switch
you should not see 12V until you honk the horn. If we are
good so far. I want you to place the volt meter in the Ω setting.
Take the wire end going to the new horn and place one probe
on it and the other on ground. Let me know what the reading is.
BTW I will be home most all day on the 4th. Fire Watch. So if you
have time a phone call might be helpful for you.
I stripped out all the existing grounds and started over. I did finally locate the factory horns and the wiring. The reason I couldn't find them before was because I was looking too far back under the fender.
Unfortunately, little did I know, I had one of my grounds connected in line with one of the power feeds and needless to say, I went through 13 fuses before I figured that out.
Anyway, I wanted to find a way to wire the horn inside the cab instead of inside the engine compartment. So, after testing wire after wire I finally found the one off the back of the fuse box in the cab. I found this photo on another board that shows which wire I used (yellow with light green tracer)...
(I added the arrow to show which wire I used.)
I mounted the relay under the dash and grounded it to the body. Then, thanks to Yahiko's guidance in his post of how to make the connections to the relay (above), I wired everything up and now everything is working perfectly! Now, the compressor and air horn will only work when the rig is running, and upfitter switch #1 is on to fill the compressor and upfitter switch #4 is on to sound the air horn with the factory horn.
Thank you for all your help, Yahiko. I'll get a video of how everything works posted soon.

 07-01-2015, 10:59 PM