My 52 Ford F-1 Project
#47
$400 for the rack and cross-member work. I had behind bars race cars do it for me. He welds aluminum for a living and the shaft he did welded and remachined on a lathe.
I can put you in touch if you are interested. PM me.
http://www.behindbarsracecars.com/
I can put you in touch if you are interested. PM me.
http://www.behindbarsracecars.com/
#49
I plan on boxing the front of mine and then X bracing the rear and center with some 2" tube for what I expect to be a much more rigid platform
A twin turbo 392? Sounds like fun. Plans for this are an efi 302 with gt40 heads and intake and a small cam. Thoughts of a turbo kit have crossed my mind.
A twin turbo 392? Sounds like fun. Plans for this are an efi 302 with gt40 heads and intake and a small cam. Thoughts of a turbo kit have crossed my mind.
#52
#53
#54
Build is looking very good - great ideas, and not being done by cutting corners.
Ax's comments on the weld quality will cause controversy, but I don't think that was his intention.
In Australia, you MUST have any "significant" mods (right down to changing a wiper drive setup or seat mount) inspected and signed off by a Gov-certified automotive engineer. You discuss your plans up front, he gives agreement and/or an alternate acceptible plan, then inspects afterward to verify the plan was implemented properly. You can NOT drive a modified vehicle on the road legally without the Engineer's Certificate.
In a case like this, I suspect that the Engineer would gladly accept the professionally welded crossmember (but NOT the steering shaft that was cut and shut) based on heat impacts on strength of cast parts, etc.
He would give you some good advice on how to make your spacer above & below the chassis rails, and would approve or knock back based on the quality of your welding.
Please understand, NONE of this is personal attack against you.....just tyring to prompt thought towards better safety for you, the guy who buys this cool truck off you 3 years later, his pregnant wife who starts driving it, and my wife, mother & child driving in the opposite direction on the day that one of these parts snaps in half due to brittleness or fatigue brought on by flexing of improperly secured mounting points...
....and in the world of internet, you must realise that you are setting a precedent that others with a lot less skill and brains than you might follow....
A SMALL amount of advice from a more experienced professional might lift this build from 'maybe ok' to an essay of "this is how it's done, boys!".
Great effort, best of luck!
#56
#57
#58
Cool. How are you determining the size of the spacers for the front crossmember?
are you targeting some baseline caster setting?
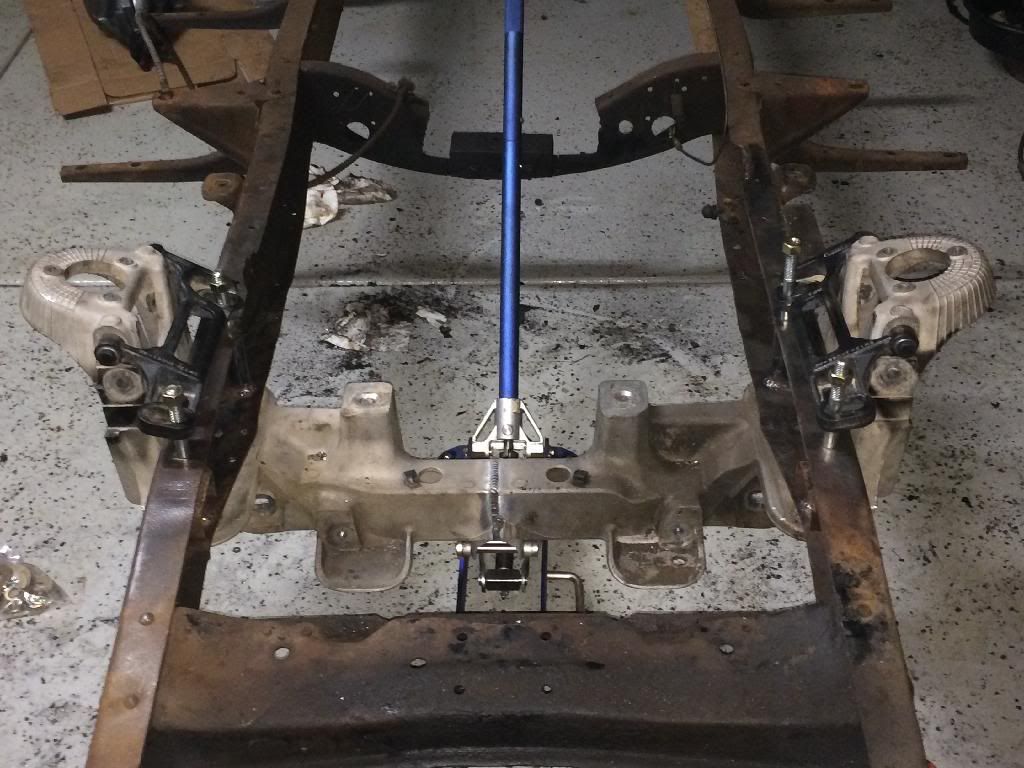
That's a nice looking front crossmember.
Curious, since it was narrowed do you the mod the engine mounts? Or does it not bolt to the crossmember?
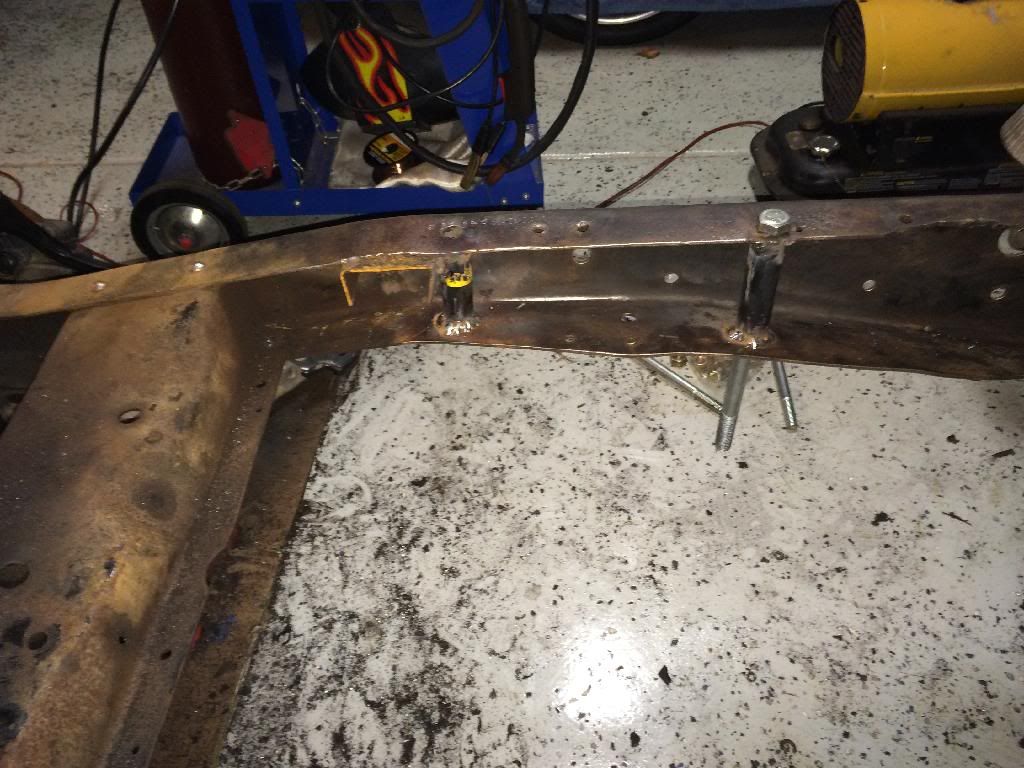
Hard to see the welds. Maybe a close up would reveal a bit more info, but I suppose you aren't asking for feedback?
#59
I just finished with the spacers. Set the crossmember level to the frame. Spacers were constructed out of a 1" bolt washer and a 5/8" bolt washer welded together and to a shape cut piece of 2" DOM tube steel and the whole thing welded to the frame. The top spacers were made to take up the difference, also out of 2" tube and a grade 8 5/8" washer. Therefore the bolt passed through the upper crossmember mount, a 5/8" washer welded to the upper spacer, a 5/8" hole in the frame, the frame spacer, a 5/8" washer in the lower spacer and then the lower crossmember. So with double sheer in respect to the crossmember and quadruple sheer with respect to the frame I am not too concerned with strength. Especially as the clamped together assembly puts little torsional force on the bolts, they are primarily there for clamping.
#60
Cool. How are you determining the size of the spacers for the front crossmember?
are you targeting some baseline caster setting?
That's a nice looking front crossmember.
Curious, since it was narrowed do you the mod the engine mounts? Or does it not bolt to the crossmember?
Hard to see the welds. Maybe a close up would reveal a bit more info, but I suppose you aren't asking for feedback?
are you targeting some baseline caster setting?
That's a nice looking front crossmember.
Curious, since it was narrowed do you the mod the engine mounts? Or does it not bolt to the crossmember?
Hard to see the welds. Maybe a close up would reveal a bit more info, but I suppose you aren't asking for feedback?
Not sure how I am going to mount the engine yet, probably just to the frame.
Wasn't really looking for feedback on the welds. Thanks! Internet opinions on weld strength crack me up (pun intended). There is nothing anyone can say about a welds strength based on appearance. You really need to check ultrasonically, or with X-ray, or cut the weld apart to see how good it is. Have done enough roll cages, frames, and fabrication to be comfortable with my own worksmanship. It cracks me up when people come on the internet and have nothing positive to say about anyone elses work and yet, you look at what they are doing and they are still rocking a beam axle because they weren't up to the 6 month challenge it takes to install an IFS

All joking aside, I am pretty happy with the way the build is coming along.


