
Shackle reversal swap
#1
 08-30-2013, 09:32 PM

Shackle reversal swap
Why did ford put the shackle in the front just so when you hit a bump it kicks forward so you can spill your coffee?? Seriously stupid design!
I've starting fabbing a drop hanger for the front of frame ,then 1/2" flat bar shackles. I've purchased a set of stock 2000 superduty springs to replace my also stiff 6" lift springs. I'm hoping to get the same ride height but with stock springs and shackle in better location. The BACK!
What have you guys done? I have seen some online kits but I'm a steel worker for a living.
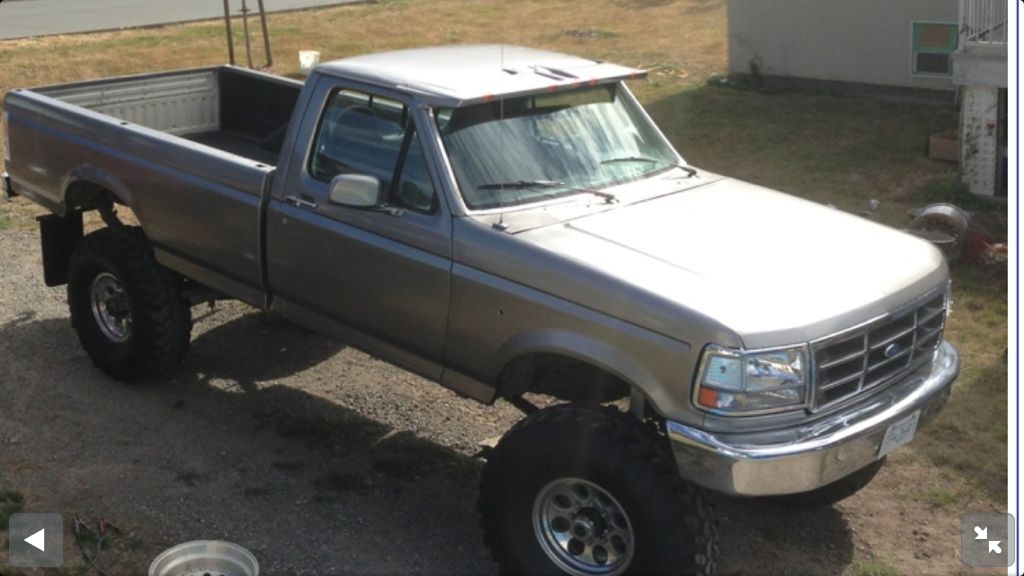
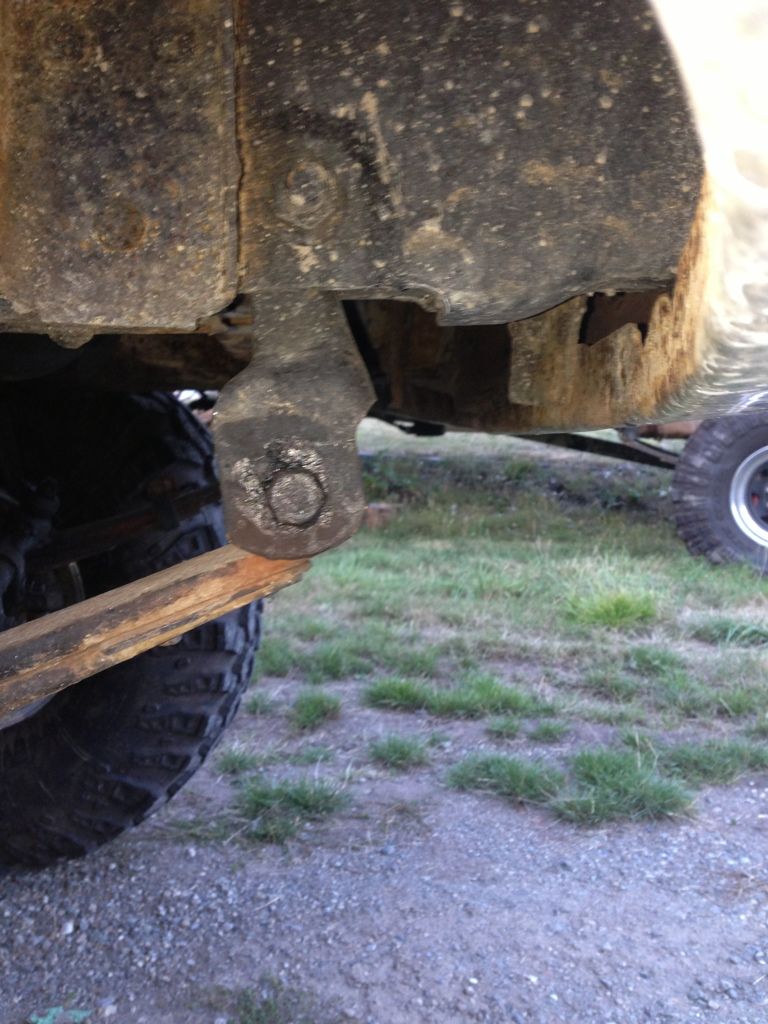
As it sits now..
I've starting fabbing a drop hanger for the front of frame ,then 1/2" flat bar shackles. I've purchased a set of stock 2000 superduty springs to replace my also stiff 6" lift springs. I'm hoping to get the same ride height but with stock springs and shackle in better location. The BACK!
What have you guys done? I have seen some online kits but I'm a steel worker for a living.
As it sits now..
#2
08-31-2013, 05:04 AM

Mountain Pass
#4
08-31-2013, 10:01 AM
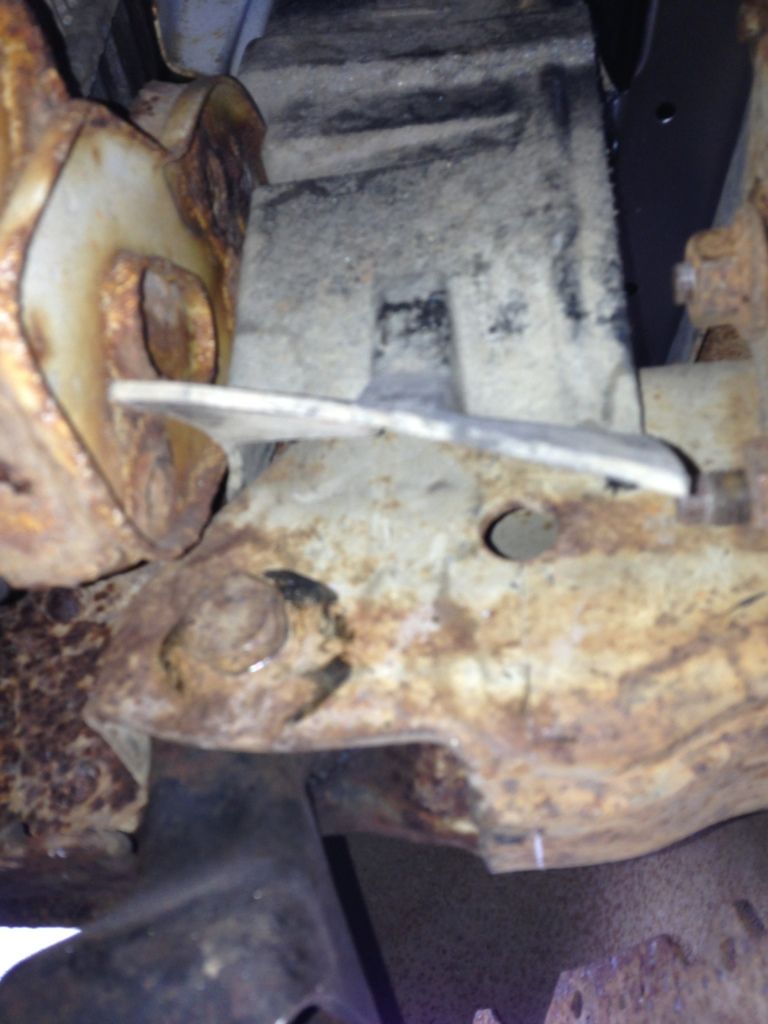
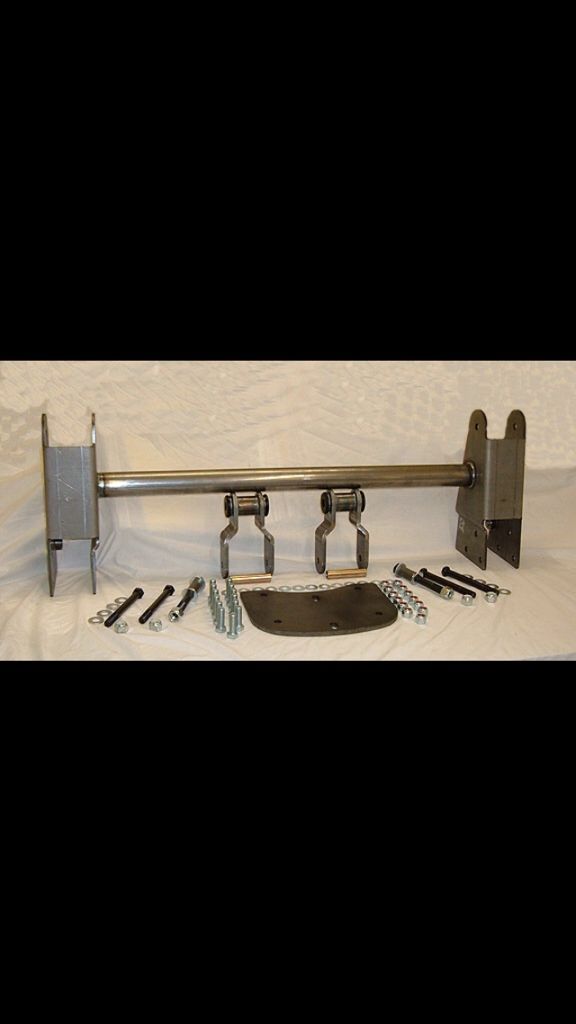
Here's my plan! Going to cap the outside of frame section with some 1/4" plate and a hole punched to make recessed hole flush using the existing shackle hole.
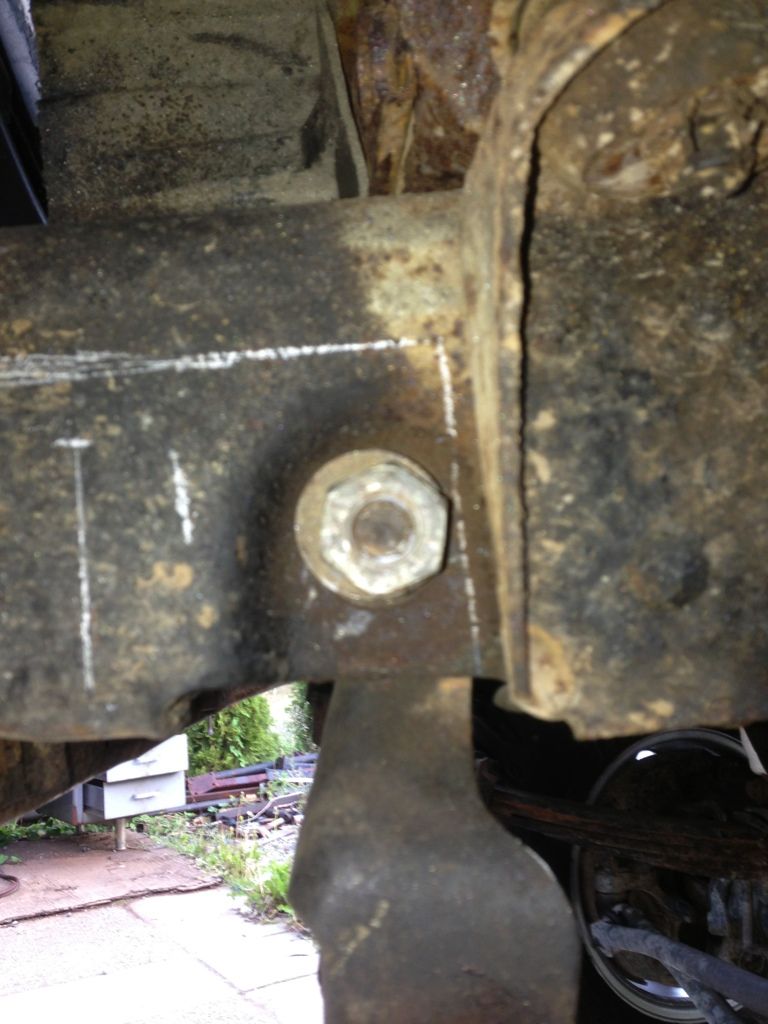
On the inside of frame there's a hole which I carefully measured on my template so I can reuse that as well but it will have to be opened up on outside of frame as its not a through hole.
My template will looks like this.
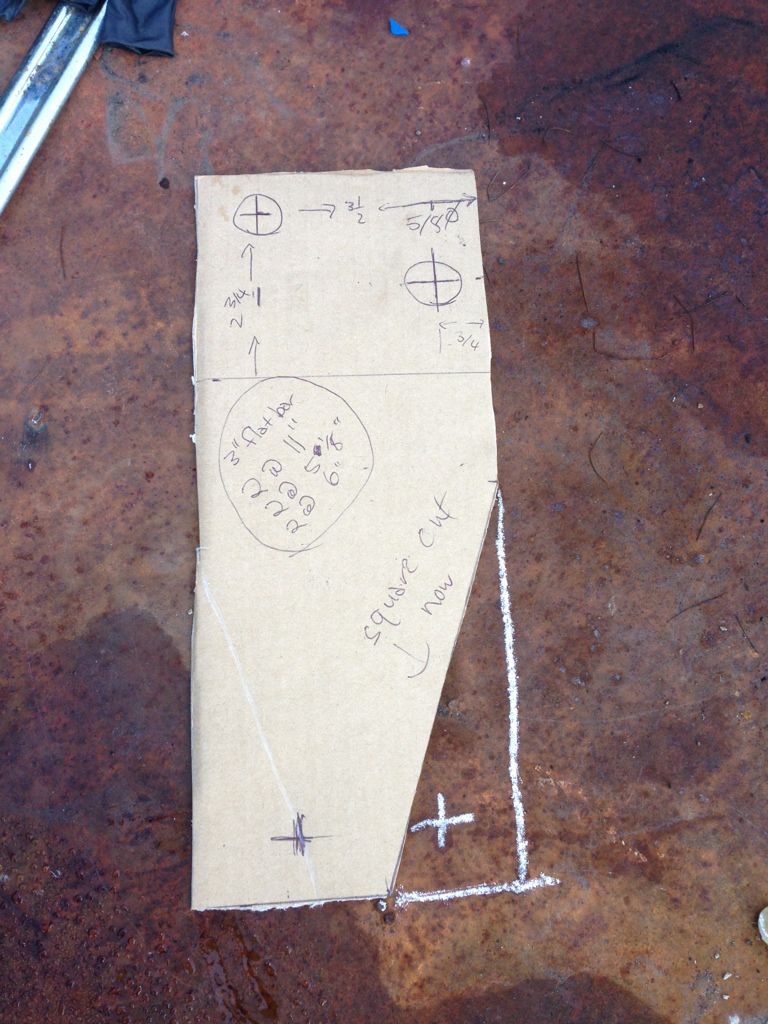
Basically I had second thoughts on the plate . My SD springs are 3 1/2 " longer than my current springs so I want to move eye location on front towards front by about 1 1/2" so that leaving the rear shackle its kicked back slightly for proper movement.
BUT I thought about it I'm actually going to leave the plate square and if I decide the rear hole works better for shackle angle I'll use it and then trim the taper. So there will be 2 holes on bottom for spring and I can chose which one later.
Basically I don't want to move the rear mounted hanger as I've seen some guys do. I'd rather just leave it alone. For shackles I ordered at my parts store a couple rear spring bushings , and some DOM tube to match, and I'll weld in DOM then press in the bushing.
I'll probably use some 1/2x2" flat bar that I will bend in our press to shape.
On the inside of frame there's a hole which I carefully measured on my template so I can reuse that as well but it will have to be opened up on outside of frame as its not a through hole.
My template will looks like this.
Basically I had second thoughts on the plate . My SD springs are 3 1/2 " longer than my current springs so I want to move eye location on front towards front by about 1 1/2" so that leaving the rear shackle its kicked back slightly for proper movement.
BUT I thought about it I'm actually going to leave the plate square and if I decide the rear hole works better for shackle angle I'll use it and then trim the taper. So there will be 2 holes on bottom for spring and I can chose which one later.
Basically I don't want to move the rear mounted hanger as I've seen some guys do. I'd rather just leave it alone. For shackles I ordered at my parts store a couple rear spring bushings , and some DOM tube to match, and I'll weld in DOM then press in the bushing.
I'll probably use some 1/2x2" flat bar that I will bend in our press to shape.
#5
08-31-2013, 10:15 AM

#6
09-01-2013, 09:51 AM
Fleet Owner


#7
09-01-2013, 10:36 AM
Trending Topics
#8
09-01-2013, 12:16 PM
Posting Guru
i have one waiting to go in mine hopefully tomorrow, but everything i got was suggested by brad, he swears by these kits and bill stein shocks, take his advice it wil be well worth the money and saved time
#9
09-01-2013, 08:25 PM
Fleet Owner
#10
09-01-2013, 09:10 PM
I went to my shop yesterday and sheared a bunch of 4 1/2" plate and punched a bunch of 5/8 holes for the 16mm bolts.
Here's the first bracket tacked up.
3 holes to mount to frame, and 2 holes on bottom are for options on mounting spring in different locations, then cut down sides with a taper to that hole.
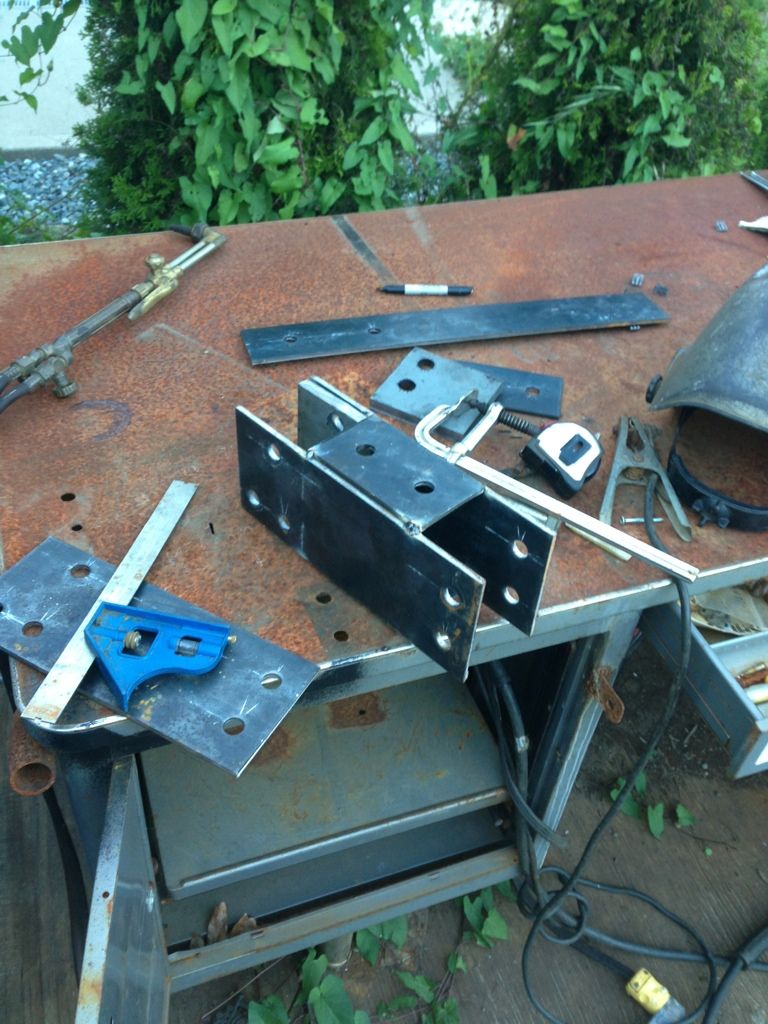
You can see a spacer washer tacked on the inside of the top of the plates. This is just so it eliminates the bent plate, kind of a no brainer making things easier to fab.
Most of my day was spent wet sanding this thing from 1000,1500,2500
Then 3 stages of polishing pads.
Glad I only have to do all this one time. No more bumpy clear coat though!
I'll post back when I get closer to installing all the pieces .
Here's the first bracket tacked up.
3 holes to mount to frame, and 2 holes on bottom are for options on mounting spring in different locations, then cut down sides with a taper to that hole.
You can see a spacer washer tacked on the inside of the top of the plates. This is just so it eliminates the bent plate, kind of a no brainer making things easier to fab.
Most of my day was spent wet sanding this thing from 1000,1500,2500
Then 3 stages of polishing pads.
Glad I only have to do all this one time. No more bumpy clear coat though!
I'll post back when I get closer to installing all the pieces .
#12
09-01-2013, 09:31 PM
#13
09-01-2013, 09:39 PM
Fleet Owner


#14
09-01-2013, 10:05 PM
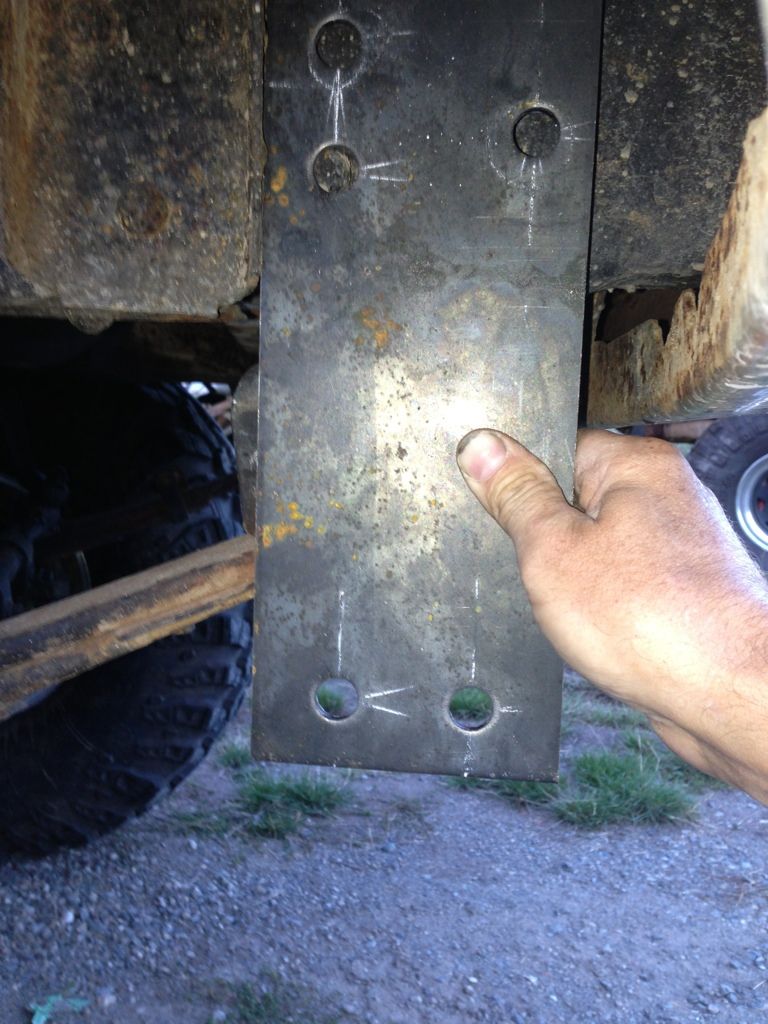
Here's how I look at it. The forward mounted hole in my plate puts the eye hole 2"s more forward than stock.
The superduty springs I have are 3 1/2" longer. So if 2"s goes to the front mounted hole I'm left with 1 1/2" past the rear hanger which sounds just about right for a proper shackle angle being kicked back.
I have about 45 minutes into making plates holes and everything. This stuff is easy and if I did actually need to kick it forward more and under bumper it's a minor cut and angle a piece with a full pen weld. I'm a certified welder.
#15
09-01-2013, 10:09 PM
I don't want to mess with the rear hanger but if it had to be moved I could , plus relocating axle to center is easy too with a three hole spring perch. I've got a good idea what I'm doing its not my first custom suspension job
Three Hole Spring Perches
Three Hole Spring Perches