
1989 F250 Project
#16
 09-09-2013, 10:11 PM

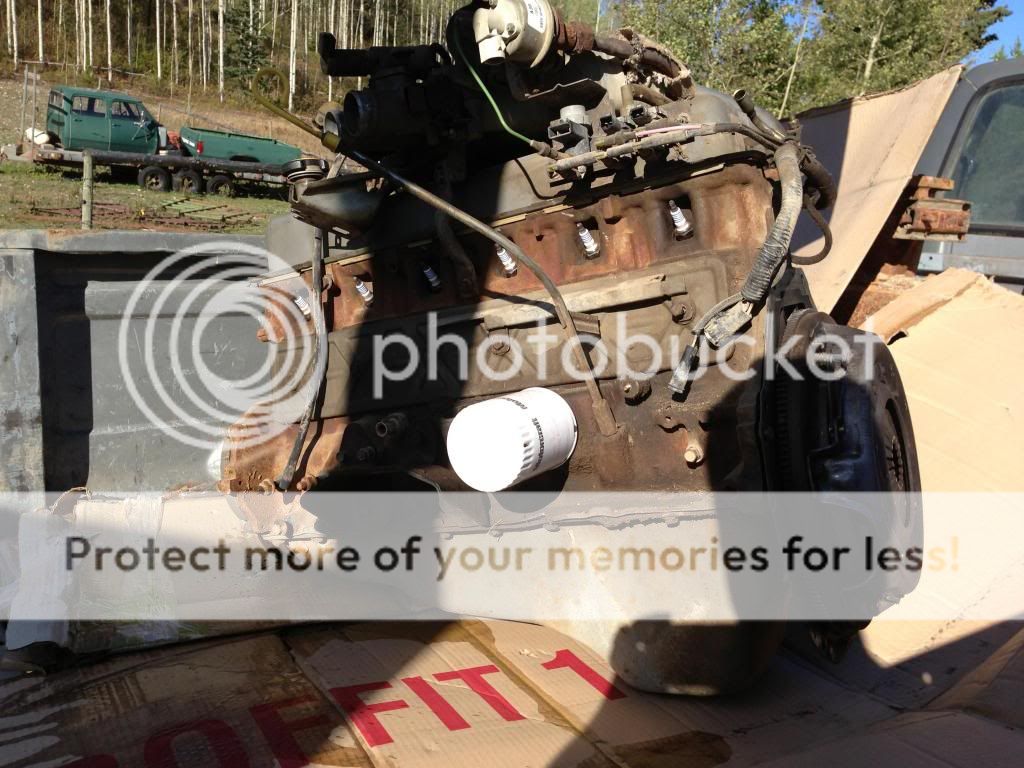
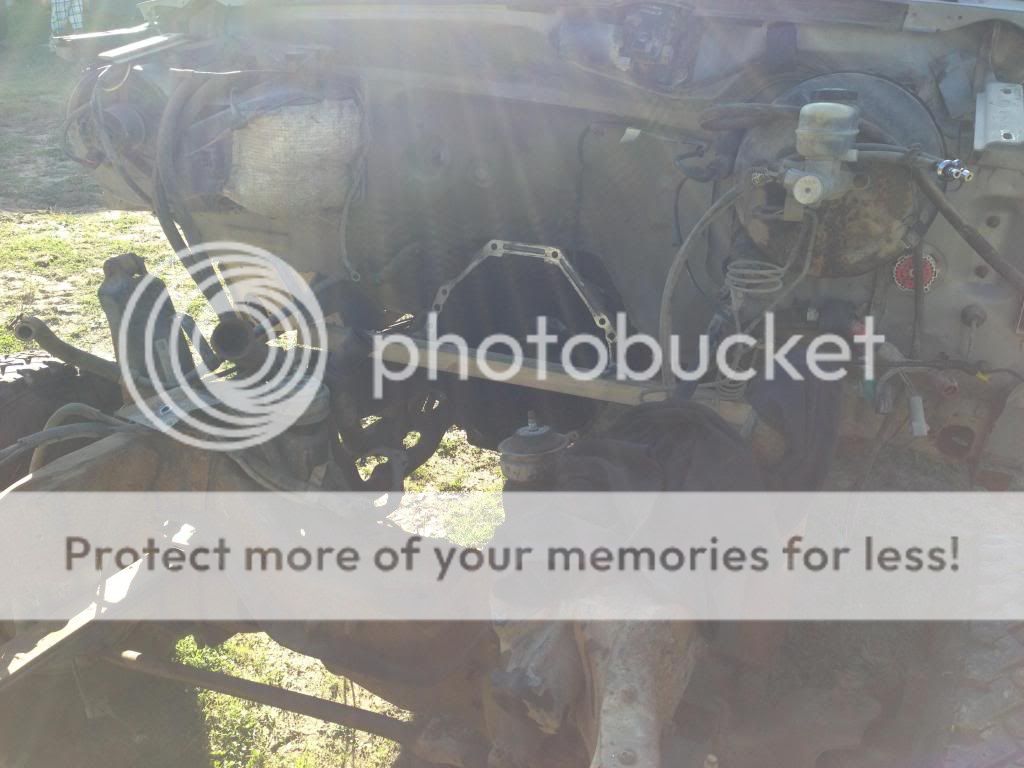
Got the engine pulled this weekend.
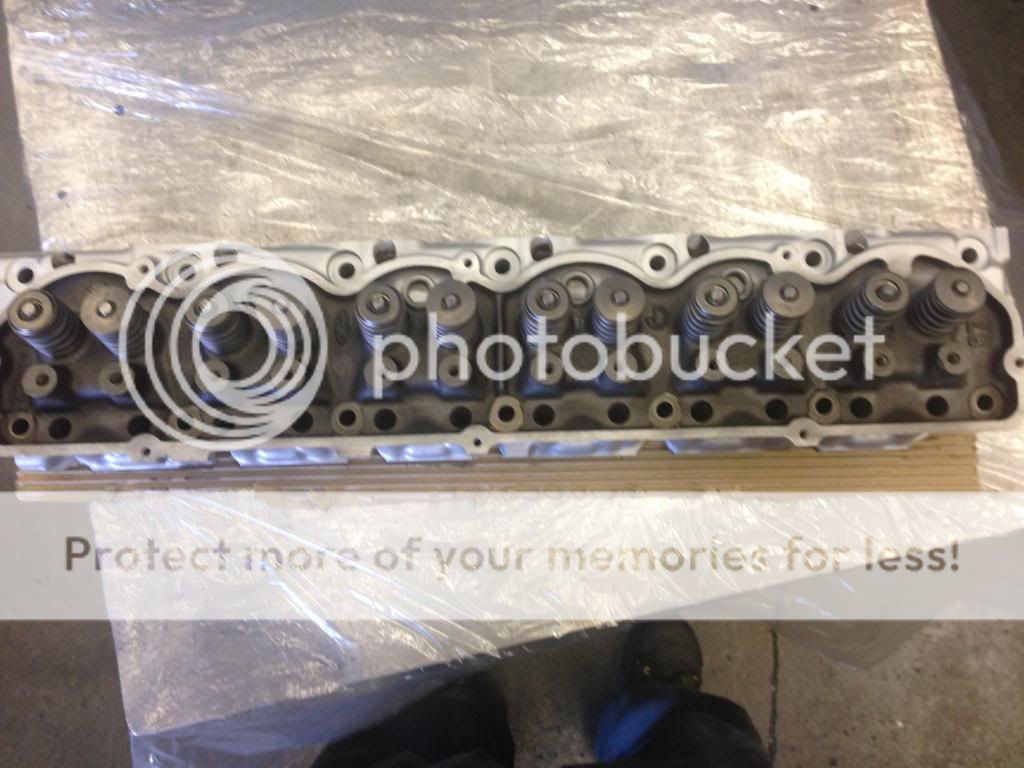
Pulled the head off and brought it into work today (no pics of the head yet, will try to snap some tomorrow). Looking at everything I don't think it'll be much machine work. The valves were good, no excessive wear and no pounding. Will have to change 1 intake valve guide but it's more borderline and a might as well change it while it's apart thing.
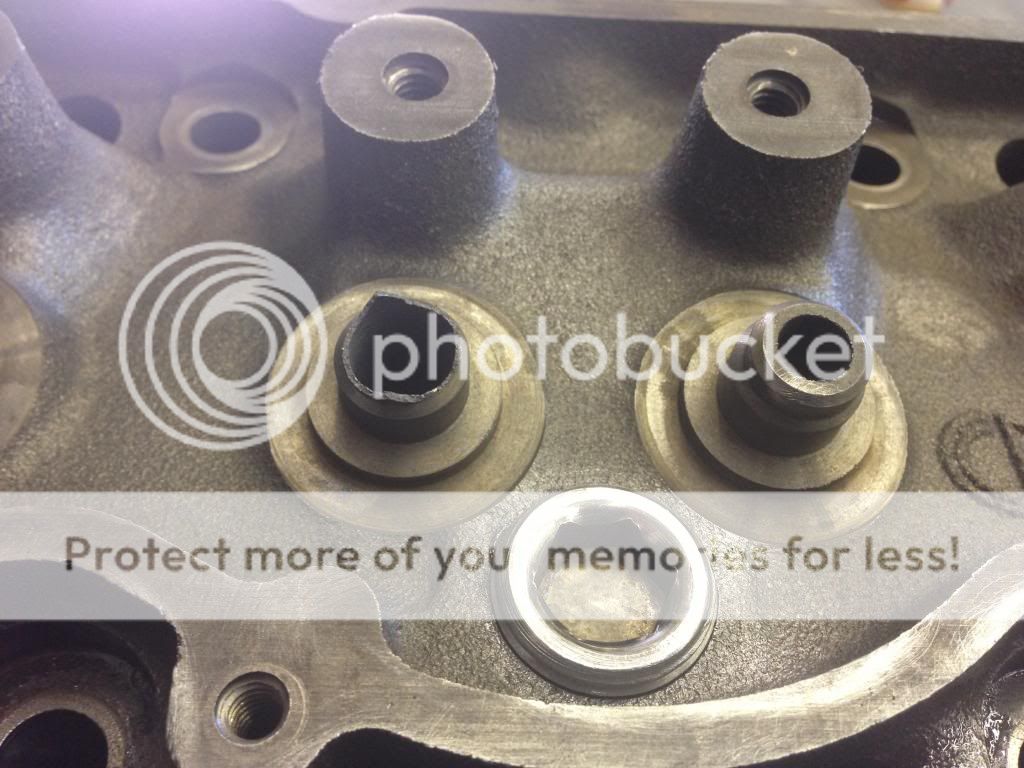
I did have 1 hiccup pulling it apart. 4 of the 6 tubes on the air manifold tube broke at the joint due to the bottom "nut" portion being rusted in the hole. I've looked into replacing it ($60-100) but I've heard you can just plug the holes and delete it. Any negatives to doing this?
Will finish pulling the rest of the engine apart this weekend but based on how decent the top of the cylinder looks and the head was I'm doubting the crank will need much too. Probably standard or .001 oversize bearings
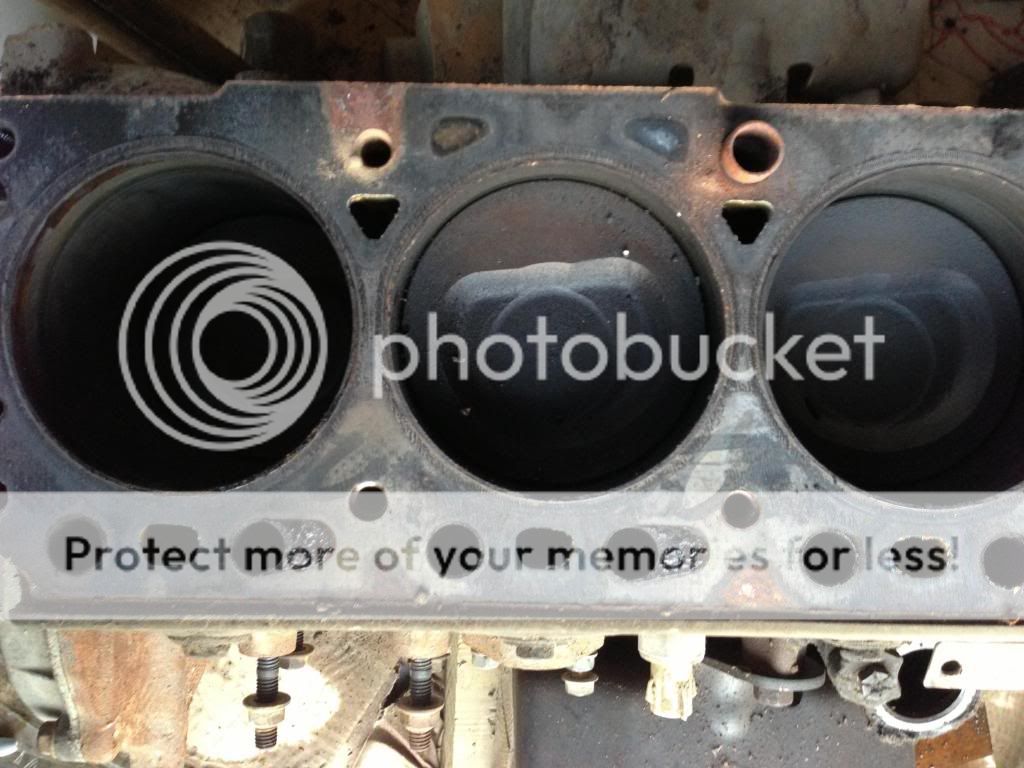


Pulled the head off and brought it into work today (no pics of the head yet, will try to snap some tomorrow). Looking at everything I don't think it'll be much machine work. The valves were good, no excessive wear and no pounding. Will have to change 1 intake valve guide but it's more borderline and a might as well change it while it's apart thing.
I did have 1 hiccup pulling it apart. 4 of the 6 tubes on the air manifold tube broke at the joint due to the bottom "nut" portion being rusted in the hole. I've looked into replacing it ($60-100) but I've heard you can just plug the holes and delete it. Any negatives to doing this?
Will finish pulling the rest of the engine apart this weekend but based on how decent the top of the cylinder looks and the head was I'm doubting the crank will need much too. Probably standard or .001 oversize bearings


#17
09-10-2013, 07:46 PM
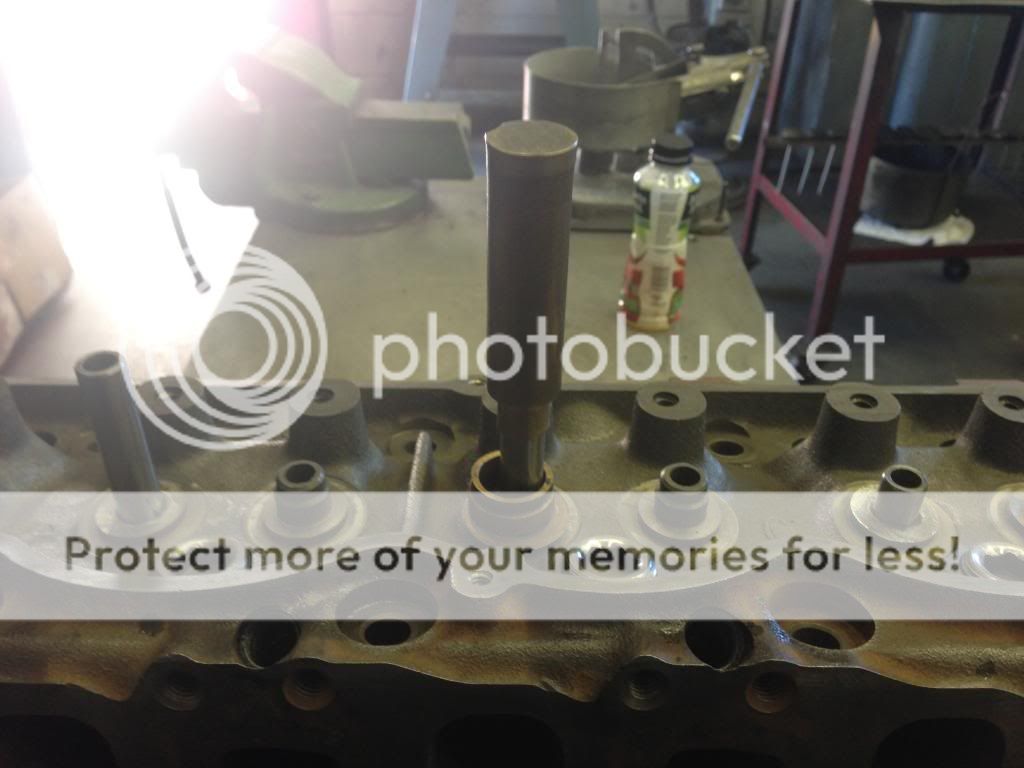
Got the busted air manifold tube piece out of the head and cleaned it up some more this morning before work started.
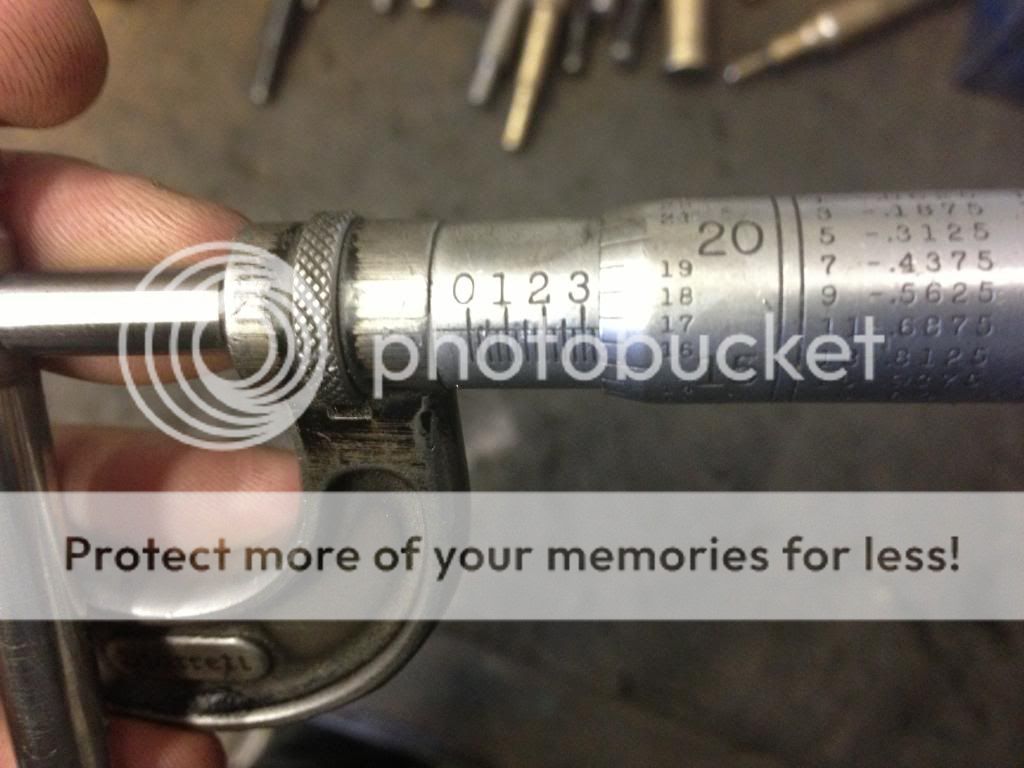
Also cleaned up the valves and mic'd them and found out 2 of the intake valves' shafts are worn down .003 thou and that the 1 valve guide I had thought needed to be changed was actually because I had grabbed 1 of the worn valves to check it initially. Hopefully the pictures are clear enough to show the difference, it was hard to take a in focus picture and mic.

At lunch I got the rest of the good valves ground...


...and checked the head for warp-age. It was only .0015 thou but I'll still deck it.

I'll try to take as much pictures as I can at work in case people are curious about the machine shop side of things but with my limit time to get work done (before work and at lunch) I have to get as much as I can done in that time and clean up the area before getting back to work. I'll do what I can

Also cleaned up the valves and mic'd them and found out 2 of the intake valves' shafts are worn down .003 thou and that the 1 valve guide I had thought needed to be changed was actually because I had grabbed 1 of the worn valves to check it initially. Hopefully the pictures are clear enough to show the difference, it was hard to take a in focus picture and mic.


At lunch I got the rest of the good valves ground...


...and checked the head for warp-age. It was only .0015 thou but I'll still deck it.

I'll try to take as much pictures as I can at work in case people are curious about the machine shop side of things but with my limit time to get work done (before work and at lunch) I have to get as much as I can done in that time and clean up the area before getting back to work. I'll do what I can
#18
09-11-2013, 07:49 PM
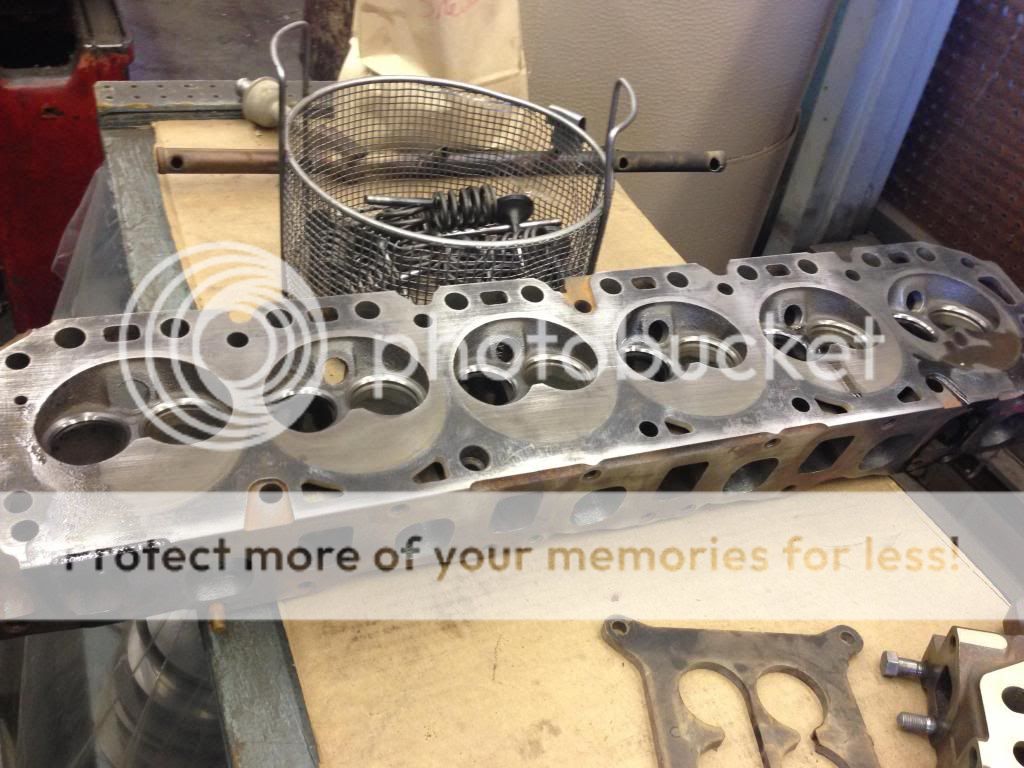
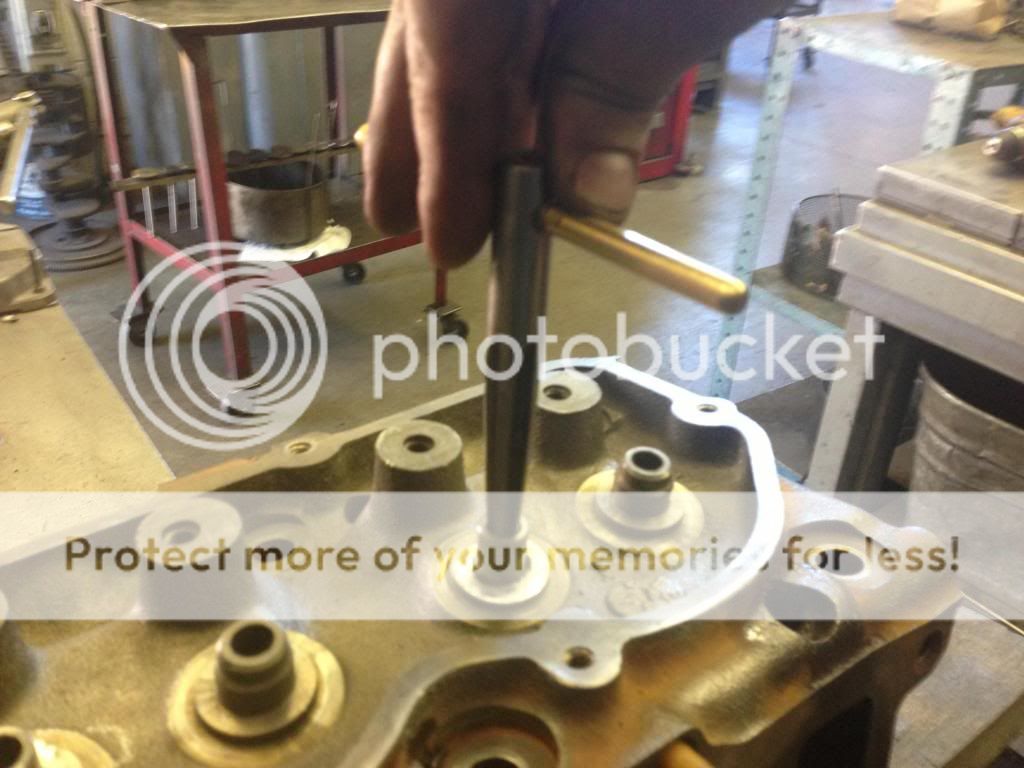
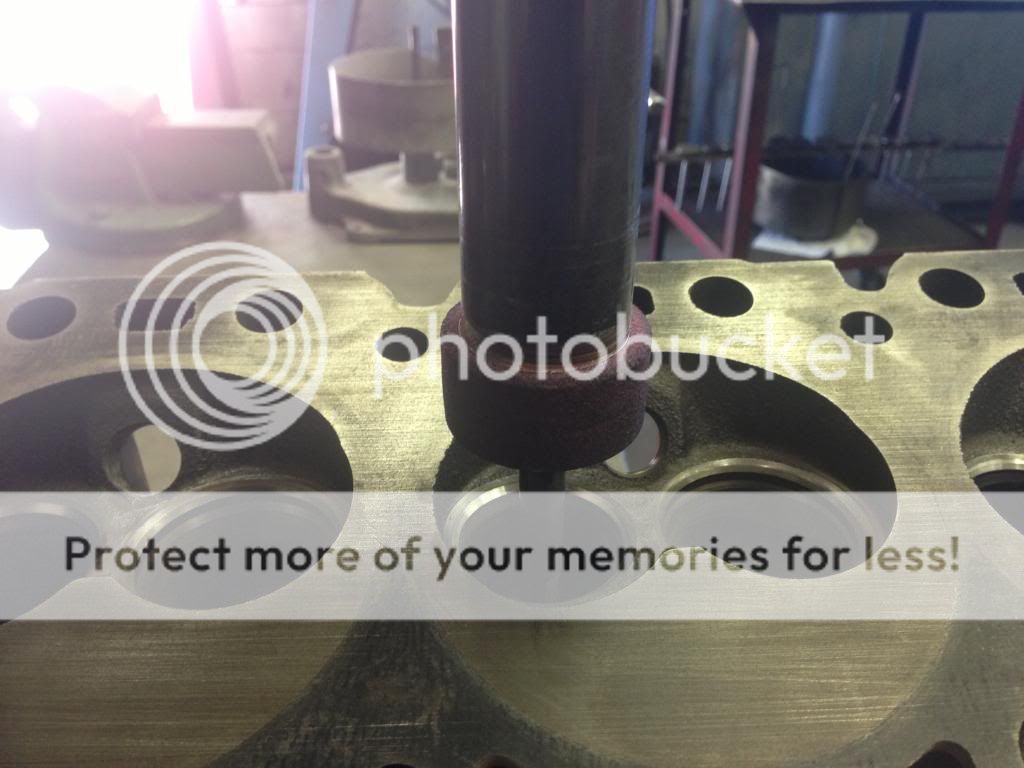
After giving it some thought last night, I decided to changed to intake guides after all. I have it apart and they're like a buck each so it's just my time, what the hell. Didn't snap any pictures of drilling and reaming the old guides out this morning but I did snap these at lunch.
I had some left over casting from the old guide. Now you could leave this extra casting if you a) have a valve seal that has to go on the end and b) didn't push excessively hard while drilling/reaming. But the 300 i6 has a shield that goes on the valve stem so I just knocked off the excess with a chisel and cleaned it up with a die grinder.

After that I pounded the new guides in...
...and gave the ends a chamfer in case the punch gave it a burr.
Ground the seats 45 degrees...
...and gave them all a 15 degree top angle.

Tomorrow I will be lapping the valves in and then decking the head.
I have a question about anyone that's put a Comp Cam 252H, 260H or 268H into their EFI 300 i6. Which did you put in and how much better was it in power and mpg? I realize the 300 i6 isn't a V8 in terms of power but a little something more would be nice.
Also, any info on deleting the air manifold tube and plugging the holes for it in the head?
I had some left over casting from the old guide. Now you could leave this extra casting if you a) have a valve seal that has to go on the end and b) didn't push excessively hard while drilling/reaming. But the 300 i6 has a shield that goes on the valve stem so I just knocked off the excess with a chisel and cleaned it up with a die grinder.


After that I pounded the new guides in...

...and gave the ends a chamfer in case the punch gave it a burr.

Ground the seats 45 degrees...

...and gave them all a 15 degree top angle.

Tomorrow I will be lapping the valves in and then decking the head.
I have a question about anyone that's put a Comp Cam 252H, 260H or 268H into their EFI 300 i6. Which did you put in and how much better was it in power and mpg? I realize the 300 i6 isn't a V8 in terms of power but a little something more would be nice.
Also, any info on deleting the air manifold tube and plugging the holes for it in the head?
#19
09-12-2013, 09:05 PM
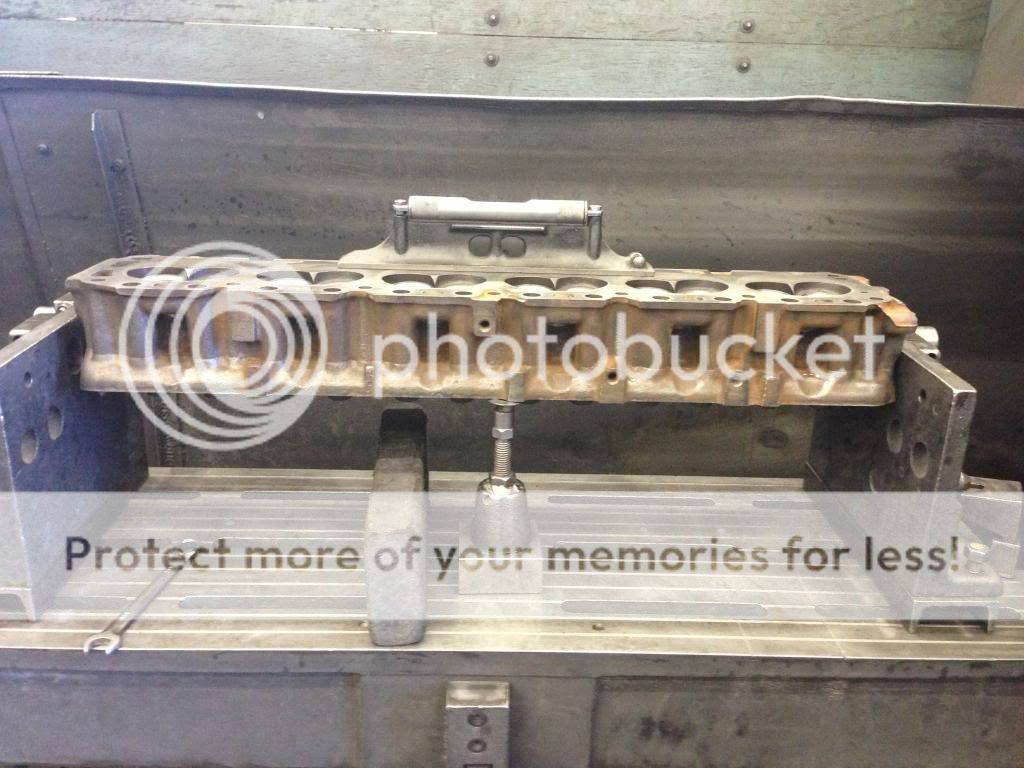
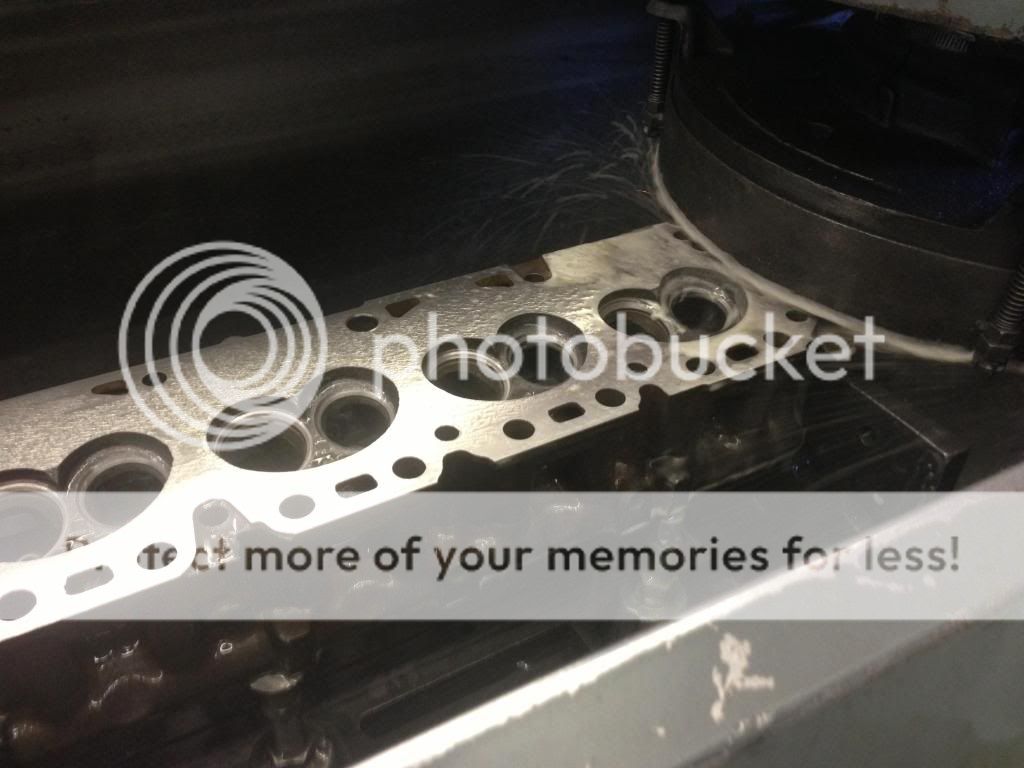
Well another day and another couple hours put into the head. Lapped the valves in and did a final clean this morning in preparation for decking at lunch.
Decked the head and while the straight edge and feeler gauge before only showed maybe .0015 thou it took between .004-.007 thou to come clean.
Anyways, onto the pictures for those following along.
The set up...
Mid resurface...
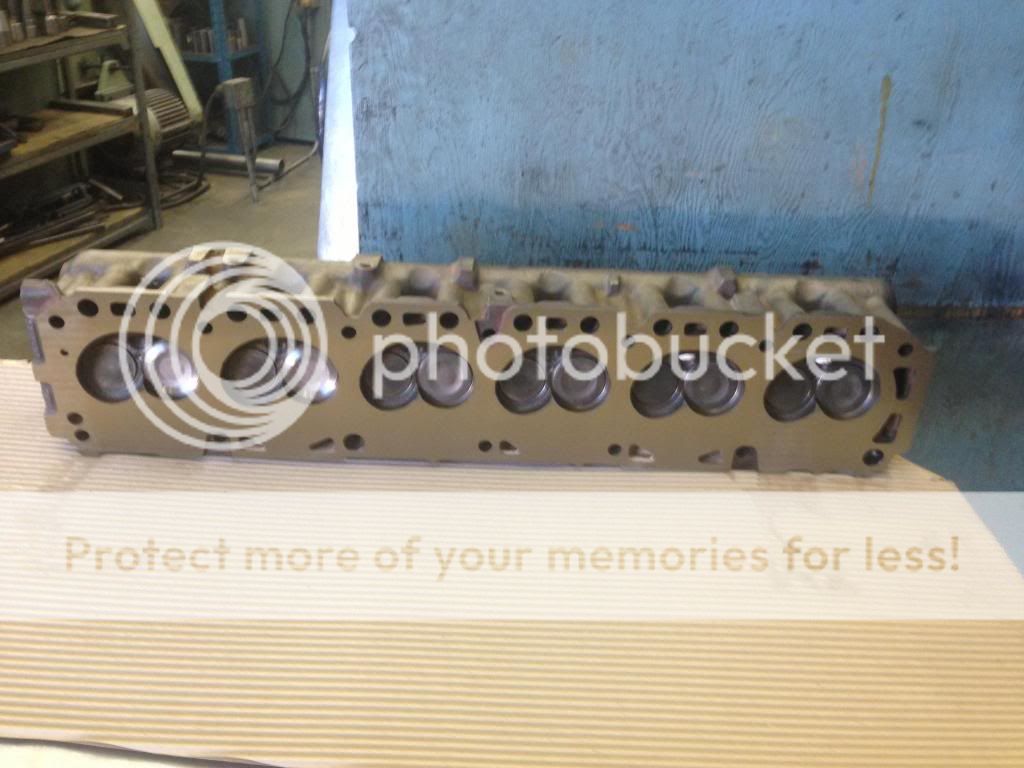
And the fanale...

I steam cleaned it afterwards, ordered new Fel-Pro shields and coated it in wd40 in preparation for assembly tomorrow morning. But things slowed down near the end of the day so I put it together and it's just awaiting primer and paint and then I'll be sealing it in plastic wrap after a healthy dose of oil/wd40 and putting it in storage until the rest of the engine parts are done and ready for final assembly.
So tomorrow is the last day of head pictures for those of you that are bored with seeing and hearing about them
Bring the crank and block and con rods in next week for hot tank and assessment. So hopefully some more interesting stuff next week
Decked the head and while the straight edge and feeler gauge before only showed maybe .0015 thou it took between .004-.007 thou to come clean.
Anyways, onto the pictures for those following along.
The set up...

Mid resurface...

And the fanale...

I steam cleaned it afterwards, ordered new Fel-Pro shields and coated it in wd40 in preparation for assembly tomorrow morning. But things slowed down near the end of the day so I put it together and it's just awaiting primer and paint and then I'll be sealing it in plastic wrap after a healthy dose of oil/wd40 and putting it in storage until the rest of the engine parts are done and ready for final assembly.
So tomorrow is the last day of head pictures for those of you that are bored with seeing and hearing about them
Bring the crank and block and con rods in next week for hot tank and assessment. So hopefully some more interesting stuff next week
#20
09-12-2013, 09:35 PM


#21
09-12-2013, 10:12 PM
Thanks SideWinder
I thought about doing a few things I read about (3-4 angle valve grind and port and polish come to mind) but I couldn't find any real proof they did anything noticeable on a 300 i6. Or what to remove for P&P.
If there's some write up or guide as to what to remove I can always pull the head apart. It's just time for me.
Otherwise I'm going to keep this a pretty mild build with just a better camshaft. Still looking into which one from Comp Cams. Leaning towards the 252H.
This is going to be my DD/work truck. I'll get a little more wild with the 351w in my '79.
EDIT: Thanks also the info on plugging those holes. I take it I can delete everything else that attaches to that tube?
#22
09-12-2013, 11:56 PM
Freshman User
Join Date: Sep 2013
Location: Park Hills, MO
Posts: 49
Likes: 0
Received 0 Likes
on
0 Posts
I have tried to read through all this, but I'm hoping that you decided to stick with an 80's style front clip. Even though I like the 90's clip better, if you look closely at the very front of the frames on both the 80's and 90's trucks I believe that you'll find just a slight difference. I know that I had an 89 1 ton that I wanted to put a 90's front clip on and it wasn't until after I switched it that I realized that the front nose of the frame was different and the bumper wasn't interchangeable, and since the 80's bumper won't match the 90's clip and I had to paint the clip anyway I wound up switching them back. I felt it was better giving up and undoing my work than chopping the front 6" or so of the frame and trying to switch them out. Your's may be a different frame nose than what I was dealing with, but I can almost guarantee that the 91's bumper won't mount to the 88's frame without frame mods. I think you had decided already against swapping clips, but I figured I'd mention it anyway. Good luck with your build, if it was me I'd build that 351w, but then you'd have to swap out motor mount towers on the frame, the radiator, fan shroud, and possibly the tranny crossmember (or atleast move it forward I believe due to the 351 being shorter from front to back) and almost definately the driveshaft/s. Still in my opinion worth it, if you do the right low budget mods to the 351w then you can get as good if not better gas mileage than the 300, it sounds better, runs better if you want to step on it, and you can get more torque out of the 351w if you bore it .030, shave the head decks, and put a good low lift cam in it. I put a Comp Cam 35-255-5 in my 351w that has a .478 int/.485 exh lift, it works perfect with my computer, and even though my truck being an F-250 Heavy Duty only has 3.55 rear/3.54 front gears, after having the heads shaved and boring it .030 over I have somewhere around 10.5:1 compression and the low end torque is unreal. Mine has a ZF 4-speed w/overdive and it will take off in 1st by just letting out a little slow on the clutch, no gas at all, and will cruise through town at 30 mph in overdrive. On the highway it gets about 16-17 mpg at 60 mph barely giving it any gas, and when you put a heavy load on it it doesn't even know that it has a load, 3,000 lb. load or none it drives the same and gets the same gas mileage. Just a thought, me personally I just couldn't imagine driving a truck with a 6 banger in it. Lol, have fun building your Ford, I did mine.
#23
09-13-2013, 04:58 AM
I have tried to read through all this, but I'm hoping that you decided to stick with an 80's style front clip. Even though I like the 90's clip better, if you look closely at the very front of the frames on both the 80's and 90's trucks I believe that you'll find just a slight difference. I know that I had an 89 1 ton that I wanted to put a 90's front clip on and it wasn't until after I switched it that I realized that the front nose of the frame was different and the bumper wasn't interchangeable, and since the 80's bumper won't match the 90's clip and I had to paint the clip anyway I wound up switching them back. I felt it was better giving up and undoing my work than chopping the front 6" or so of the frame and trying to switch them out. Your's may be a different frame nose than what I was dealing with, but I can almost guarantee that the 91's bumper won't mount to the 88's frame without frame mods. I think you had decided already against swapping clips, but I figured I'd mention it anyway. Good luck with your build, if it was me I'd build that 351w, but then you'd have to swap out motor mount towers on the frame, the radiator, fan shroud, and possibly the tranny crossmember (or atleast move it forward I believe due to the 351 being shorter from front to back) and almost definately the driveshaft/s. Still in my opinion worth it, if you do the right low budget mods to the 351w then you can get as good if not better gas mileage than the 300, it sounds better, runs better if you want to step on it, and you can get more torque out of the 351w if you bore it .030, shave the head decks, and put a good low lift cam in it. I put a Comp Cam 35-255-5 in my 351w that has a .478 int/.485 exh lift, it works perfect with my computer, and even though my truck being an F-250 Heavy Duty only has 3.55 rear/3.54 front gears, after having the heads shaved and boring it .030 over I have somewhere around 10.5:1 compression and the low end torque is unreal. Mine has a ZF 4-speed w/overdive and it will take off in 1st by just letting out a little slow on the clutch, no gas at all, and will cruise through town at 30 mph in overdrive. On the highway it gets about 16-17 mpg at 60 mph barely giving it any gas, and when you put a heavy load on it it doesn't even know that it has a load, 3,000 lb. load or none it drives the same and gets the same gas mileage. Just a thought, me personally I just couldn't imagine driving a truck with a 6 banger in it. Lol, have fun building your Ford, I did mine.
#24
09-13-2013, 03:42 PM
Thanks Hutch and Dan for the info
You're right that I'm not swapping the '91 clip anymore. The '87 my brother and me picked up will be the cab and front clip donor. Should be a relatively easy swap apart from changing the 6.9 rad support out for a gasser.
As for the motor, I don't have a lot of choices for this truck that made sense.
I have this 300, a 302, 460 (possible cracked block), oodles of 351m/400, the rough 6.9 diesel (too costly to swap in/rebuild in my opinion) and the 351w that's going in my '78/79 with basically the exact write up you described and a ZF5 behind it.
#25
09-13-2013, 03:53 PM
Finished up the head today with a coat of primer and some aluminum paint before wrapping it for storage.
The way I left it last night...
Painted glory..

After a coating of graphite lube...
Like I said before I'll be bring the rest of the engine into work next week and get started on it.
I'm going to have to hussle pulling the cab and box off and get on cleaning and painting the frame. I may have the engine ready before the truck to put it in!
The way I left it last night...

Painted glory..

After a coating of graphite lube...

Like I said before I'll be bring the rest of the engine into work next week and get started on it.
I'm going to have to hussle pulling the cab and box off and get on cleaning and painting the frame. I may have the engine ready before the truck to put it in!
#26
09-13-2013, 04:23 PM

A 4 or 5 angle valve job is a waste of time on street engine, which I'm sure you were already aware of.
The 4.9 in particular would be an even larger waste of time, air flow is not its strong point, torque is.
Fordsix.com has some good info about getting a little more performance out of straight 6's. The Frenchtown Flyers posts are generally pretty informative.
He happens to have a rare factory prototype head that is straight through, intake ports on one side, and exhaust on the other. There are videos around of him making passes at the strip with it.
Have to scroll through a couple pages and agree to be nice in order to get to the forum on fordsix.
There is a factory retard built into the timing on our years of 4.9s, so a cam ground to remove that should give some increased performance. I was going to go the cheap route and use a stock cam with an offset key in my engine, but I didn't like the look of it when it arrived so I just went back straight stock.
Good luck on your build.
#27
09-13-2013, 07:11 PM
Thanks bdelmar, I wasn't too sure if I was making a mistake not pursuing some of those head mods but after spending a few more hours searching around on FordSix (spent limited time through google searches on there before) I'm much more comfortable putting the head away for storage.
Any chance you know if the Comp Cam 252H (Part #66-236-4) is ground to remove the retard the stock cam has? That was the cam I was looking into. Just a little something to help.
Any chance you know if the Comp Cam 252H (Part #66-236-4) is ground to remove the retard the stock cam has? That was the cam I was looking into. Just a little something to help.
#28
09-14-2013, 09:20 AM
I don't know if that cam has the retard removed, but it seems like one of the popular choices for these engines. I would guess it does, but a call to Comp Cams, or an email should get a definite answer.
Handy comparasion chart:
FORDSIX PERFORMANCE • View topic - Specifications of common cams for 240/300 engines
Without looking at a graph, it appears to give a little more bottom end torque than stock and more useable high rpm, probably a very flat torque curve. The higher rpm isn't likely to be too useful for daily driving, my truck rarely sees 3k unless I'm feeling frisky. But the extended rpm range of your cam should give more useable power throughout.
Increased torque at lower rpm is what removing the factory retard from the cam does, this is what makes me think the cam you mentioned probably has it removed. We are talking about 4 degrees if I remember correctly.
The bottom end boost would be helpful for me, I have the M5od with 3.55 rear and the gearing is a bit odd. First gear is a little to low, second gear a little to high, and reverse is also on the high side. This is with 265 75/16s which are fairly close to stock, just wider.
So, first is only good for about 25 feet, but taking off in second has a tendency to make the tires spin on anything but pavement, and backing up a trailer is funky, similar to taking off in second.
More low end torque would in theory let me take off in second with having to rev up quite so much, and also let me back things up with a similar improvement.
From what I understand, the zf5 has different characteristics, and after reading over your post I gather that's what you will be using. If you mentioned tire size I didn't catch it.
In any case the zf5 seems to be more truck friendly, lower geared.
I would guess the power band change with the cam you mentioned wouldn't be enough to cause any issues with the zf, it looks to be only about 200 rpm. I doubt if it would have made a huge difference with my m5, just a little better.
#29
09-14-2013, 10:29 AM
Thanks again bdelmar
I seen that post on FordSix and it helped reinforce my choice of the 252H. I didn't want to go wild with this build as it's my first from start to finish and I'm still learning all the machining and assembly sides of things.
I'm also glad to hear the cam choice shouldn't effect my choice to use the ZF. I wanted to keep most of the drive train the way it is now with just the engine getting a little more oomph and stepping up to a slightly larger tires. I was leaning towards 285/75r16. Shouldn't be too much to effect the DD aspect of this build.
#30
09-15-2013, 08:19 AM
285's won't bother it at all, at least in the rear for sure. I had 285 75's on the rear of mine for several years and it drove fine, even with a worn out engine/trans/rearend. Speedo was probably wrong as they are taller then the 265's by about 2 inches or so - just a rough eyeball, not actual measurement.
When I switched my rear from a semi-floating open 3.55 to a full float ls 3.55 I had an odd bird rim on it and it wouldn't clear the hub. The 285's were getting dry and I didn't think the odd one would survive a rim change, but I got a deal on some almost new 265's, tires, rims, and balanced for $100.
What shape is your cab in? I know you are working on the engine part right now, but I made the mistake of ignoring my cab and doing the mechanical part of my truck. Now I have to fix rust problems and its not going to be much fun.
I saw you have one that looks pretty good, but mine didn't look that bad at a casual glance either.
But both cab corners have rust holes you can't see from outside, there are drain plugs there but ford glued over them with some kind of foam that holds moisture. The water came from either the poorly sealed cargo light - which I may end up welding closed, or from the slider window leaking, or both. I'm going with a solid window now I think.
Also, both front areas where the door piller meets the floor and rockers have rust holes, can't see them from outside, and only looks like a small hole from underneath, different story when you pull up the carpet though.
Nothing that can't be fixed, but would be a lot easier to deal with when you have the cab off.
Also, I wouldn't use rustoleum on your truck anywhere. I spent the better part of two days cleaning and prepping my rearend and sprayed it with 3 coats of rustoleum with a actual paint gun and its showing rust already less than 400 miles later.
I expect some flak from some of the people on this forum, but por 15 is not very well liked on the professional body/paint forums either. I don't have any experience with it personally, but I do know its pretty expensive.
Hotrodders.com has a body-exterior forum that is pretty good. Retired paint reps, retired and current body/restoration shop owners and the like. I've been reading and askinq questions over there for a few weeks now.
A couple of the more often recommended frame treatments are SPI epoxy, and this: Chassis Paints, Rust Paints & Chemical Resistant Floor Coatings
Its a family business and the ex-owner who is still associated with the company sent me a free quart of the silver primer to try on my cab.
I'm even considering the AG111 topcoat for final paint. Kind of limited in colors, but appears to be exceptionally tough, and quite reasonable in price.
Anyway, I would focus more on the cab then the bed, the bed is relatively easy to work on, or even pull and work on, but once the cab is in place and all hooked up its much harder to work on. And perhaps you already have checked the cab closely, I'm mentioning it just in case.
I'm sure you have read about the cowl sealer issue, something else that would be much easier to deal with if the cab is off. There is another spot not often mentioned in the cowl that can leak as well. Ford actually issued a TSB on it, its the hidden seam up underneath. Ford didn't put any sealer there at all and when driving in heavy rain water can blow back through it and intrude into the cab.
Oh, and the firewall flex thing. My truck had that as well. Basically a bit of poor engineering there. If you don't have one of the two plates on the cab you are using I would find one. The smaller plate would probably be ok if you don't have the problem already, but I made a copy of the larger plate for my truck. There is a guy who makes the plate and sell it and the hardware for like $120 delivered, if I had it to do over again I would buy that, its quite a job to make a plate that fits well.
Just some of the stuff I've encountered working on my truck, maybe it will save you some time down the road.
Oh, I blocked off those air ports in my head as well. My truck came with no catalytic converter, and the air pump wasn't functioning anyway, so it made no difference in driving/running. The 9/16 x 18 x 2.5" inch bolts listed in other posts would be perfect. I had to use 3" ones because they were the closest I could find. Shorter that 2.5 would hit the brackets/intake, and I got lucky on the 3 inch and one of the flats was turned just right to clear the lifting bracket in the front. You might be able to find something better in a machine shop though.