68 F100 SBFS build; CV, T45, DOHC
#1
 07-18-2013, 02:03 PM

Join Date: May 2003
Location: Kettering, Ohio
Posts: 59
Likes: 0
Received 0 Likes
on
0 Posts
68 F100 SBFS build; CV, T45, DOHC
Thought I'd start a build thread of my 68.
As I bought it almost 10 years ago in Little Rock complete with a 350 Olds under the hood.
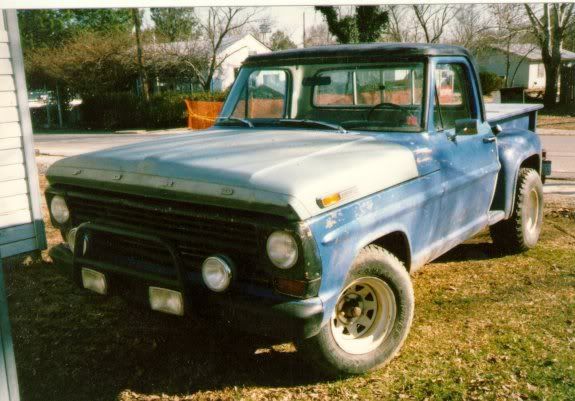
Once home, didn't take long to tear it apart, pulling the Olds driveline and swapping in a MN12 IRS.
Bought a SVO and pushed the F100 aside.... Completely redid the SVO, all Cobra suspension with IRS, brakes and steering. Coil over fronts, Bilsteins, Volvo 16V head conversion in the 2.3L. Installed T tops, and repainted.

Fast forward to last Fall. Decided to pull the cab, and reskin the roof, and replace the floor pans and cab mounts with proper panels.
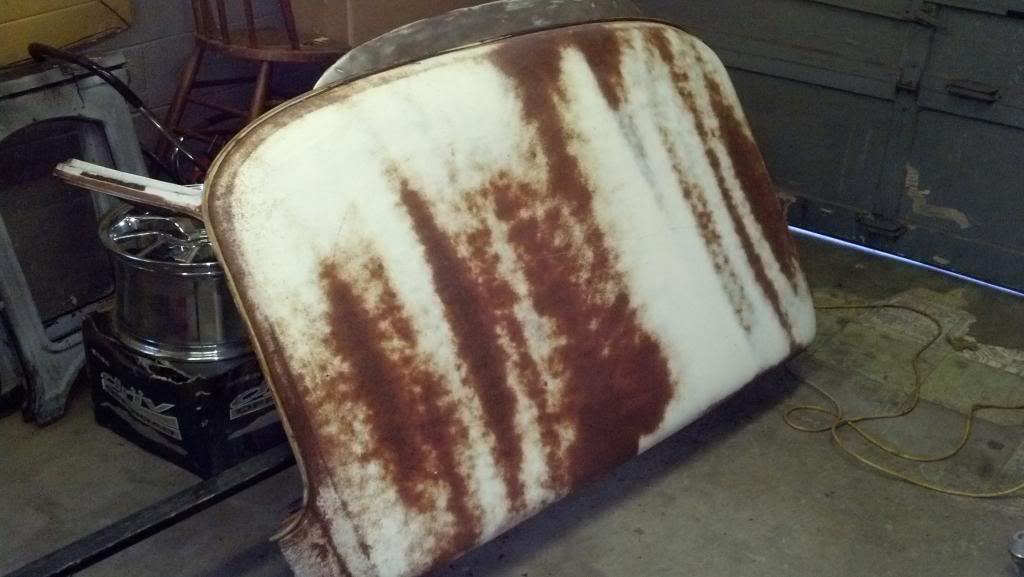
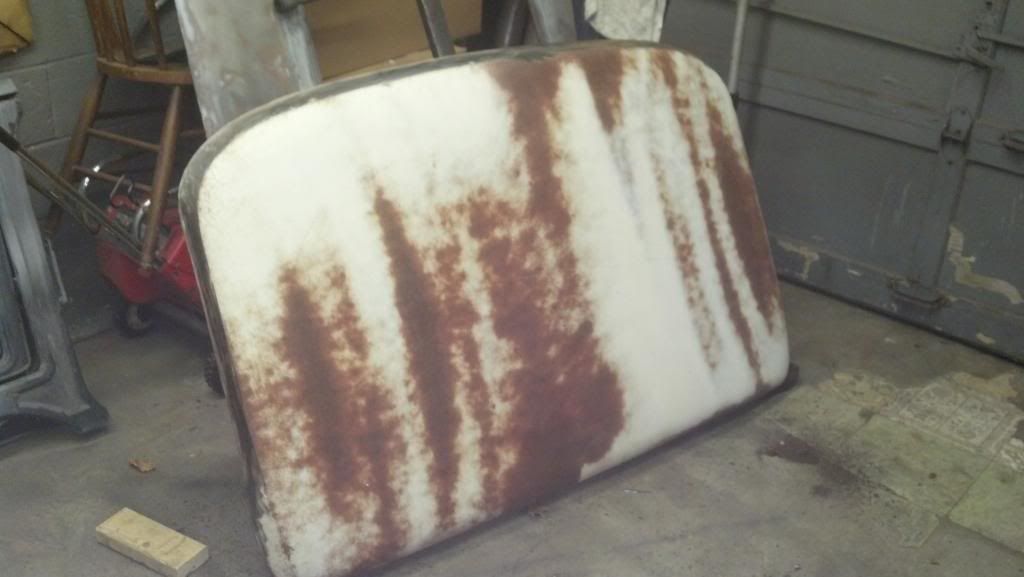
Picked up a roof to replace the original that had a sunroof cut in.
Separated it at the seam and as low as I could around the rest.
Cut the roof off the cab..
Found all the areas that didn't get paint from the factory had a nice coat of surface rust... Wire brushed it all and covered with Rustoleum converter paint.
As I bought it almost 10 years ago in Little Rock complete with a 350 Olds under the hood.
Once home, didn't take long to tear it apart, pulling the Olds driveline and swapping in a MN12 IRS.
Bought a SVO and pushed the F100 aside.... Completely redid the SVO, all Cobra suspension with IRS, brakes and steering. Coil over fronts, Bilsteins, Volvo 16V head conversion in the 2.3L. Installed T tops, and repainted.
Fast forward to last Fall. Decided to pull the cab, and reskin the roof, and replace the floor pans and cab mounts with proper panels.
Picked up a roof to replace the original that had a sunroof cut in.
Separated it at the seam and as low as I could around the rest.
Cut the roof off the cab..
Found all the areas that didn't get paint from the factory had a nice coat of surface rust... Wire brushed it all and covered with Rustoleum converter paint.
#2
07-18-2013, 02:07 PM
Join Date: May 2003
Location: Kettering, Ohio
Posts: 59
Likes: 0
Received 0 Likes
on
0 Posts
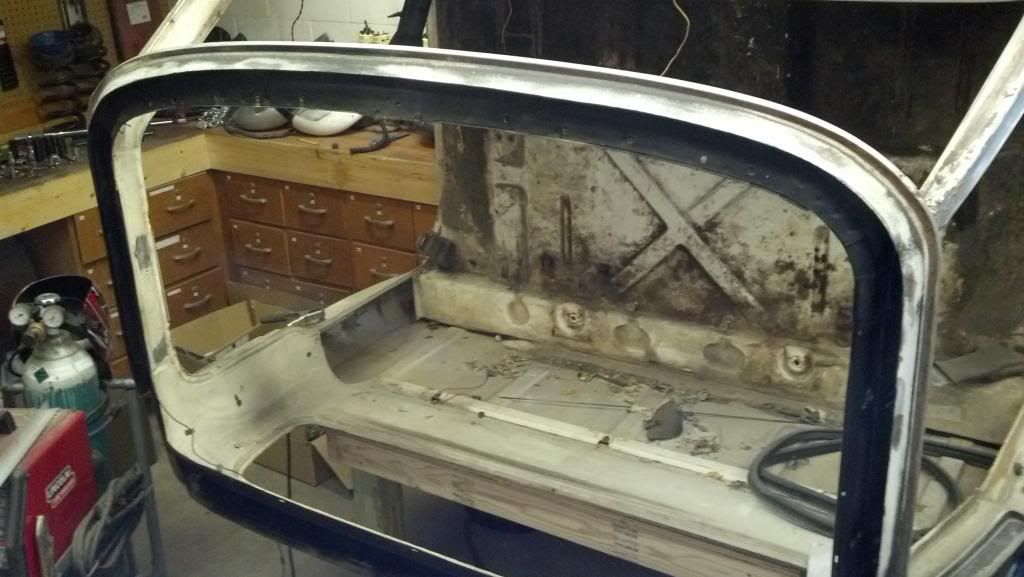
Got the roof fitted and strapped in place for welding.

Tacked it in place..


Smoothed the welds..

DC cab mounts waiting...

Scored a 09 CV IFS over the weekend. Needs inner tie rods (bent), but otherwise in great shape. (That's the same little boy from above, not so little now)

Tried out some 18x9 FR500's I have sitting around for size... I'm thinking about 18 x 9 and 18 x 10 Anthricite Bullitts for a vintage look.

Filled the original gas opening. Will be getting the usual Mustang tank under the bed.

Working my way around the back seam. No matter how much I clean it up, whatever sealer Ford used is fighting me, making welding a pain.

Cut in and welded the pass side pan the past couple nights.


Pass side cab mount. Note that DC put the inner fender holes on the wrong side...

I'll weld them up and drill them in the correct spot.
Picked up the DOHC....

Looks pretty good inside for 150K miles.

Powerwashed the crossmember.

Worked on the driver's pan.

and what weekend isn't complete without a fire and a beer.

Tacked it in place..
Smoothed the welds..
DC cab mounts waiting...
Scored a 09 CV IFS over the weekend. Needs inner tie rods (bent), but otherwise in great shape. (That's the same little boy from above, not so little now)
Tried out some 18x9 FR500's I have sitting around for size... I'm thinking about 18 x 9 and 18 x 10 Anthricite Bullitts for a vintage look.
Filled the original gas opening. Will be getting the usual Mustang tank under the bed.
Working my way around the back seam. No matter how much I clean it up, whatever sealer Ford used is fighting me, making welding a pain.
Cut in and welded the pass side pan the past couple nights.
Pass side cab mount. Note that DC put the inner fender holes on the wrong side...
I'll weld them up and drill them in the correct spot.
Picked up the DOHC....
Looks pretty good inside for 150K miles.
Powerwashed the crossmember.
Worked on the driver's pan.
and what weekend isn't complete without a fire and a beer.
#3
07-18-2013, 02:09 PM
Join Date: May 2003
Location: Kettering, Ohio
Posts: 59
Likes: 0
Received 0 Likes
on
0 Posts
Flipped the cab on it's back and fixed the inner dr cab corner. Not pretty, but who's gonna see?

Undercoated the floor/cab,

Bedliner on the frame.

Pulled the bed off and powerwashed the frame. Urethane cab mounts.

Cab meets frame once again.

Removed the Aerostar IFS, need to clean up the rails and set up for the CV IFS.

Also spent some time cleaning up the DOHC, put on the CV mounts.

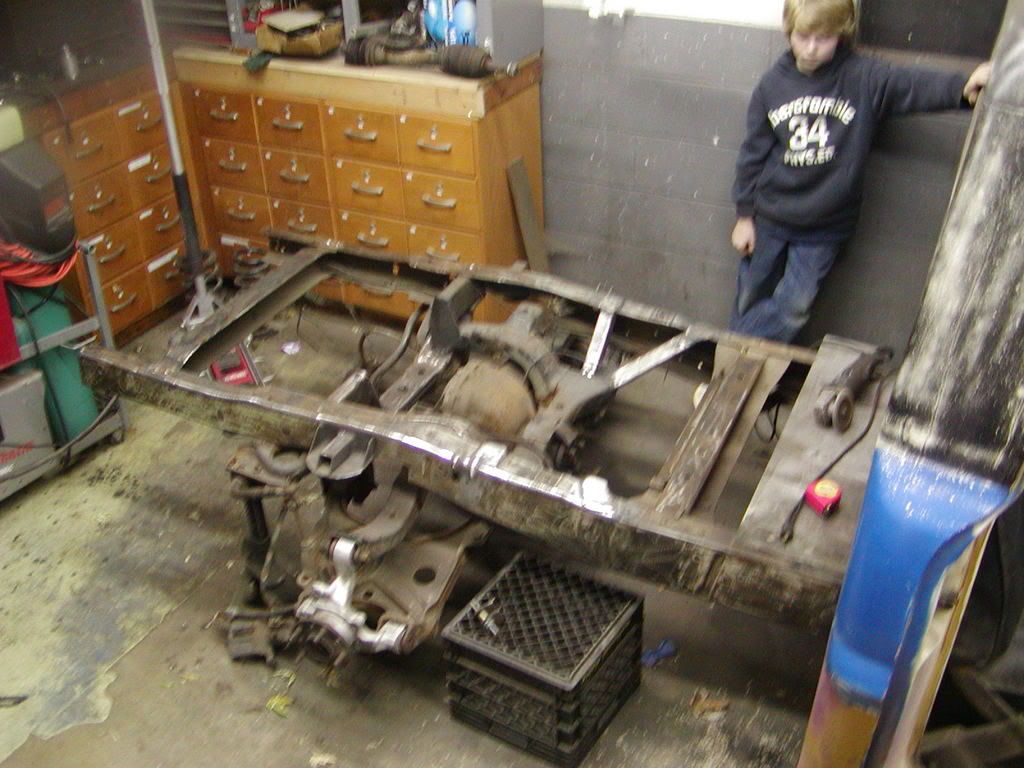
Hit up the metal recyclers and picked up material to put the CVIFS in. I had cut up both rails when I put in the Aerostar IFS in years ago. So I had to fab up pieces to replace my hacking.
I made up new lower and outer plates.


Boxed in both sides.


So once that was done, I put on some wheels and rolled it out to clean up my mess.

Tossed on a side for fun.

Then back in the garage to work on the rear lower mounts.


Tomorrow, finish the mounts, clean the rails and bedliner them.


Cleaned and scuffed the floor.... Smothered it in bedliner.


Undercoated the floor/cab,
Bedliner on the frame.
Pulled the bed off and powerwashed the frame. Urethane cab mounts.
Cab meets frame once again.
Removed the Aerostar IFS, need to clean up the rails and set up for the CV IFS.
Also spent some time cleaning up the DOHC, put on the CV mounts.
Hit up the metal recyclers and picked up material to put the CVIFS in. I had cut up both rails when I put in the Aerostar IFS in years ago. So I had to fab up pieces to replace my hacking.
I made up new lower and outer plates.
Boxed in both sides.
So once that was done, I put on some wheels and rolled it out to clean up my mess.
Tossed on a side for fun.
Then back in the garage to work on the rear lower mounts.
Tomorrow, finish the mounts, clean the rails and bedliner them.
Cleaned and scuffed the floor.... Smothered it in bedliner.
#4
07-18-2013, 02:11 PM
Join Date: May 2003
Location: Kettering, Ohio
Posts: 59
Likes: 0
Received 0 Likes
on
0 Posts
Boxed in my ugly original mounts...


Ran a boxing plate on the inside.


Smothered in bedliner...


Got the pass side all cleaned up and painted. Swapped in my other spindle with redrilled hubs. Tossed a 13" Cobra rotor on for fun. (I did measure up an relocation bracket for the caliper, in case I want to run monster brakes.)


Big rotor..

Driver's side still in FU mode. Bobby giving the offending bolt some love.

Finally got the spindle off the control arm, but I had to junk it to do it. Thankfully I have spares. Got the lower cleaned and painted, the replacement spindle has a new bearing and redrilled hub. Back on all fours again.

Finished welding and grinding the roof seam. Blasted it and shot some primer.

Had a great day to work outside. Got most of the roof DA'd, managed to overheat my compressor too..

Clutch assembly bearing upgrade and conversion to cable.
Will need some 5/8" dia rod, some 1" rod, two 5/8" flat washers, some schedule 40 1 1/2" pipe (1 3/8" id), two 5/8" ID/ 1 3/8" OD bearings with external snap ring. These can be found on ebay cheap. A Fox Mustang aftermarket quadrant. Some flat stock and 1/2" rod.
Drill the pivot hole on the quadrant to 5/8" id, make the shaft extender and spacer per below. I'm not the greatest explainer as most of what I do is on the fly... But everyone gets pictures.
Knock out the original "bearings" from the pedal mount.
Bearings are 5/8" ID/1 3/8" OD with external snap ring. Bearing rings are .310" thick.

Weld rings on center on both sides.

Weld 5/8" flat washers as spacers on the inside.

Blasted the parts, painting..

Modified clutch arm. Extended to catch quadrant, 1/2" dia rod/stud.

Spacer for extended shaft. Shaft extension 3 3/4" drill and tapped to thread on the original shaft, welded with flats matching original shaft. Either make from scratch or from second clutch pedal. Spacer is 2 1/2" long.

Antisieze lube on original plastic brake pedal.

Completed pedal assembly.

I'm using a firewall adjuster, pretty self explanatory...

Ran a boxing plate on the inside.
Smothered in bedliner...
Got the pass side all cleaned up and painted. Swapped in my other spindle with redrilled hubs. Tossed a 13" Cobra rotor on for fun. (I did measure up an relocation bracket for the caliper, in case I want to run monster brakes.)
Big rotor..
Driver's side still in FU mode. Bobby giving the offending bolt some love.
Finally got the spindle off the control arm, but I had to junk it to do it. Thankfully I have spares. Got the lower cleaned and painted, the replacement spindle has a new bearing and redrilled hub. Back on all fours again.
Finished welding and grinding the roof seam. Blasted it and shot some primer.
Had a great day to work outside. Got most of the roof DA'd, managed to overheat my compressor too..
Clutch assembly bearing upgrade and conversion to cable.
Will need some 5/8" dia rod, some 1" rod, two 5/8" flat washers, some schedule 40 1 1/2" pipe (1 3/8" id), two 5/8" ID/ 1 3/8" OD bearings with external snap ring. These can be found on ebay cheap. A Fox Mustang aftermarket quadrant. Some flat stock and 1/2" rod.
Drill the pivot hole on the quadrant to 5/8" id, make the shaft extender and spacer per below. I'm not the greatest explainer as most of what I do is on the fly... But everyone gets pictures.
Knock out the original "bearings" from the pedal mount.
Bearings are 5/8" ID/1 3/8" OD with external snap ring. Bearing rings are .310" thick.
Weld rings on center on both sides.
Weld 5/8" flat washers as spacers on the inside.
Blasted the parts, painting..
Modified clutch arm. Extended to catch quadrant, 1/2" dia rod/stud.
Spacer for extended shaft. Shaft extension 3 3/4" drill and tapped to thread on the original shaft, welded with flats matching original shaft. Either make from scratch or from second clutch pedal. Spacer is 2 1/2" long.
Antisieze lube on original plastic brake pedal.
Completed pedal assembly.
I'm using a firewall adjuster, pretty self explanatory...
#5
07-18-2013, 02:14 PM
Join Date: May 2003
Location: Kettering, Ohio
Posts: 59
Likes: 0
Received 0 Likes
on
0 Posts
Added a Mustang clutch safety.

Took the day off yesterday as it was a bang on nice day and got the T45 installed....


Original trans cross member set the trans up too high, so once setting the driveline angle -3 degrees.... I whipped one out...


Adapted a Mustang hydroboost tonight.... Removed most of the original plate and fabbed up a plate to fit.

Pushrod needed adjusting too..

Raised the opening.

A little trimming later...


Took the day off yesterday as it was a bang on nice day and got the T45 installed....
Original trans cross member set the trans up too high, so once setting the driveline angle -3 degrees.... I whipped one out...
Adapted a Mustang hydroboost tonight.... Removed most of the original plate and fabbed up a plate to fit.
Pushrod needed adjusting too..
Raised the opening.
A little trimming later...
#6
07-18-2013, 02:15 PM
Join Date: May 2003
Location: Kettering, Ohio
Posts: 59
Likes: 0
Received 0 Likes
on
0 Posts
Not much lately, rebuilding the front end, and modding the spindles for Cobra 13" brakes.


Hub OD is stepped, is the same as Mustang where the wheel mounts, steps up some at the rotor so the Cobra rotor won't sit flush. Had a hell of a time getting the hub out of the spindle thanks to corrosion due to dissimilar metals, but using longer bolts and a solid bar was able to press out the hub. Then, cleaned it up, pressed the studs out and chucked it in my lathe, squared it, and a couple passes later no more step. Pressed the studs back in.
Media blasted the spindle, lathed up some plugs for the original cradle holes. Tossed em in the freezer, warmed up the spindle and pressed them in. Milled them flush to the original surface... I need to redrill for the Cobra cradle, and need to space the cradle toward the rotor. How much I haven't determined yet. Bigger brakes, and a ton lighter then the CV stuff.

Machining the plugs flush with the spindle.
Set the cradle in the correct location and scribed the outline of the spindle on the cradle. Removed the rotor, set the cradle back on the scribe marks and clamped in place. Marked the centers with a center punch dowel, checked my spacing, setup the spindle in the mill and drilled the new holes.

And here we have the cradle bolted to the modified spindle.


Needed to space the cradle toward the rotor to center. A simple washer was perfect. I need to order up the correct bolts and hardened washers to finish, but I've got my big brakes....


Marauder guys, eat your hearts out....
Hub OD is stepped, is the same as Mustang where the wheel mounts, steps up some at the rotor so the Cobra rotor won't sit flush. Had a hell of a time getting the hub out of the spindle thanks to corrosion due to dissimilar metals, but using longer bolts and a solid bar was able to press out the hub. Then, cleaned it up, pressed the studs out and chucked it in my lathe, squared it, and a couple passes later no more step. Pressed the studs back in.
Media blasted the spindle, lathed up some plugs for the original cradle holes. Tossed em in the freezer, warmed up the spindle and pressed them in. Milled them flush to the original surface... I need to redrill for the Cobra cradle, and need to space the cradle toward the rotor. How much I haven't determined yet. Bigger brakes, and a ton lighter then the CV stuff.
Machining the plugs flush with the spindle.
Set the cradle in the correct location and scribed the outline of the spindle on the cradle. Removed the rotor, set the cradle back on the scribe marks and clamped in place. Marked the centers with a center punch dowel, checked my spacing, setup the spindle in the mill and drilled the new holes.
And here we have the cradle bolted to the modified spindle.
Needed to space the cradle toward the rotor to center. A simple washer was perfect. I need to order up the correct bolts and hardened washers to finish, but I've got my big brakes....
Marauder guys, eat your hearts out....
#7
07-18-2013, 06:20 PM

Trending Topics

#10
07-18-2013, 09:36 PM


#11
08-12-2013, 03:29 PM

#13
08-12-2013, 06:08 PM
Senior User
Join Date: Jan 2013
Location: Kingston, Pa. 18704
Posts: 479
Likes: 0
Received 0 Likes
on
0 Posts
#15
08-12-2013, 07:38 PM
Join Date: May 2003
Location: Kettering, Ohio
Posts: 59
Likes: 0
Received 0 Likes
on
0 Posts
Neah, I haven't messed with the seats any.
Finished the other side converting to the 13" brakes, replaced the upper/lower ball joints and inner tie rods. Been sitting as I've been sidetracked with some side work for a buddy, building up his 04 Cobra IRS. Rebuilt trac lok, 4.10 gears, FRPP rear cover, replaced all bushings with delrin. Finishing the uppers this week.


and Jr just got his license and bought an 95 Cherokee... Needs rockers replaced, and I sanded and painted the hood tonight.. Nothing special here...

FR500... Thanks 351.
Finished the other side converting to the 13" brakes, replaced the upper/lower ball joints and inner tie rods. Been sitting as I've been sidetracked with some side work for a buddy, building up his 04 Cobra IRS. Rebuilt trac lok, 4.10 gears, FRPP rear cover, replaced all bushings with delrin. Finishing the uppers this week.
and Jr just got his license and bought an 95 Cherokee... Needs rockers replaced, and I sanded and painted the hood tonight.. Nothing special here...
FR500...
Thanks 351.