
The Official Candy Cane's Project Thread
#16
 02-23-2013, 10:50 AM


Good point Ronzi, I checked and its an F36.
It's time to replace the fuel tank shroud. During the week I prepared the new shroud by sanding some of the loose rust and then coated with POR-15. Sunday I'll install the shroud.
Here's my old shroud. Candy Cane was made in Milpitas and the first and second owners lived in Lake County California so its always been a California truck. This is the ONLY rust I have and that is due to the lack of drain holes in the shroud so water would collect. My replacement has added holes so it didn't have that problem (Too much)


The new replacement.
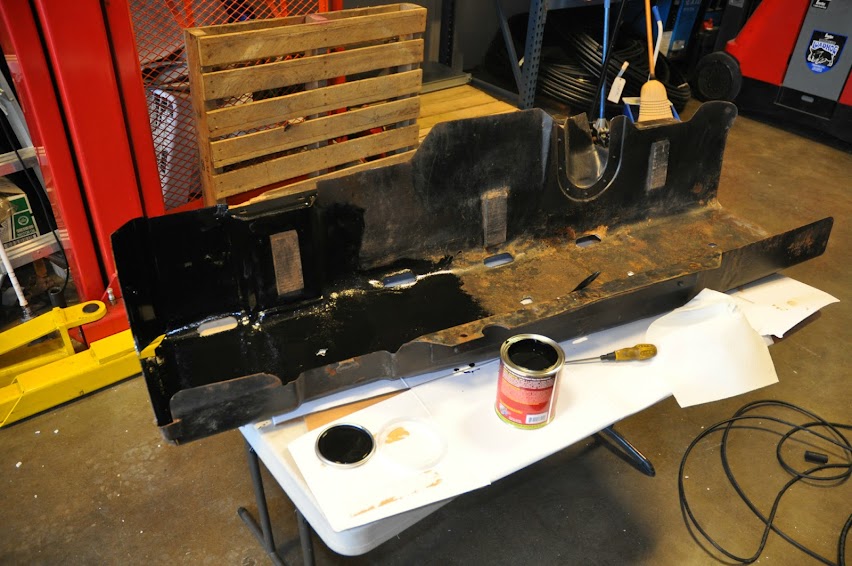

All finished.


It's time to replace the fuel tank shroud. During the week I prepared the new shroud by sanding some of the loose rust and then coated with POR-15. Sunday I'll install the shroud.
Here's my old shroud. Candy Cane was made in Milpitas and the first and second owners lived in Lake County California so its always been a California truck. This is the ONLY rust I have and that is due to the lack of drain holes in the shroud so water would collect. My replacement has added holes so it didn't have that problem (Too much)
The new replacement.
All finished.
#17
02-24-2013, 09:57 PM
Today I finished the removal and installation of the new tank shroud. I got it up on the lift and got right to work.

A quick inspection of what I have to work with. I used PB Blaster on all the bolts but even with a 1/2 Breaker Bar I was unable to break those bolts off. Time for the cut off wheel!


Since I will be showering the area with sparks around an open fuel tank lines safety is priority.

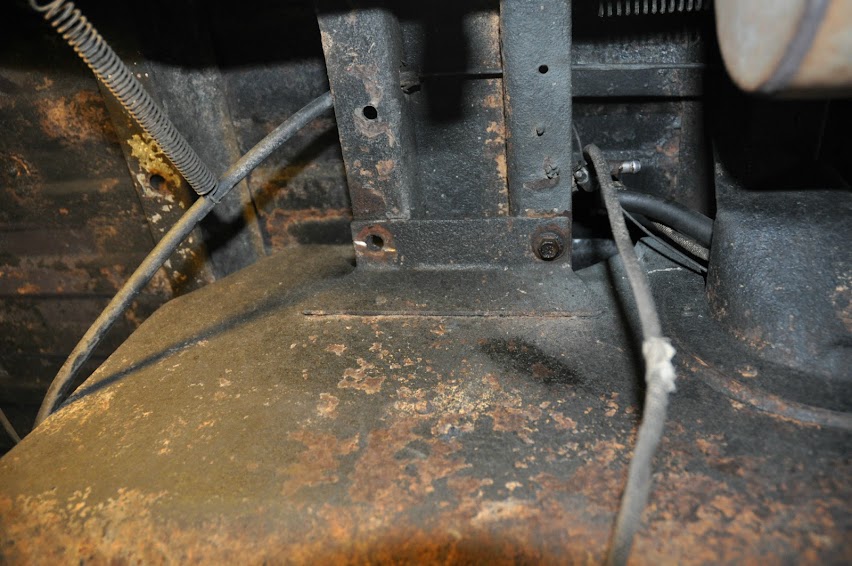
I cut the old shroud out and it hit the shop floor hard. It had about 100 pounds of tightly compacted mud between the tank and the shroud. I have never seen so much mud packed into one small space before. The tank got hung up (Fortunately) on the frame, it had about 10 gallons of fuel sloshing around inside.


While I had the tank out I took the opertunity to clean up some PO wireing and other handy work. I also noticed that he replaced the brake line but didn't drop the tank, he just threaded it through the frame. I also replaced all the 3/8 fuel lines that are difficult to reach with the tank in place.

I'm not sure what this was for, It wasn't hooked up to anything.

More tidy up work.


Since I was working alone (Usually do...) I had to come up with a method to install the tank and new shroud. I only had 2, 1 Gallon gas cans so I didn't want to dump out my fuel and my rear tank was full. I set up the folding table, set the tank on the 2 one gallon cans (For additional height.) and lowered my truck to the tank. Worked like a charm and I didn't have to tweak my back doing it. I don't know how I survived doing projects such as this without a lift. What a time saver!


I installed new shiny stainless steel nuts and bolts and tightened everything up.


I am really happy with the way the POR-15 worked. I will do my front and rear differentials then my frame after I fix a few things.
A quick inspection of what I have to work with. I used PB Blaster on all the bolts but even with a 1/2 Breaker Bar I was unable to break those bolts off. Time for the cut off wheel!
Since I will be showering the area with sparks around an open fuel tank lines safety is priority.
I cut the old shroud out and it hit the shop floor hard. It had about 100 pounds of tightly compacted mud between the tank and the shroud. I have never seen so much mud packed into one small space before. The tank got hung up (Fortunately) on the frame, it had about 10 gallons of fuel sloshing around inside.
While I had the tank out I took the opertunity to clean up some PO wireing and other handy work. I also noticed that he replaced the brake line but didn't drop the tank, he just threaded it through the frame. I also replaced all the 3/8 fuel lines that are difficult to reach with the tank in place.
I'm not sure what this was for, It wasn't hooked up to anything.
More tidy up work.
Since I was working alone (Usually do...) I had to come up with a method to install the tank and new shroud. I only had 2, 1 Gallon gas cans so I didn't want to dump out my fuel and my rear tank was full. I set up the folding table, set the tank on the 2 one gallon cans (For additional height.) and lowered my truck to the tank. Worked like a charm and I didn't have to tweak my back doing it. I don't know how I survived doing projects such as this without a lift. What a time saver!
I installed new shiny stainless steel nuts and bolts and tightened everything up.
I am really happy with the way the POR-15 worked. I will do my front and rear differentials then my frame after I fix a few things.

#19
02-24-2013, 10:07 PM
#20
02-24-2013, 10:19 PM
I was just about to ditch the whole saddle tank and get a larger rear fuel cell but on a trip to Turbohunter's "Honey Hole" up in Quincy CA I found a rust free factory shroud so it was a no brainier. Also having 2 fuel tanks exempts me from some of the California emissions.
#21
02-24-2013, 10:36 PM
Thanks,
I was just about to ditch the whole saddle tank and get a larger rear fuel cell but on a trip to Turbohunter's "Honey Hole" up in Quincy CA I found a rust free factory shroud so it was a no brainier. Also having 2 fuel tanks exempts me from some of the California emissions.
I was just about to ditch the whole saddle tank and get a larger rear fuel cell but on a trip to Turbohunter's "Honey Hole" up in Quincy CA I found a rust free factory shroud so it was a no brainier. Also having 2 fuel tanks exempts me from some of the California emissions.
The place Turbohunter found looks like it would be a hoot to visit. Wish it wasn't so far away.
#23
02-25-2013, 12:11 AM
Hi Steve, Nice work! Does the company know that you borrowed their table? ha ha...
I have a new bumper (looks like yours) that is sitting in my garage floor and your write up on that was helpful. What kind of clearance would you say you have when the tailgate is down? Did you also have to pull it inward?
Question on the tank shield - You mentioned your tank dropped when you removed the shield so can I assume they share the same mounting points? I have a rusty area on my shield and I think I can patch it and will need to drop it as well. I also got POR to do the underside but plan to apply a top coat of enamel to keep it looking black.
I see you installed your Skyjacker and noticed the ripped shock booty - Is that a quality issue or do you think you may have snagged it on something? I am also planning to buy the 6" kit from Skyjacker and I hope that its a top quality kit.
Your hydraulic lift is pretty awesome!
#24
02-25-2013, 08:52 AM
Hi Steve, Nice work! Does the company know that you borrowed their table? ha ha...
I have a new bumper (looks like yours) that is sitting in my garage floor and your write up on that was helpful. What kind of clearance would you say you have when the tailgate is down? Did you also have to pull it inward?
Question on the tank shield - You mentioned your tank dropped when you removed the shield so can I assume they share the same mounting points? I have a rusty area on my shield and I think I can patch it and will need to drop it as well. I also got POR to do the underside but plan to apply a top coat of enamel to keep it looking black.
I see you installed your Skyjacker and noticed the ripped shock booty - Is that a quality issue or do you think you may have snagged it on something? I am also planning to buy the 6" kit from Skyjacker and I hope that its a top quality kit.
Your hydraulic lift is pretty awesome!
I have a new bumper (looks like yours) that is sitting in my garage floor and your write up on that was helpful. What kind of clearance would you say you have when the tailgate is down? Did you also have to pull it inward?
Question on the tank shield - You mentioned your tank dropped when you removed the shield so can I assume they share the same mounting points? I have a rusty area on my shield and I think I can patch it and will need to drop it as well. I also got POR to do the underside but plan to apply a top coat of enamel to keep it looking black.
I see you installed your Skyjacker and noticed the ripped shock booty - Is that a quality issue or do you think you may have snagged it on something? I am also planning to buy the 6" kit from Skyjacker and I hope that its a top quality kit.
Your hydraulic lift is pretty awesome!
My Skyjacker lift is fine, my problem is with the shock mounts. The holes are too large for the shock so they flop around and sometimes the shock will actually fall out. I am currently working on a replacement plan I'm not sure if I will replace the mounts with the same type or get the mount that will fit the shock with a bolt on the top end (Similar to the bottom mount)
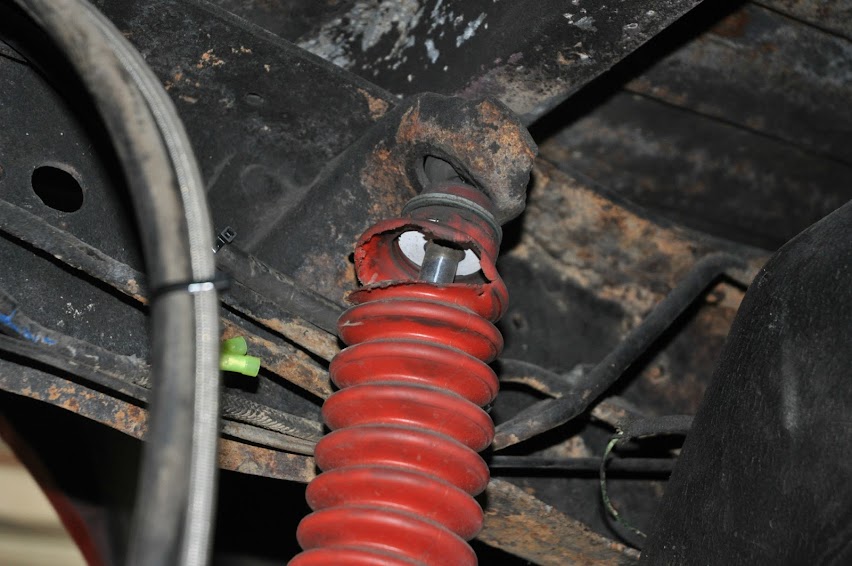

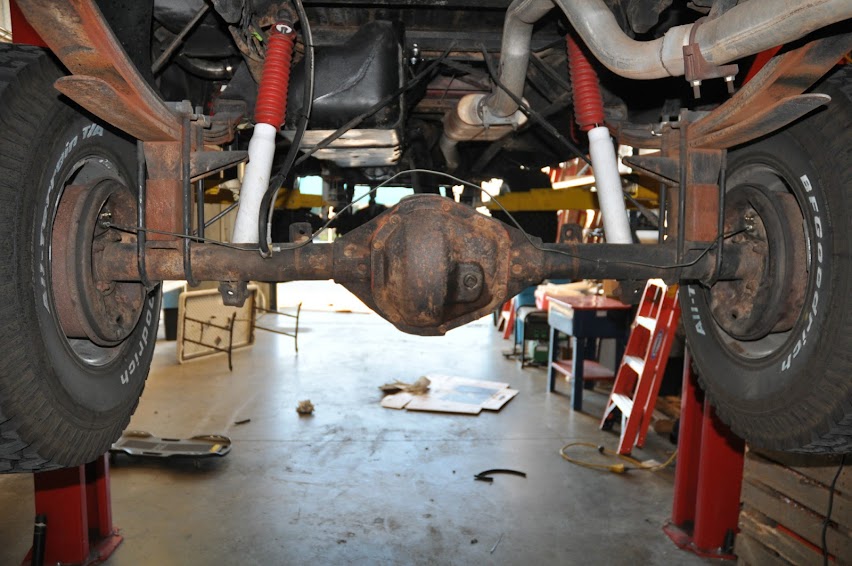
Also you are looking at the suspension fully extended. I'll also look into replacing my parking brake cable as well, it was like a piano string.
#25
02-25-2013, 09:42 AM
#26
03-05-2013, 10:17 PM
#27
03-05-2013, 10:36 PM
Thanks for the bump AK.
I have been doing a lot of behind the sceans work, I have a list of stuff I'm going to order from DC pretty soon. I also have been doing some homework on future projects such as my clutch replacement/Tranny-Tcase mini rebuild project. I'm about ready to start my LED courtesy light install probably by next weekend. More to come...
Other than that work and family keeping me busy. I drove Candy Cane to work all last week, this week she gets a break and is safe in the garage. Rain is expected for a few days.
#28
03-05-2013, 10:53 PM
#29
03-10-2013, 11:40 PM
LED Lights
Thanks AK and just for that here's a progress report for all the Candy Cane Fans.
I ordered some surface mount LED strips from eBay to use as courtesy lights and whatever else I could think of. First thing I wanted to do was to make a bracket to attach the LED's to so they wont peel off on the first 100 degree day. I used some blank aluminum panel cover plates and put a slight bend to them to angle the light towards the front part of the floor. I drilled some holes so I could attach the LED's with a cable tie if they start to peel off.

I peeled the back off the LED's to reveal
the solder pads and soldered the wires.


Tested.
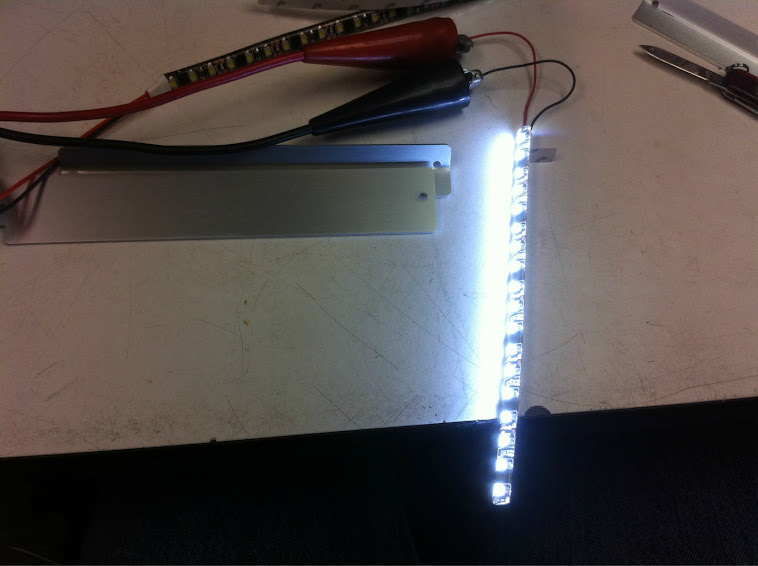
All finished and ready to install.

With my camera on a tripod and no light except the garage light and the windows I shot this picture with a 1 sec exposure and the iris wide open.

Same exposure after photo.

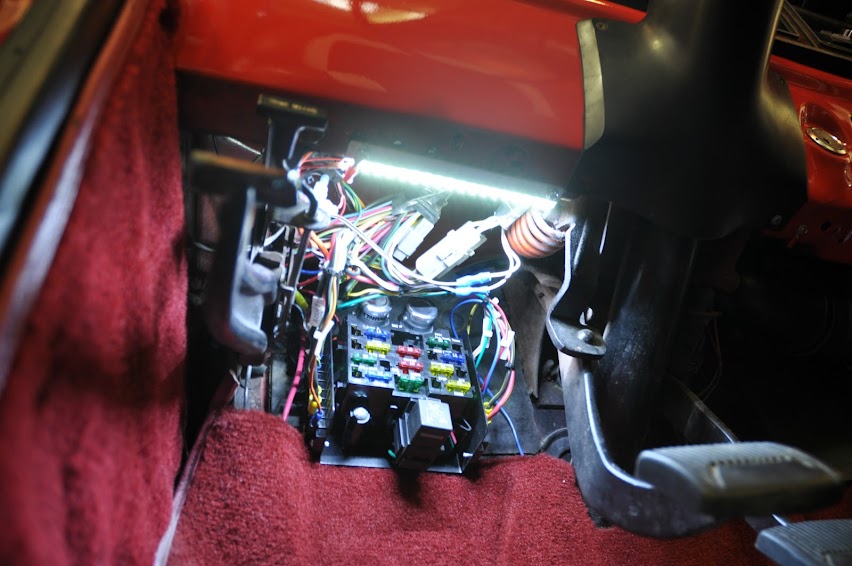
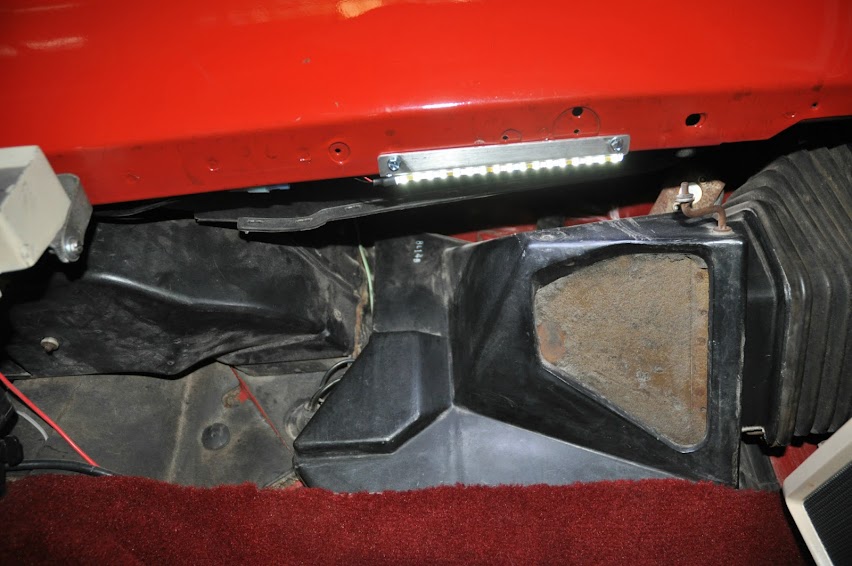
I know its a small thing but it sure does look good especially since with a dark interior and one lamp it really adds a lot to the overall appearance at night. Just in time for those long summer days eh?
Now for some news. This just in, I ordered my Grill Shell from DC along with some other trim pieces. Details to follow!
I ordered some surface mount LED strips from eBay to use as courtesy lights and whatever else I could think of. First thing I wanted to do was to make a bracket to attach the LED's to so they wont peel off on the first 100 degree day. I used some blank aluminum panel cover plates and put a slight bend to them to angle the light towards the front part of the floor. I drilled some holes so I could attach the LED's with a cable tie if they start to peel off.
I peeled the back off the LED's to reveal
the solder pads and soldered the wires.
Tested.
All finished and ready to install.
With my camera on a tripod and no light except the garage light and the windows I shot this picture with a 1 sec exposure and the iris wide open.
Same exposure after photo.
I know its a small thing but it sure does look good especially since with a dark interior and one lamp it really adds a lot to the overall appearance at night. Just in time for those long summer days eh?
Now for some news. This just in, I ordered my Grill Shell from DC along with some other trim pieces. Details to follow!
#30
03-11-2013, 12:15 AM
Join Date: Oct 2010
Location: Northern and Southern Cal
Posts: 4,656
Likes: 0
Received 0 Likes
on
0 Posts