When you click on links to various merchants on this site and make a purchase, this can result in this site earning a commission. Affiliate programs and affiliations include, but are not limited to, the eBay Partner Network.
That is an irate downpipe up top. The bottom is cut off of a regular 3-4 inch downpipe from tymar for an obs and welded on. I'm the one that sold it to Nick. I'm suprised that the bottom won't work. It was just hooked to a 4 inch straightpipe.
That's right, now I remember. Thank you again. I compared to my old pipe and the lower section sure seemed much different, and not near as curved. Anyways if it fit right up, I 'm sure it did. I have not been able to get that far of even fitting it up yet.
Thank you again. Finally getting around to putting it in, or at least attempting to.
Well, I hope that sucker fits for ya Nick. I had to mess up my firewall pretty decent to get it to work on mine too, but don't think my clearance was as bad as yours. I've got mine tunnelled now, well worth the time.
Welder and some sheet metal and we tunnel that dude at rre!
Let me know if we decide to go this route, I have a Miller Cricket (120V, flux core machine) I can bring along. Though it seems maybe Neal travels with welder in tow as well.
Quote:
<table width="100%" border="0" cellspacing="0" cellpadding="6"><tbody><tr><td class="alt2" style="border: 1px inset currentColor;"> Originally Posted by strokin'_tatsch What was DC% at WOT with the T500 vs the HB Jr.....
</td></tr></tbody></table>I haven't run it enough to know for sure Travis but I have seen 77% with the T500 and maybe as high as 55% with the HBJ. I also saw 3,400 psi with the HBJ and 3,200 with the T500. Is this a fair comparison, IDK. The other day I was data logging and saw 1,600� EGT.
Quote:
<table width="100%" border="0" cellspacing="0" cellpadding="6"><tbody><tr><td class="alt2" style="border: 1px inset currentColor;"> Originally Posted by nossliw Good I was just curious how it was working out. Think my T500 will be just fine for my measly stage 1s, might throw some stage 2s at it some day.
I would keep it in your Y. I have mine right before the boot going into the Y. My Y is a shave X pipe off a 2000 7.3. I used the old AIS hole for my manifold pressure reading to my guage, I welded a nipple to IC piping up stream of the y to read pressure for the boost switch and then welded a nut right before the boot where I screw in my 90* elbow and nozzle. It is screwed in very tight to not loose charge pressure from the IC piping or water at the fitting.
Your is leaking? When off or on? I have a solenoid in line to prevent leak down when off. If its leaking when on its simply just too loose... you think? I figure you have already tried teflon tape to get it a bit tighter.
I may be mistaken in what you meant.
</td></tr></tbody></table>
Its leaking when I'm on it. I do have a solenoid. I've tired everything to stop it leaking. I'm going to order another nozzle holder. I've seen on their website a diagram (can't find it now) of where to mount the nozzle and its recommends to not mount it in the Y. My leaking and being mounted in the Y don't have anything to do with the leak, I'm sure.
Quote:
<table width="100%" border="0" cellspacing="0" cellpadding="6"><tbody><tr><td class="alt2" style="border: 1px inset currentColor;"> Originally Posted by nossliw
Here is a pic from around two years ago. You can see the nipple at the 90 where the pressure switch connects, the gauge pressure reading at the y, and the water line went in about 3" upstream of the boot going into the y.
Not sure if that helps. Its changing a little as the 366 goes in, but not much.
</td></tr></tbody></table>
Thanks for your help!
Quote:
<table width="100%" border="0" cellspacing="0" cellpadding="6"><tbody><tr><td class="alt2" style="border: 1px inset currentColor;"> Originally Posted by fordman67 Welder and some sheet metal and we tunnel that dude at rre!
</td></tr></tbody></table>
OK, say we skip the 4by4 conversion and do the DP, LOL
Quote:
<table width="100%" border="0" cellspacing="0" cellpadding="6"><tbody><tr><td class="alt2" style="border: 1px inset currentColor;"> Originally Posted by MOOSE_MACHINE 4" baby
</td></tr></tbody></table>
That's what I want for a DP!! I don't think it would work being a 2 WD, not enough room but it sure would help some with EGT's.
Quote:
<table width="100%" border="0" cellspacing="0" cellpadding="6"><tbody><tr><td class="alt2" style="border: 1px inset currentColor;"> Originally Posted by DIYMechanic Let me know if we decide to go this route, I have a Miller Cricket (120V, flux core machine) I can bring along. Though it seems maybe Neal travels with welder in tow as well.
</td></tr></tbody></table>
I also travel with a welder, lets do it!
Well I got all the IC piping fabbed up last night. Modified the old pipes. Pulled the clutch and flywheel and continued to whack the crap out of the firewall... it still doesn't fit. So I started piecing my efuel kit together and stopped there.
Is it worth replacing the rear main? I know they rarely go bad but man it was just staring me in the face.
Won't have much to update for a while. I am spending all weekend fixing a friends rig. I am going to grab a new pilot and throw out today for mine and hopefully have enough time to get the clutch and flywheel back in and start with the under hood efuel bits. And maybe drink a 5th of whiskey before I go back to whacking on the fire wall Pick up the expensive tranny on Monday, and want it all back in by Wed so I can focus on the efuel setup.
Starting with a CPS and popping the valve covers, and monitor the EOT. Its reached a pretty bad point in running, that I have a feeling I will be grabbing a trailer tonight to go pick him up on the way to my place.
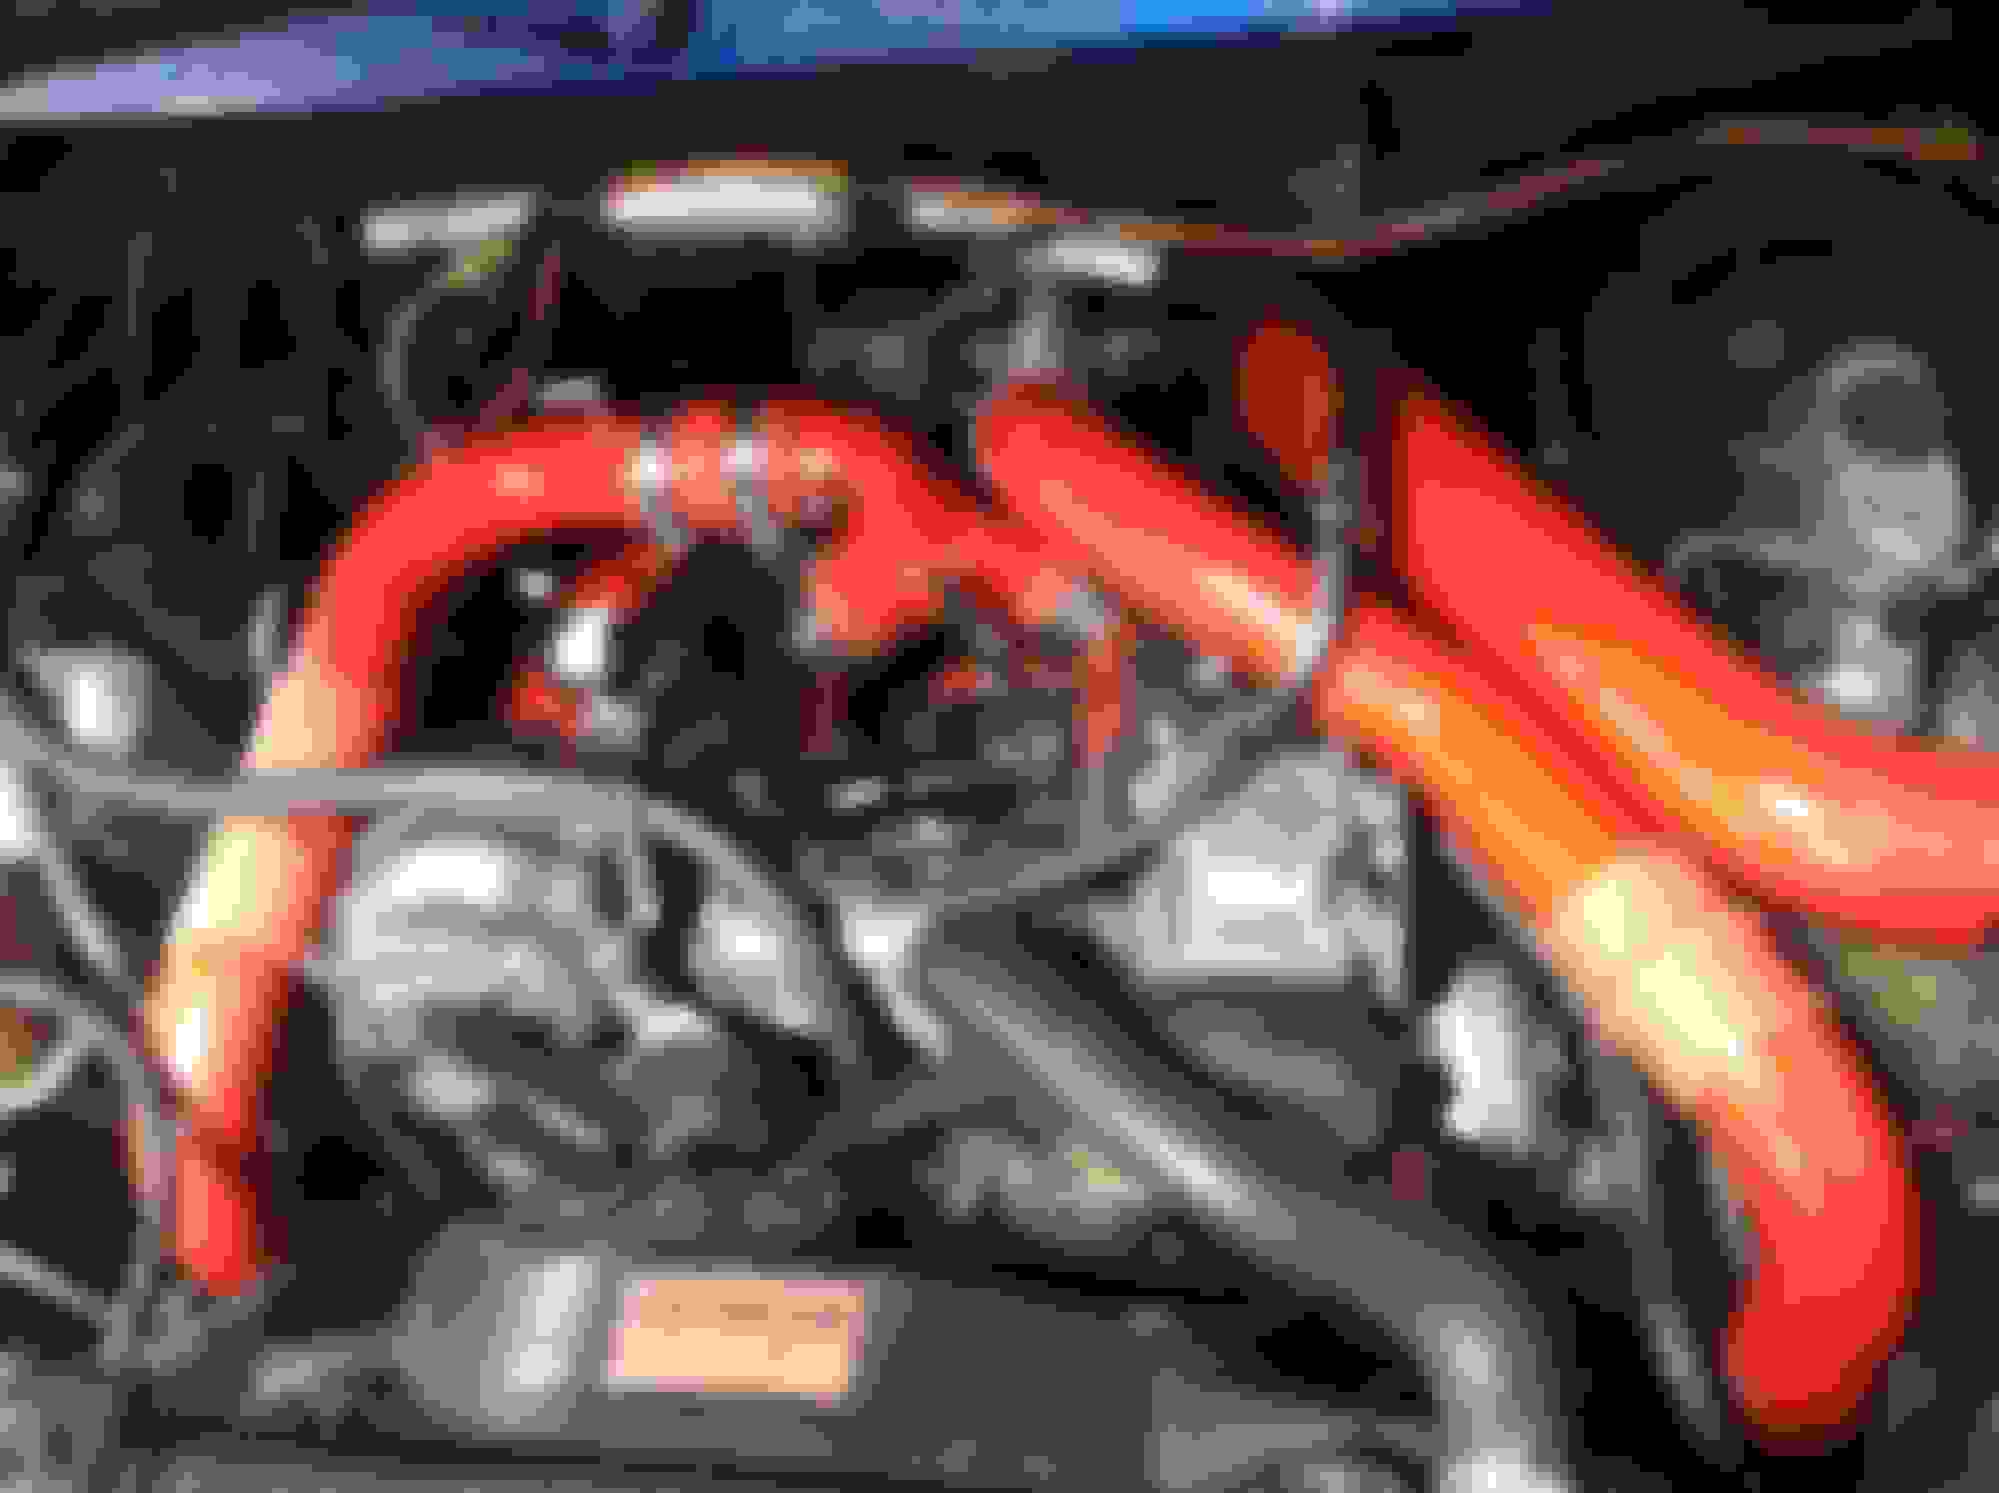
Well not much for this weekend, was working on another truck. Pulled and re-fabbed the IC piping and started to get ready to assemble the e fuel. Will be picking up the trans and clutch parts tomorrow and hope to have the time to put it in Wed. Hopefully this all goes smoothly! Few pics of them mocked up and ready to install.
I'm not sure what I did, but while laying on top of the motor putting the turbo in, it seems I have tweeked the radiator shroud some how. I have done this a million times before but maybe this was it. I noticed the fan was touching the shroud once I removed my coats and padding....oops
Looking good Nick! One thing when I did mine, I keep blowing off my boots. Clay suggested I sand off the paint on the ends of the pipes and I haven't had a problem since.
Looking good Nick! One thing when I did mine, I keep blowing off my boots. Clay suggested I sand off the paint on the ends of the pipes and I haven't had a problem since.
I agree. I was going to wire wheel them before I put them in for good. If you look closely I added extra weld material at the ends of each pipe, similar to a lip for the clamps to grab, but did not fully encircle the pipes with a weld bead. I hope they don't pop off after doing that. We will see.
 02-19-2015, 04:38 PM