
Operation XLT
#61
 08-25-2012, 12:43 AM

Post Fiend
Join Date: Nov 2011
Location: Algona, Washington
Posts: 8,908
Likes: 0
Received 0 Likes
on
0 Posts
Would that be considered a sleeper? Hehe, we refer to sleepers as a 4 banger mustang with a 5.0 in it. It looks slower than snot but is faster than a cheetah.
 !
!
#62
08-27-2012, 01:21 PM
So I picked up a whole bunch of awesome stuff at a new junk yard I found yesterday. I'm doing some work right now re-wiring stuff and I'll post some pictures up as soon as I'm done. I have to re-do the overhead console wiring since I crimped the Explorer wiring harness to my old Bronco's wiring harness which I am now replacing. It's a big pain to do it all over again BUT, I have a soldering gun this time so I will feel better about the connections this time around since I had problems with the crimps before.
#63
08-27-2012, 04:26 PM
Post Fiend
Join Date: Nov 2011
Location: Algona, Washington
Posts: 8,908
Likes: 0
Received 0 Likes
on
0 Posts
Sounds good. Yeah i have a very good familiarity with crimps or how i call them "butt connectors" i hate using them because it doesn't seem very safe but i love them cause their simple and i have yet to run into an issue with them. Then again most of the time the wires are almost too big for that style or just the right size. I haven't run into small enough wires where i couldn't use them.
#64
08-27-2012, 06:21 PM
Yeah, the ones I used are specifically called butt connectors I think. Its just easier to say crimps! But anyways, most of the electrical wiring in my truck that I've dealt with is a terrible gauge for the butt connectors. They are in the 18-22 gauge, and about 1/2 the time or more, the wires only stay snug enough in one of the ends for them not to fall off from gravity. If you give them a tug, the come out. It is a huge pain. I'm getting much better at soldering now and wow, soldering with using the shrink wrap (I bought color coded shrink wrap too because I'm cool like that) is SOOO much better.
When I first tried soldering, somehow I put too much solder on or left the gun on too long trying to heat the wire, or was just way too buff and one end of the tip ended up breaking.. it was only after about 20 minutes of on/off usage. Good thing the kit I got came with three tips. I read everywhere that you don't want to heat the solder directly, let the heat rise and the solder start to melt into the wires... well that's why my tip broke because after about 5 continuous minutes on one wire, the solder never melted and the gun started making a weird noise. Anyways, now I very slightly touch the solder to the tip and then dab it on the top of the wire while heating the bottom still. It spreads the solder and transfers heat much easier.
Anyways enough rambling, I took a nap because there were too many nats outside and it was hot, and I was up at 5:00 because of PT. I just have to solder the new wiring harness to the rear passenger side speakers and I will have it all connected! I'll be able to use my power seats as soon as I get them back! Okay, but for real this time, I'm going back outside to work. I'll have picture up soon.
#65
08-28-2012, 02:06 AM
Post Fiend
Join Date: Nov 2011
Location: Algona, Washington
Posts: 8,908
Likes: 0
Received 0 Likes
on
0 Posts
Sounds like you making good progress. Good to hear the soldering is working. The only time i soldered anything on my truck was the 2 wires going to my driver door speaker... Right after that i found the connector down in the bottom of the door. I used it on the passenger side.
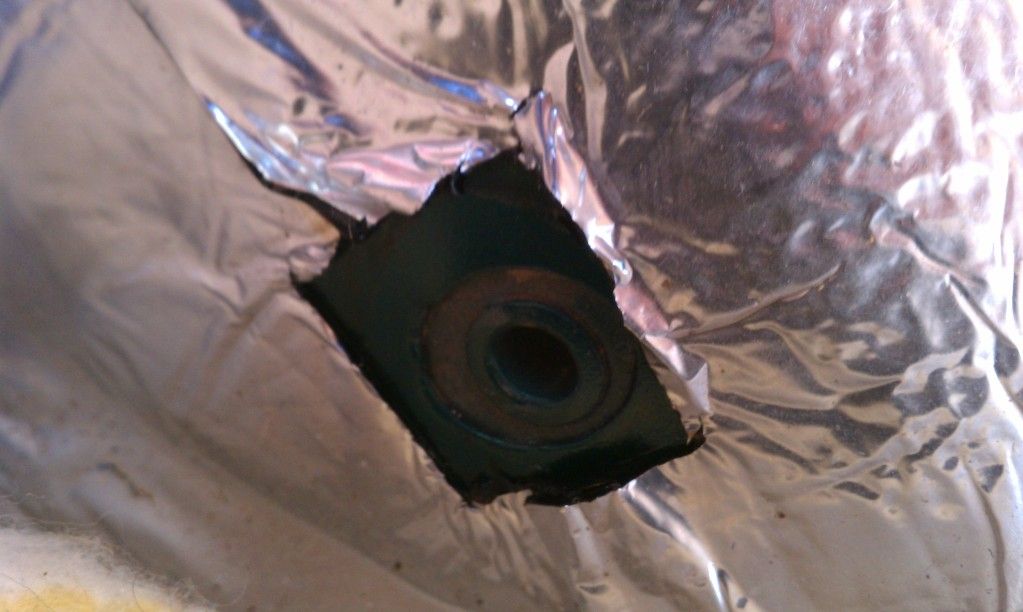
My next adventure is cleaning out the tin foil the PO put in my fuse block and replace that with regular fuses. My only issue is finding the correct fuses to go in there. I am pretty sure walmart doesn't have them but for now i will have to wait till i get more money.
My next adventure is cleaning out the tin foil the PO put in my fuse block and replace that with regular fuses. My only issue is finding the correct fuses to go in there. I am pretty sure walmart doesn't have them but for now i will have to wait till i get more money.
#66
08-29-2012, 11:36 AM
Haha oh jeez sounds like fun. Tin foil instead of fuses? I never heard of that.
I hope my seats get done today, then I can put up some more pictures. In the mean time, I have to mess with more wiring... I somehow messed up the simple wiring from my dash switch I put in to my electric fan. It's only two wires, and I didn't think I messed with them, but now if I have the switch plugged into the fan, it stays on no matter what position the switch is in...
I'm almost done with this wiring!!!!! If I can get my stupid phone to hook up to my computer I'll post some more pictures soon. Otherwise I may just draw what I did on Microsoft paint and post those instead.
#67
08-29-2012, 12:23 PM

#68
08-29-2012, 03:26 PM
Post Fiend
Join Date: Nov 2011
Location: Algona, Washington
Posts: 8,908
Likes: 0
Received 0 Likes
on
0 Posts
I agree with Brett, that the switch may be bad.
People would use tin foil to wrap their fuse because they couldn't get the correct fuse. The problem, as i figure you could imagine, is that there is no longer a weak spot within the wire system so if you get a sudden jump in voltage, whatever lights or load source will burn up pretty quick. Luckily mine are are mainly lights so that is all i am loosing. I want to get them replaced i just have to find the fuse's.
People would use tin foil to wrap their fuse because they couldn't get the correct fuse. The problem, as i figure you could imagine, is that there is no longer a weak spot within the wire system so if you get a sudden jump in voltage, whatever lights or load source will burn up pretty quick. Luckily mine are are mainly lights so that is all i am loosing. I want to get them replaced i just have to find the fuse's.
#69
08-29-2012, 08:39 PM
I got "lazy" and didn't check my switch yet.. the fan will shut off after about 30 of the truck being off. So I will drive around a few days until I can dig in and find out what's wrong. However, I emailed myself some pictures of the work I was doing (since my phone still wouldn't connect to my computer) and got my new seats in!!!!!
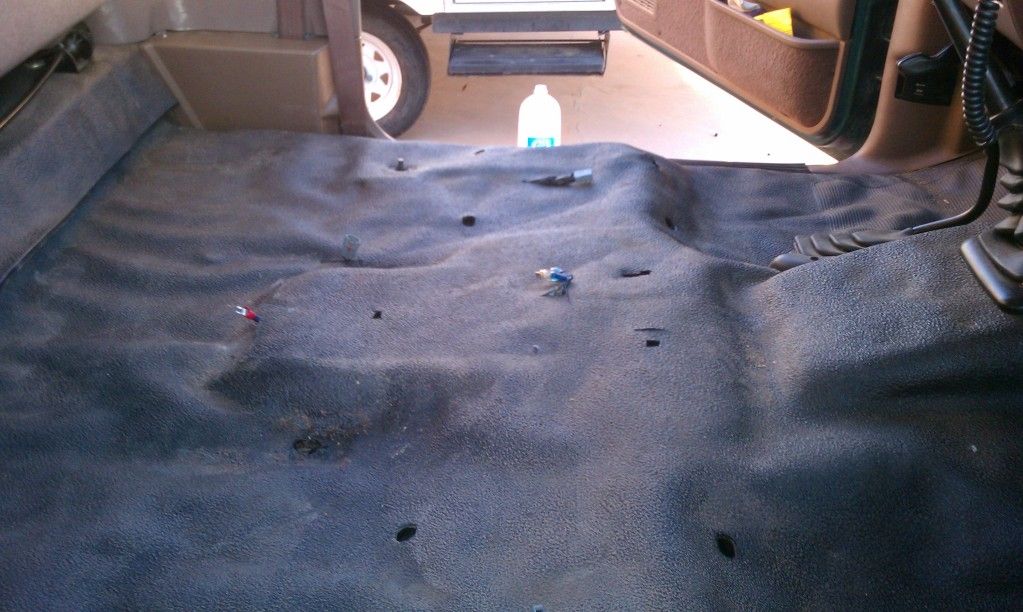
Alright, here are some picture of me doing the wiring:
The seats out so I can pull back the flooring:
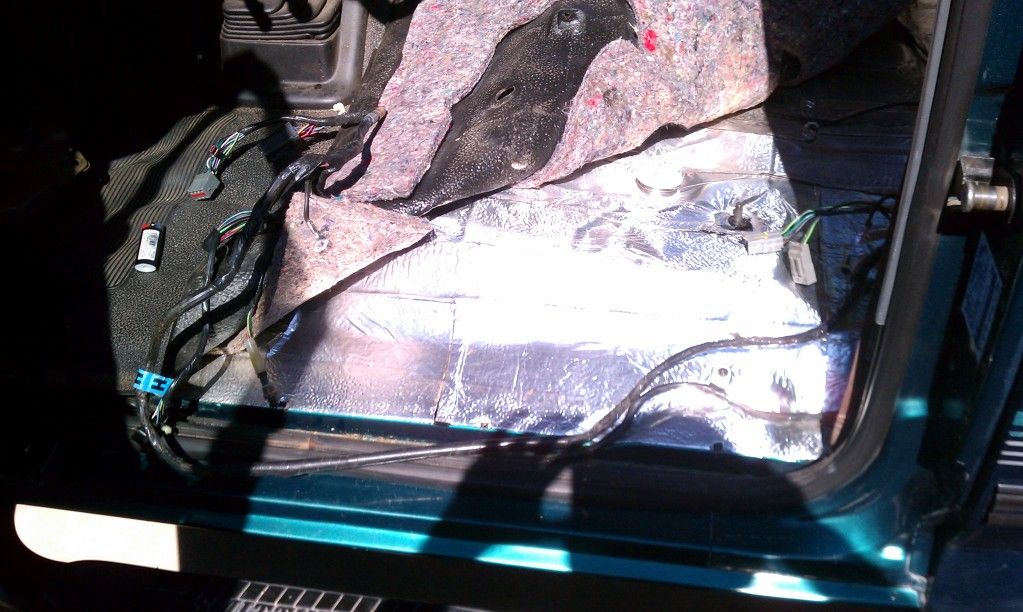
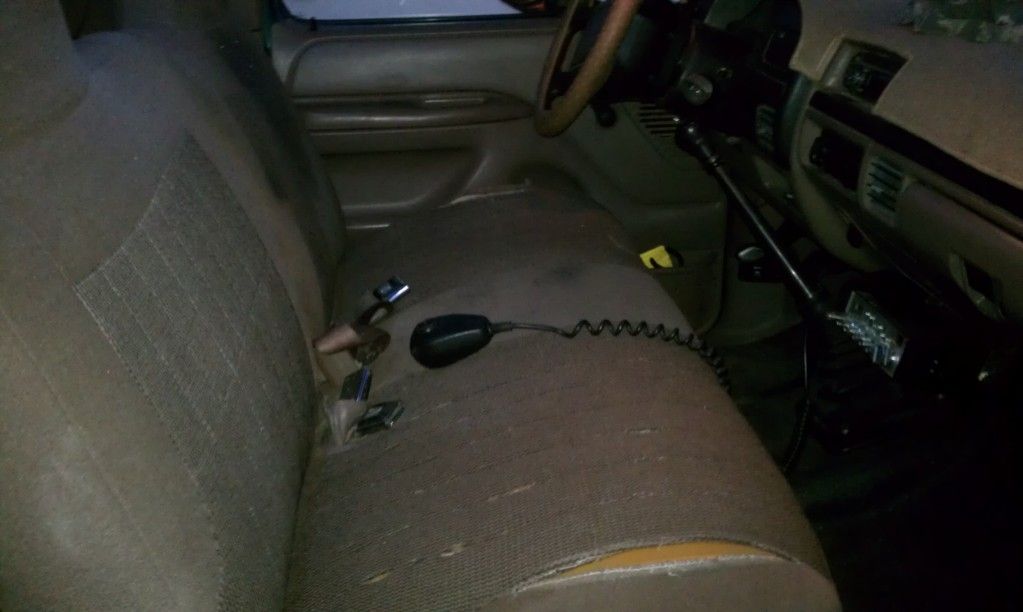
Wiring mess for the center console and door wiring harness...
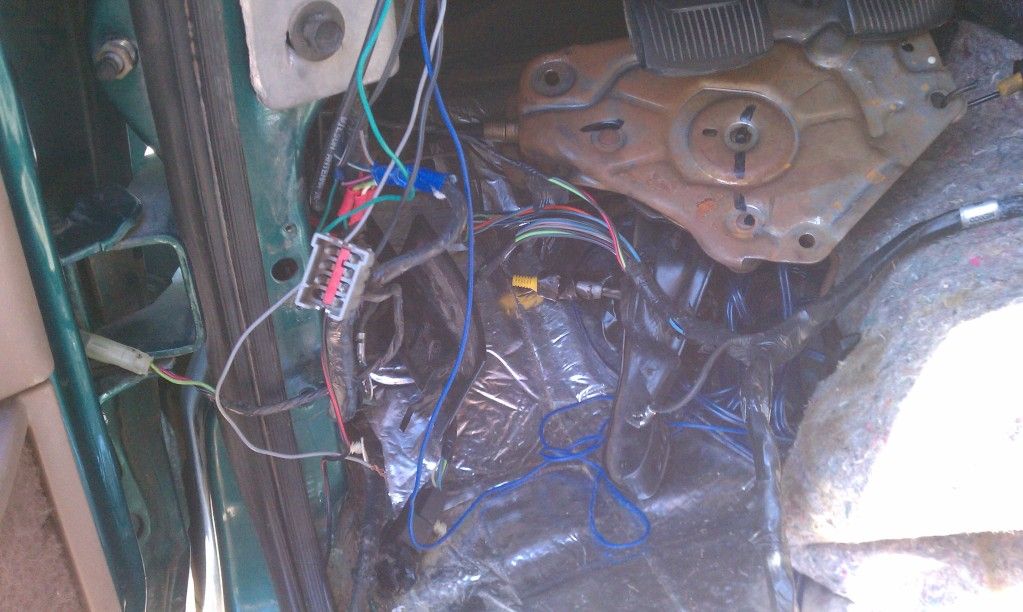
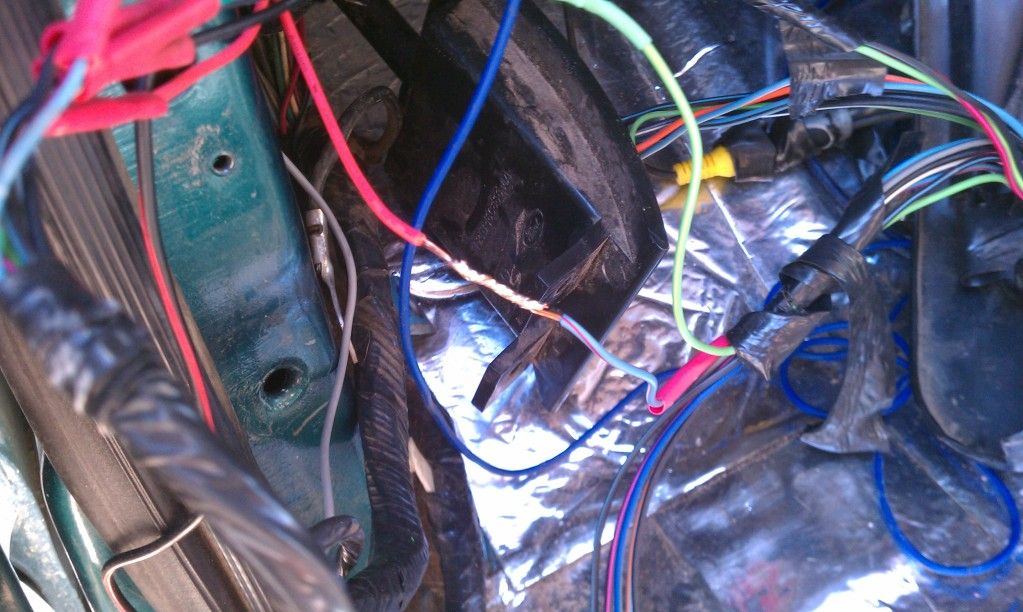
Got some soldering done:
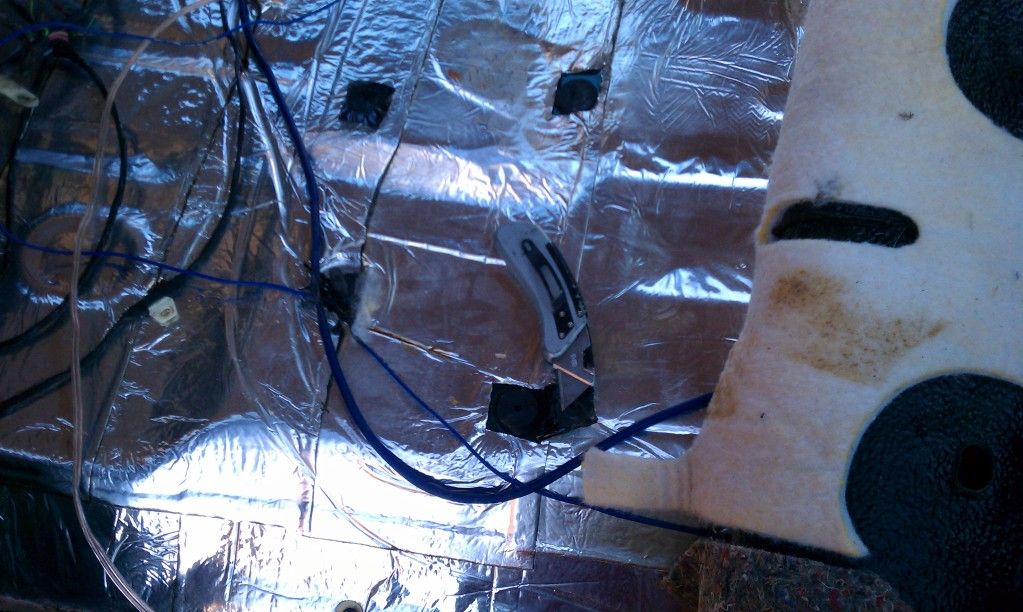
Cutting away liner to reveal bolt holes for the new seats!
I had to screw in the bolt threw the hole to thread them since they weren't threaded yet:
Almost done:
Everything back together and waiting for the new seats!!
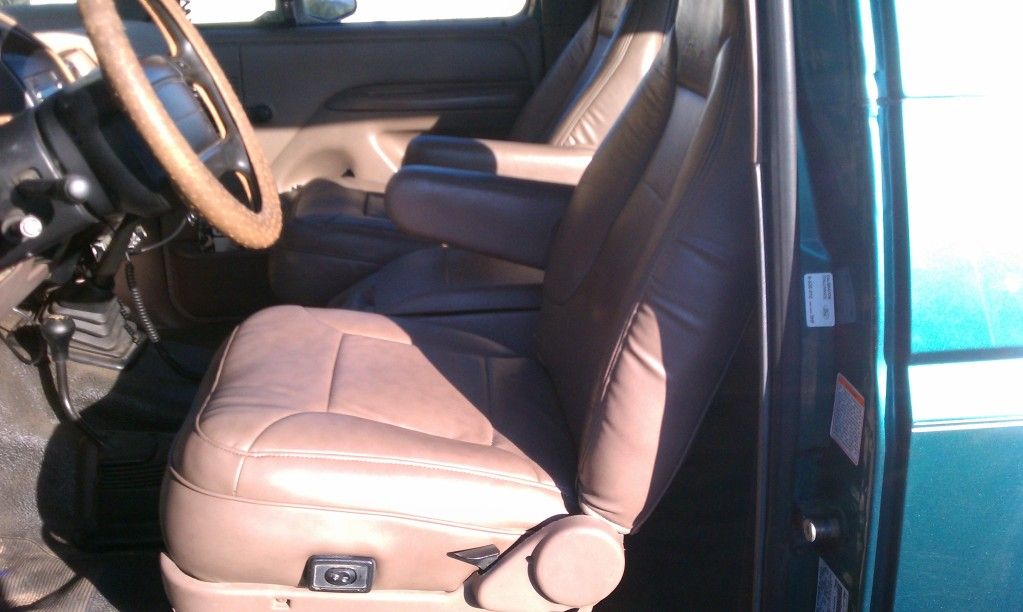
Alright, what everyone has been waiting for..... my new seats!!!! ! I got them back from the upholstery shop today and they look pretty fantastic. I didn't have them fully upholstered because I'm not rich, but the parts that are original (backs of the seats/armrests/90% of the rear seat) are in pretty awesome condition.
Driver's side:
Another view:

Passenger side:
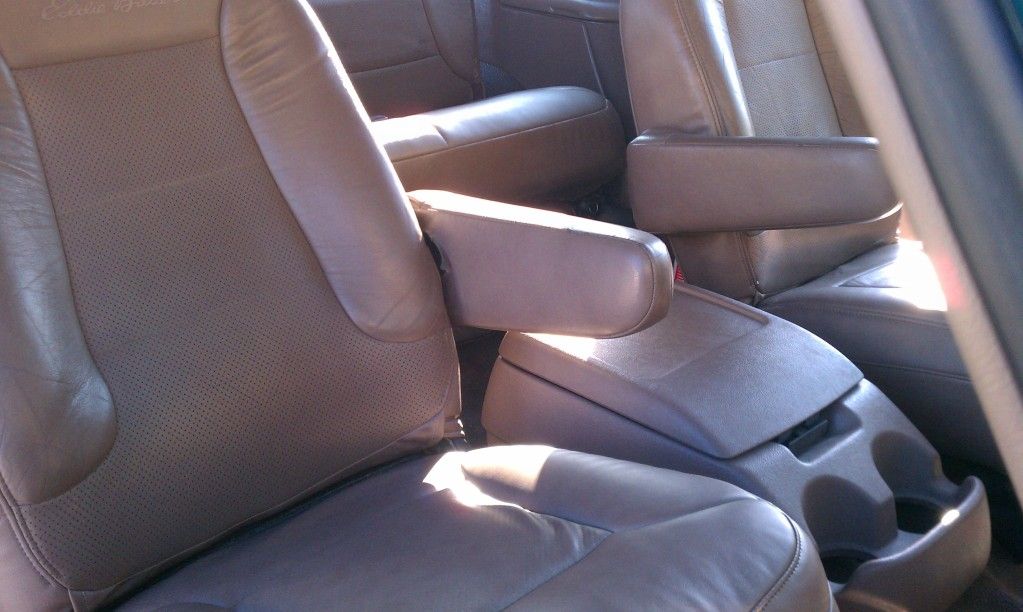
They are so much better!! Unfortunately, the lumbar support on the driver's side doesn't work. It works on the passenger side so I'm not too sure what's wrong. It may just be the switch, or maybe the motor. It probably won't be too bad to fix hopefully, but I'm not really concerned right now about that.
Oh, and here are some goodies I will be working on later when I get the time:
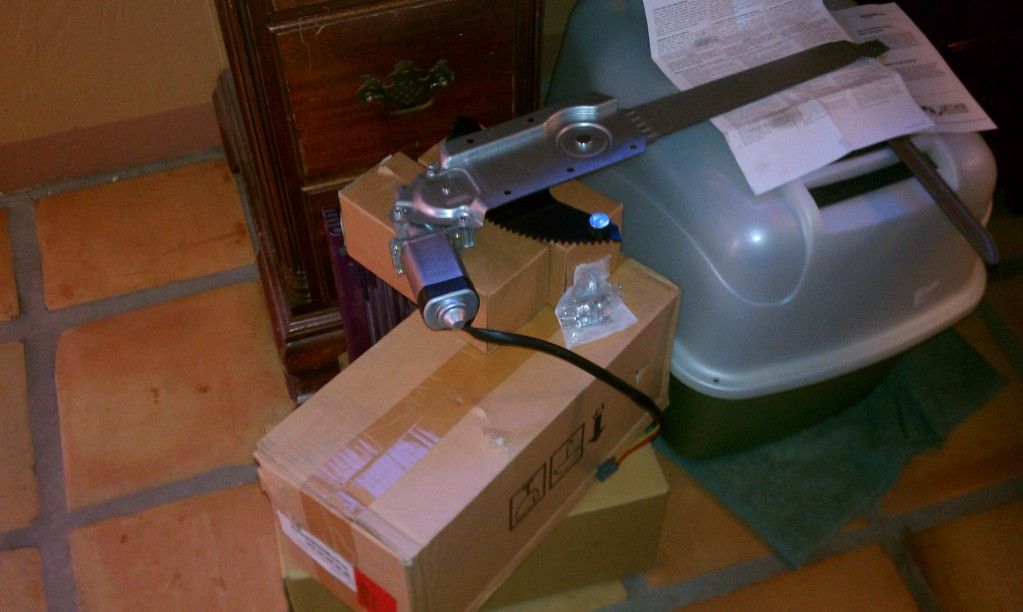
It's my new power regulator with the motor, new chrome power window mirrors, and door lock actuators. It's probably going to be a pain getting the old regulator out, but I know it's something I can do. Hopefully it's not too tough.
Alright, here are some picture of me doing the wiring:
The seats out so I can pull back the flooring:
Wiring mess for the center console and door wiring harness...
Got some soldering done:
Cutting away liner to reveal bolt holes for the new seats!
I had to screw in the bolt threw the hole to thread them since they weren't threaded yet:
Almost done:
Everything back together and waiting for the new seats!!
Alright, what everyone has been waiting for..... my new seats!!!!
! I got them back from the upholstery shop today and they look pretty fantastic. I didn't have them fully upholstered because I'm not rich, but the parts that are original (backs of the seats/armrests/90% of the rear seat) are in pretty awesome condition.Driver's side:
Another view:
Passenger side:
They are so much better!! Unfortunately, the lumbar support on the driver's side doesn't work. It works on the passenger side so I'm not too sure what's wrong. It may just be the switch, or maybe the motor. It probably won't be too bad to fix hopefully, but I'm not really concerned right now about that.
Oh, and here are some goodies I will be working on later when I get the time:
It's my new power regulator with the motor, new chrome power window mirrors, and door lock actuators. It's probably going to be a pain getting the old regulator out, but I know it's something I can do. Hopefully it's not too tough.
#70
08-29-2012, 08:51 PM
Post Fiend
Join Date: Nov 2011
Location: Algona, Washington
Posts: 8,908
Likes: 0
Received 0 Likes
on
0 Posts
#71
08-30-2012, 10:00 AM

Those seats look fantastic! I kept my EB leather seats so I can have them redone when I can afford it. Mine also needs all 3 window motors replaced. (Well, I could just replace the nylon bushings, but I have read where peeps did that and then the motor itself failed, so I will just replace all 3 motors)
Jim
Jim
#72
08-30-2012, 12:58 PM
Post Fiend
Join Date: Nov 2011
Location: Algona, Washington
Posts: 8,908
Likes: 0
Received 0 Likes
on
0 Posts
Motor replacements aren't too difficult from what i have read, but it isn't fun due to the limited space within the door. Eventually when i am sitting on a nice stack of money (like that will happen  ) I want to dig into the tailgate on TGM and remove the rubbery grease and replace it with some lithium junk. Get that stuff working well.
) I want to dig into the tailgate on TGM and remove the rubbery grease and replace it with some lithium junk. Get that stuff working well.
#74
08-30-2012, 06:51 PM
Thanks everyone! Yeah I love the new seats. It's so amazing having cupholders and a center console. The seats are quite soft too, I didn't think they were going to be as comfortable as they are.
I'm waiting on getting the driver's side window regulator before I tackle doing anything with the doors, but I have run into a problem. The door lock actuators didn't come with mounting brackets, and I don't know what to use to mount them. I suppose I will stop by a junkyard tomorrow to see if I can grab the brackets out of one of the doors without breaking them... I don't know how I'm going to get the rivet out though without a drill though... Hopefully a hacksaw and some pliers will work.
I'm waiting on getting the driver's side window regulator before I tackle doing anything with the doors, but I have run into a problem. The door lock actuators didn't come with mounting brackets, and I don't know what to use to mount them. I suppose I will stop by a junkyard tomorrow to see if I can grab the brackets out of one of the doors without breaking them... I don't know how I'm going to get the rivet out though without a drill though... Hopefully a hacksaw and some pliers will work.
#75
08-30-2012, 07:34 PM
Post Fiend
Join Date: Nov 2011
Location: Algona, Washington
Posts: 8,908
Likes: 0
Received 0 Likes
on
0 Posts