
Operation XLT
#31
 08-18-2012, 06:06 PM

Post Fiend
Join Date: Nov 2011
Location: Algona, Washington
Posts: 8,908
Likes: 0
Received 0 Likes
on
0 Posts

#33
08-20-2012, 04:15 PM
Haha yeah that's a great place for the K&N sticker. I have some MSD, hooker, and bassani stickers I've been contemplating putting on.. but I don't want to overdo it. I like some stickers, but I don't want to add too much extra horespower if you know what I mean. I don't think my drive-train could handle adding three or four more stickers.
Anyways, I get paid this week so I should be able to order those seats! I'm super excited to get them, I just have to wait a few more days to order them.. then wait for them to be shipped across the country..
In the meantime, I've been thinking about what else I can do to upgrade my XL to an XLT (then hopefully Eddie Bauer). So, I have searched junk yards and decided to tackle the project of adding power windows/doors/mirrors/seats (the seats I will get have power lumbar whatever that is).
I found a 96 Bronco at a salvage yard with all the stock wiring so I managed to pull it out over the course of a few days.
Here is the passenger side wiring, drivers-side/under-dash wiring, and floor wiring:

I had to cut the driver's side wiring at the door jam before the yard closed one day so I have to splice it back together now:
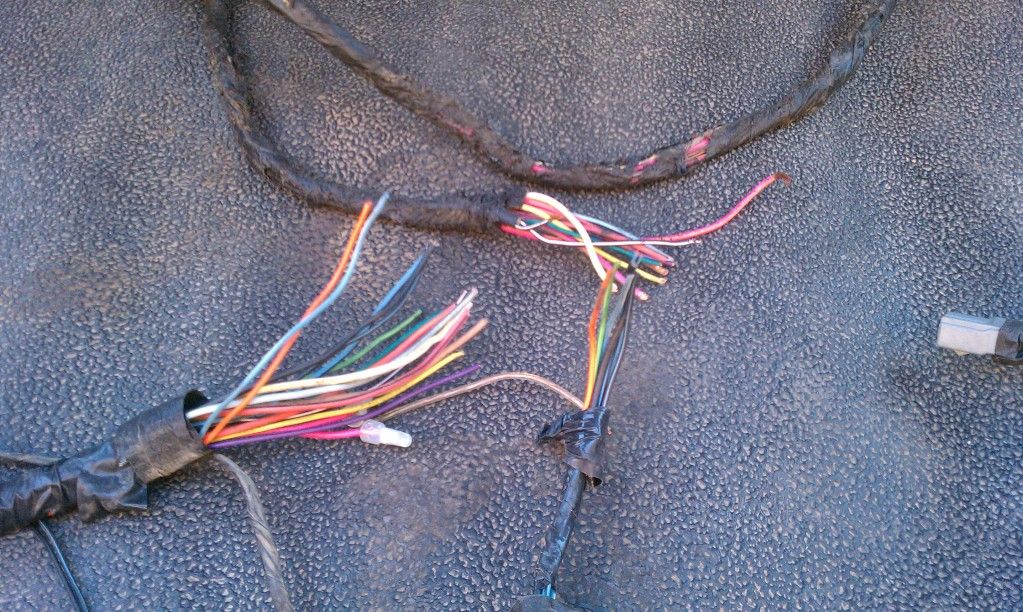
So far, I only have the wiring but I believe it's all compete. I don't think adding door lock actuators, window regulators, and window motors will be that much work. Adding the power mirrors will be easy too, but those can wait until later since everything will add up $$$ pretty quickly.
The driver's side wiring harness connects mainly over on the passenger side, but also has a connection on the drivers side behind the parking brake. I grabbed the wiring underneath the carpet, but there were wires that ran up through the sides of the truck near the seat belts that I had to cut. I don't know where those wires go, or what they are used for, so hopefully it will be a simple splice job when I pull my old wiring out.
Okay now onto the questions, doesn't anybody know if I will be able to just plug in these wiring harnesses to the stock wiring, or will I need to do some extra wiring? I'm hoping it won't be too much extra work getting the wiring all set up but we shall see. If anyone has and advice/wiring diagrams/info on switching from manual to power, any help would be greatly appreciated!
Anyways, I get paid this week so I should be able to order those seats! I'm super excited to get them, I just have to wait a few more days to order them.. then wait for them to be shipped across the country..
In the meantime, I've been thinking about what else I can do to upgrade my XL to an XLT (then hopefully Eddie Bauer). So, I have searched junk yards and decided to tackle the project of adding power windows/doors/mirrors/seats (the seats I will get have power lumbar whatever that is).
I found a 96 Bronco at a salvage yard with all the stock wiring so I managed to pull it out over the course of a few days.
Here is the passenger side wiring, drivers-side/under-dash wiring, and floor wiring:
I had to cut the driver's side wiring at the door jam before the yard closed one day so I have to splice it back together now:
So far, I only have the wiring but I believe it's all compete. I don't think adding door lock actuators, window regulators, and window motors will be that much work. Adding the power mirrors will be easy too, but those can wait until later since everything will add up $$$ pretty quickly.
The driver's side wiring harness connects mainly over on the passenger side, but also has a connection on the drivers side behind the parking brake. I grabbed the wiring underneath the carpet, but there were wires that ran up through the sides of the truck near the seat belts that I had to cut. I don't know where those wires go, or what they are used for, so hopefully it will be a simple splice job when I pull my old wiring out.
Okay now onto the questions, doesn't anybody know if I will be able to just plug in these wiring harnesses to the stock wiring, or will I need to do some extra wiring? I'm hoping it won't be too much extra work getting the wiring all set up but we shall see. If anyone has and advice/wiring diagrams/info on switching from manual to power, any help would be greatly appreciated!
#35
08-20-2012, 07:01 PM
Thanks Big_Rob! I'm slowly (as of recently somewhat quickly) upgrading my interior from XL to XLT then in the end goal, Eddie Bauer. The toughest thing for sure will be adding the power option from manual with all the OEM wiring and such. I don't think I'm going to put the wiring harness up and behind my dash like the normal wiring harness is for the power options. It wasn't too bad taking the dash off of a Bronco in the junk yard... but I'm a little skeptical to do it for mine. It really wasn't that bad, but I think I can reroute the wiring up inside the dash from the bottom and have them be plenty out of the way.
I'll need to find a good set of tan door panels too.. but I will wait until I get my seats done first, and probably put the wiring in place before. Good door panels aren't going to be cheap.
I'll need to find a good set of tan door panels too.. but I will wait until I get my seats done first, and probably put the wiring in place before. Good door panels aren't going to be cheap.
#36
08-20-2012, 08:43 PM
Alright, I got bored and started working on the wiring. I just got the passenger side done, but it went by extremely smoothly so that makes me highly optimistic for the drivers side and under the flooring.
Here is the new wiring fitting exactly into the existing plug under the passenger kick panel:
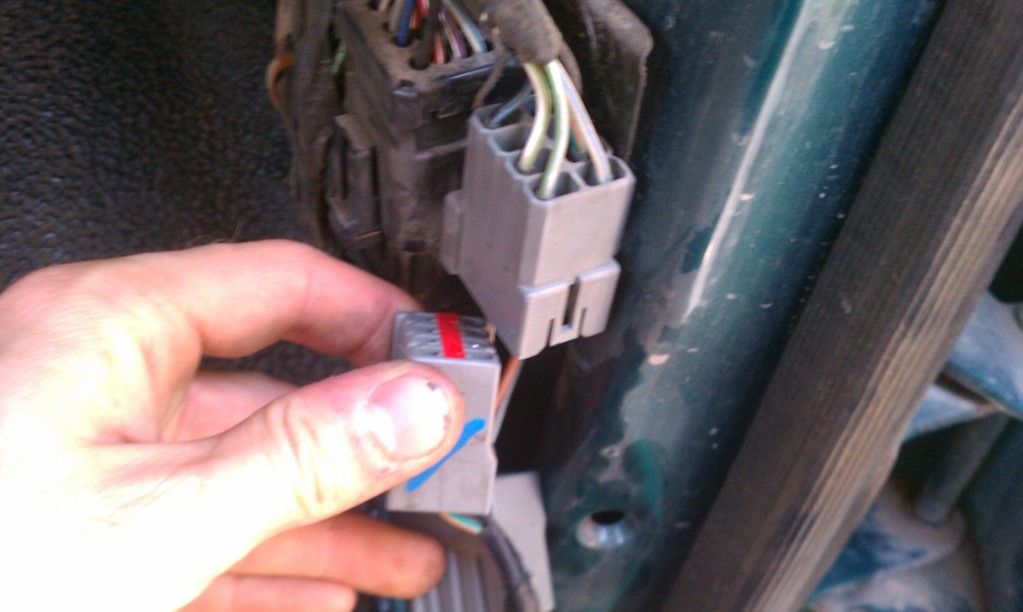
The old speaker wiring was the only thing that went into the existing plug, but there were existing wires on the opposite end of the plug for the power option.
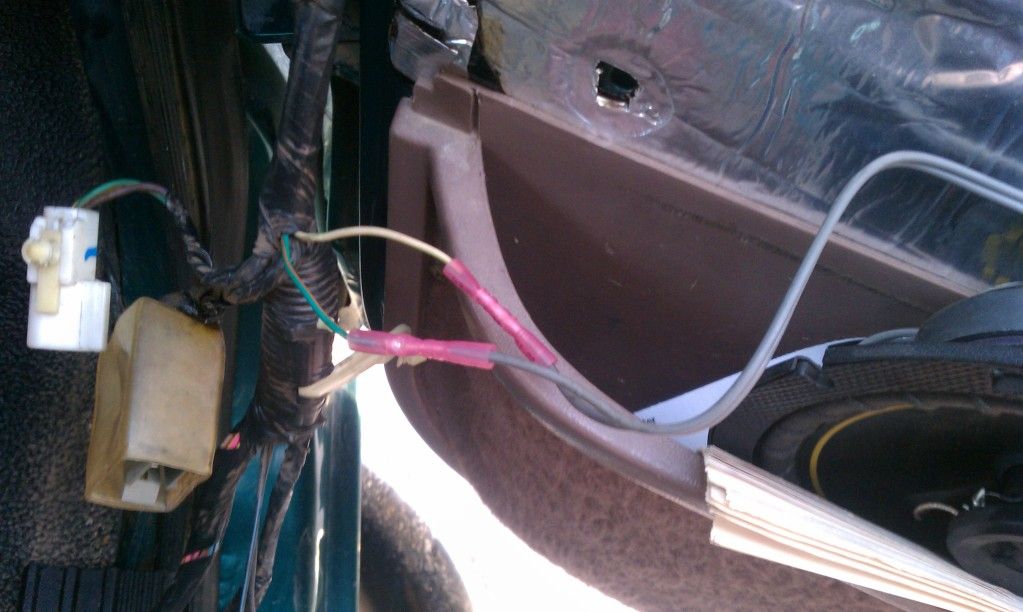
Here are the speaker wires spliced up to my Kicker speaker and partially through the doorjamb:
And here it is all set up (minus having the plugs actually hooked up to mirrors/motors etc and not having power door-panels, so the switches are currently smushed behind the armrest until I swap out my panels):
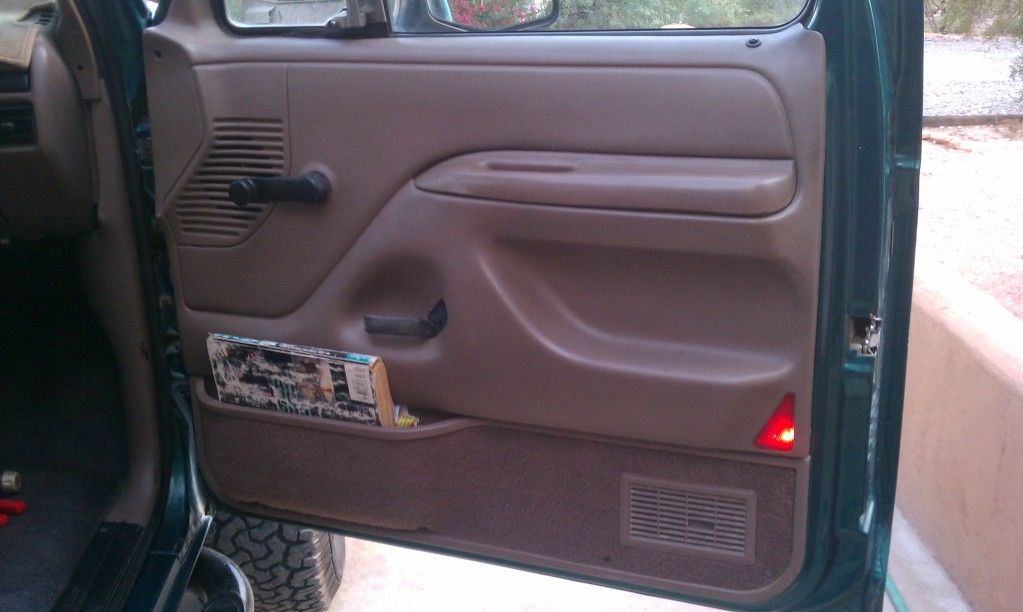
Notice the working light on the door panel! Installing the window motor/regulator, door actuator, and power mirror should be somewhat of a breeze now with the wiring all ready to be plugged in! I think I'll wait to do the drivers side and underfloor wiring until I get the new seats. That will save me from taking out my seats twice.
Here is the new wiring fitting exactly into the existing plug under the passenger kick panel:
The old speaker wiring was the only thing that went into the existing plug, but there were existing wires on the opposite end of the plug for the power option.
Here are the speaker wires spliced up to my Kicker speaker and partially through the doorjamb:
And here it is all set up (minus having the plugs actually hooked up to mirrors/motors etc and not having power door-panels, so the switches are currently smushed behind the armrest until I swap out my panels):
Notice the working light on the door panel! Installing the window motor/regulator, door actuator, and power mirror should be somewhat of a breeze now with the wiring all ready to be plugged in! I think I'll wait to do the drivers side and underfloor wiring until I get the new seats. That will save me from taking out my seats twice.
#37
08-20-2012, 08:54 PM

#38
08-20-2012, 09:12 PM
Hmm okay I'll probably insulate it pretty well then. The wiring I got is the factory wiring harness that hooks up to power seats and I believe seat belt warning lamps too. I pulled it out of a 1996 Bronco that had those options. The wiring harness under the floor though also connected to the drivers side wiring harness.
I don't think the wiring I have now supports the power seats or power window/doors option (because the factory wiring harness under the floor that connects to the seats/seat-belt lamps also connects the power door/window harness next to the firewall.)
Hopefully the wiring I have does indeed support that so I won't have to tear that harness out and can just plug in the drivers side door wiring harness directly into it, but I'm thinking it probably doesn't have that.
Thanks for the advice though, I probably would have just slapped it down, then covered it back up. I'll make sure to be pretty careful when I do replace it if I have to.
#39
08-21-2012, 05:52 PM
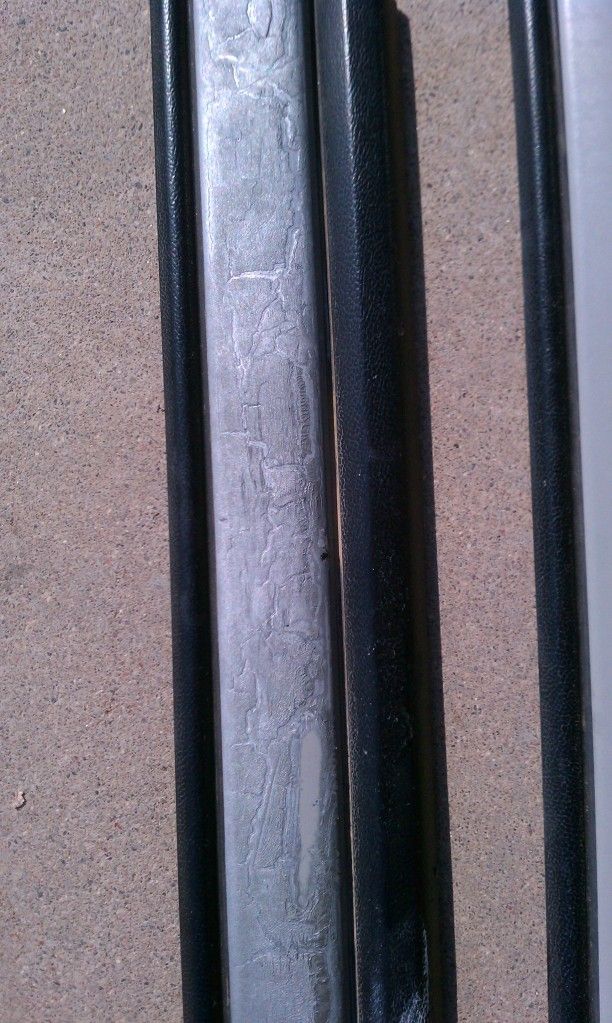
Well my new molding came in today so I figured I'd go ahead and put it on since I had no other plans. For anyone interested, I'll kinda have this post as a quick write-up to putting new molding on.
First, I started off by pulling one section of the molding off:
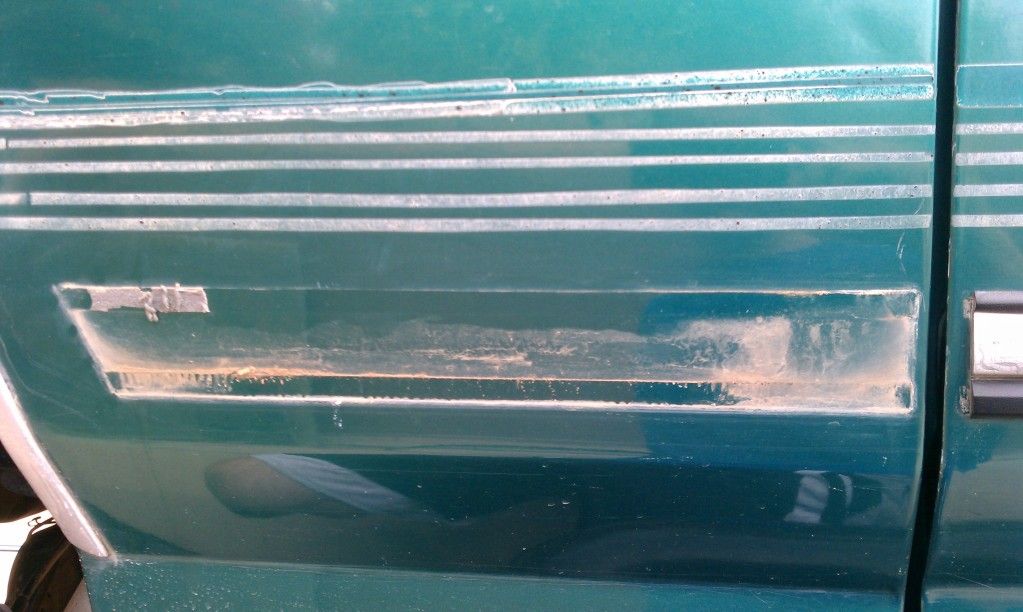
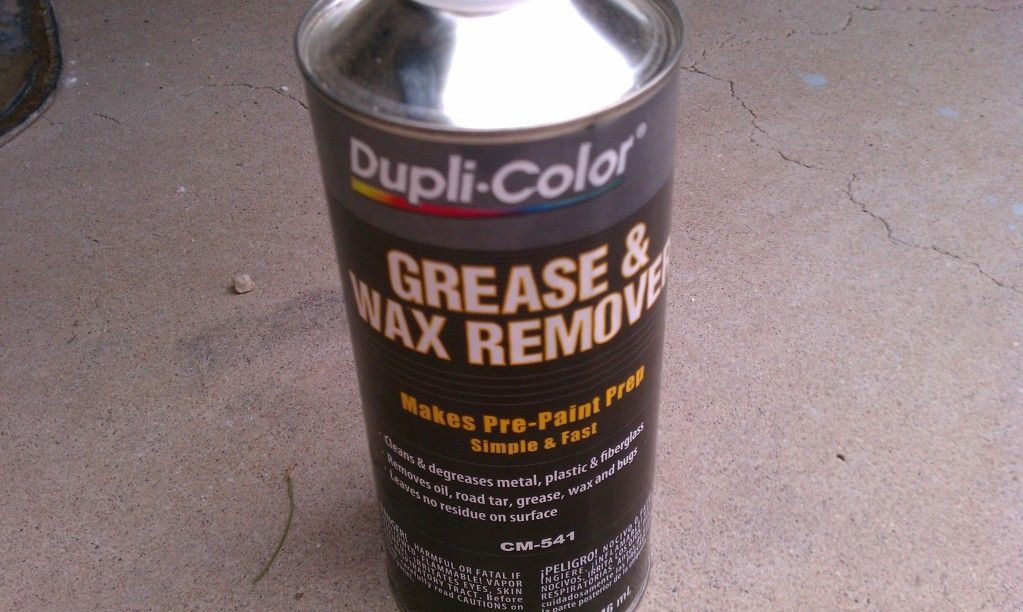
You can see how dirty it is underneath and all the junk that needs to be cleaned off. I cleaned it off by wiping with a microfiber towel and then going over with some Dupli-Color Grease and wax remover I had left over from my previous paint jobs:
After the cleaning:
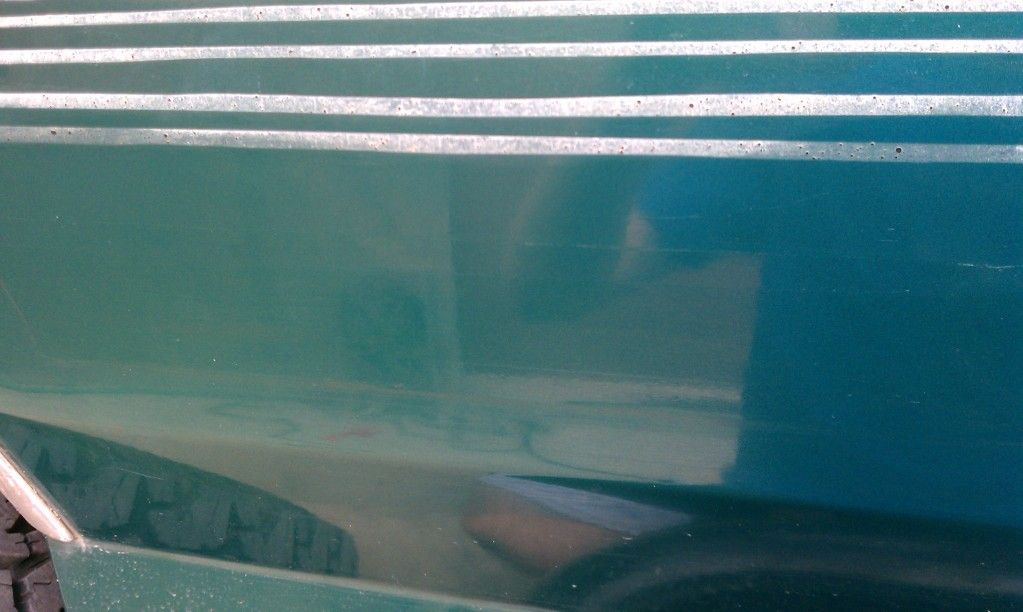
Some areas were kinda tough and I need to scrape the glue off with a flat blade. I was okay doing this because I knew I would cover the area right back up. If you do scrape at it, you will leave scratches.
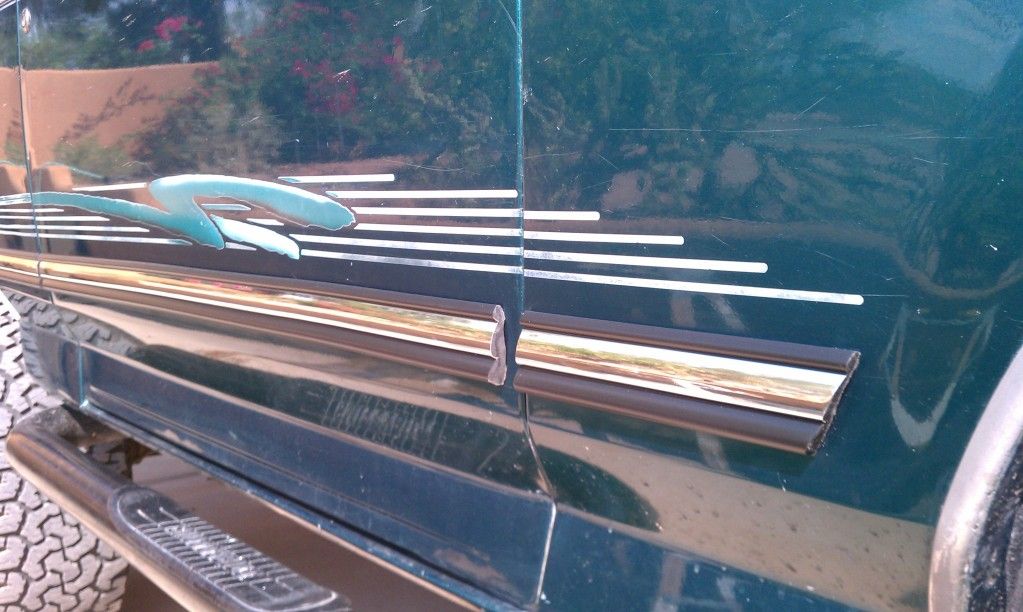
The next thing I did was take the old piece of molding, and use it as a template from the roll:
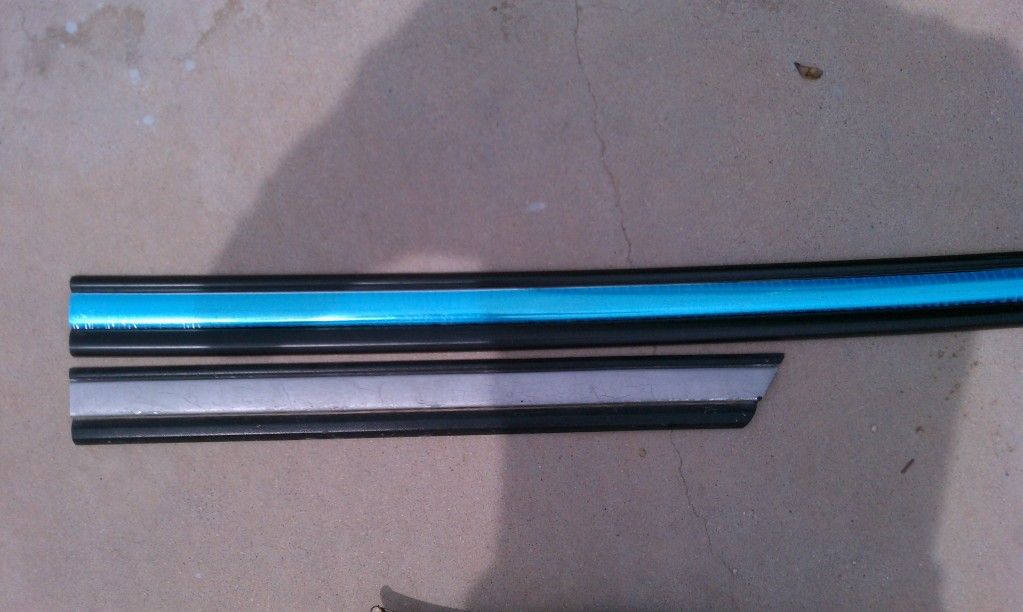
I used garden shears to cut the molding. You want to make sure the blade goes down on the chrome part, not up, so you don't start to tear off the chrome when cutting.
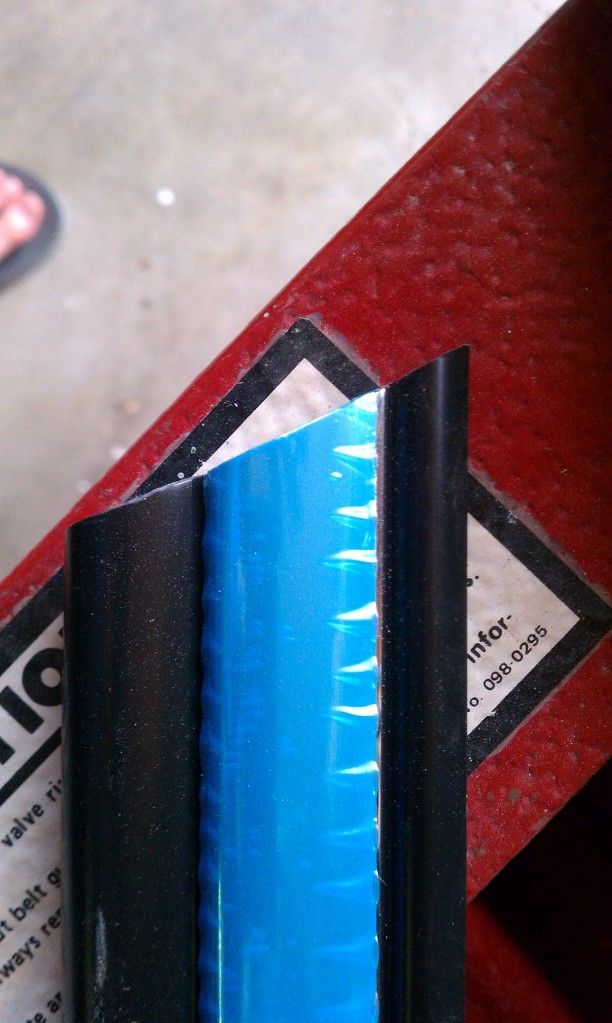
Since the shears I used weren't super sharp, the edges weren't perfectly straight:
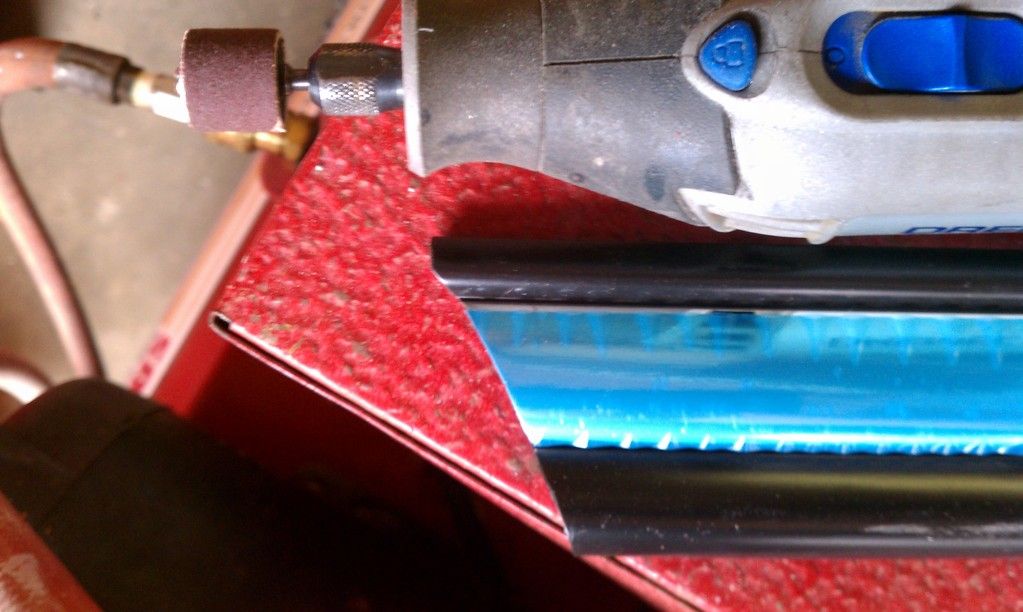
I ended up using my dremel tool to sand the edges down to straighten them out, being careful around the chrome edge:
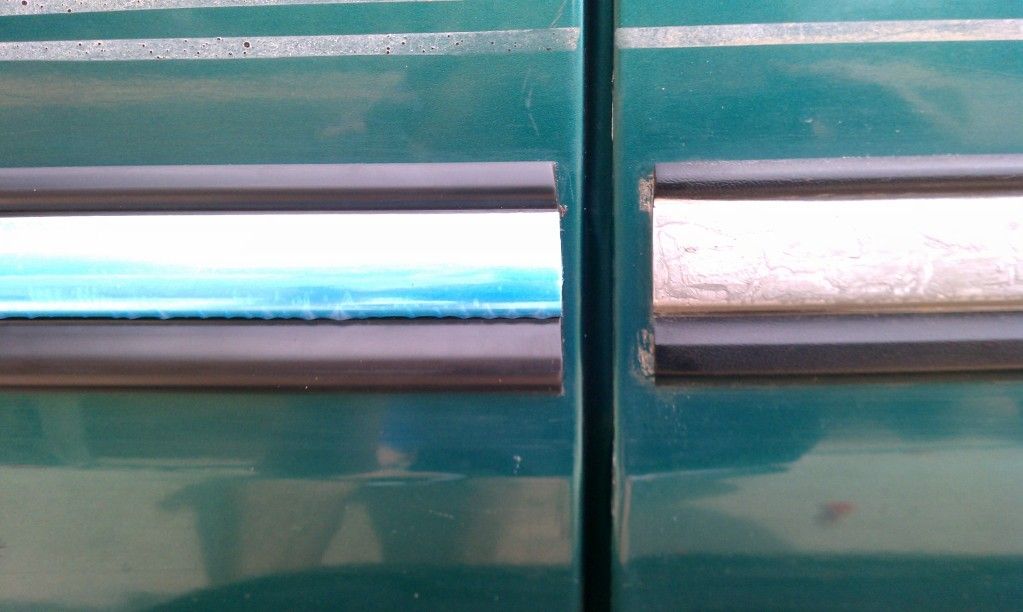
Make sure to leave some of the old molding on, that way it is much easier to line up the new molding (that is if you are replacing it. If you are just adding it, then use your best judgement and probably tape sections off for reference so it doesn't' go on crooked.):
Here is all my old molding:
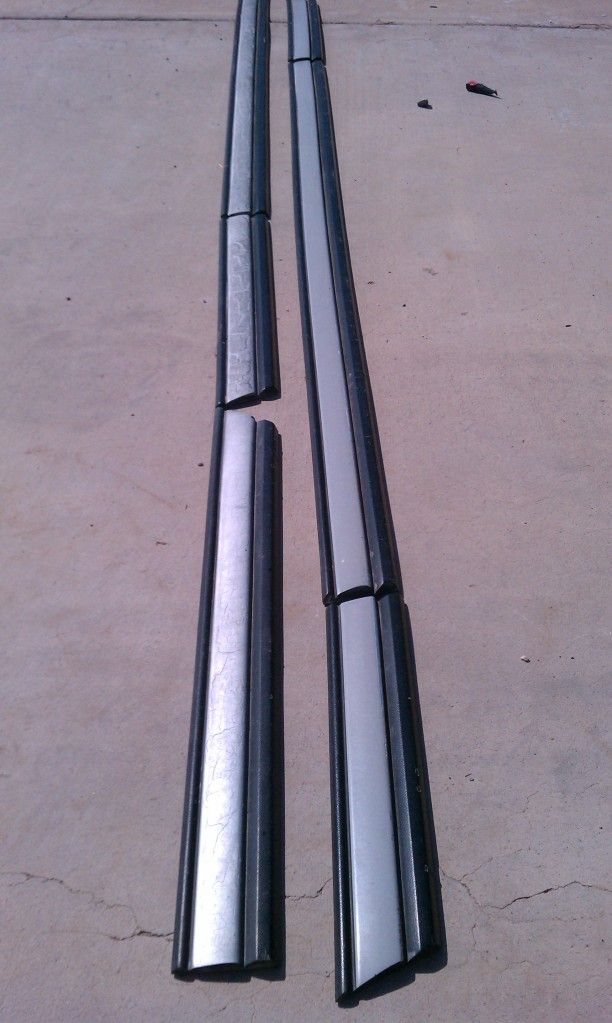
And a few pictures of the new!

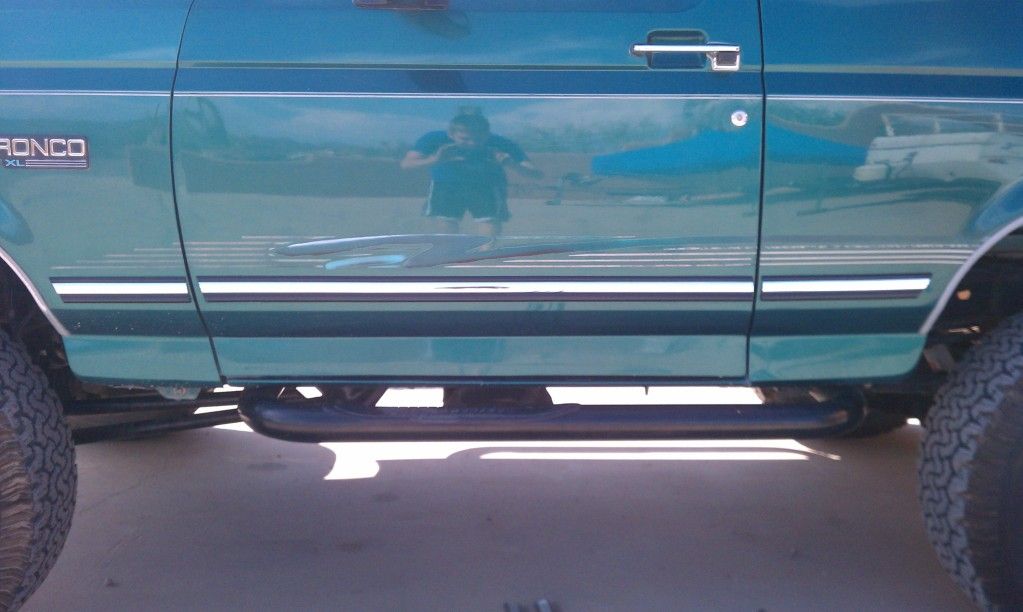
It probably will take anyone about 1.5 hours if you work straight on it the whole time. Not too bad of a job, and it sure looks a lot better then the old molding. I've been wanting to replace it for a long time so I'm glad that's one thing out of the way!!
Now I just have to wait to get money for those seats....... I may start to put more of the power wiring in place too.. I thought I was going to wait to get the seats, but I may just go ahead and pull them later today to take a loot at my wiring harness underneath my flooring.
First, I started off by pulling one section of the molding off:
You can see how dirty it is underneath and all the junk that needs to be cleaned off. I cleaned it off by wiping with a microfiber towel and then going over with some Dupli-Color Grease and wax remover I had left over from my previous paint jobs:
After the cleaning:
Some areas were kinda tough and I need to scrape the glue off with a flat blade. I was okay doing this because I knew I would cover the area right back up. If you do scrape at it, you will leave scratches.
The next thing I did was take the old piece of molding, and use it as a template from the roll:
I used garden shears to cut the molding. You want to make sure the blade goes down on the chrome part, not up, so you don't start to tear off the chrome when cutting.
Since the shears I used weren't super sharp, the edges weren't perfectly straight:
I ended up using my dremel tool to sand the edges down to straighten them out, being careful around the chrome edge:
Make sure to leave some of the old molding on, that way it is much easier to line up the new molding (that is if you are replacing it. If you are just adding it, then use your best judgement and probably tape sections off for reference so it doesn't' go on crooked.):
Here is all my old molding:
And a few pictures of the new!
It probably will take anyone about 1.5 hours if you work straight on it the whole time. Not too bad of a job, and it sure looks a lot better then the old molding. I've been wanting to replace it for a long time so I'm glad that's one thing out of the way!!
Now I just have to wait to get money for those seats....... I may start to put more of the power wiring in place too.. I thought I was going to wait to get the seats, but I may just go ahead and pull them later today to take a loot at my wiring harness underneath my flooring.
#40
08-21-2012, 07:17 PM
Post Fiend
Join Date: Nov 2011
Location: Algona, Washington
Posts: 8,908
Likes: 0
Received 0 Likes
on
0 Posts
Hey that looks great. You should get into the body shop business, i think you would do pretty well there. I had thought about getting into it when i was spray painting some things but i found out i have terrible patience for that kind of thing. Especially when your workplace is outside in the wind...
#41
08-21-2012, 09:00 PM
Thanks! Yeah I thought about stuff like that. I would really like to do something with working on vehicles, but for now I don't think it's too much of an option. I've got two more years of mechanical engineering at ASU (college) and I'm doing the Air Force ROTC also, so once I graduate I'll be commissioned into the Air Force. However, depending on how long I stay in, I may try and use my degree and experience and work at some high end auto shop or for a dealership. I heard Audi automotive technicians make 100K plus a year.. so I wonder what higher end luxury technicians make! Of course I'd need more schooling in vehicles before something like that happens but I can have goals!
Okay I have to try and finish up this wiring now for the drivers side door panel... its a little bit more frustrating then I thought but it will get done.
Okay I have to try and finish up this wiring now for the drivers side door panel... its a little bit more frustrating then I thought but it will get done.
#42
08-21-2012, 09:04 PM
Junior User
Join Date: Feb 2012
Location: DFW
Posts: 63
Likes: 0
Received 0 Likes
on
0 Posts
Bronco looks Awesome Bubba.
There's a guy here with a wrecked 93' with what looks to be mint seats. If he would part it out, I don't know what shipping would be, but I'd be willing to take them to a shipper of your choice.
Here's the ad as well as another from a junkyard which doesn't show interior.
93 Ford Bronco Parts
92 ford bronco
#43
08-21-2012, 11:17 PM
Oh wow, those are the exact seats I've been looking at (the whole set of bucket and rear bench, and console though to match). The cost for the 3 seats and console are 400 with 250 shipping from what I've been waiting to get. If the price for that whole setup is around that (or cheaper  ) I'd definitely be very interested!
Edit: and if he has door panels too I could take them also! I don't know how much shipping would be for the seats and all, but that's from Texas right? That's a lot closer to Arizona then Florida that's for sure. You'd have to let me know how much you'd want for your trouble taking them to a shipper also if he is willing to part those out and the price is good!
) I'd definitely be very interested!Edit: and if he has door panels too I could take them also! I don't know how much shipping would be for the seats and all, but that's from Texas right? That's a lot closer to Arizona then Florida that's for sure. You'd have to let me know how much you'd want for your trouble taking them to a shipper also if he is willing to part those out and the price is good!
#44
08-22-2012, 01:52 AM
Post Fiend
Join Date: Nov 2011
Location: Algona, Washington
Posts: 8,908
Likes: 0
Received 0 Likes
on
0 Posts
In the job situation, i would be careful if looking in dealerships and shops as a mechanic. Though they advertise to make a lot, the underlying truth can be deceiving. I worked for a Buick/GMC dealership, you would think with their quality of work and how many of their vehicles have to be in the shop, the tech still get crap for pay. Some just up and leave to go home half way through the day due to no work coming in. If you can find one that does hourly wages over flat rate you might be in a good spot.
#45
08-22-2012, 08:57 AM
Junior User
Join Date: Feb 2012
Location: DFW
Posts: 63
Likes: 0
Received 0 Likes
on
0 Posts
Oh wow, those are the exact seats I've been looking at (the whole set of bucket and rear bench, and console though to match). The cost for the 3 seats and console are 400 with 250 shipping from what I've been waiting to get. If the price for that whole setup is around that (or cheaper ) I'd definitely be very interested!
Edit: and if he has door panels too I could take them also! I don't know how much shipping would be for the seats and all, but that's from Texas right? That's a lot closer to Arizona then Florida that's for sure. You'd have to let me know how much you'd want for your trouble taking them to a shipper also if he is willing to part those out and the price is good!
) I'd definitely be very interested!Edit: and if he has door panels too I could take them also! I don't know how much shipping would be for the seats and all, but that's from Texas right? That's a lot closer to Arizona then Florida that's for sure. You'd have to let me know how much you'd want for your trouble taking them to a shipper also if he is willing to part those out and the price is good!
