
How-To install cab lights
#76
 04-24-2015, 07:40 PM

Posting Guru
#79
04-27-2015, 06:26 AM
#80
07-06-2015, 05:57 PM

This topic comes up pretty often so I figured I would do How to since I was installing them on my 97. This is not for the faint of heart. You have to drill 15 holes
The harness is the same from the 70s-97, with the only differences being on the end where it plugs into the truck. I had a 89 harness so I had to change the plug at the end. NOT a big deal. The 70s-91 have one type of plug, the 92-97 have another. 92-97 have the power lug on the passenger side. 80-91 have the power plug on the drivers side. Adjust accordingly
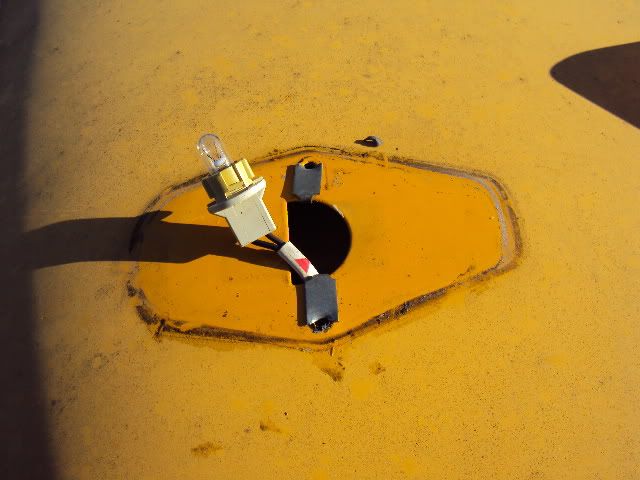
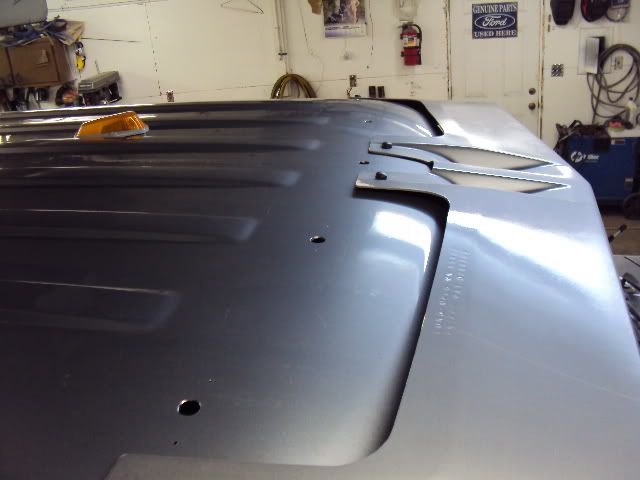
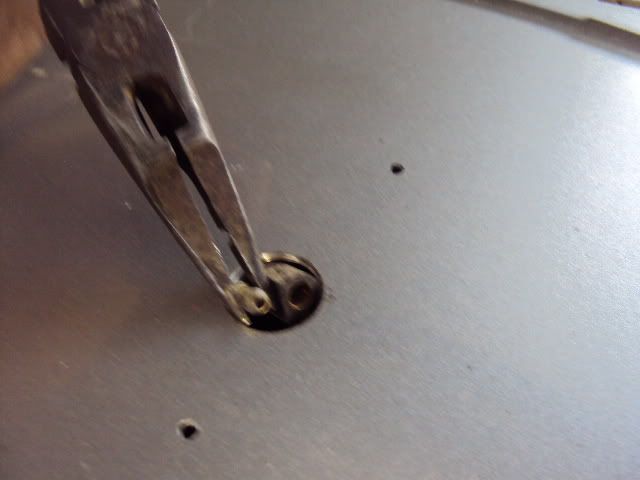
First I will show you what the FACTORY cab holes looks like. The hole is big enough to put the entire socket thru it. and Ford uses the little speed clips for the attaching screws(not necessary)
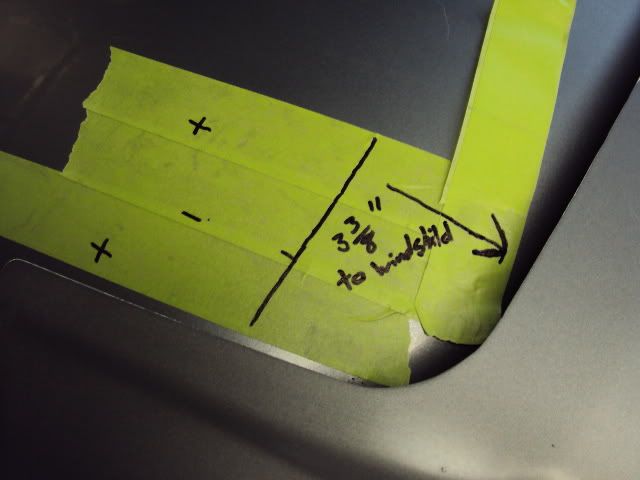
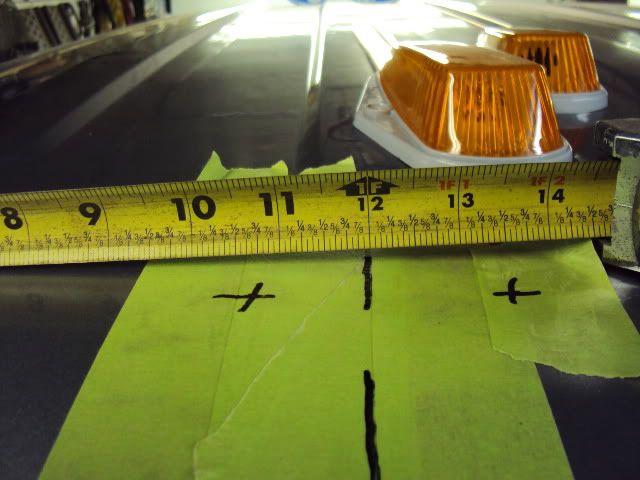
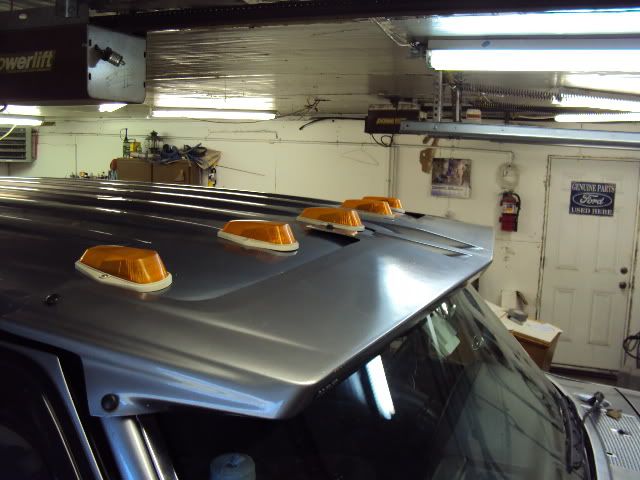
Ok. 1st Tape off the general are where each light will go. The light is set back from the windshield trim 3 3/8" and they are evenly spaced out at 12".
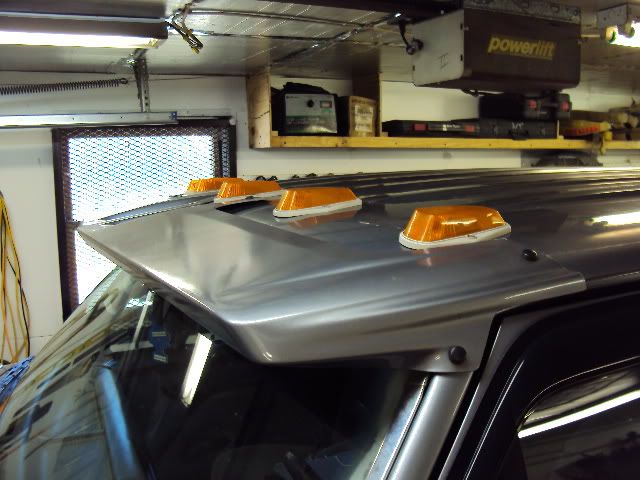
Find the center of the roof and work your way out. Remember measure TWICE if need be. Then lay the lights on the roof and and back and look at them to make sure they look right. Do fine tuning as you see fit. I like to have them as close to factory as possible, all facing straight ahead. Some like to have them follow the arc of the roof.
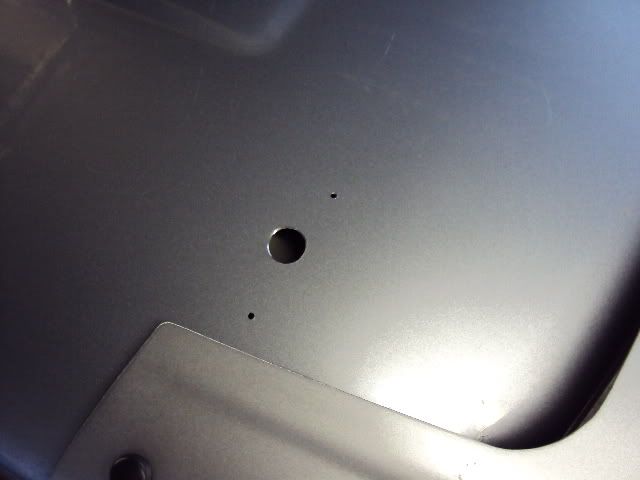
Once you get them where your want them, mark your screw holes. Then remove the light and mark a spot of the wire to pass thru about dead center between the screw holes
Then get out your drill and drill away. Just drill thru the OUTER roof. DO NOT drill thru the inner roof. I use a 7/64" bit to drill all the holes. Then I come back with a UNI-BIT and open up the WIRE holes to 3/4".
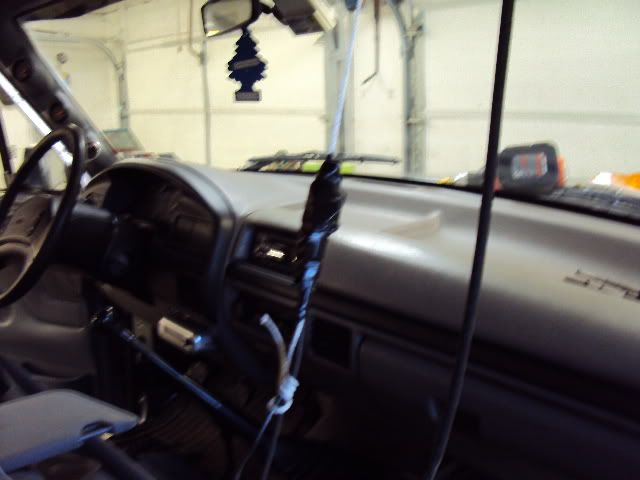
Next up is fishing the wire thru the roof. Remove the passenger side sun visor. You will need to use the visor hole to fish the wire. The best way I have found to fish the wire is like so. Take a coat hanger and straighten it out and bend a SMALL loop on the end. The tire a good piece of string thru the loop.
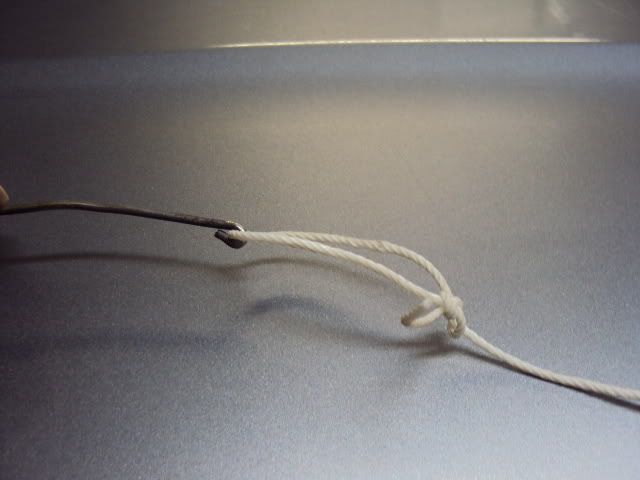
Start on the drivers side and fish it in the 1st hole and try to get it out the middle hole. Once you get it out the middle hole pull the coat hanger completely out. then stick it back in the middle hole and try to get it out the far passenger side hole. Again, pull the coat hanger all the way out then stick it back in the far passenger side hole and thru the inside hole for the passenger visor.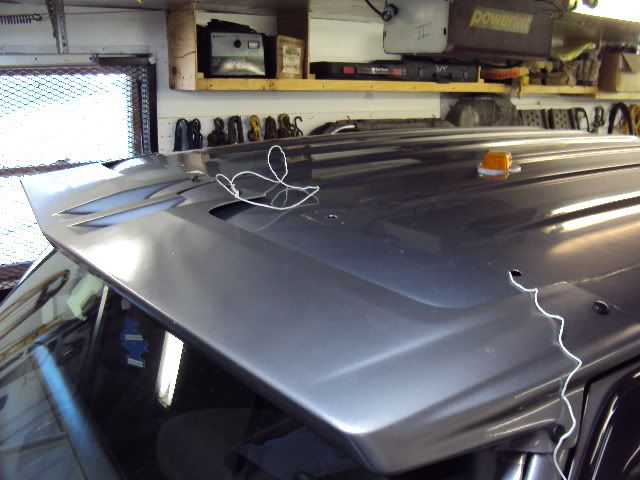
Pull the coat hanger all the way out and untie the string. Tie the string onto the harness for the drivers side light(unplug all the 5 light sockets from the harness). If you left your self enough string you can have it come thru the drivers door and to the passenger side with the string. This will allow you to pull the string and feed the harness at the same time
Keep feeding the harness and pulling the string. Once the last cab light plug goes into the visor hole, the 1st cab light pug should hit a stopping point.
Then you need to get a pair of needle nose pliers to pull each connector from each hole
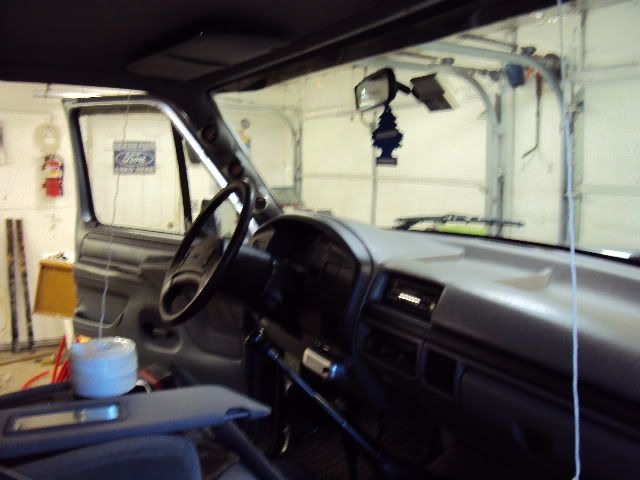
Now you need to fish the passenger side A pillar. Remove the Kick panel and A pillar cover.Again with the coat hanger and string. Start at the top in the visor hole and work the coat hanger down the A pillar. Once it is thru tie the other end of the string to the plug on the other end of the harness w a stopper knot and tape the dead so it will not get caught while pulling
it is a tight fit so just keep pulling and feeding at the same time. Once you get the head down to the kick panel you will need to plug it into the truck side harness. This plug
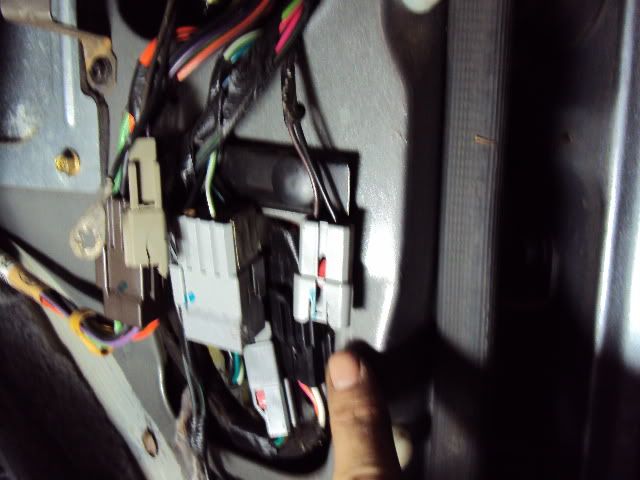
I had to modify my harness to fit the plug(because I had an older harness).
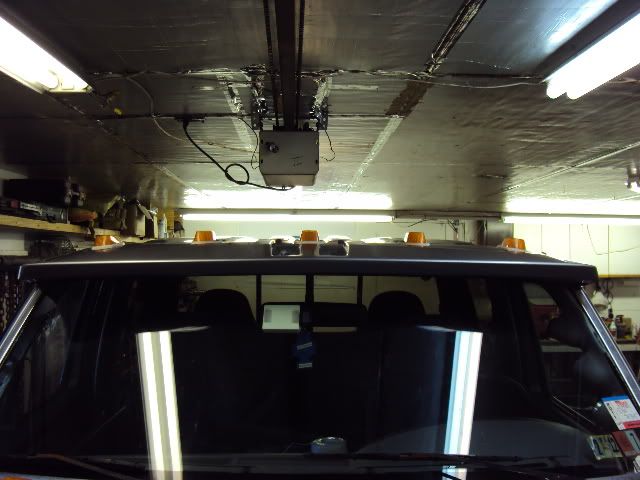
Plug in the 5 sockets for the cab lights and turn on your headlights. You SHOULD have lights.
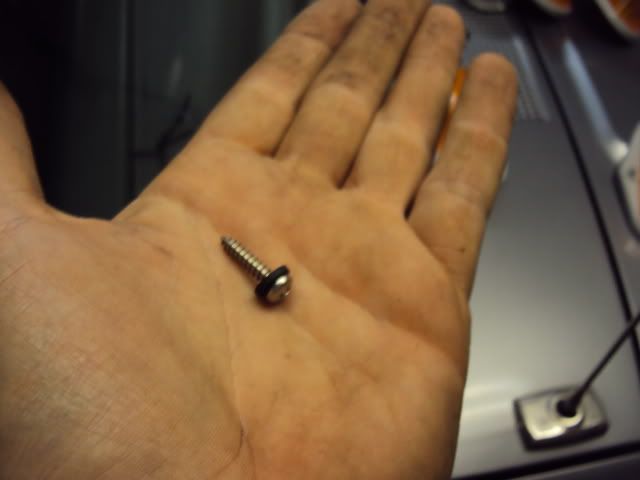
Putting the cab lights on is pretty simple. The sockets are a 1/4 turn in to the lens and I use #8 stainless pan head screws a Neoprene washers to seal better. I also put silicone on the treads of each screw as well
Tighten the screws but DO NOT OVER TIGHTEN
There is no need for silicone on the cab light gasket, that will just make thing harder if.when a cab light burns out.
And there ya go. Cab lights 101

The harness is the same from the 70s-97, with the only differences being on the end where it plugs into the truck. I had a 89 harness so I had to change the plug at the end. NOT a big deal. The 70s-91 have one type of plug, the 92-97 have another. 92-97 have the power lug on the passenger side. 80-91 have the power plug on the drivers side. Adjust accordingly
First I will show you what the FACTORY cab holes looks like. The hole is big enough to put the entire socket thru it. and Ford uses the little speed clips for the attaching screws(not necessary)
Ok. 1st Tape off the general are where each light will go. The light is set back from the windshield trim 3 3/8" and they are evenly spaced out at 12".
Find the center of the roof and work your way out. Remember measure TWICE if need be. Then lay the lights on the roof and and back and look at them to make sure they look right. Do fine tuning as you see fit. I like to have them as close to factory as possible, all facing straight ahead. Some like to have them follow the arc of the roof.
Once you get them where your want them, mark your screw holes. Then remove the light and mark a spot of the wire to pass thru about dead center between the screw holes
Then get out your drill and drill away. Just drill thru the OUTER roof. DO NOT drill thru the inner roof. I use a 7/64" bit to drill all the holes. Then I come back with a UNI-BIT and open up the WIRE holes to 3/4".
Next up is fishing the wire thru the roof. Remove the passenger side sun visor. You will need to use the visor hole to fish the wire. The best way I have found to fish the wire is like so. Take a coat hanger and straighten it out and bend a SMALL loop on the end. The tire a good piece of string thru the loop.
Start on the drivers side and fish it in the 1st hole and try to get it out the middle hole. Once you get it out the middle hole pull the coat hanger completely out. then stick it back in the middle hole and try to get it out the far passenger side hole. Again, pull the coat hanger all the way out then stick it back in the far passenger side hole and thru the inside hole for the passenger visor.
Pull the coat hanger all the way out and untie the string. Tie the string onto the harness for the drivers side light(unplug all the 5 light sockets from the harness). If you left your self enough string you can have it come thru the drivers door and to the passenger side with the string. This will allow you to pull the string and feed the harness at the same time
Keep feeding the harness and pulling the string. Once the last cab light plug goes into the visor hole, the 1st cab light pug should hit a stopping point.
Then you need to get a pair of needle nose pliers to pull each connector from each hole
Now you need to fish the passenger side A pillar. Remove the Kick panel and A pillar cover.Again with the coat hanger and string. Start at the top in the visor hole and work the coat hanger down the A pillar. Once it is thru tie the other end of the string to the plug on the other end of the harness w a stopper knot and tape the dead so it will not get caught while pulling
it is a tight fit so just keep pulling and feeding at the same time. Once you get the head down to the kick panel you will need to plug it into the truck side harness. This plug
I had to modify my harness to fit the plug(because I had an older harness).
Plug in the 5 sockets for the cab lights and turn on your headlights. You SHOULD have lights.
Putting the cab lights on is pretty simple. The sockets are a 1/4 turn in to the lens and I use #8 stainless pan head screws a Neoprene washers to seal better. I also put silicone on the treads of each screw as well
Tighten the screws but DO NOT OVER TIGHTEN
There is no need for silicone on the cab light gasket, that will just make thing harder if.when a cab light burns out.
And there ya go. Cab lights 101

My question is can you tell me where i can get/ order it?
Does it fits on my 1990 F150 xlt lariat?
Kind regards,
Mike
#81
07-06-2015, 06:13 PM
Posting Guru
Hi diesel brad, i'm mike from germany, i saw your introduction for the cab lights and i feld in love with your cab visor (hope it is called cab visor). The thing in front of your cab lights over the wind shield
My question is can you tell me where i can get/ order it?
Does it fits on my 1990 F150 xlt lariat?
Kind regards,
Mike
My question is can you tell me where i can get/ order it?
Does it fits on my 1990 F150 xlt lariat?
Kind regards,
Mike
The following users liked this post:
#82
07-06-2015, 06:22 PM
Post Fiend
Join Date: Jul 2006
Location: Wabanaki Indian Territory
Posts: 18,724
Likes: 0
Received 37 Likes
on
31 Posts
the one shown in the pic on Brads truck is (was,i should say) called the "sun visor".
you can also get them with built in lights.also made by lund.they call (called) that one the "moon visor" and it's part# is 19004
it's also discontinued.amazon does still show a pic for reference;

they can also be found on CL,ebay and your local swap and trade mags........well ok,probably not in Germany though lol.
.....
i wish someone made black plastic or rubber grommets that would snap/fold around the factory cab light trim.i hate that cream.i'll remove them and paint them black but i fear the paint will flake off.
you can also get them with built in lights.also made by lund.they call (called) that one the "moon visor" and it's part# is 19004
it's also discontinued.amazon does still show a pic for reference;
they can also be found on CL,ebay and your local swap and trade mags........well ok,probably not in Germany though lol.
.....
i wish someone made black plastic or rubber grommets that would snap/fold around the factory cab light trim.i hate that cream.i'll remove them and paint them black but i fear the paint will flake off.
#83
07-06-2015, 07:11 PM
Thank you guys for the fast answers.
Haa, that would be my second question if anybody tried to install build in lights in the the front of the visor.
This moon visor looks great. What would be a fair price for a used one if i can't find a new one?
In germany you find not sun visors like that especially with that shape because its not allowed to drive with it, but for older american cars you can get easier a special permit. It's very strictly in germany with custom design, every change on your car after the factory deliverence( other tire size, new rims, seats, engine modifications, exhoust, headlights..) needs a special permit and it costs a lot for each part and in most cases they say no and you are not allowed to drive in public, just for shows..
That's why we in german love to see what you do with your cars then in germany it would be impossible to do.
The following users liked this post:
#84
07-06-2015, 07:37 PM
FordF250HDXLT
You wrote this:
i wish someone made black plastic or rubber grommets that would snap/fold around the factory cab light trim.i hate that cream.i'll remove them and paint them black but i fear the paint will flake off.
I don't know if you know that but in germany it is very famous it is a liquid rubber and in most cases we use it to change the color of our rims and to protect them against stones..
The following users liked this post:
#85
07-07-2015, 12:18 AM
#86
07-07-2015, 03:47 AM
Keystone Restyling now remakes the Lund visor # 12159
http://www.summitracing.com/parts/kr...rd/model/f-250
http://www.summitracing.com/parts/kr...rd/model/f-250
#87
07-07-2015, 11:37 AM
Posting Guru
Keystone Restyling now remakes the Lund visor # 12159
http://www.summitracing.com/parts/kr...rd/model/f-250
http://www.summitracing.com/parts/kr...rd/model/f-250
#88
07-07-2015, 04:12 PM
Post Fiend
Join Date: Jul 2006
Location: Wabanaki Indian Territory
Posts: 18,724
Likes: 0
Received 37 Likes
on
31 Posts
i thought the styling of Keystone Restyling wasn't as good as the original lund versions though? i thought i saw pics with someone with the keystones and it's just not like the lunds.i could be mistaken.there are lots of good used ones out there though.i found a really nice moon visor on CL for log truck for i can't remember now but either 50 or 75$ i think it was.from down in mass.he shipped it up to ME issue free for me.
#89
07-07-2015, 04:18 PM
Posting Guru
i thought the styling of Keystone Restyling wasn't as good as the original lund versions though? i thought i saw pics with someone with the keystones and it's just not like the lunds.i could be mistaken.there are lots of good used ones out there though.i found a really nice moon visor on CL for log truck for i can't remember now but either 50 or 75$ i think it was.from down in mass.he shipped it up to ME issue free for me.
#90
07-08-2015, 03:49 AM