
1973 F350 CREWCAB desert/dunes budget build by DirtyDeedsIndustries
#1
 11-28-2011, 11:33 PM


Join Date: Jan 2010
Posts: 260
Likes: 0
Received 0 Likes
on
0 Posts
1973 F350 CREWCAB desert/dunes budget build by DirtyDeedsIndustries
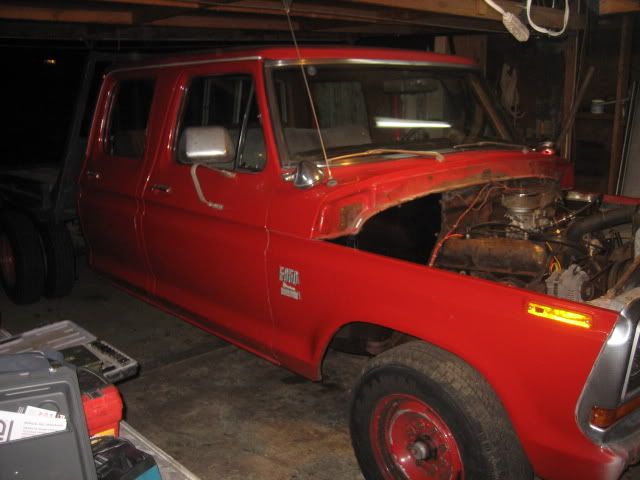
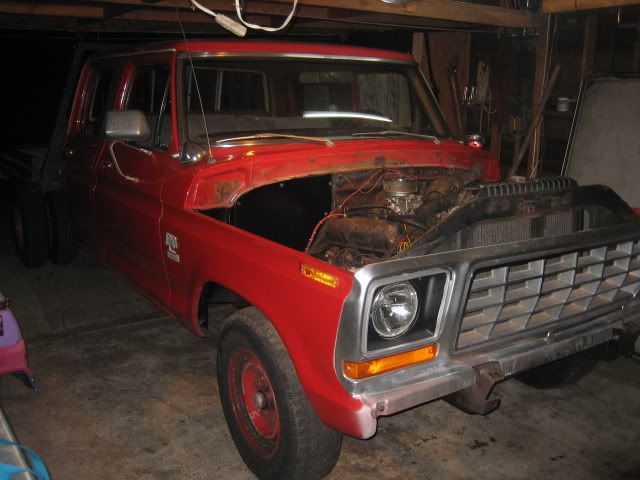
So this is going to be a very sloooooow build, but I will shoot as many pics as possible. I've meant to start this thread for months now, I bought the truck early this year. It's been in Socal it's whole life. I bought it from the second owner. He daily drove it as a fencing contractor. I paid $2750 for it. The front seat was tore up so I replaced with an 80's f150 bench that I gave my neighbor $10 for. The rear seat is in really good shape still.
Windows and doors rattle, steering is loose, gets about 4mpg, slow for having a 390 in it, no bed, gets you high while you drive it, vibrates and runs like *****. LOL but I love it, reminds me of when I was a kid. Some of my best times were when I was a kid mobbing around in my dad's 67 f100 4X4 short bed single cab. My brother and I in the back with our dogs. Mom, Dad and sister in front. We would go on forever in the mountains here in San Diego, shooting, panning for gold, playing in the creeks. Camping, etc.
I am a welder/fabricator/pipefitter/structural steel by trade. I can do anything that I want to this truck. It's all just a matter of time. List of things I've done so far:
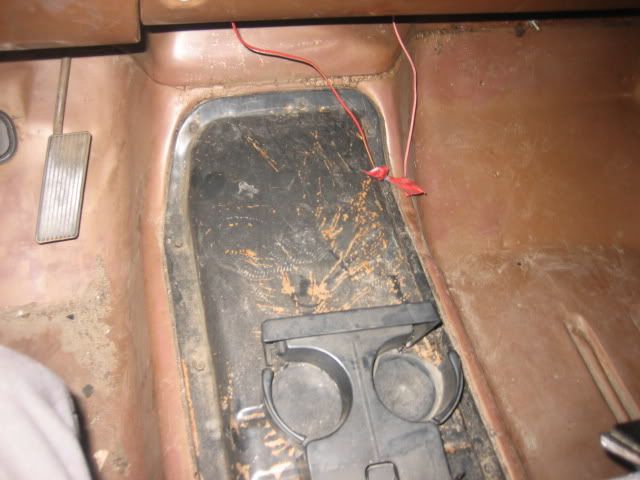
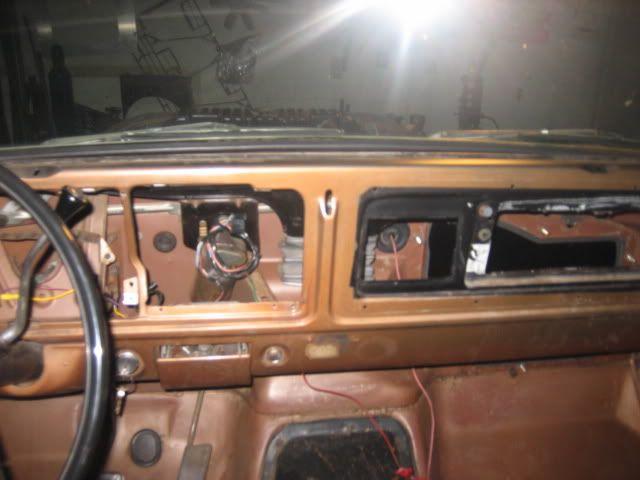
*strip interior of headliner (all trim is for sale), carpet, tar coating, gauges, glove box, a/c vents, wiring, brackets, screws, lights, GAS TANK, etc.
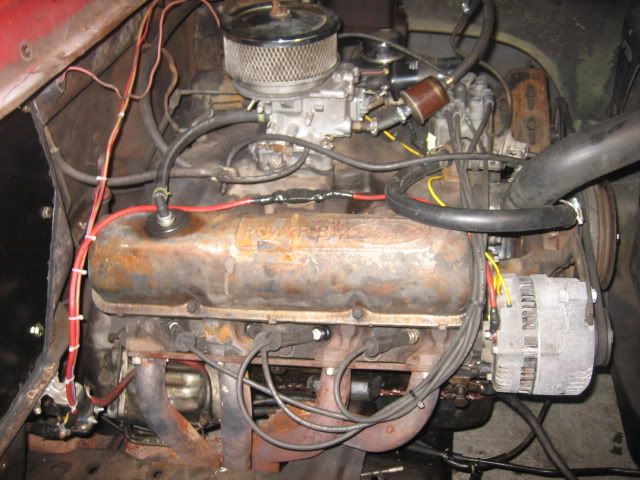
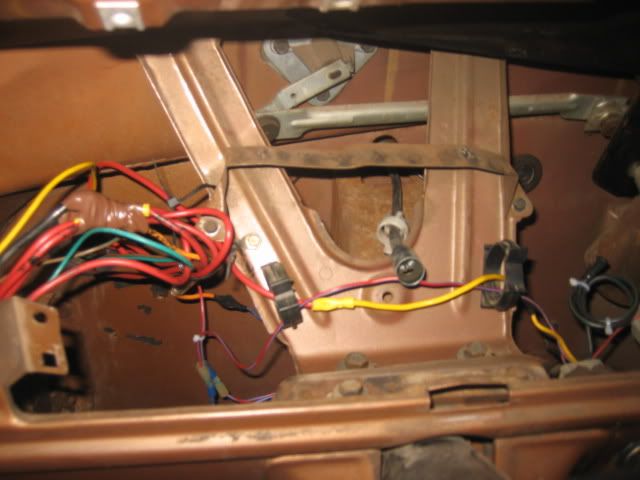
*Completely removed all chassis and engine wiring. Re- wired bare essentials with brand new wiring. Only what's needed to run. All lights are on separate toggles.
*Installed electric fuel pump, haven't removed stocker yet, but will soon just to get it outta the way, will make front steer conversion easier.
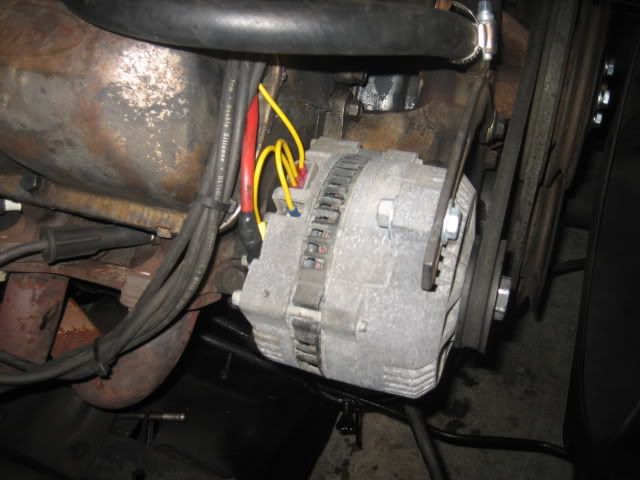
*Installed gen3 alternator from 94-95 stang. Got at junkyard for $35. Also got Taurus fan for $25 that I will install later.
*Removed 2 of the 3 fuel tanks and most of no longer needed fuel lines.
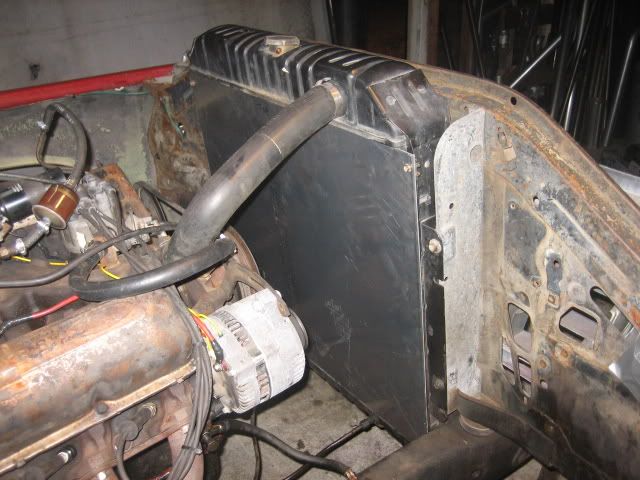
*Removed front clip and changed passenger head gasket. Re-installed front clip using bare minimum bolts in preparation for removal of core support.
*Removed all A/C components, cut out a block off plate for huge hole in firewall. (A/C components are for sale)
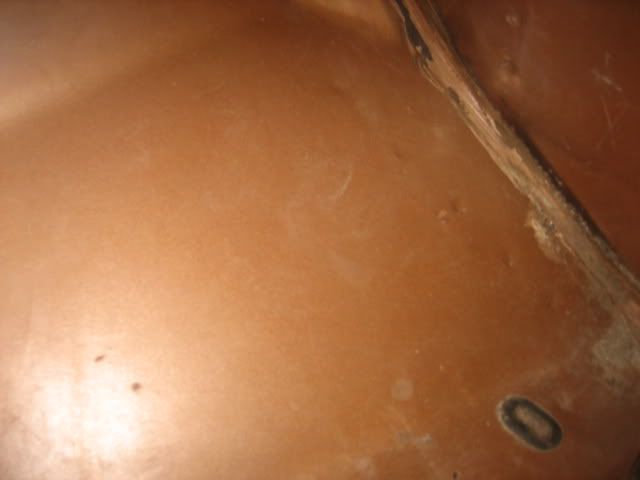
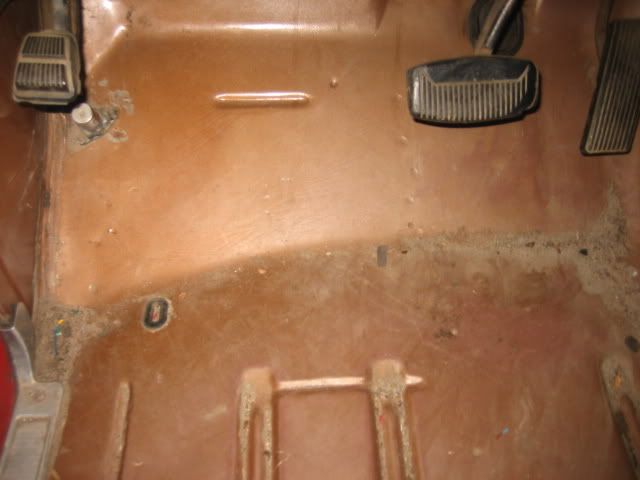
*cleaned and pressure washed everything just so I could see what was there. This truck has ZERO rust, except for a small spot in roof. Floorboards are like brand new.
*re-built front calipers with Autozone re-build kit, total cost $24. Doesn't pull anymore when you step on the brakes.
*full tune up, rebuilt carb, still runs like *****!!! Sick of this carter
I know there's stuff that I've missed, I've basically tinkered for the last few months and it's been a blast
Plans for the near future:
*Electric fan conversion
*Build tubular core support to hang fenders and grill independently, removal of separate pieces should only take a minute or 2 for each piece. When future Long Travel conversion is complete will install fiberglass fenders that I bought from ChaseTruck (great guy to do business with BTW, more on this later)
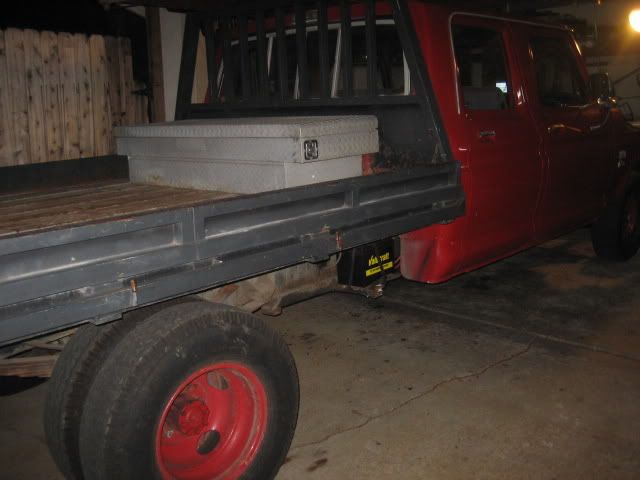
*Remove flat bed and cut down frame so truck fits in garage.
*Install brand new BFG all terrains I have just sitting there (just need to find wheels)
*Install softer springs on the rear, I have like 6-7 sets of various packs laying around, will piece together bare minimum until future plan.
*Convert to front steer (as soon as I can fit truck in garage) During this conversion I will bend beams at the wheel end, cut and extend at pivot end, convert to 'J' arm, fully plate and brace with 3/16 chromoly, and build double crossover steering. I still haven't decided what steering box to run yet, but it has to be a junkyard box.
*Will cut off all stock brackets and coilbuckets. Will build new beam mounts off frame a little to make beam wider (if that makes sense). Will make an engine cage and use 16" coilovers that I bought used for $300.
*remove stock rubber body mounts, they appear to be about an inch thick. Will replace with 2.5" sch 40 steel pipe about 2" tall which will lift body about 1" over stock which I know is frowned upon, but the extra room it will generate will be worth it. Plus that height needs to be determined right away since the core support, steering, cage, etc. all are based upon where the cab is. The entire cab will be welded to the cage in long term.
*Build super simple hangers for fiberglass bed sides.
I think that's it for now on the short term stuff.
Long Term plans:
*back half and 4 link rear
*full cage
*cut out firewall set new engine waaaaay back (engine not decided but it WON'T BE THIS 390)
*5 full size seats with 5pt harnesses.
*aluminum in place of dash bezels, will use all gauges necessary (no speedo, that's what GPS is for)
*As many KC highlights as I can fit on bumper and roof, with one LED bar on bumper
*37 or 39 BFG all terrains
*full float 40 spline 9"
*Blitz race hubs (great guys to do business with!!!)
*sound deadner where possible, roof, floor, firewall, doors, back of cab. Probably leave where your feet go steel cab, no carpet.
I'll add stuff as I think of it. My neighbors had a Ranger that they built the way I plan to build this, all pretty cheap junk yard parts. They had less than 20K into their truck. They came in 3rd at BAttle at Primm this year. The 2 trucks that came in before them were $150K professionally built trophy trucks.
This is my second full desert build. I learned a lot with my first, and won't make the same mistakes twice. I still have the first project, my wife uses it as her daily driver, I sold her car to pay off the loan since the economy won't support such a high car payment anymore. I bought her truck in 2003 brand new for 20K with the intention of making a pre runner. I spent about $20K upgrading and wasted another $10K or so on mistakes. After a total of $50K I realized that the truck is maxed out unless I backhalf and convert to beams, or crazy j arms or something.
I figured if I was going to start over again that I would do it with a truck that I don't have to smog, has 4 doors (we have 2 kids since I bought the tundra) and that I would build everything that I could instead of buying kits. All parts will either be junkyard or forums/craigslist finds. (In this economy I'm lucky to even have that luxury right now)
I plan to pay for all of this by doing side work and by selling/parting the existing F350 parts that won't be used. I also have tons of other parts from various other projects that I have been meaning to sell, but just haven't gotten around to. I make pre-runner bumpers, Long Travel kits for 1st gen Tundra's, BAmufflers for most vehicles, any welding projects I can find. ETC.
I hope to keep this project under $20K including the truck, and there's no reason that isn't possible. Here's some pics of little to no headway so far LOL:
Windows and doors rattle, steering is loose, gets about 4mpg, slow for having a 390 in it, no bed, gets you high while you drive it, vibrates and runs like *****. LOL but I love it, reminds me of when I was a kid. Some of my best times were when I was a kid mobbing around in my dad's 67 f100 4X4 short bed single cab. My brother and I in the back with our dogs. Mom, Dad and sister in front. We would go on forever in the mountains here in San Diego, shooting, panning for gold, playing in the creeks. Camping, etc.
I am a welder/fabricator/pipefitter/structural steel by trade. I can do anything that I want to this truck. It's all just a matter of time. List of things I've done so far:
*strip interior of headliner (all trim is for sale), carpet, tar coating, gauges, glove box, a/c vents, wiring, brackets, screws, lights, GAS TANK, etc.
*Completely removed all chassis and engine wiring. Re- wired bare essentials with brand new wiring. Only what's needed to run. All lights are on separate toggles.
*Installed electric fuel pump, haven't removed stocker yet, but will soon just to get it outta the way, will make front steer conversion easier.
*Installed gen3 alternator from 94-95 stang. Got at junkyard for $35. Also got Taurus fan for $25 that I will install later.
*Removed 2 of the 3 fuel tanks and most of no longer needed fuel lines.
*Removed front clip and changed passenger head gasket. Re-installed front clip using bare minimum bolts in preparation for removal of core support.
*Removed all A/C components, cut out a block off plate for huge hole in firewall. (A/C components are for sale)
*cleaned and pressure washed everything just so I could see what was there. This truck has ZERO rust, except for a small spot in roof. Floorboards are like brand new.
*re-built front calipers with Autozone re-build kit, total cost $24. Doesn't pull anymore when you step on the brakes.
*full tune up, rebuilt carb, still runs like *****!!! Sick of this carter
I know there's stuff that I've missed, I've basically tinkered for the last few months and it's been a blast
Plans for the near future:
*Electric fan conversion
*Build tubular core support to hang fenders and grill independently, removal of separate pieces should only take a minute or 2 for each piece. When future Long Travel conversion is complete will install fiberglass fenders that I bought from ChaseTruck (great guy to do business with BTW, more on this later)
*Remove flat bed and cut down frame so truck fits in garage.
*Install brand new BFG all terrains I have just sitting there (just need to find wheels)
*Install softer springs on the rear, I have like 6-7 sets of various packs laying around, will piece together bare minimum until future plan.
*Convert to front steer (as soon as I can fit truck in garage) During this conversion I will bend beams at the wheel end, cut and extend at pivot end, convert to 'J' arm, fully plate and brace with 3/16 chromoly, and build double crossover steering. I still haven't decided what steering box to run yet, but it has to be a junkyard box.
*Will cut off all stock brackets and coilbuckets. Will build new beam mounts off frame a little to make beam wider (if that makes sense). Will make an engine cage and use 16" coilovers that I bought used for $300.
*remove stock rubber body mounts, they appear to be about an inch thick. Will replace with 2.5" sch 40 steel pipe about 2" tall which will lift body about 1" over stock
which I know is frowned upon, but the extra room it will generate will be worth it. Plus that height needs to be determined right away since the core support, steering, cage, etc. all are based upon where the cab is. The entire cab will be welded to the cage in long term.*Build super simple hangers for fiberglass bed sides.
I think that's it for now on the short term stuff.
Long Term plans:
*back half and 4 link rear
*full cage
*cut out firewall set new engine waaaaay back (engine not decided but it WON'T BE THIS 390)
*5 full size seats with 5pt harnesses.
*aluminum in place of dash bezels, will use all gauges necessary (no speedo, that's what GPS is for)
*As many KC highlights as I can fit on bumper and roof, with one LED bar on bumper
*37 or 39 BFG all terrains
*full float 40 spline 9"
*Blitz race hubs (great guys to do business with!!!)
*sound deadner where possible, roof, floor, firewall, doors, back of cab. Probably leave where your feet go steel cab, no carpet.
I'll add stuff as I think of it. My neighbors had a Ranger that they built the way I plan to build this, all pretty cheap junk yard parts. They had less than 20K into their truck. They came in 3rd at BAttle at Primm this year. The 2 trucks that came in before them were $150K professionally built trophy trucks.
This is my second full desert build. I learned a lot with my first, and won't make the same mistakes twice. I still have the first project, my wife uses it as her daily driver, I sold her car to pay off the loan since the economy won't support such a high car payment anymore. I bought her truck in 2003 brand new for 20K with the intention of making a pre runner. I spent about $20K upgrading and wasted another $10K or so on mistakes. After a total of $50K I realized that the truck is maxed out unless I backhalf and convert to beams, or crazy j arms or something.
I figured if I was going to start over again that I would do it with a truck that I don't have to smog, has 4 doors (we have 2 kids since I bought the tundra) and that I would build everything that I could instead of buying kits. All parts will either be junkyard or forums/craigslist finds. (In this economy I'm lucky to even have that luxury right now)
I plan to pay for all of this by doing side work and by selling/parting the existing F350 parts that won't be used. I also have tons of other parts from various other projects that I have been meaning to sell, but just haven't gotten around to. I make pre-runner bumpers, Long Travel kits for 1st gen Tundra's, BAmufflers for most vehicles, any welding projects I can find. ETC.
I hope to keep this project under $20K including the truck, and there's no reason that isn't possible. Here's some pics of little to no headway so far LOL:
#2
11-29-2011, 06:38 PM
Lead Driver
Looks good. Subscribing & can't wait to see more.
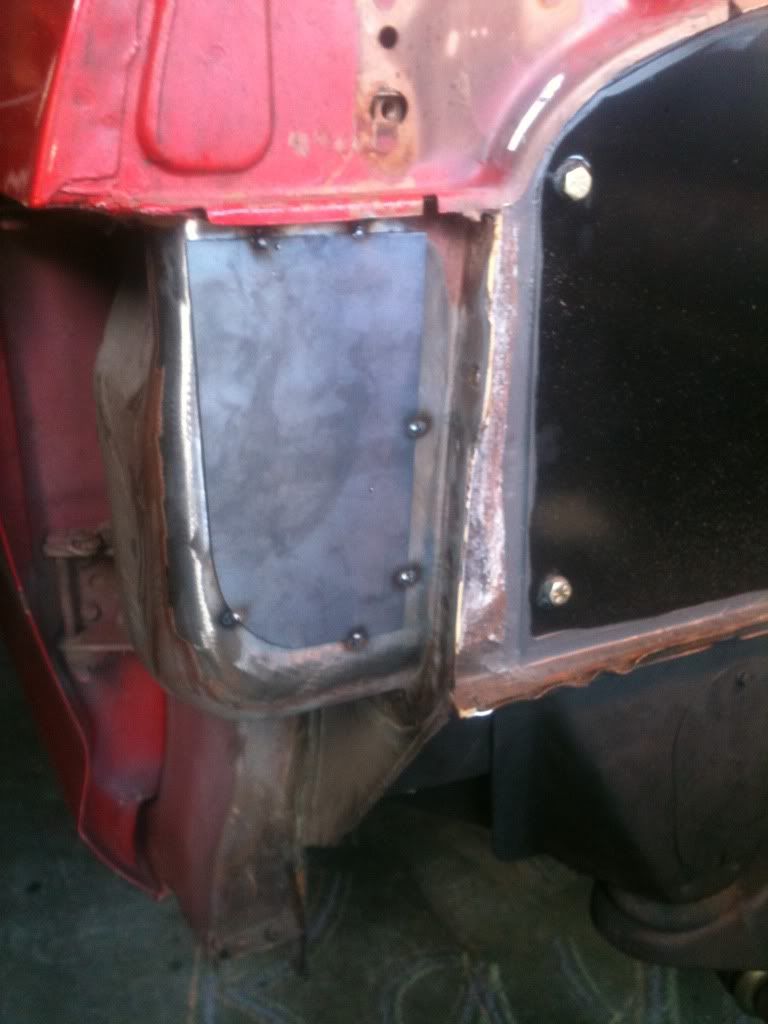
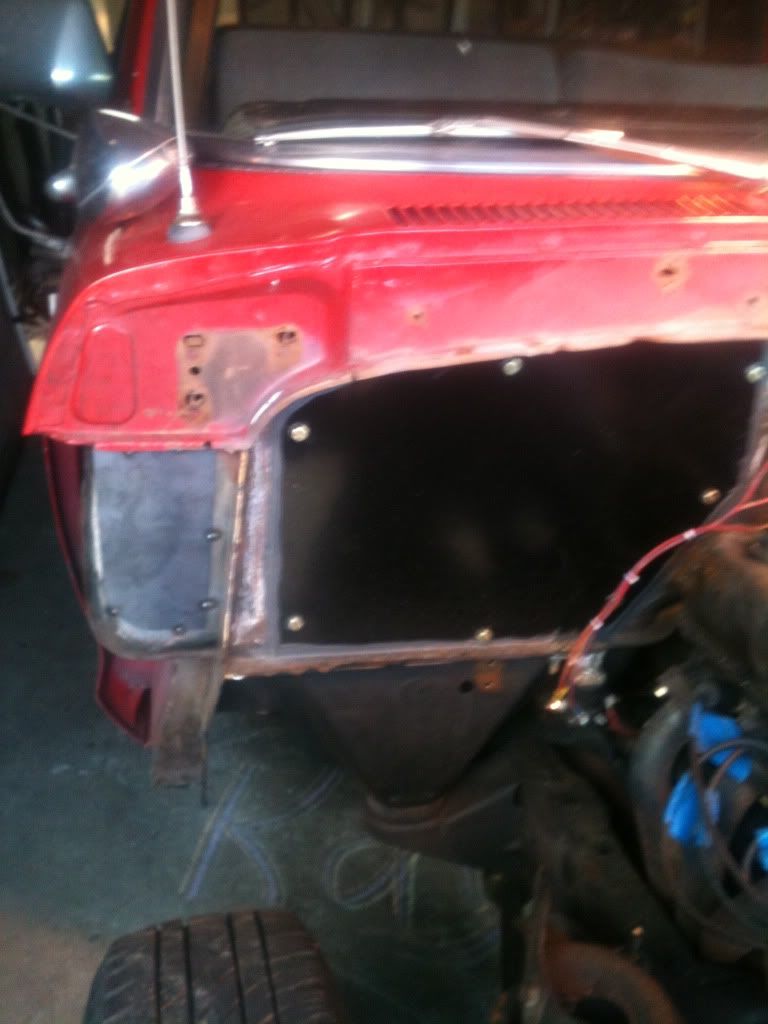
What are the 2 plates that are welded on the side of the firewall - out by the cowl? What do they cover?
It's not frowned upon if done right & the way you're talking about sounds like it will be fine.
Just a note though - take measurements of the body mounts ON the truck & adjust from there. They tend to "grow" a bit when the weight of the cab is lifted off them...
What are the 2 plates that are welded on the side of the firewall - out by the cowl? What do they cover?
*remove stock rubber body mounts, they appear to be about an inch thick. Will replace with 2.5" sch 40 steel pipe about 2" tall which will lift body about 1" over stock which I know is frowned upon, but the extra room it will generate will be worth it. Plus that height needs to be determined right away since the core support, steering, cage, etc. all are based upon where the cab is. The entire cab will be welded to the cage in long term.
which I know is frowned upon, but the extra room it will generate will be worth it. Plus that height needs to be determined right away since the core support, steering, cage, etc. all are based upon where the cab is. The entire cab will be welded to the cage in long term.Just a note though - take measurements of the body mounts ON the truck & adjust from there. They tend to "grow" a bit when the weight of the cab is lifted off them...
#3
11-29-2011, 07:07 PM
Join Date: Jan 2010
Posts: 260
Likes: 0
Received 0 Likes
on
0 Posts
Hey!! Good idea on the body mounts. Coincidentally that's how I took the measurement. The space right now body to bracket is 1".
While I have the steering all apart and before I make the core support I'll put in new body mounts.
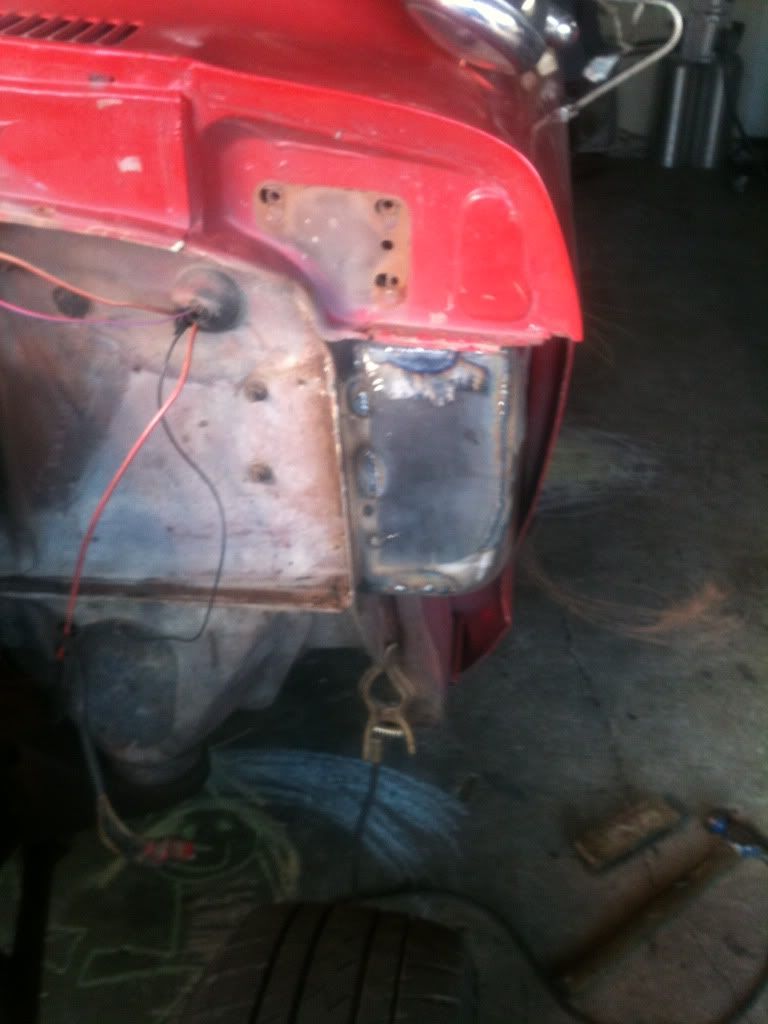
The plates are just to reinforce that area. They are fully welded now, and painted. When I build the core support I'll run a piece of tubing from the tubular core support to that plate. I will make it unbolt from that plate so that I can remove the tube and fender at the same time if I want.
I'll try to shoot more pics tonite. I plan to start on electric fan conversion, but who knows, not even home from work yet.
While I have the steering all apart and before I make the core support I'll put in new body mounts.
The plates are just to reinforce that area. They are fully welded now, and painted. When I build the core support I'll run a piece of tubing from the tubular core support to that plate. I will make it unbolt from that plate so that I can remove the tube and fender at the same time if I want.
I'll try to shoot more pics tonite. I plan to start on electric fan conversion, but who knows, not even home from work yet.
#4
11-29-2011, 07:36 PM
Lead Driver
#5
11-29-2011, 10:07 PM
#6
11-29-2011, 10:22 PM
Post Fiend
#7
11-29-2011, 11:31 PM
Post Fiend
Trending Topics
#8
11-30-2011, 12:49 AM
Join Date: Jan 2010
Posts: 260
Likes: 0
Received 0 Likes
on
0 Posts

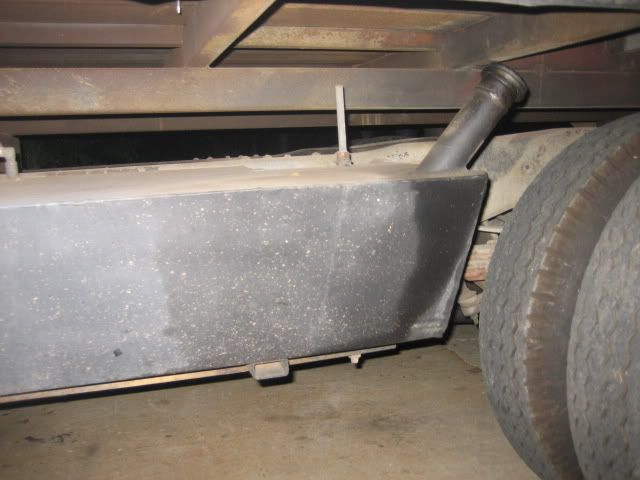
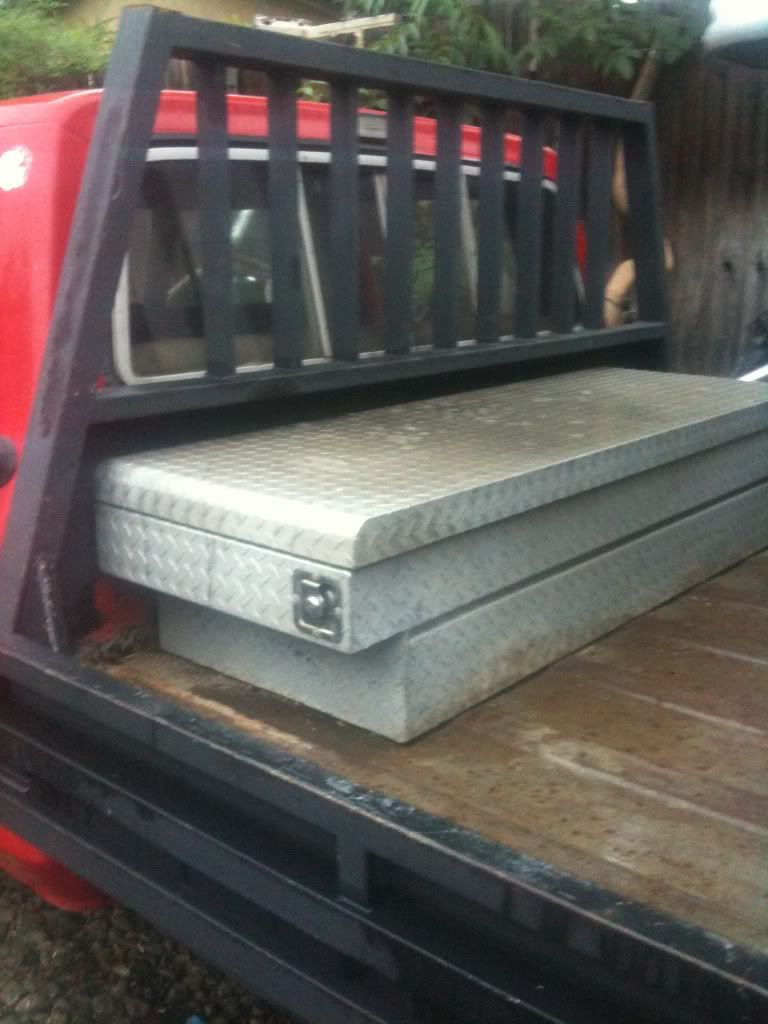
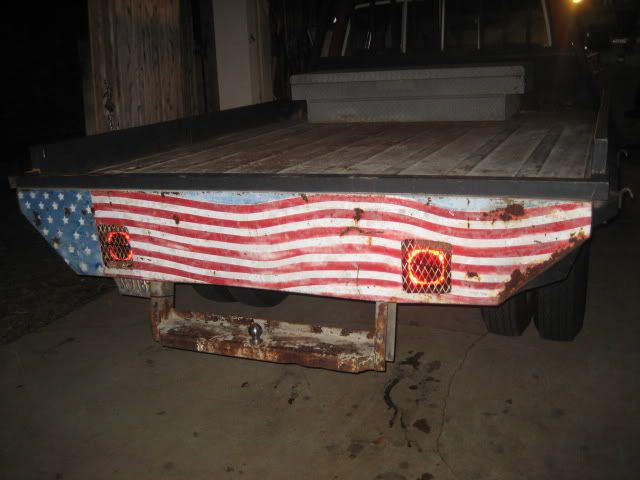
It sux to fill up under the flatbed, there is barely room for the nozzle. I'll put a 50+ gallon cell someday
#9
11-30-2011, 12:54 AM
Join Date: Jan 2010
Posts: 260
Likes: 0
Received 0 Likes
on
0 Posts
#10
11-30-2011, 12:59 AM
Join Date: Jan 2010
Posts: 260
Likes: 0
Received 0 Likes
on
0 Posts
The tubing will only serve one purpose, to locate the tubed core support front to back, that's it. Later in the future, I'll tie the core support into the engine cage, but I think that I'll keep it removable.
#11
11-30-2011, 01:06 AM
Join Date: Jan 2010
Posts: 260
Likes: 0
Received 0 Likes
on
0 Posts


#12
11-30-2011, 01:15 AM
Join Date: Jan 2010
Posts: 260
Likes: 0
Received 0 Likes
on
0 Posts
I mistakenly posted a electric fan pic above, but here they are kinda in order:
This fan came off an older 3.8L that I pulled outta Ramona Auto Dismantling for $25
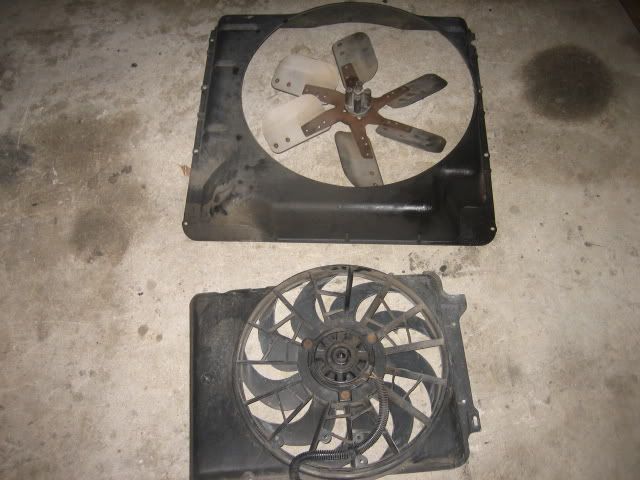
Basically I just cut out a plate of 1/8" aluminum that bolts onto the radiator in place of the original fan shroud. AAAAAhhhnnnnnddd, that's as far as I got tonight LOL
I have to modify the fan itself to bolt to this shroud. When that is done I'll chose a location for the fan, trace it out, drill holes, then bolt the fan to the shroud. I'll post up pics as it progresses
This fan came off an older 3.8L that I pulled outta Ramona Auto Dismantling for $25
Basically I just cut out a plate of 1/8" aluminum that bolts onto the radiator in place of the original fan shroud. AAAAAhhhnnnnnddd, that's as far as I got tonight LOL
I have to modify the fan itself to bolt to this shroud. When that is done I'll chose a location for the fan, trace it out, drill holes, then bolt the fan to the shroud. I'll post up pics as it progresses
#13
11-30-2011, 01:22 AM
Join Date: Jan 2010
Posts: 260
Likes: 0
Received 0 Likes
on
0 Posts

#14
11-30-2011, 01:25 AM
Join Date: Jan 2010
Posts: 260
Likes: 0
Received 0 Likes
on
0 Posts
#15
11-30-2011, 01:25 AM

Join Date: Oct 2010
Location: Northern and Southern Cal
Posts: 4,656
Likes: 0
Received 0 Likes
on
0 Posts