69 F350 Bump Side Crew Cab Restoration
#1
 11-25-2011, 08:22 PM

69 F350 Bump Side Crew Cab Restoration
I purchased a f350 Crew Cab LWB today. It has a little surface rust and some sheep metal to be replaced along the bottoms of the doors. It has a 360 with rebuilt heads and a 4 speed behind it. I plan on pulling that and putting in a 6bt. I'll need lots of help along the way to get her rolling.
The passenger window is busted out of the front door. Do you have to remove the skin to put in the new glass????
Also, i'm going to convert it to the dodge steering as well. It is a outboard steering head and the ford is an inboard. I think it will interfere with the cummins starter. Anyway, that is a ways off.
Parts i need:
1) Hood - rusted out along front
2) Patches on bottom of doors
3) Possible a steering Column
4) Possibly a better bed, but might be able to repair the one i have.
5) Passenger Front door window
6) Higher Gear's for the rear end- I think it has 4.11's i haven't pulled the numbers
7) I want to replace all tie rods, ball joints, bearing etc. Any suggestions on good source (i may just use a local napa) would be great.
8)I need a new ceiling in the cab as it is falling down
9) The List will grow i'm sure.
I'm doing pretty good except for the $200 worth of diesel i burned going to get her today.
I made about 600 on my 79- Guy is picking up next week so i'm in the 69 pretty right for the time being.
Lots of Pics will follow soon- Here's where she sat for several years until today. Note second pic with Slicker suit window cover!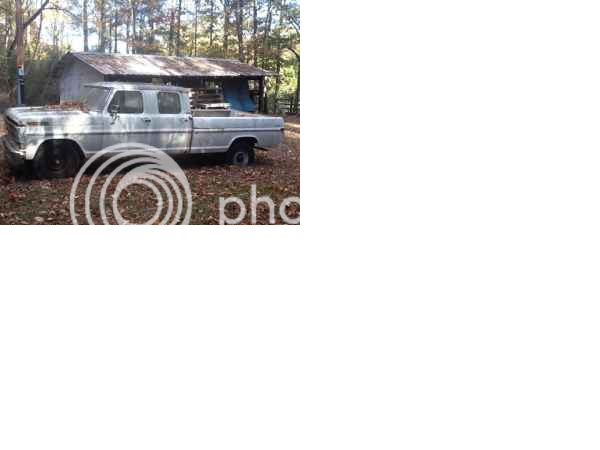
#2
11-25-2011, 08:39 PM
Post Fiend
That's awesome. I had a lead on one a few months ago... an F350 crew 4x4 for $1,000. Poof... it was gone by the time I called. C'est l'vie!
Below is an outline for a restoration:
First a note, some of the phases can be piggybacked. For example, subassemblies (chassis, engine, etc.) can be done while the bodywork is being completed.
Pre-Teardown Phase
Determine the purpose of your rig... street/strip, trail riding, daily driver, tow rig, etc.
Determine budget...
Now add another 20 percent to your budget.
Determine sources for tech support and parts.
Build a Bumpside Reference Library
Order lots of catalogs!!
Invest in a factory shop manual, or Chilton's, Chiltoms. Clymer.
Get your work area and tools in order
Needs.... Money, time, and patience.
Phase 1 - Teardown
Bodywork / Interior disassembly
Catalog, label, and bag your parts!
Doghouse removal (hood, outer & inner fenders, core support)
Engine & transmission removal
Bed & cab removal
Chassis disassembly (including rear axle) and hardlines
Phase 2a - Bodywork
Clean & strip body finish
Bodywork, body mods, and seal with epoxy primer
Door fitment & gaps (rebuild your door hinges now)
Paint job!
Phase 2b - Chassis
Strip & refinish frame
Build axles and install new brakes
Build new suspension & steering
Install fuel tank, fuel line, brake lines.
Phase 3 - Powertrain Build-up
Build engine
Build transmission
Build transfer case
Phase 4 - Cab Assembly
Install cab on frame
Install & adjust door & window mechanicals
Install door window glass, rear glass, and windshield
Install firewall pad
Run all electrical wiring, vacuum hoses, & control cables.
Install under dash components like wiper motor, etc.
Install instruments, steering wheel and column
Install climate control systems
Run any sound-system wiring
Lay sound deadener (like Dynamat) and carpet underlayments
Phase 5 - Powertrain Installation
Install engine/transmission/transfer case
Install brake hydraulics (MC/booster/proportioning valve)
Build exhaust system
Do the 3G alternator upgrade!
Install core support & radiator
Phase 6 - First Run
Perform preliminary engine system checks and FIRE IT UP!
At this point you should have a truck that is driveable but not road legal.
Phase 7 - Front Clip Assembly & Bed Assembly
Install inner fenders, fenders, and hood
Install bed and route wiring to rear
Phase 8 - Interior
Upholstery & headliner
Install interior accessories
Watershields & door panels
Carpeting
Install seat(s)
Phase 9 - You're Almost There!
Dial-in engine tuning
Install exterior electrical components (head, tail, side marker, running lights, etc.)
Perform a thorough vehicle system checks
Detail work (emblems, grill, bumpers, etc.)
Exterior accessories (winch, light bars, auxiliary lights, etc.)
Phase 10 - Celebrate!
Btw, an awesome place to get electrical supplies is DelCity.com...

#4
11-26-2011, 02:00 AM
Posting Guru
good list.
I just recently blasted mine and wish I would of taken more photos of before. had to replace a rear panel and when I refabbed in new with door off i didn't get replace as good as I was hoping. to late for me and maybe help another guy on lessons learned. take some photos! make sure doors open good and make sure your fits are good. look for any odd rust situation. its been a fun journey and will be happy in the end but its a lot of work. still working the doors skins and hoping to be finished by this thanksgiving weekend. everything will be primered by this weekend. my front fenders that I thought were ok are not ok. blaster found stuff? innerfenders had issues that make it not worth using, get different ones. sometimes suprises kinda suck. was wanting to have front end on and primered. not gonna happen. it will get done but not this weekend like i wanted. catch you later and take some detailed photos.
#5
11-26-2011, 08:57 AM
Door Skins
I just recently blasted mine and wish I would of taken more photos of before. had to replace a rear panel and when I refabbed in new with door off i didn't get replace as good as I was hoping. to late for me and maybe help another guy on lessons learned. take some photos! make sure doors open good and make sure your fits are good. look for any odd rust situation. its been a fun journey and will be happy in the end but its a lot of work. still working the doors skins and hoping to be finished by this thanksgiving weekend. everything will be primered by this weekend. my front fenders that I thought were ok are not ok. blaster found stuff? innerfenders had issues that make it not worth using, get different ones. sometimes suprises kinda suck. was wanting to have front end on and primered. not gonna happen. it will get done but not this weekend like i wanted. catch you later and take some detailed photos.
I plan to take some pics today of the truck and get some photos of troubled areas. I have zero body experience so it will be a trip. I could once TIG weld stainless that was 1/64 thick building SS hoses for chemical apps. If i can get a TIG welder, i can probably weld in the panel patches pretty easy. I've got to figure out what metal to get in order to patch the places.
I am putting the 5.9 with dodge auto tranny. I want to make her a 4x4. SO WHAT TRANSFER CASE will i need
 . I've not done much along the lines of the 4x4 stuff either.
 I do plan to use the truck as DD, and tow a boat. I might want to tow a camper, but my f250 is good for that. IF I GET the 69 like i want it, i'll get rid of the 2000 7.3 4x4 Crew that i currently drive, but that is a year or two down the road i am sure. I want to stay auto with the tranny and use the old dodge where i don't need a controller. Any help appreciated.
#6
11-27-2011, 07:01 AM
Coverting to 4x4
I do want to make her a 4x4 and want to stay with the heavy 8 lug wheels of the f350. Someone has suggested that the 2wd and 4wd frames are a different width. Is this true? Further, does anyone have any sugesstions on how that might need to happen. I plan on using a divorced 205 transfercase. Is there one truck that stands out over others to get a donar front end from?
#7
12-03-2011, 06:26 PM
New Pics and Better Evaluation
I got to look it over a little today. It usually works out to be a little worse that you think upon initial viewing, but its not to bad. I did discover that the front is drum brakes. I thought the heavier trucks were disc. I want to convert to 8 lug 4x4 anyway.
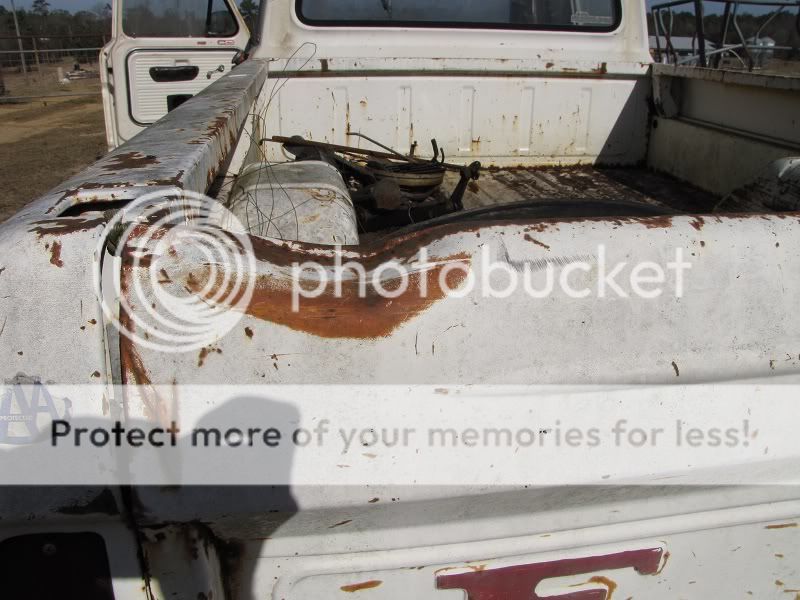
Here are some pics showing the rust. I have some rust through on driver's front door corner and the floor pan just at the edge. The hood is shot and the bed is pretty far gone. Gonna be looking for a couple of donor trucks. One for 4x4 and the other for hood, bed etc. I hope to find a good passenger front door as the glass is busted. It looks to me that the skin has to come off to change out the glass. The inner door panel hole is too small. It may rotate then slide in, but i'll have to see.

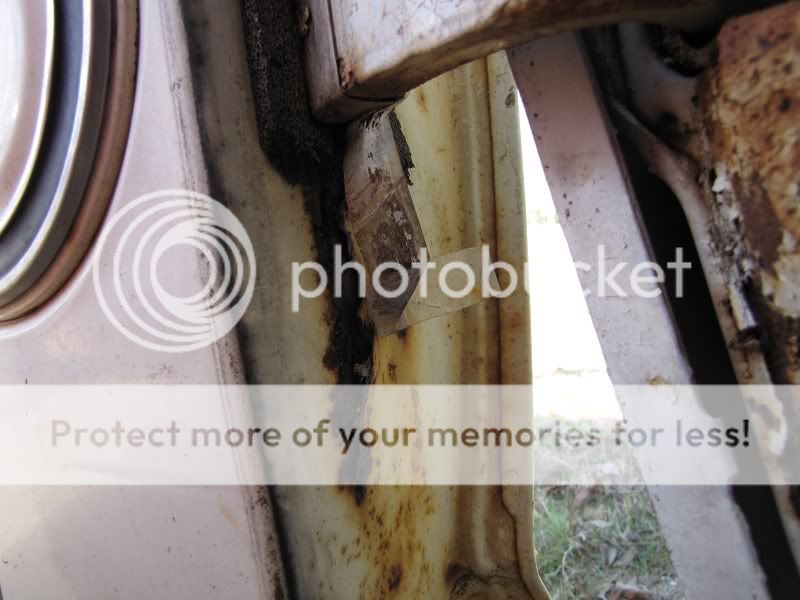
This rust is on both sides of the cab. this is the worst side

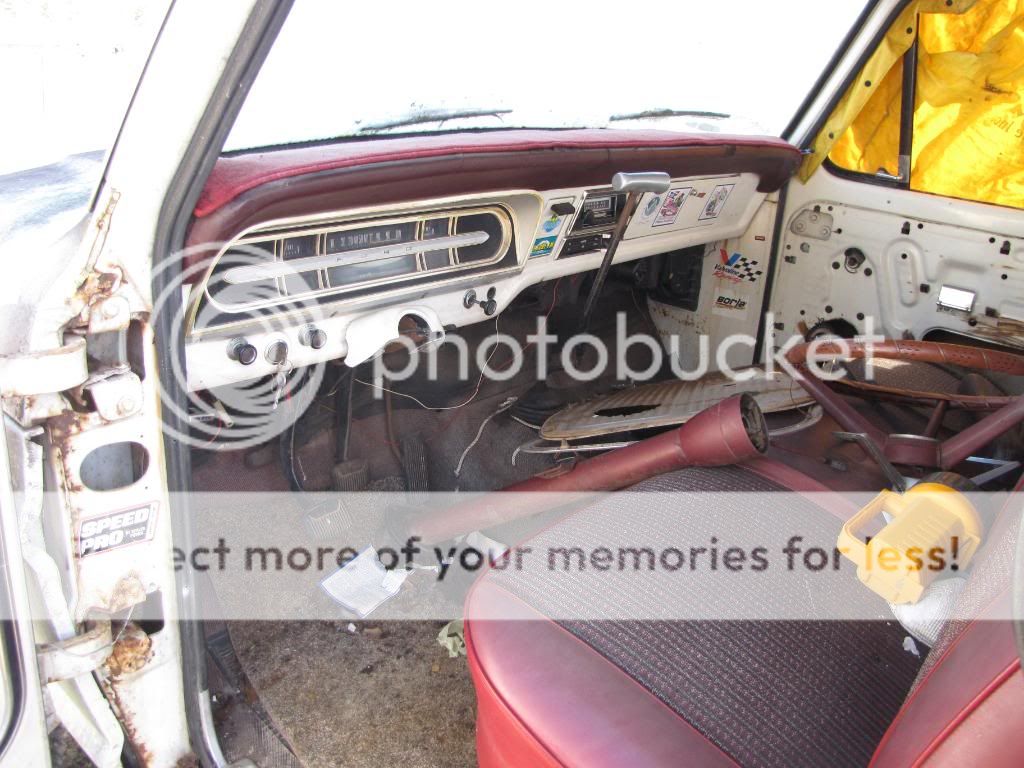
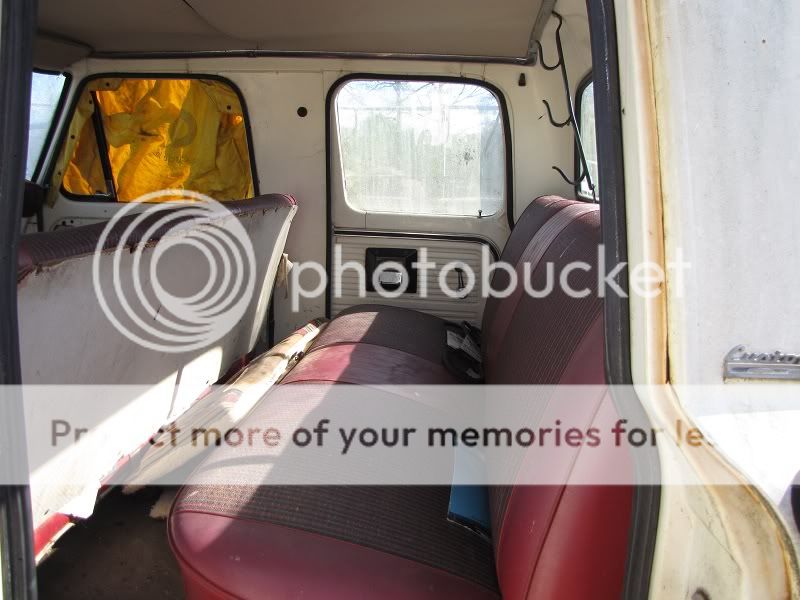
Here are a few other interior/exterior pics

Dent in tailgate i think i can fix. It works really good and i want save it if i can.
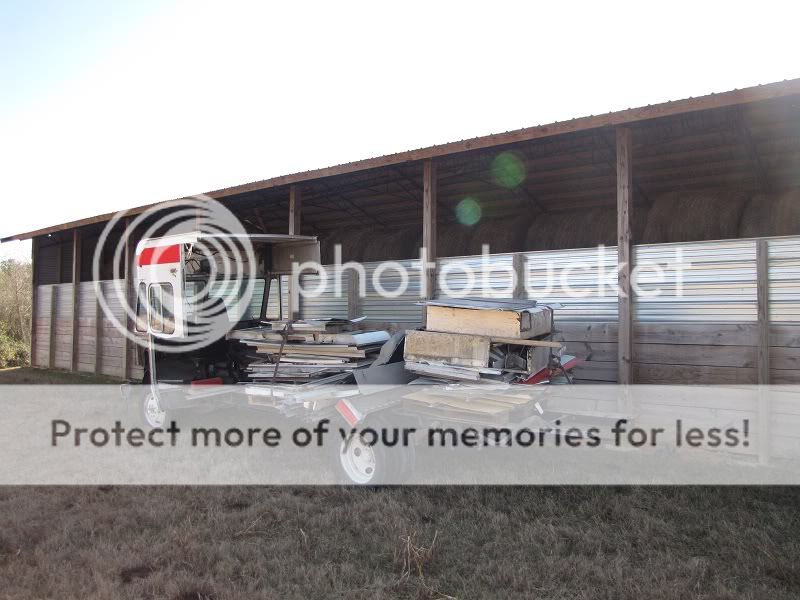
Here is a look at the p30 i'm pulling the 4bt out of for a 91 f150 xlt
Any suggestions on the body work would be appreciated.
Here are some pics showing the rust. I have some rust through on driver's front door corner and the floor pan just at the edge. The hood is shot and the bed is pretty far gone. Gonna be looking for a couple of donor trucks. One for 4x4 and the other for hood, bed etc. I hope to find a good passenger front door as the glass is busted. It looks to me that the skin has to come off to change out the glass. The inner door panel hole is too small. It may rotate then slide in, but i'll have to see.
This rust is on both sides of the cab. this is the worst side
Here are a few other interior/exterior pics
Dent in tailgate i think i can fix. It works really good and i want save it if i can.
Here is a look at the p30 i'm pulling the 4bt out of for a 91 f150 xlt
Any suggestions on the body work would be appreciated.
Trending Topics
#8
12-03-2011, 08:27 PM
#9
12-11-2011, 05:39 PM
IS the dana 44 too light for my truck
I located a dana 44 with the right gears for my 69 today. I have also located an overdrive housing for 4x4 for the a518 so i can mate a transfer case to it. My question is this. I found the dana 44 with one ton springs from a dodge. the front end came from a chevy. Will a chevy dana 44 be the proper width for my ford. Again, i'm not going to mud bog, i just want to be able to get out of a bind now and then if the rear wheels start turning. It is a passenger drop and would work great for the dodge passenger drop transfer case i have located.
The ohter option is an adapter (400 dollars) and a hard to find ford np 205 for a 77-79. Any advice?
Another question would be, How do i make sure i get the right leaf springs. I will have to build the carriers as it is curently a 2wd anyway?
The ohter option is an adapter (400 dollars) and a hard to find ford np 205 for a 77-79. Any advice?
Another question would be, How do i make sure i get the right leaf springs. I will have to build the carriers as it is curently a 2wd anyway?
#10
12-12-2011, 10:50 AM
Posting Guru
lookin at photos?
my truck was a basket case also. One thing I figured into my build was blasting cab. I used a 40/60 blend copper slag and it did a beautiful job of cleaning cab and doors. these old trucks need some help and time. Not sure on your purpose for truck? My truck is for clean old truck and huntin rig and driver. blasting the cab was a good thing because you can spend a lot of time trying to fix a rusted spot and if you just would of blasted it could of been done in 1/3 the time. keepin old iron alive is difficult but worth it. the windows will come out but have to work at it pull cover off door and undo some bolt inside of door and everything will come loose and wiggle window up through window slide. I have big hands/arms and could do it and nicked my knuckles a little but doable. good luck and reccomend the sand blast 40/60 if getting serious on cleaning up rust. I used around 20 bags of sand 80lb to do my cab. 10 bucks per bag. my sand blaster isn't the best but got it done!
#11
12-12-2011, 11:02 AM
Posting Guru
crewcab restore.
On the floor look closely at your cab. their is a c channel underneath cab that might still have a piece of rubber in channel and it to support cab to frame. i pulled this out and will be building a new cab support for center of cab. the C channel flexes and has caused a place for rubbing and rusting of cab internal the whole length of cab underneath cab and some showing underneath rubber matt inside cab. so quick solution is to build another cab support and take out some of the flex in cab. Lesson learned. Once I seen all these little issues in cab glad I went with blasting in my budget. take lots of detailed photos of cab at door corners and stand back photos. i took a few but not detailed. i wish I would of did this!! my rear cab passenger side needed some serious help and could of did a better job. got it back to its original spot but the guy who built back in the day jsut didn't do a perfect job on this side, think it was a monday cab build or friday build, guy wasn't 100% when working cab apparently back in the day?
#12
12-13-2011, 07:53 AM
#13
12-13-2011, 01:14 PM
speed sensor issues
I'm undergoing a project i don't know a whole lot about, and i am trying to learn as much as i can up front before i let go of the cash. I know some of you guys have figured it out already so lay it on me.
I have a 91 12V with a518 tranny 2wd. I am placing a 4wd OD housing and tail shaft on it to go 4wd. I have located a 95 241d TC. My question is in regard to the speed sensors function. So, i have two questions:
1) How much of the dodge elctrical do i need to carry to the ford i'm putting this in to make the OD work properly? (I'm assuming the PCM can be stuck under the dash somewhere and all wouldl be good)
2)Will the 91 2wire connection on the a518 mount on the 241d TC so the two can communicate?
Another pointers will be greatly appreciated!
#14
12-13-2011, 02:30 PM
Logistics Pro
Not sure what all wiring needs to be used for the 12v od to work but all the motor needs is 12 volts hooked up for the ignition from what I've read are you goin with coil spring or leaf spring front suspension when you convert to 4wd there's some threads on here with good info on how to convert to 4wd but with your drivetrain you want to use you might be mocking up everything as you go since your using a dodge t case might be better to use the dodge front axle in this case can you get a measurement of the frame I can measure my 71 crew cab 4wd frame and let you know how wide it is
#15
12-13-2011, 03:23 PM
On the floor look closely at your cab. their is a c channel underneath cab that might still have a piece of rubber in channel and it to support cab to frame. i pulled this out and will be building a new cab support for center of cab. the C channel flexes and has caused a place for rubbing and rusting of cab internal the whole length of cab underneath cab and some showing underneath rubber matt inside cab. so quick solution is to build another cab support and take out some of the flex in cab. Lesson learned. Once I seen all these little issues in cab glad I went with blasting in my budget. take lots of detailed photos of cab at door corners and stand back photos. i took a few but not detailed. i wish I would of did this!! my rear cab passenger side needed some serious help and could of did a better job. got it back to its original spot but the guy who built back in the day jsut didn't do a perfect job on this side, think it was a monday cab build or friday build, guy wasn't 100% when working cab apparently back in the day?


The B pillar is 1/2 inch out on the Drivers side. It drove me nuts looking at the truck when it was together as the doors were peaked at the bottom center. I have to fix this and then have the cab blasted.
Garbz