
OUO Traction Bar install, with pics...
#1
 05-17-2011, 06:51 PM


Join Date: Jan 2008
Location: Kansas City, MO
Posts: 213
Likes: 0
Received 0 Likes
on
0 Posts
First off, i just want to give a huge thank you and shout out to Mr. Riff Raff himself, who has been so much help during all the modding of mine and so many others' trucks, took the time to call me when a batch of these traction bars became available, and as usual, was more than willing to answer questions, make calls to chase down parts, and generally just be the premier customer oriented dude that he is... You da man, Clay!! 
So, i may not have that much lift, (2.5" level up front, F350 blocks in back), nor huge power (80 horse tune from Jody is my DD) but I've battled an annoying driveline vibration since I got my truck a year and a half ago, especially when loaded at around 14k total (3k bed payload, 4k trailer). Every time i would take off, unless i only gave it the lightest throttle, i would have a pronounced wobble until i decreased throttle input, or got the beast moving enough to lessen the strain on the pinion u-joint. I knew my issue wasnt to much bed sag, as i have air springs keeping it level, and i've replaced all 3 joints in the 2 piece shaft, as well as the carrier bearing, all with high end parts. I even went as far as to have the assembly balanced by a reputable driveshaft shop, all to no avail. I then added a 1/2" drop spacer to the carrier pillow block, which did improve the situation noticeably, but it still wasnt right by any means.
I finally just gave up for the time being, and decided i would just live with it until i could afford a one piece shaft. Then one day as i was talking to the ever-helpful-ever-patient Clay, he started talking about One Up Offroad, and their sweet traction block systems. My answer was of course "I thought traction bars and such were just for high horsepower trucks".
Well, as it turns out, they aren't just for someone making big power, and to tell the truth, a mildly modified 7.3 powerstroke like mine is probably putting down north of 600 ft lbs of torque, which isn't anything to sneeze at when we're talking about axle wrap.
So, long story short, Clay sang their praises, and after hearing how much they improved his truck, and that they have systems available without the lift blocks their famous for, i decided i had to try them. Upon his recommendation, i went with the fixed length bars, as i have a crew cab short box, and i wanted to keep the cost down, and ground clearance up as much as possible. I chose the weld on mounts, as they are a little more low key profile-wise than the bolt on type, are noticeably cheaper, and i have access to a fairly nice welder.
I would rate the installation process as medium difficulty, mostly due to the tedious alignment of the weld on brackets, and the 16 holes one has to drill in their frame, and then compressing the rather resistant bushings at the end of the bar to allow the mounting of the forward brackets. Adding to the difficulty, I was working by myself. Fortunately for me, i have access to a nicely equipped shop, with a fully adequate welder (Miller 211, 0.30 wire, set on auto, 230v side) and a lift- although, throughout much of the install, the vehicle suspension needs to be loaded, or measurements will be off, so the lift was only helpful towards the end of the process.
It's tough to convey all the details with pictures, but just for your enjoyment, here's a few of the install, with some notes explaining along the way.
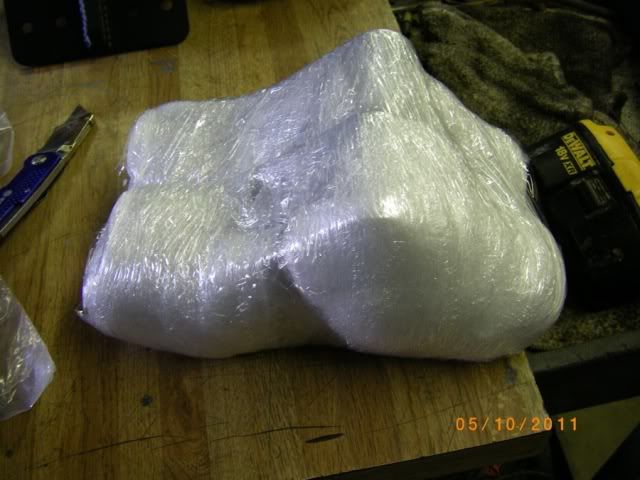
The UPS man delivered my mummified kit in two well packed boxes, in a surprisingly short amount of time. OUO doesn't play around with packing!
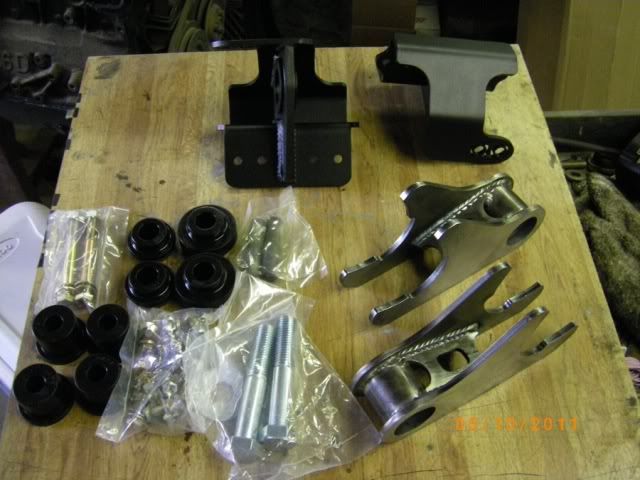
The kit, minus the bars. it comes with great install instructions (i recommend a read-thru before starting), and all hardware is included, but you will have to provide your own silicone suspension grease.
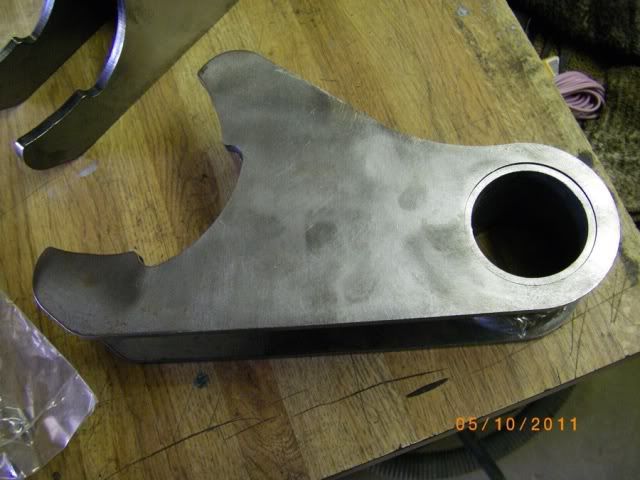
A couple shots of the forward bar mount frame brackets- these things are a work of art... Very high quality craftsmanship throughout the system.
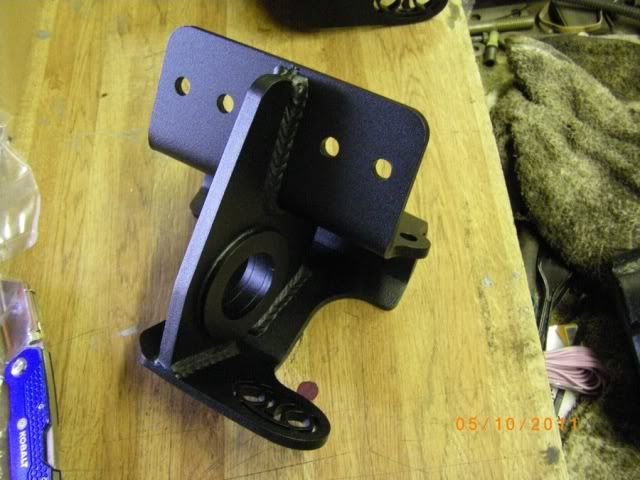
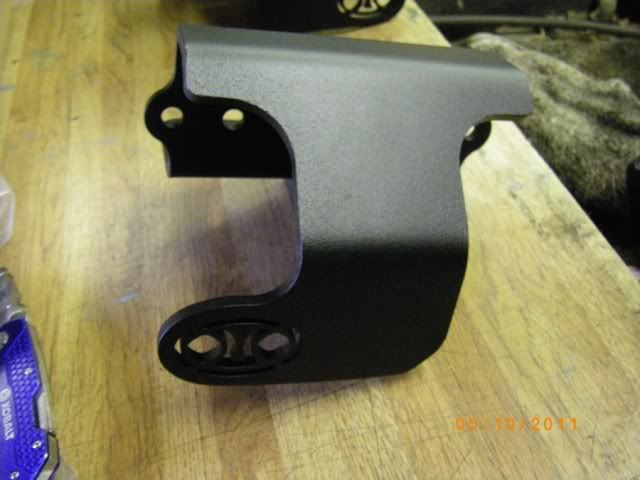
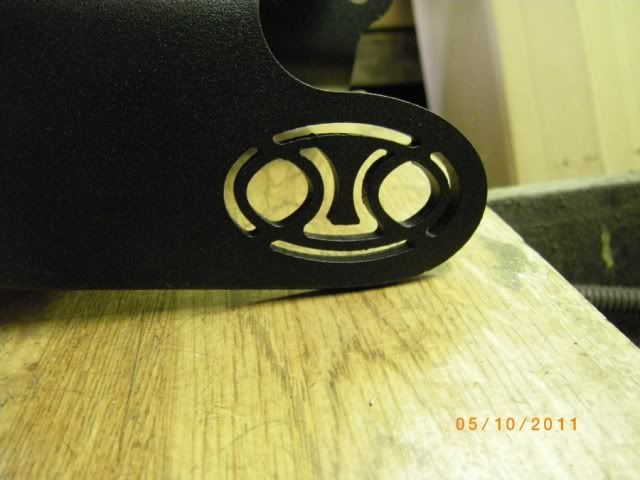
For me the biggest drawback to the weld-on brackets was the fact that they are shipped raw steel, and therefore aren't as well protected against the elements as the rest of the system, which is powdercoated. I used a good quality aerosol-can paint, but you just cant get the same result from a rattle can...

I started by supporting the axle with jackstands at approx wheel ride height, which allowed me to have the rear wheels removed for the install. I did one side at a time, because welding on the rear brackets requires removing the spring pack u-bolts, and i didn't want to have any accidental movement of the axle by removing both sets of u-bolts at the same time, since the weight of the truck is still sitting on the axle. After removing the u-bolts, i took my time setting, re-setting, centering, re-centering, and finally welding the bracket in place, being careful to follow the instructions. I only welded 1/2"- 1" at a time, then moved to the other side of the bracket, to avoid overheating and warping the axle tube. Pay no attention to my ugly welds, I aint no Cory, aka "Wrench Norris", but they'll hold.
Then came cleaning, primer-sealer, and then 500* engine enamel, which ive found holds up exremely well when sprayed on a well prepped surface.
Pass side, with new u-bolts installed, (I'd already tempted fate by reusing the original ones once, figured I could afford to spend $60 for peace of mind...)
With bushings greased, and installed.
Now on to the front, frame mounted brackets. Definitely the more challenging part of the install, as i only had one pair of hands to work with. It took some doin' to get the correct measurements called for in the instructions, and i ended up modifying the technique a little... The instructions say to measure from the center of the rear bushing bolt hole forward the length of the traction bar your kit came with (64" in my case) and then add 7/8" for your bracket centerpoint.
I found this cumbersome, as i had no one to hold the tape on the welded end, and i couldnt get it to hold still, so i just temporarily installed the traction bar onto the rear bracket, and holding it up to the frame with the forward bracket c-clamped in place, spaced the center point of the bracket 7/8" away from the end of the bar, and called it good. It worked great, and the second side went smoother as a result of not fighting the tape measure...
Bracket c-clamped to the frame.
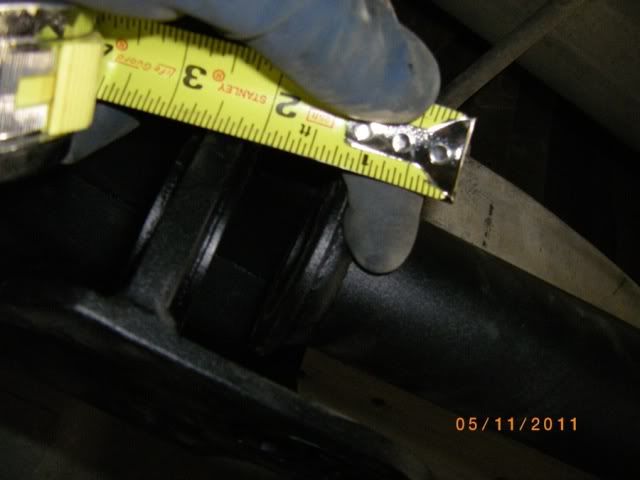
Poor quality photo, but the point is to show the measurement between the frame bracket, and the end of the bar.
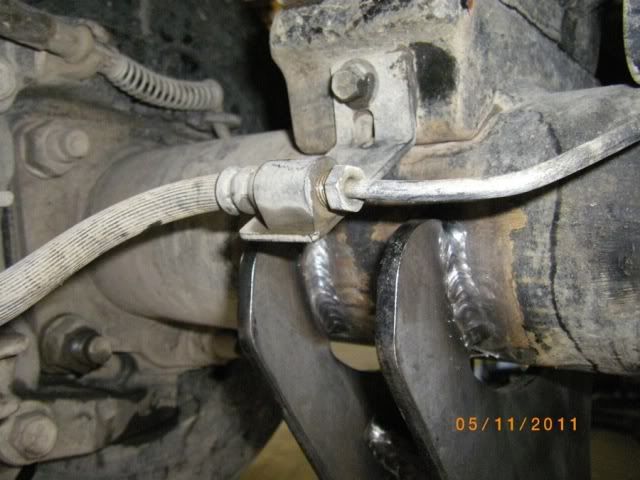
Drilling the holes was also tricky, as the 90* angle of the bracket doesnt line up perfectly with the slightly rolled right angle of the frame edge. I had the best luck clamping the bracket to frame on both axis, drilling two holes, temp. installing the bolts, then drilling the remaining holes with the bracket bolted on. Talk about hard on the shoulders, sixteen 3/8" holes thru 1/4" steel while laying on your back- but i got thru, and after loosely assembling the bar end bolt and bushings thru the bracket (dont forget the locktite!) i used a long punch thru one of the bottom and then one of the side bracket holes to align, (This is tough, because you're compressing the large front bushings against the installed traction bar) and then install all 8 bolts per side. A bit tedious, and WAY more trouble on the driver's side where you have the fuel tank to deal with, but with the use of a magnet and a little strategic open-end wrenching, I managed to install both sides without incident, and without dropping the fuel tank. I did have to relocate the exhaust hanger bracket on the pass side, but Ford was nice enough to provide a set of holes right next to the original location, so the hanger can be retained. Sorry, during this part of the process i didn't take as many pics, it took up too much mental capacity to remember the camera...
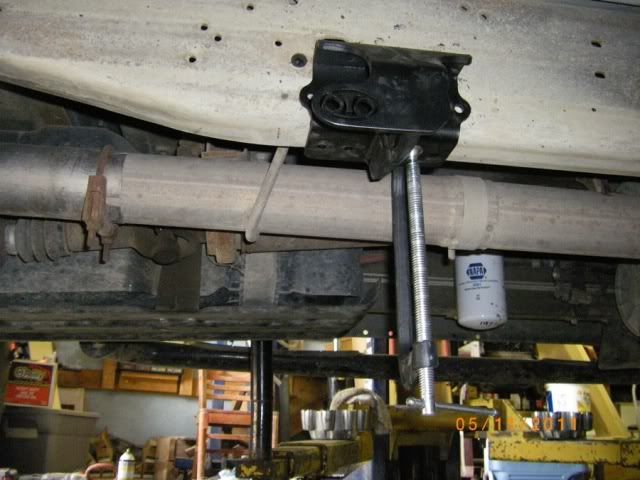
Pass side forward bracket installed and bolted down, viewed from underneath...
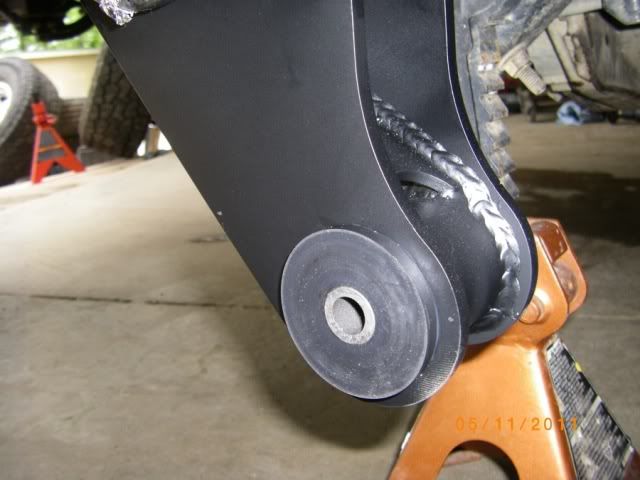
Same bracket, side view...
This freakin' bolt is massive, and you'll need a decent torque wrench to give it the 125 ft lbs it calls for....
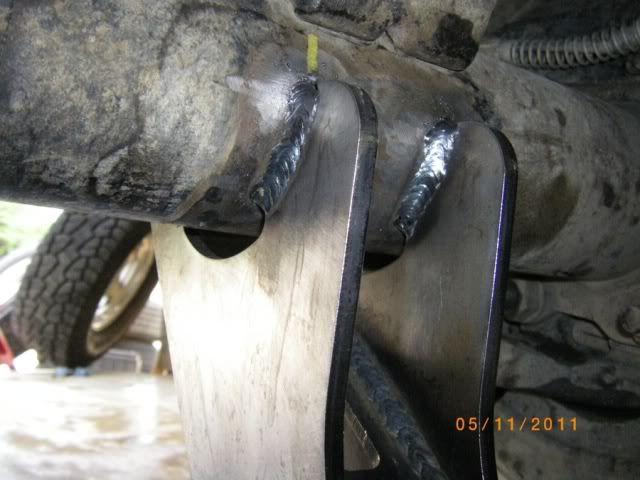
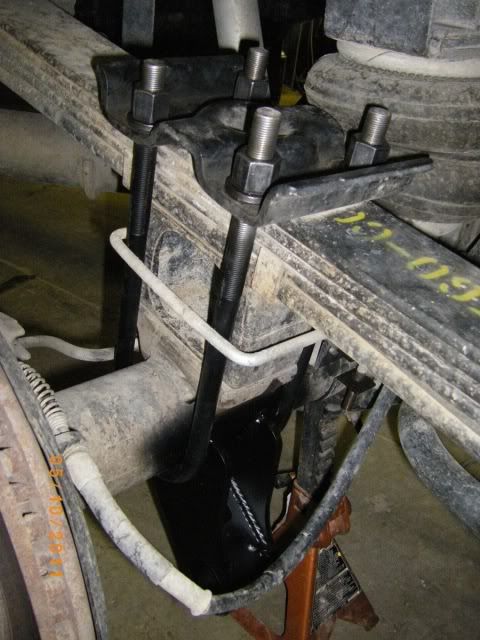
Driver's side rear, bar installed, and you can see why it's necessary to remove the u-bolts to do the welding, as it's a bit tight between the u's...
Up in the air, from the pass side...
On the ground...
One of my concerns with this system was ground clearance, but i'm pleased with result thus far, as the traction bar mounts only hang down about 2" below the shock mounts, and as long as i don't go bounding thru deeply rutted, rocky terrain, i'll be more than fine. And as this rig primarily drives on asphalt and gravel, it's not really an issue.
Following installation, i took the truck out and drove around the neighborhood, did some hard launches up some steep hills, quick takeoffs around corners on asphalt and gravel, and my test drive reaction is- Wow. The rear axle no longer "hops" on gravel, it just digs and goes. These bars really do tie things together, the whole feel of the drivetrain "slingshot effect" is vastly improved, and i'm happy to announce that the FREAKING TAKEOFF VIBRATION IS GONE! Anyone who has experienced that frustration can join in my excitement, and i would wholeheartedly recommend this system to anyone who tows, has oversized tires, is lifted, or just wants to make their truck look cool...

I'll report back after logging more miles, can't wait to put the truck back to work now!
One last shot, the pass side bar is just visible, not obnoxious at all...
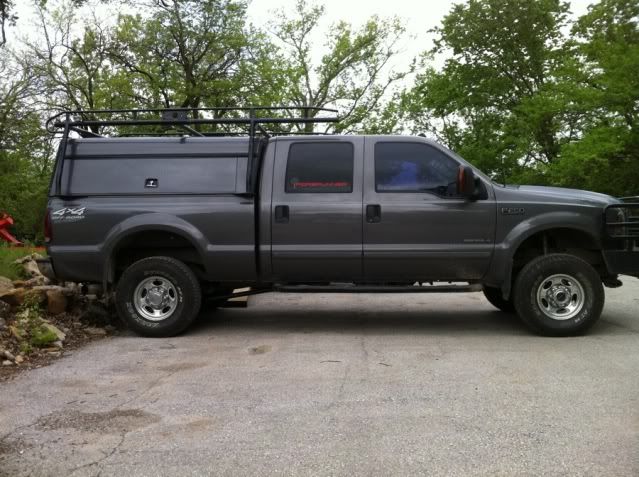
So, i may not have that much lift, (2.5" level up front, F350 blocks in back), nor huge power (80 horse tune from Jody is my DD) but I've battled an annoying driveline vibration since I got my truck a year and a half ago, especially when loaded at around 14k total (3k bed payload, 4k trailer). Every time i would take off, unless i only gave it the lightest throttle, i would have a pronounced wobble until i decreased throttle input, or got the beast moving enough to lessen the strain on the pinion u-joint. I knew my issue wasnt to much bed sag, as i have air springs keeping it level, and i've replaced all 3 joints in the 2 piece shaft, as well as the carrier bearing, all with high end parts. I even went as far as to have the assembly balanced by a reputable driveshaft shop, all to no avail. I then added a 1/2" drop spacer to the carrier pillow block, which did improve the situation noticeably, but it still wasnt right by any means.
I finally just gave up for the time being, and decided i would just live with it until i could afford a one piece shaft. Then one day as i was talking to the ever-helpful-ever-patient Clay, he started talking about One Up Offroad, and their sweet traction block systems. My answer was of course "I thought traction bars and such were just for high horsepower trucks".
Well, as it turns out, they aren't just for someone making big power, and to tell the truth, a mildly modified 7.3 powerstroke like mine is probably putting down north of 600 ft lbs of torque, which isn't anything to sneeze at when we're talking about axle wrap.
So, long story short, Clay sang their praises, and after hearing how much they improved his truck, and that they have systems available without the lift blocks their famous for, i decided i had to try them. Upon his recommendation, i went with the fixed length bars, as i have a crew cab short box, and i wanted to keep the cost down, and ground clearance up as much as possible. I chose the weld on mounts, as they are a little more low key profile-wise than the bolt on type, are noticeably cheaper, and i have access to a fairly nice welder.
I would rate the installation process as medium difficulty, mostly due to the tedious alignment of the weld on brackets, and the 16 holes one has to drill in their frame, and then compressing the rather resistant bushings at the end of the bar to allow the mounting of the forward brackets. Adding to the difficulty, I was working by myself. Fortunately for me, i have access to a nicely equipped shop, with a fully adequate welder (Miller 211, 0.30 wire, set on auto, 230v side) and a lift- although, throughout much of the install, the vehicle suspension needs to be loaded, or measurements will be off, so the lift was only helpful towards the end of the process.
It's tough to convey all the details with pictures, but just for your enjoyment, here's a few of the install, with some notes explaining along the way.
The UPS man delivered my mummified kit in two well packed boxes, in a surprisingly short amount of time. OUO doesn't play around with packing!
The kit, minus the bars. it comes with great install instructions (i recommend a read-thru before starting), and all hardware is included, but you will have to provide your own silicone suspension grease.
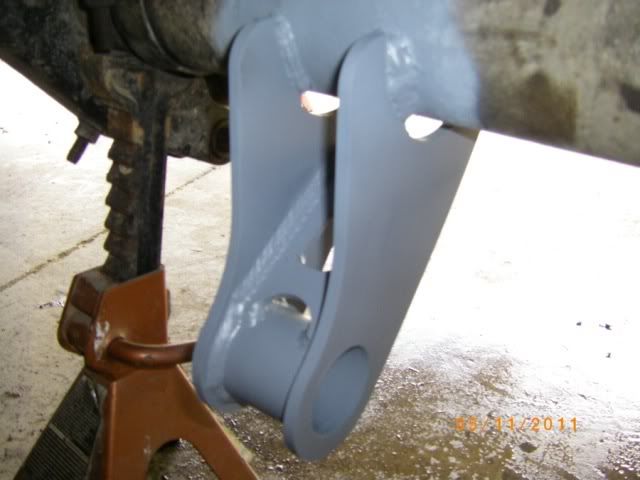
A couple shots of the forward bar mount frame brackets- these things are a work of art... Very high quality craftsmanship throughout the system.
For me the biggest drawback to the weld-on brackets was the fact that they are shipped raw steel, and therefore aren't as well protected against the elements as the rest of the system, which is powdercoated. I used a good quality aerosol-can paint, but you just cant get the same result from a rattle can...
I started by supporting the axle with jackstands at approx wheel ride height, which allowed me to have the rear wheels removed for the install. I did one side at a time, because welding on the rear brackets requires removing the spring pack u-bolts, and i didn't want to have any accidental movement of the axle by removing both sets of u-bolts at the same time, since the weight of the truck is still sitting on the axle. After removing the u-bolts, i took my time setting, re-setting, centering, re-centering, and finally welding the bracket in place, being careful to follow the instructions. I only welded 1/2"- 1" at a time, then moved to the other side of the bracket, to avoid overheating and warping the axle tube. Pay no attention to my ugly welds, I aint no Cory, aka "Wrench Norris", but they'll hold.
Then came cleaning, primer-sealer, and then 500* engine enamel, which ive found holds up exremely well when sprayed on a well prepped surface.
Pass side, with new u-bolts installed, (I'd already tempted fate by reusing the original ones once, figured I could afford to spend $60 for peace of mind...)
With bushings greased, and installed.
Now on to the front, frame mounted brackets. Definitely the more challenging part of the install, as i only had one pair of hands to work with. It took some doin' to get the correct measurements called for in the instructions, and i ended up modifying the technique a little... The instructions say to measure from the center of the rear bushing bolt hole forward the length of the traction bar your kit came with (64" in my case) and then add 7/8" for your bracket centerpoint.
I found this cumbersome, as i had no one to hold the tape on the welded end, and i couldnt get it to hold still, so i just temporarily installed the traction bar onto the rear bracket, and holding it up to the frame with the forward bracket c-clamped in place, spaced the center point of the bracket 7/8" away from the end of the bar, and called it good. It worked great, and the second side went smoother as a result of not fighting the tape measure...
Bracket c-clamped to the frame.
Poor quality photo, but the point is to show the measurement between the frame bracket, and the end of the bar.
Drilling the holes was also tricky, as the 90* angle of the bracket doesnt line up perfectly with the slightly rolled right angle of the frame edge. I had the best luck clamping the bracket to frame on both axis, drilling two holes, temp. installing the bolts, then drilling the remaining holes with the bracket bolted on. Talk about hard on the shoulders, sixteen 3/8" holes thru 1/4" steel while laying on your back- but i got thru, and after loosely assembling the bar end bolt and bushings thru the bracket (dont forget the locktite!) i used a long punch thru one of the bottom and then one of the side bracket holes to align, (This is tough, because you're compressing the large front bushings against the installed traction bar) and then install all 8 bolts per side. A bit tedious, and WAY more trouble on the driver's side where you have the fuel tank to deal with, but with the use of a magnet and a little strategic open-end wrenching, I managed to install both sides without incident, and without dropping the fuel tank. I did have to relocate the exhaust hanger bracket on the pass side, but Ford was nice enough to provide a set of holes right next to the original location, so the hanger can be retained. Sorry, during this part of the process i didn't take as many pics, it took up too much mental capacity to remember the camera...
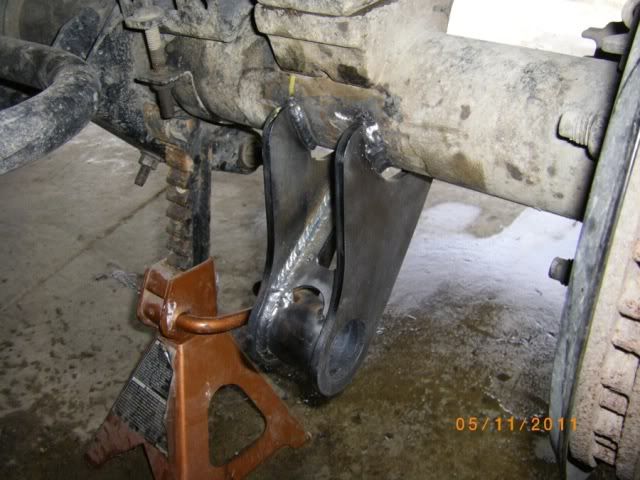
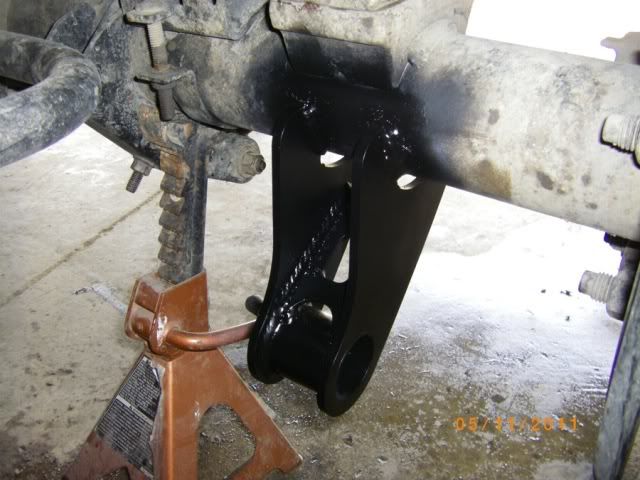
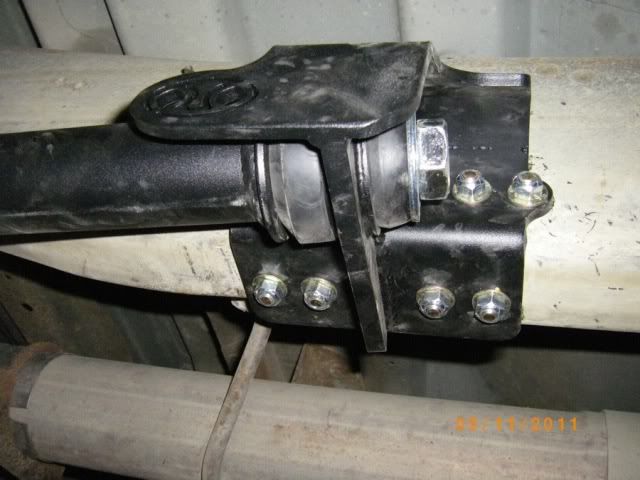
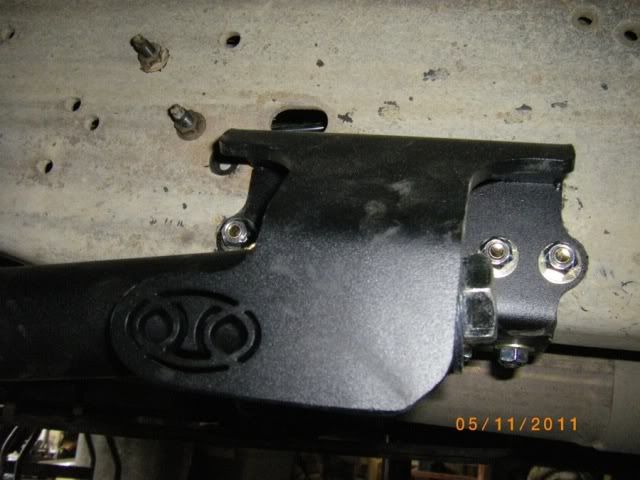
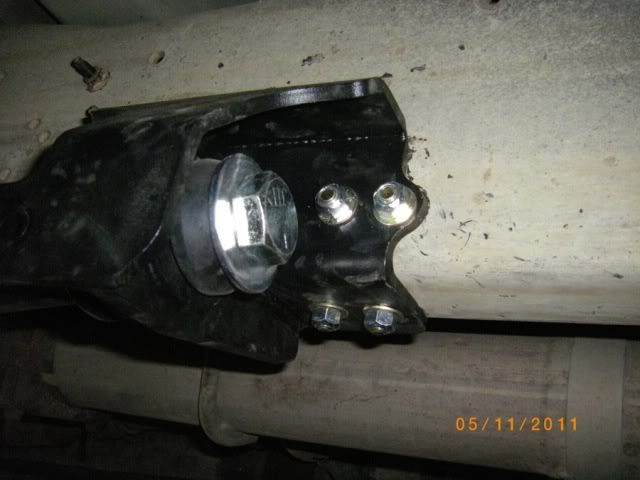
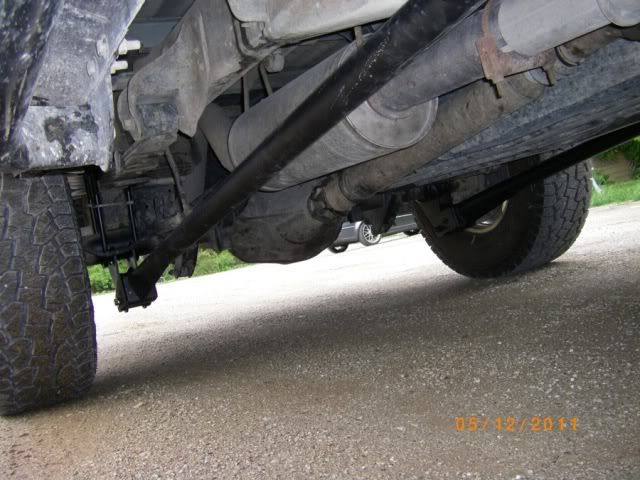
Pass side forward bracket installed and bolted down, viewed from underneath...
Same bracket, side view...
This freakin' bolt is massive, and you'll need a decent torque wrench to give it the 125 ft lbs it calls for....
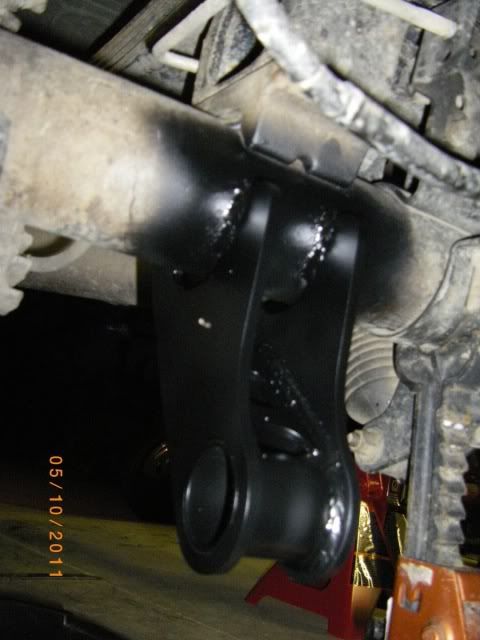
Driver's side rear, bar installed, and you can see why it's necessary to remove the u-bolts to do the welding, as it's a bit tight between the u's...
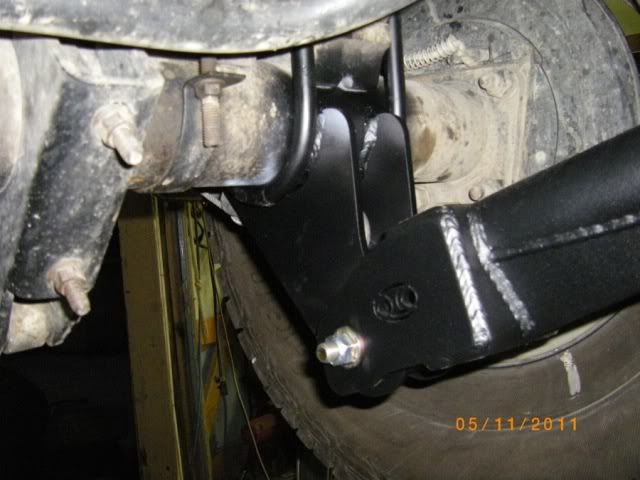
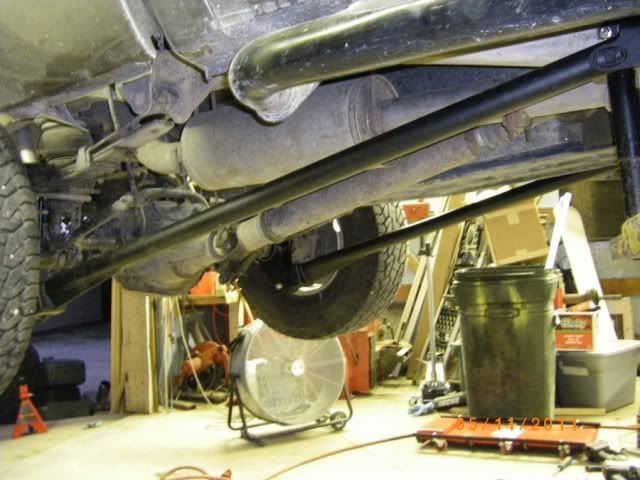
Up in the air, from the pass side...
On the ground...
One of my concerns with this system was ground clearance, but i'm pleased with result thus far, as the traction bar mounts only hang down about 2" below the shock mounts, and as long as i don't go bounding thru deeply rutted, rocky terrain, i'll be more than fine. And as this rig primarily drives on asphalt and gravel, it's not really an issue.
Following installation, i took the truck out and drove around the neighborhood, did some hard launches up some steep hills, quick takeoffs around corners on asphalt and gravel, and my test drive reaction is- Wow. The rear axle no longer "hops" on gravel, it just digs and goes. These bars really do tie things together, the whole feel of the drivetrain "slingshot effect" is vastly improved, and i'm happy to announce that the FREAKING TAKEOFF VIBRATION IS GONE! Anyone who has experienced that frustration can join in my excitement, and i would wholeheartedly recommend this system to anyone who tows, has oversized tires, is lifted, or just wants to make their truck look cool...
I'll report back after logging more miles, can't wait to put the truck back to work now!
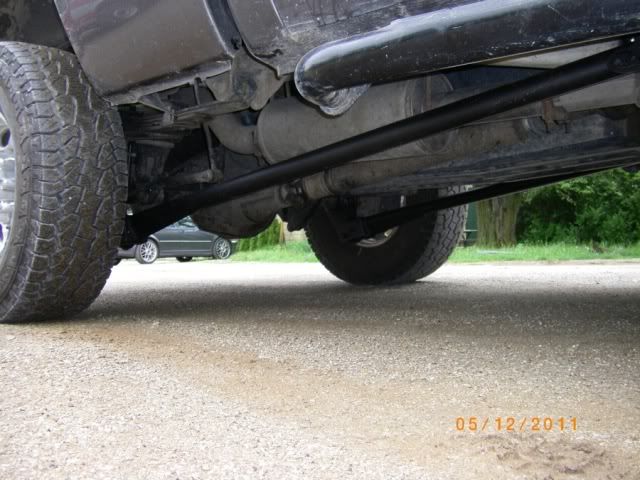
One last shot, the pass side bar is just visible, not obnoxious at all...
#2
05-17-2011, 07:18 PM
#4
05-17-2011, 07:31 PM
Posting Guru
Join Date: Jan 2007
Location: Millersburg, OR
Posts: 2,174
Likes: 0
Received 0 Likes
on
0 Posts
Honestly, a properly installed set will not effect the how the truck rides. The suspension will flex due to the bushings just like it would factory.
It would be hard to weld on those brackets. Fuel lines are usually right in the way. Typically, most kits are all bolt on from OUO.
#5
05-17-2011, 07:35 PM

#6
05-17-2011, 07:38 PM
Join Date: Jan 2008
Location: Kansas City, MO
Posts: 213
Likes: 0
Received 0 Likes
on
0 Posts
You know, funny you should ask about welding the front brackets on, i actually considered that, especially with all the trouble involved with drilling and lining things up. The biggest problem i can see with it is, compressing the bar to get the booger up inside the bracket while compressing the bushing and threading the main bolt. With the front bracket being bolt on, it affords the ability to pre assemble the front bracket to the bar end, and then put it in place. I actually tried mounting the drivers side bracket to the frame first, but couldnt for the life of me come up with a good way to compress the dang polyurethane front bushing enough to slip it into place. I don't know if i explained that very well, but still...
Thanks for the reps, i know how much i love pics, so i figure all you might as well!

#7
05-17-2011, 07:40 PM
Join Date: Jan 2008
Location: Kansas City, MO
Posts: 213
Likes: 0
Received 0 Likes
on
0 Posts

By the way, someday i'll post some pics of my version of your bypass oil filter install, thanks so much for all you contribute to this family!
Trending Topics
#9
05-17-2011, 07:52 PM
Honestly, a properly installed set will not effect the how the truck rides. The suspension will flex due to the bushings just like it would factory.
It would be hard to weld on those brackets. Fuel lines are usually right in the way. Typically, most kits are all bolt on from OUO.
It would be hard to weld on those brackets. Fuel lines are usually right in the way. Typically, most kits are all bolt on from OUO.
With the front bracket being bolt on, it affords the ability to pre assemble the front bracket to the bar end, and then put it in place. I actually tried mounting the drivers side bracket to the frame first, but couldnt for the life of me come up with a good way to compress the dang polyurethane front bushing enough to slip it into place. I don't know if i explained that very well, but still...


#14
05-17-2011, 10:34 PM
Join Date: Oct 2004
Location: NORTH IDAHO
Posts: 1,014
Likes: 0
Received 0 Likes
on
0 Posts

#15
05-18-2011, 06:20 AM

Posting Guru
Join Date: Apr 2010
Location: Canberra Australia
Posts: 1,164
Likes: 0
Received 0 Likes
on
0 Posts
Looks dang nice. Love to have a set up like that on my truck but haven't got access to a welder. Do they do a set with bolt on axle mounts?
My question answered: Riffraff Diesel: One Up Offroad Bolt-On Traction Bars
My question answered: Riffraff Diesel: One Up Offroad Bolt-On Traction Bars
Last edited by SSSimon; 05-18-2011 at 06:46 AM. Reason: link to RR page!