Gauge Write up
#1
 01-25-2011, 10:58 AM


Join Date: Nov 2008
Location: Lakewood, Colorado
Posts: 1,138
Likes: 0
Received 0 Likes
on
0 Posts
Gauge Write up
So you now need gauges. First off your going to need the gauges themselves, and then your going to need the place to put the gauges. Complete Performance (Complete Performance) out of Jasper Texas is the place to get both! They are the only producer of a 4 gauge pod for a Older Body Style Ford Truck too!
I got my Autometer gauges through Paul at Complete Performance. He got me a great deal. They are Autometer Ultra Light II series, Boost, Pryo, Trans Temp, and Fuel Pressure, all full sweep. I also acquired a 4 gauge a pillar pod from him as well. Shipping was great, very great business to deal with!
Now that I have the gauges and the pod to place them in, it is time to get busy!
1)
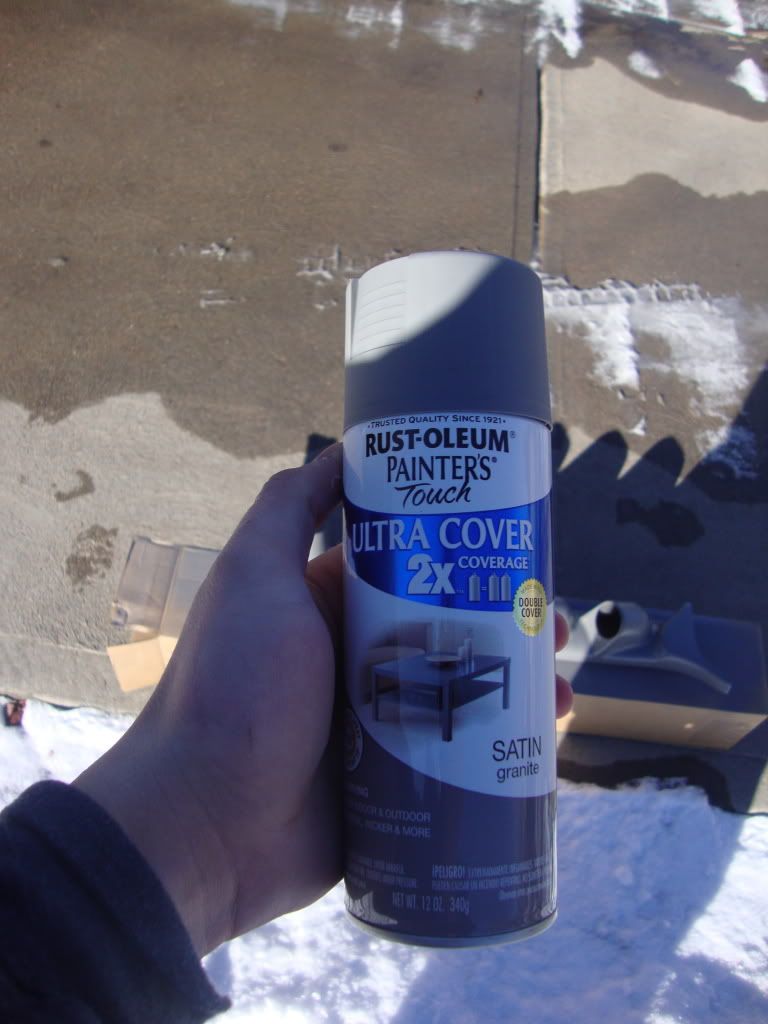
First I painted my pod. Had I been thinking ahead, I would have asked Complete Performance to send some matching paint my way as well, but of course I didn�t. So I went to home depot and found my best match to Ford Opal Gray. Turns out the can I got is a rustoleum, called Satin Graphite. Matches pretty well actually.
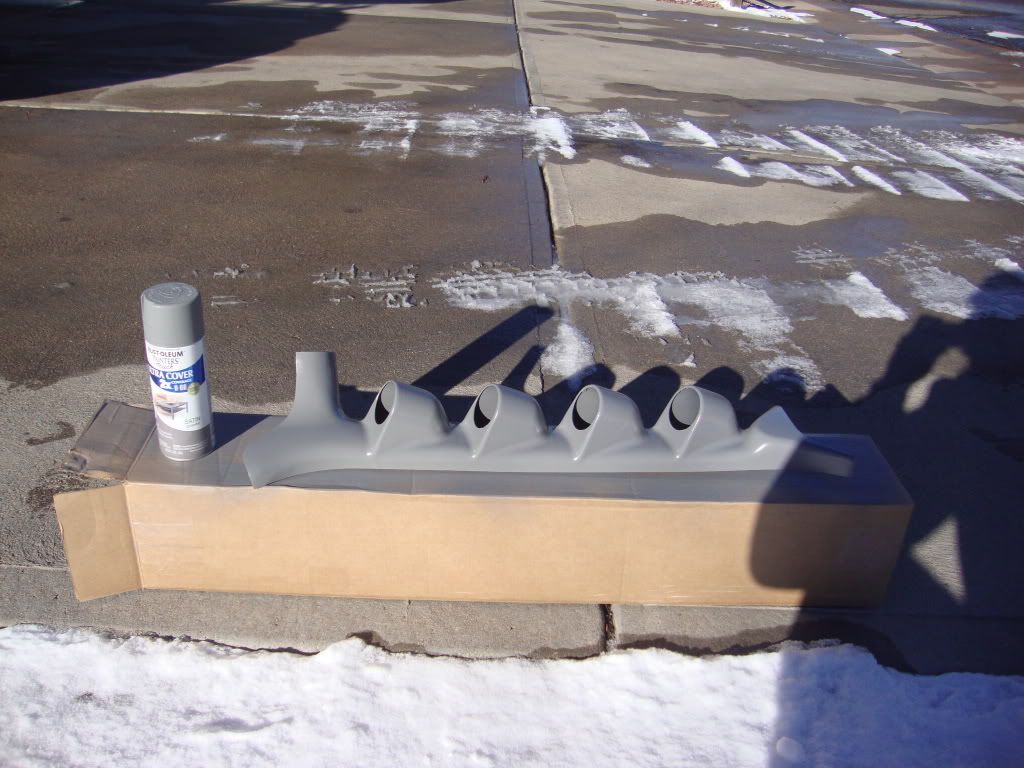
2)
Now that the gauge pod is painted with a few coats, I chose to put a few indicator LEDs in. So if you are not going to be doing this go ahead and skip this step.
I used a 5/16�s drill bit to make the holes. I got the LEDs from radio shack for 1.99 a piece.
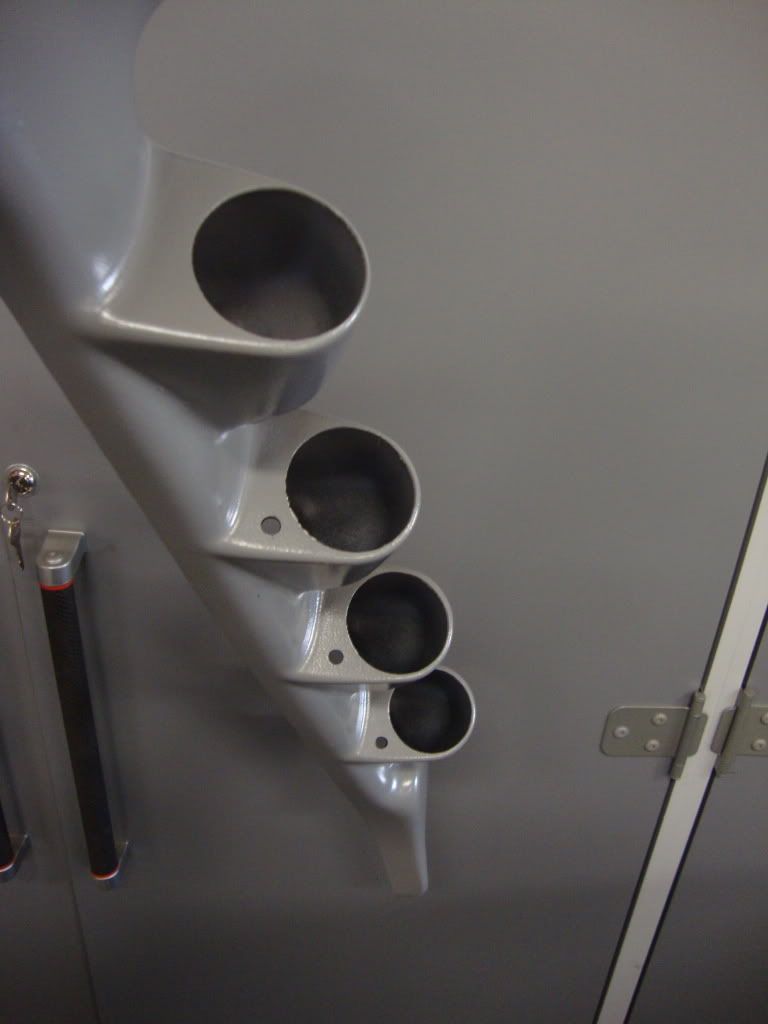
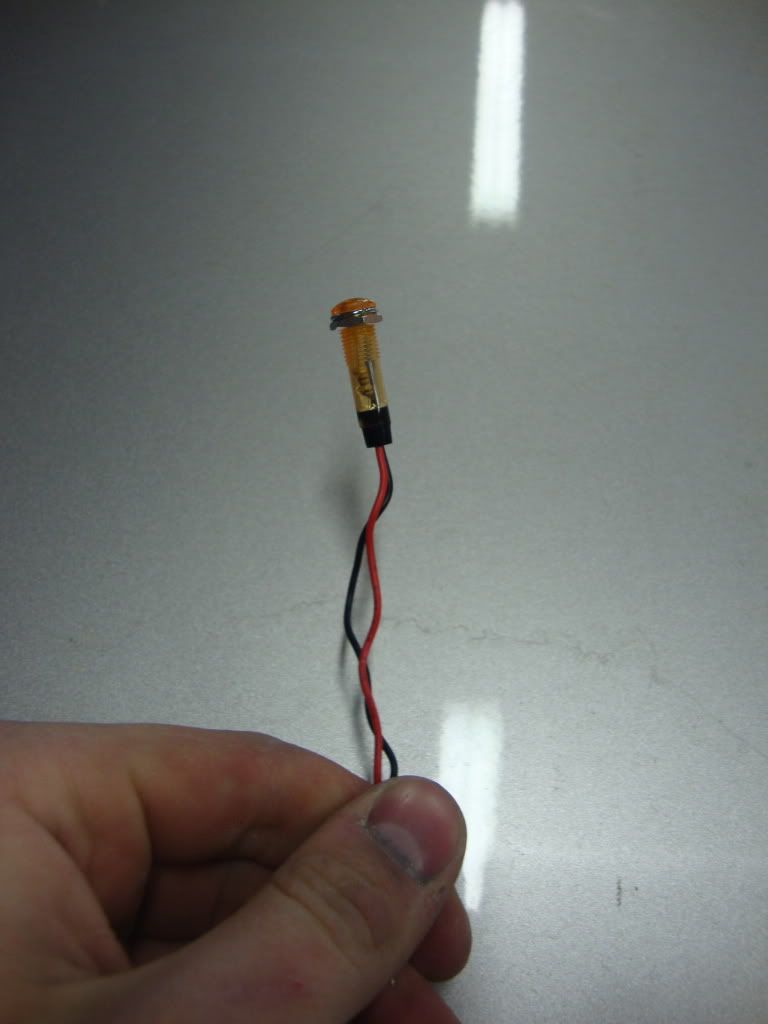
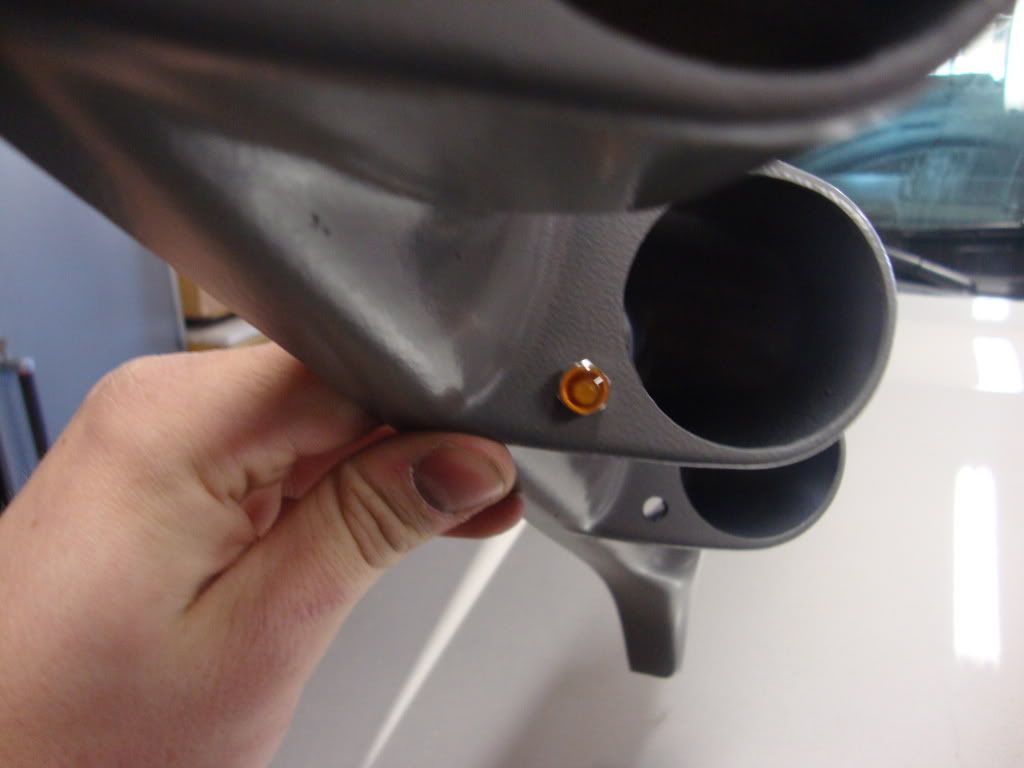
These LED�s will be used for indication that the Glow Plugs are still on, that my home built high idle is on, and that my fog lights are on. Each are a different color.

3)
Lets wire up the gauges.
A. Pryo Gauge.
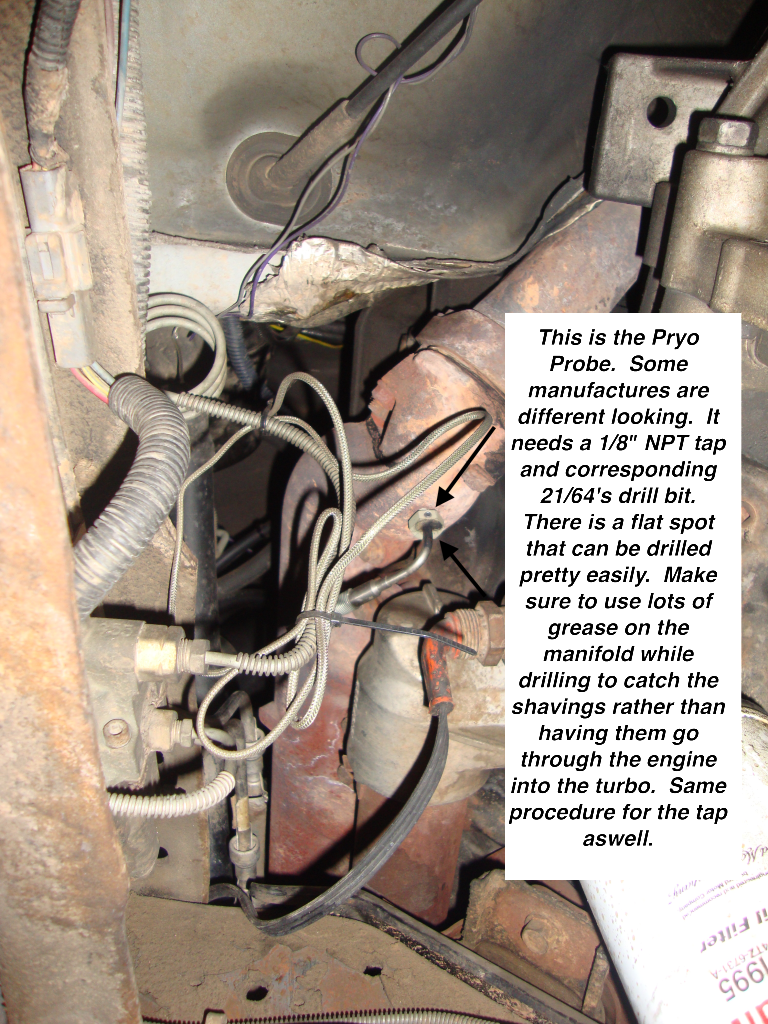
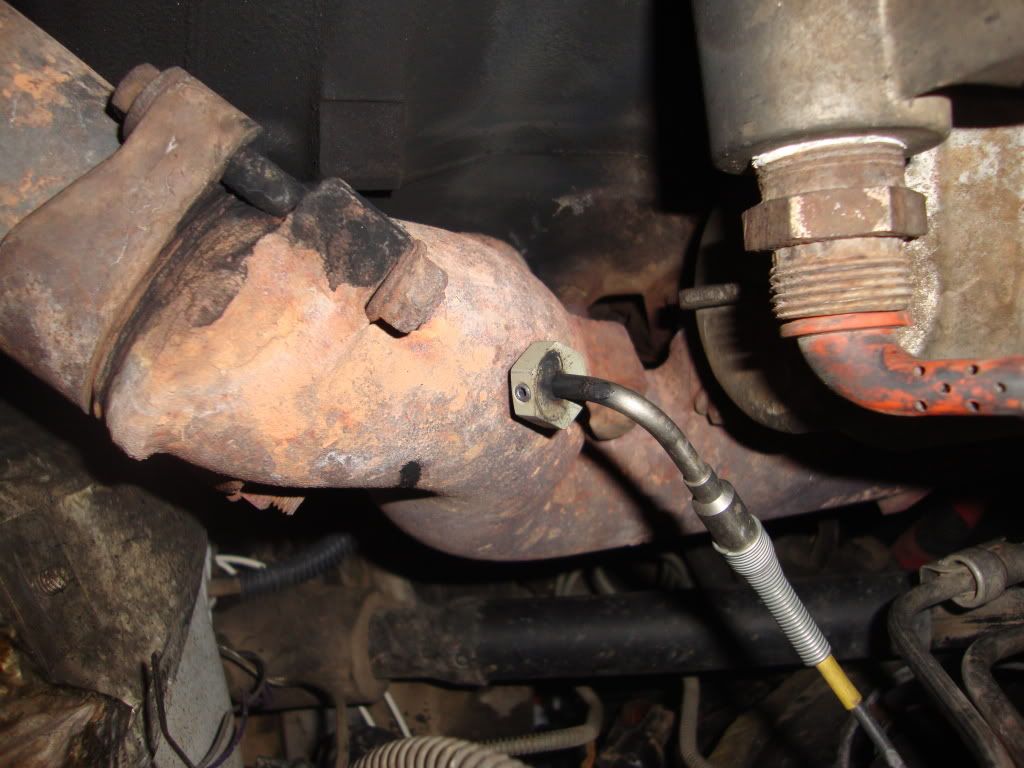
This is the hardest gauge to install. Reason for it, is because you have to drill a hole and tap the hole to screw the thermocouple in (pryo sending unit). The best place for a pryo gauge is before the turbo. You get the truest readings there. Luckily for the 7.3 Powerstroke there is a flat spot on the drivers side manifold that works perfect for the thermocouple. Start out by getting the drill out and a 21/64�s drill bit. Once you find the flat spot on the manifold, slowly start to drill the hole. It may be useful to use a smaller diameter drill bit to get a pilot started. Stop occasionally to clean the drill bit and the manifold out of shavings. Once the hole starts to get close to going through the entire manifold, get some lithium grease out and put it on the hole. This will keep the shavings from going into the exhaust manifold and eventually the turbo.
The hole is now there, it will be easy to tap now. Make sure you use lots of lithium grease again though. Tap the hole with the 1/8 inch tap (some manufacture thermocouples may be a different thread). Once tapped, screw the thermocouple into the freshly tapped hole, and run the wires up towards the fuse box under hood.
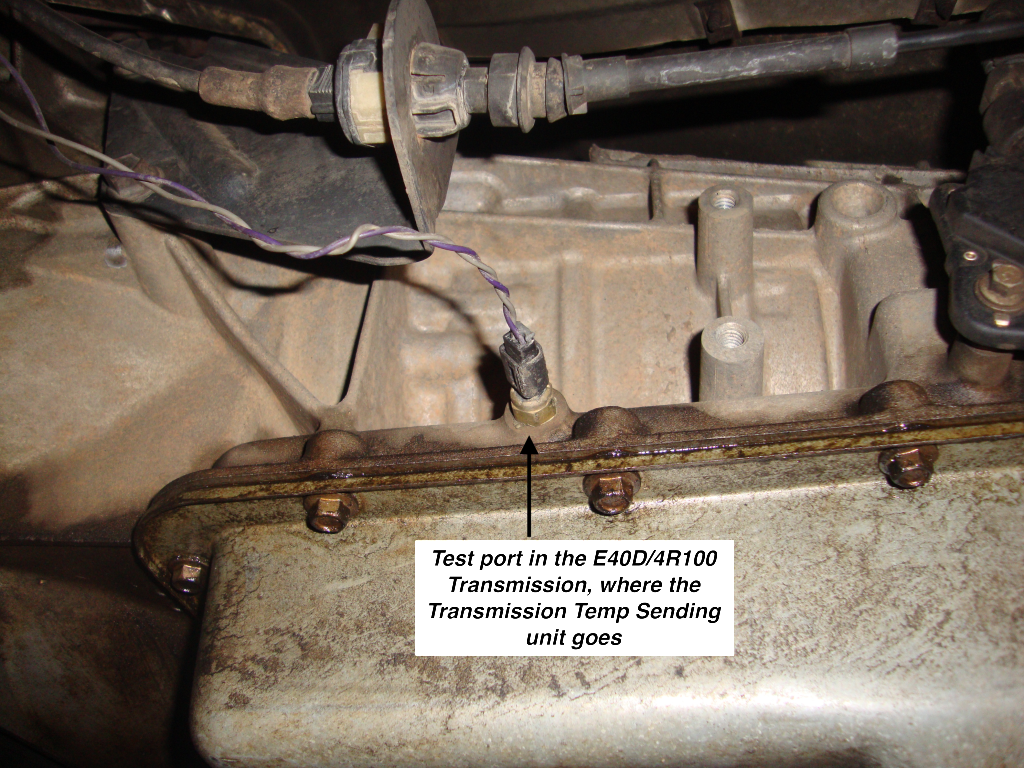
B. Transmission Temperature Gauge
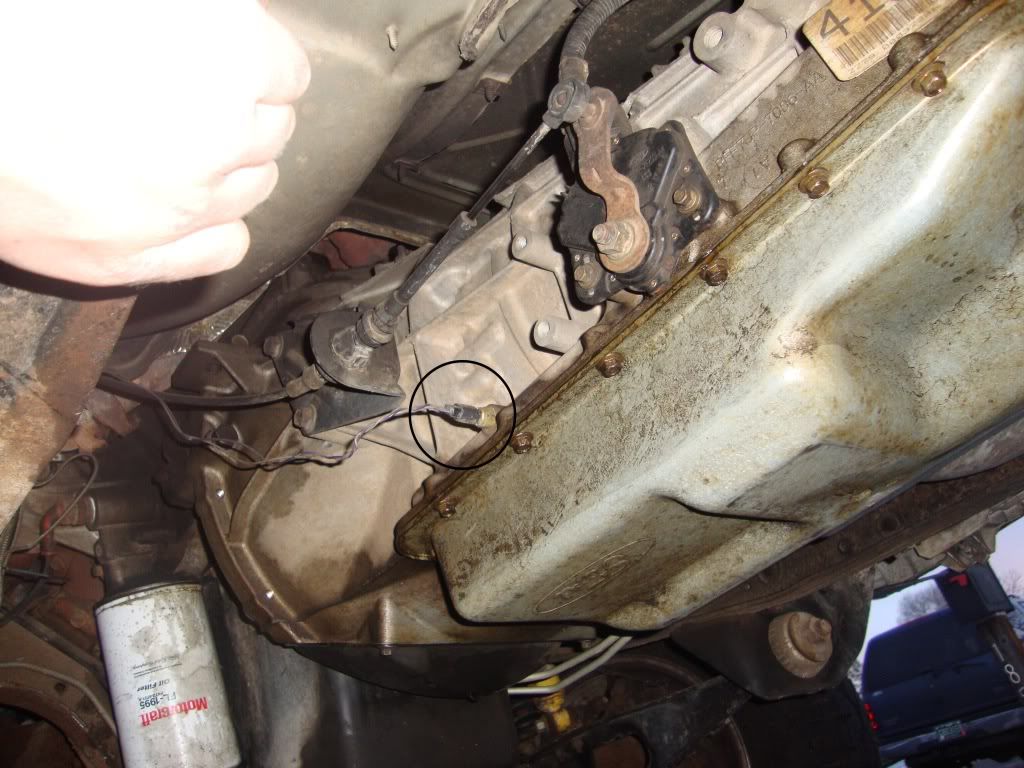
This is very straightforward. There is a test port on the side of the Ford E40D/4R100 Truck transmissions. It is shown in the pictures. Just simply unscrew that plug, and screw the sending unit in there. Using Teflon tape may not be a bad idea to prevent leaks. Again run the wires up towards the fuse box along the frame rail.
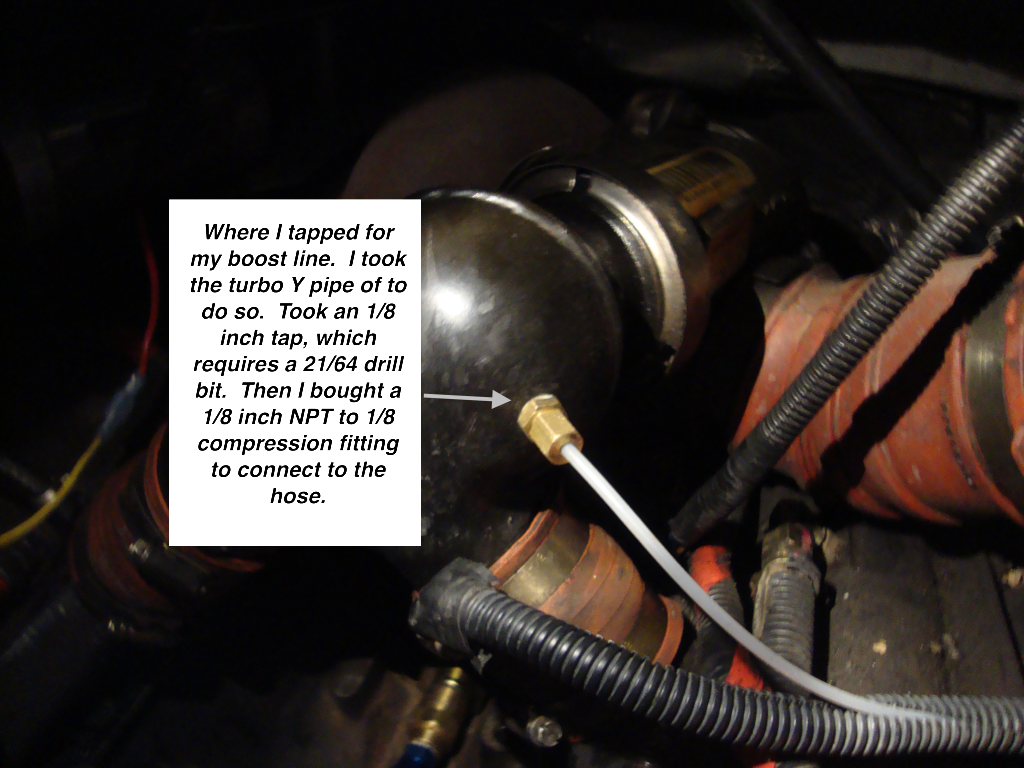
C. Boost Gauge
This is a mechanical gauge. Meaning you need to bring the pressure from the turbo to the gauge itself. Easiest way to do this is to tap into the map sensor line. Personally I tap into the Turbo Spider, as this creates less boost flutter.
To do this, take the 5 clamps loose off the spider. Take the spider completely off, careful not to damage the rubber ring on the turbo. Now take the same drill bit you used for the exhaust manifold and drill a hole in the spider. Then tap it with the 1/8 inch NPT tap. Once done clean the shavings out of it, and put back on the truck and tighten all the clamps. Take a 1/8 NPT to 1/8 compression. Screw it in the hole with some Teflon tape. Now using the provided tubing with the gauge, put a nut on it and slide the compression feral on the tube and tighten it. Put the other end of the tube again by the fuse box.
D. Fuel Pressure Gauge
This is something that most will not be purchasing. If that is the case, Skip this step.
On the fuel bowl there is a Schrader valve. It is where the fuel pressure should be read from. It is easy to unscrew the whole Schrader valve and put the new sending unit in the same place. Be careful to not tighten the new sending unit too much as the fuel bowl is only aluminum. Again use Teflon tape for sealing. Run the wires to the fuse box neatly.
If you have an aftermarket fuel system, best place is to put the sending unit right in the port for the fuel pressure regulator. Again run the wires to fuse box and use Teflon tape to seal the sending unit.
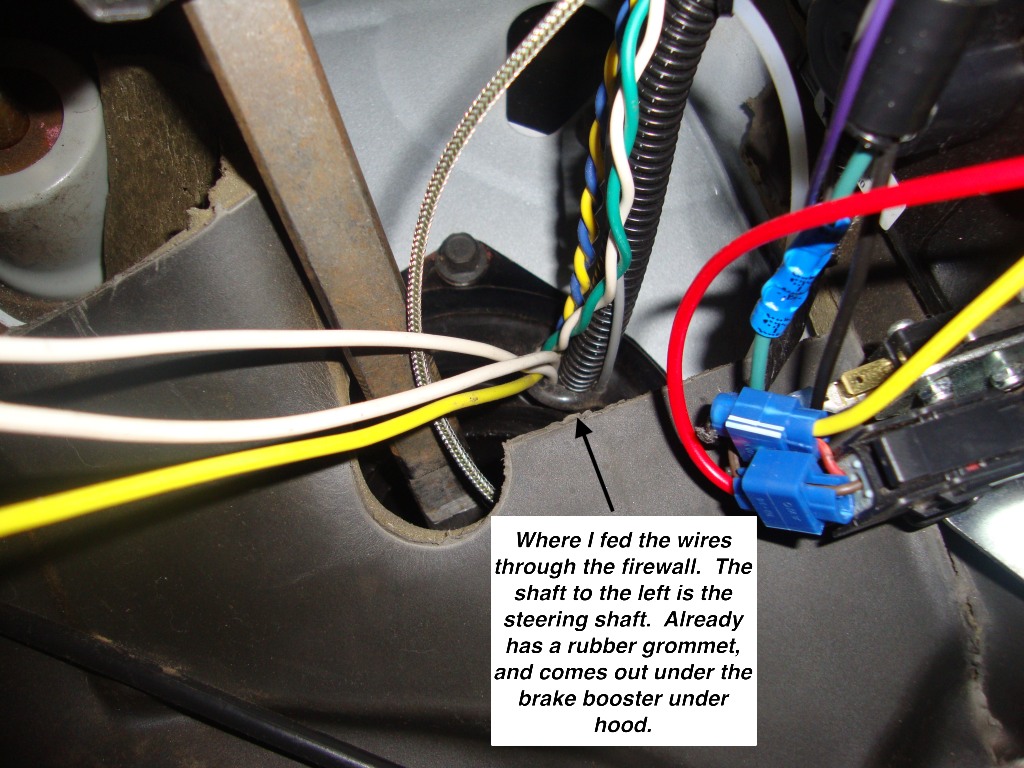
4)
Now that the sending units and the boost line are in and all by the fuse box, now its time to get them through the firewall. Under the brake booster there is a rubber grommet. This is where you send the wiring through. Take a razor blade and cut an x pattern in the rubber and was able to easily slide the wires and boost gauge as one through the hole.
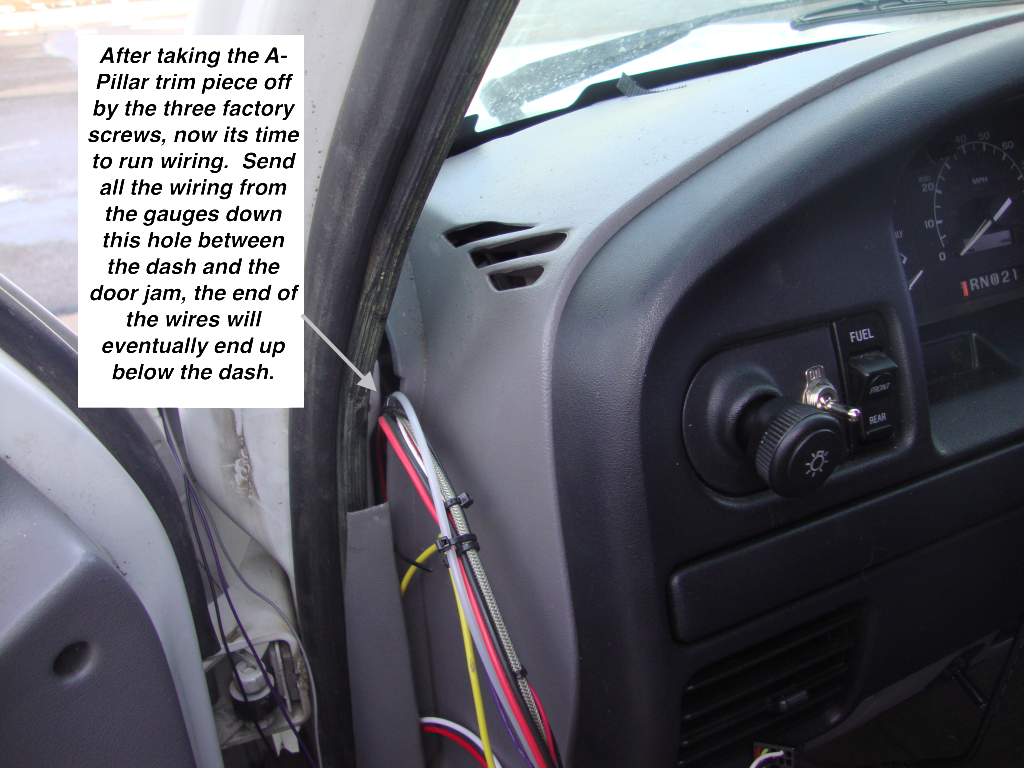
5)
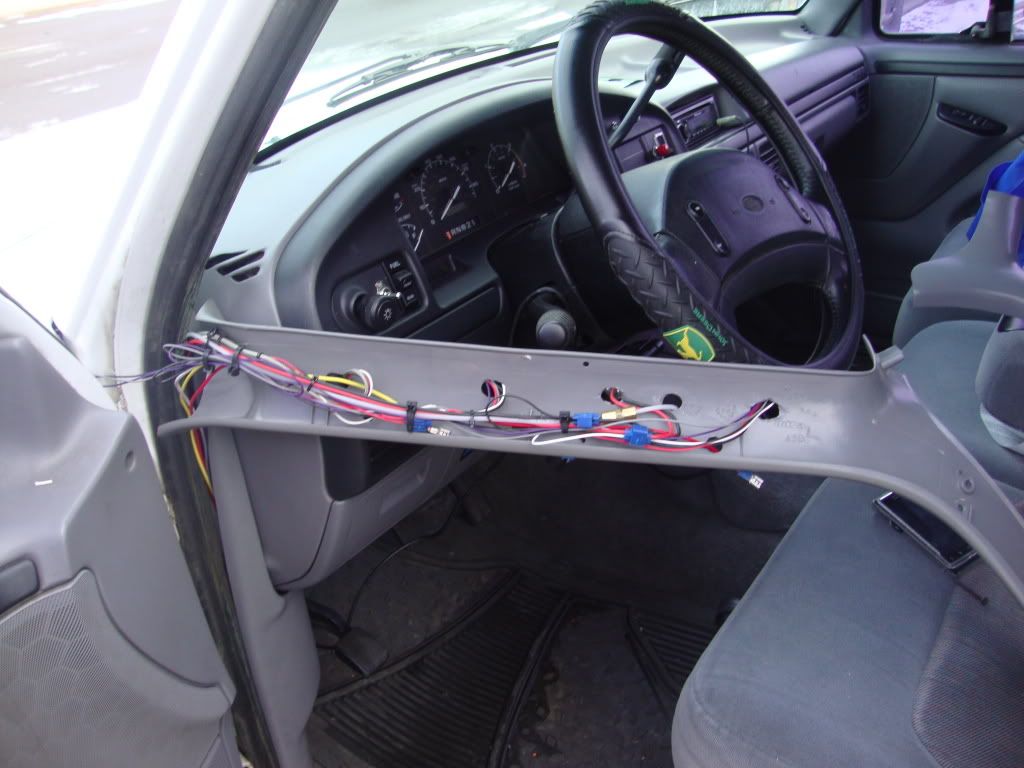
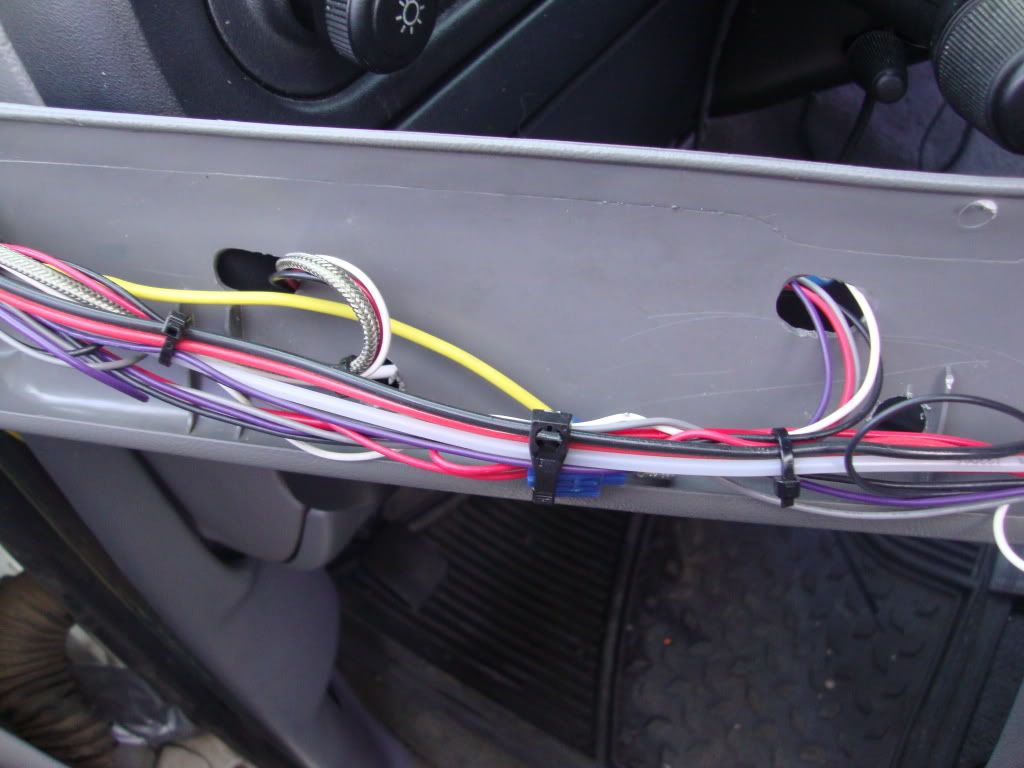
Now lets route all those wires and boost line up towards the A-pillar. This is simple to do by just going under the dash towards the door. The A pillar trim piece should be removed by taking the 3 screws out. Once there, you slide the wires around the trim pieces til they come out the top, as shown in the picture. Now is a good time to zip tie all the wires together.
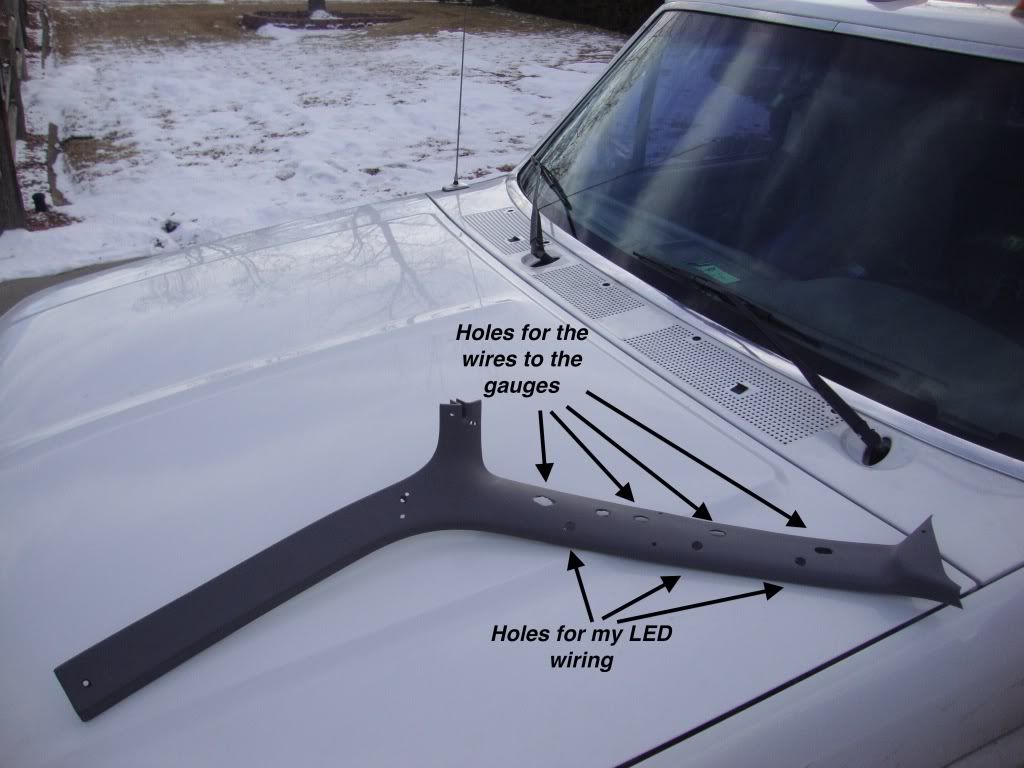
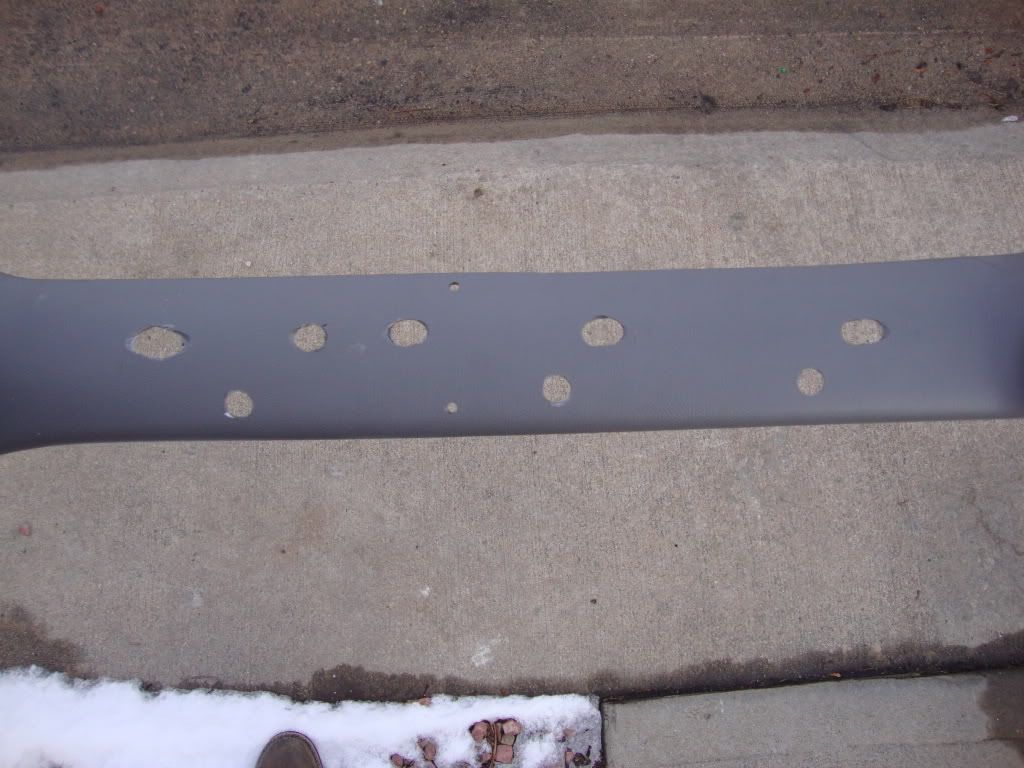
6)
Time to clearance the stock A pillar trim piece for the new gauges and wiring. To do so, take a large drill bit and drill holes for each gauge.
7)
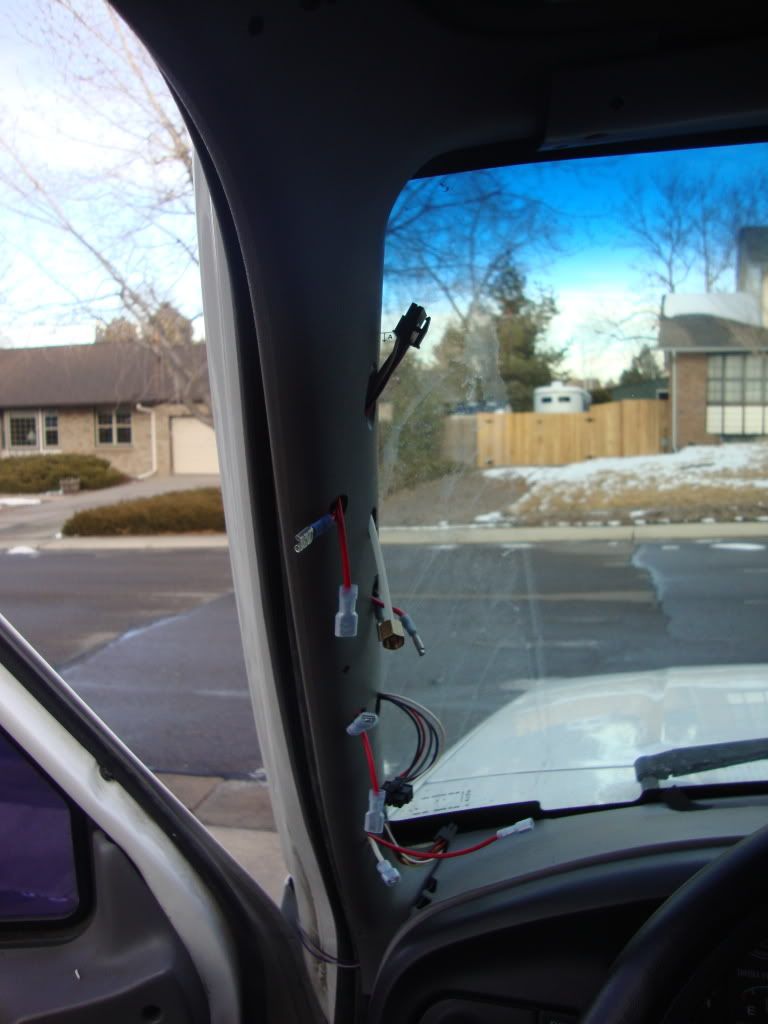
Now the wires can each be run through the corresponding holes and the piece can be placed back where it belongs. Go ahead and screw it on like it was originally. Like shown.
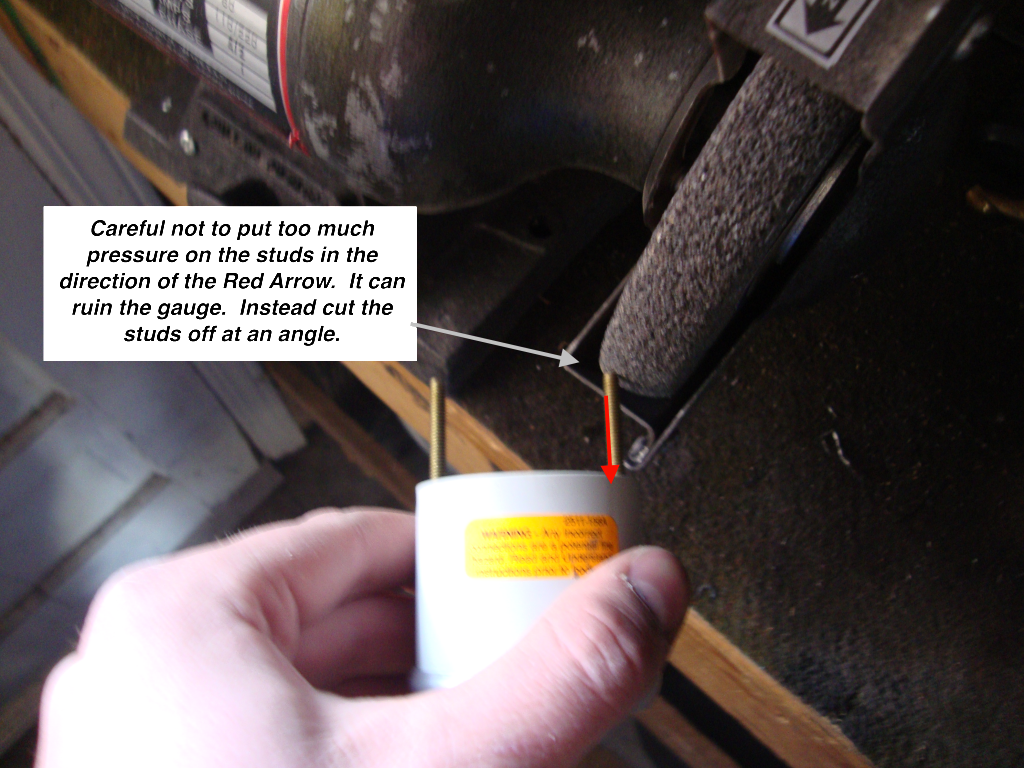
8)
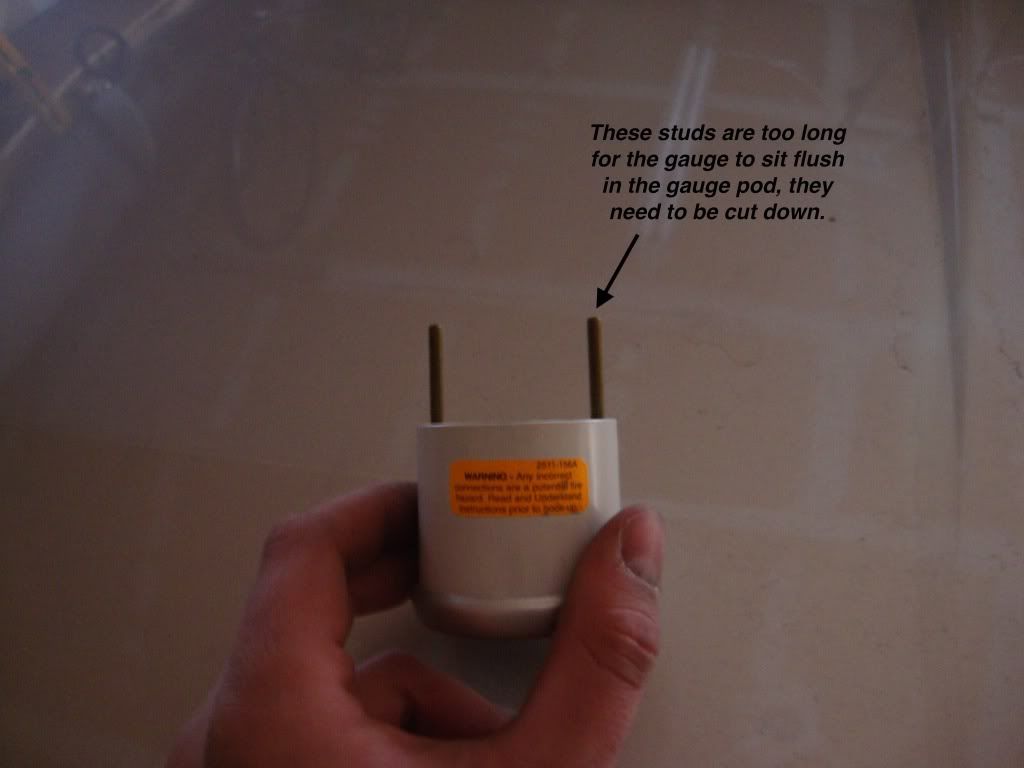
Most gauge pods require the studs on the gauges to be cut down. Don�t put too much pressure on the studs, but simply use a grinder, hack saw, or cut off wheel to cut the studs down.

9)
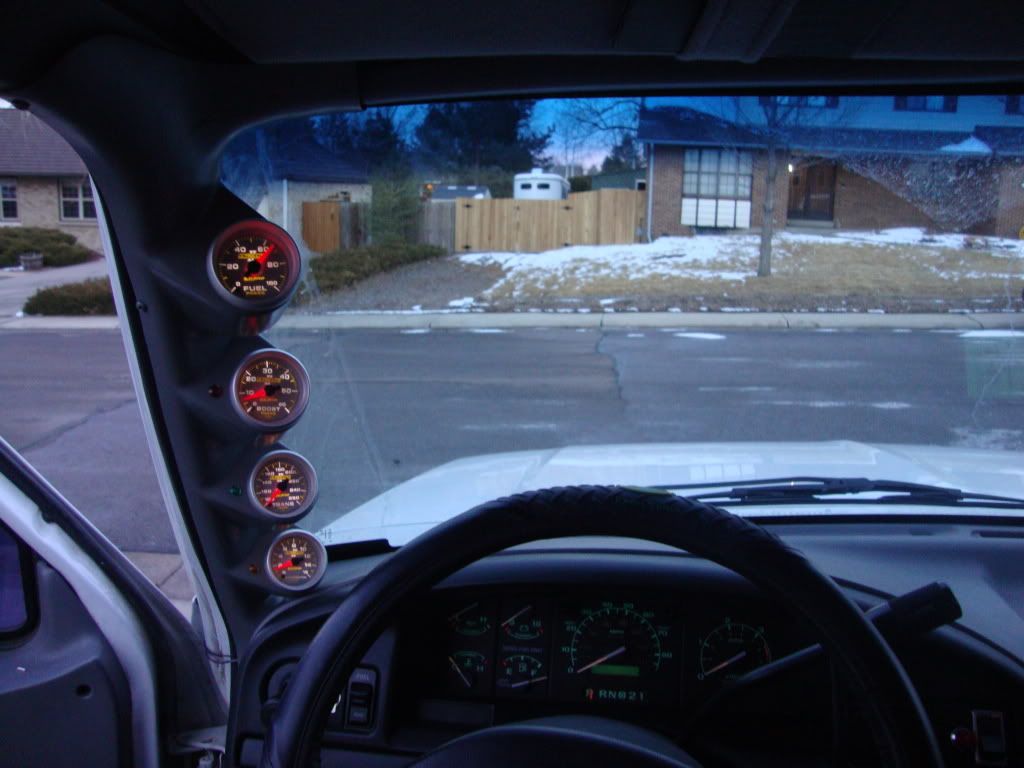
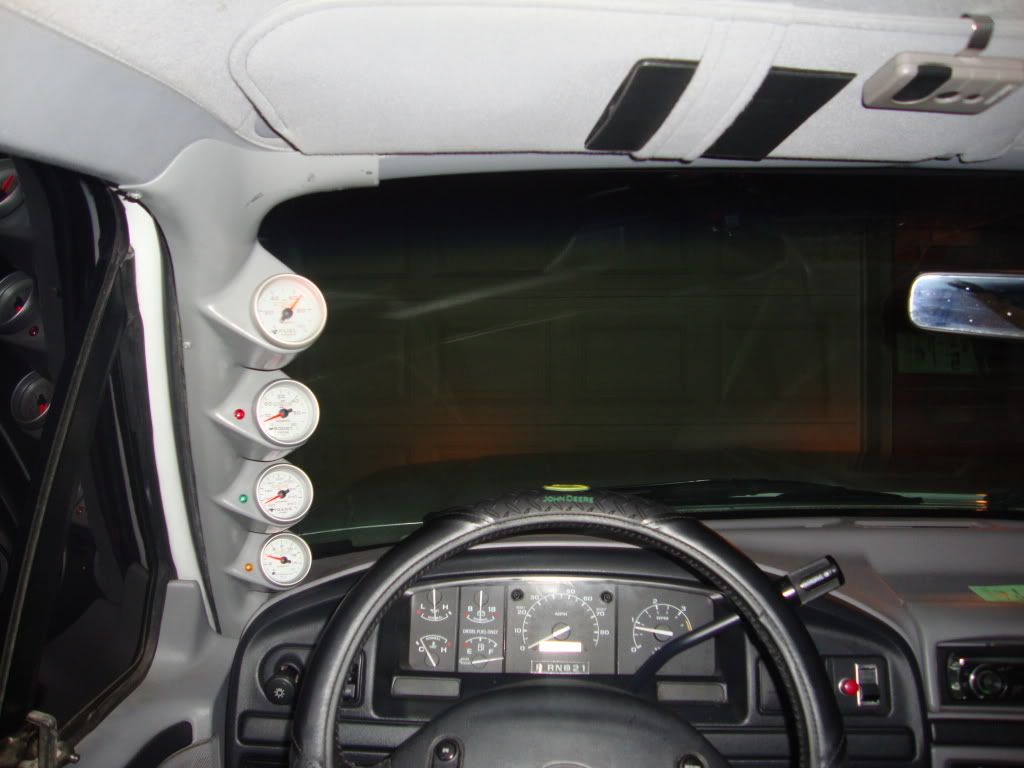
Now take the new painted gauge pod and put it up to the A pillar. Take a small screw and screw it to the factory trim in one place. Slide each gauge in connecting each wire and the boost gauge before hand.
In the end you will have them all in and a single screw holding it up. Now put in a few more screws wherever you would like.
10)
Now lets connect the power to the gauges for the lights and the gauges themselves.
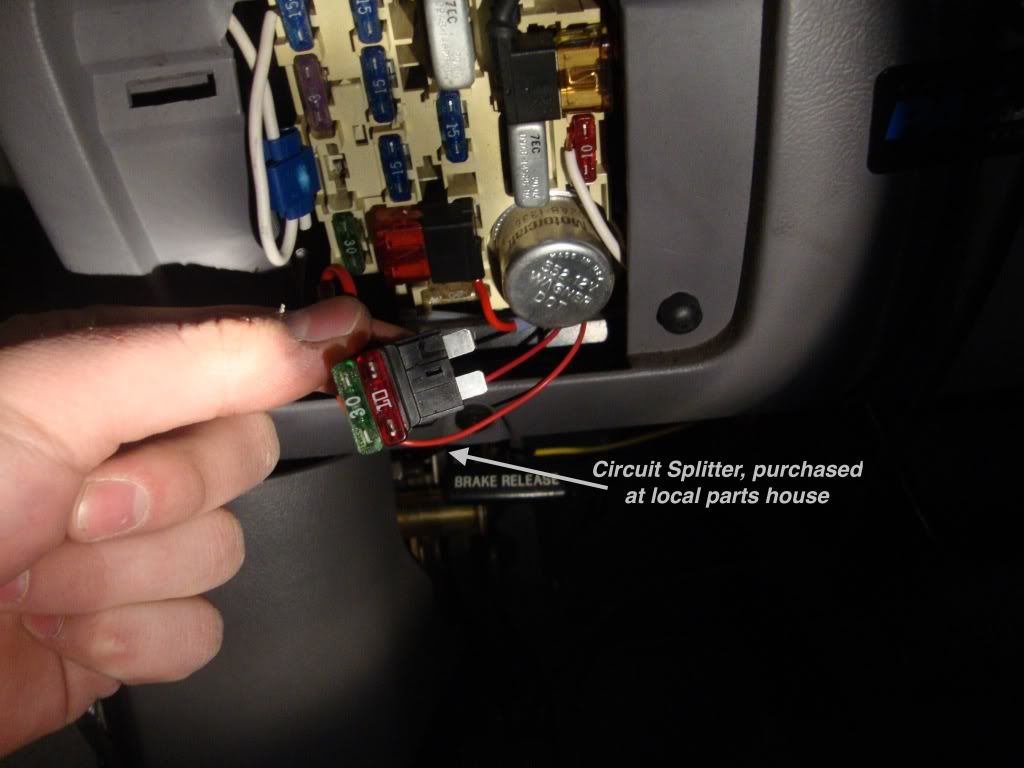
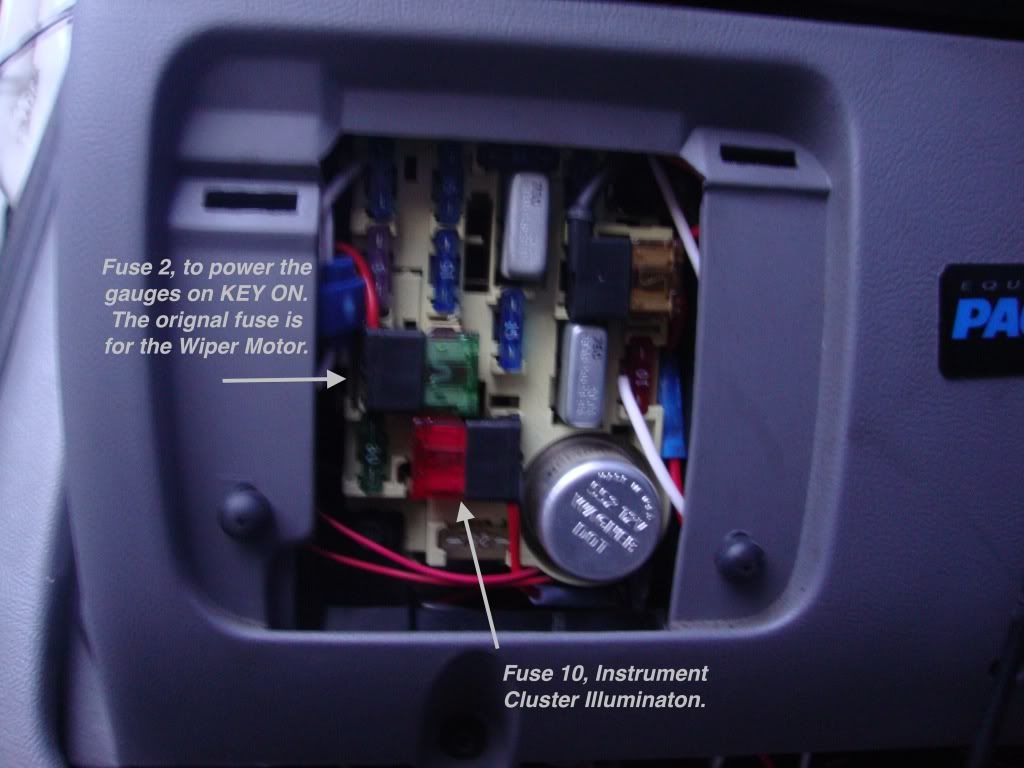
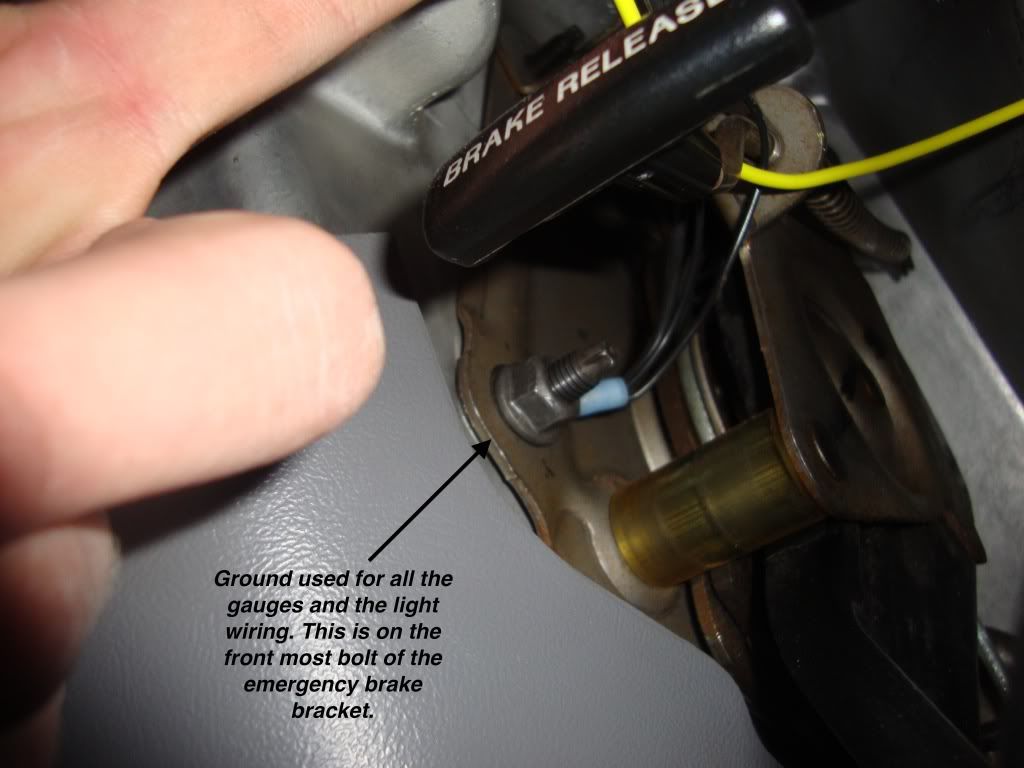
For the power of the gauges use fuse 2 on the truck. It is the Windshield wipers. It is best to use an add a circuit from the parts stores. For the lights in the gauges use the factory illumination circuit, which is fuse 10. Also best to use an add a circuit. For the ground of both the gauges and the lights use the stud and nut that holds the emergency brake on. Tie all the wires together and use a ring Terminal to attach them.

10)
Go and test those gauges! They should dim like factory and work flawlessly when the key is on!
I got my Autometer gauges through Paul at Complete Performance. He got me a great deal. They are Autometer Ultra Light II series, Boost, Pryo, Trans Temp, and Fuel Pressure, all full sweep. I also acquired a 4 gauge a pillar pod from him as well. Shipping was great, very great business to deal with!
Now that I have the gauges and the pod to place them in, it is time to get busy!
1)
First I painted my pod. Had I been thinking ahead, I would have asked Complete Performance to send some matching paint my way as well, but of course I didn�t. So I went to home depot and found my best match to Ford Opal Gray. Turns out the can I got is a rustoleum, called Satin Graphite. Matches pretty well actually.
2)
Now that the gauge pod is painted with a few coats, I chose to put a few indicator LEDs in. So if you are not going to be doing this go ahead and skip this step.
I used a 5/16�s drill bit to make the holes. I got the LEDs from radio shack for 1.99 a piece.
These LED�s will be used for indication that the Glow Plugs are still on, that my home built high idle is on, and that my fog lights are on. Each are a different color.
3)
Lets wire up the gauges.
A. Pryo Gauge.
This is the hardest gauge to install. Reason for it, is because you have to drill a hole and tap the hole to screw the thermocouple in (pryo sending unit). The best place for a pryo gauge is before the turbo. You get the truest readings there. Luckily for the 7.3 Powerstroke there is a flat spot on the drivers side manifold that works perfect for the thermocouple. Start out by getting the drill out and a 21/64�s drill bit. Once you find the flat spot on the manifold, slowly start to drill the hole. It may be useful to use a smaller diameter drill bit to get a pilot started. Stop occasionally to clean the drill bit and the manifold out of shavings. Once the hole starts to get close to going through the entire manifold, get some lithium grease out and put it on the hole. This will keep the shavings from going into the exhaust manifold and eventually the turbo.
The hole is now there, it will be easy to tap now. Make sure you use lots of lithium grease again though. Tap the hole with the 1/8 inch tap (some manufacture thermocouples may be a different thread). Once tapped, screw the thermocouple into the freshly tapped hole, and run the wires up towards the fuse box under hood.
B. Transmission Temperature Gauge
This is very straightforward. There is a test port on the side of the Ford E40D/4R100 Truck transmissions. It is shown in the pictures. Just simply unscrew that plug, and screw the sending unit in there. Using Teflon tape may not be a bad idea to prevent leaks. Again run the wires up towards the fuse box along the frame rail.
C. Boost Gauge
This is a mechanical gauge. Meaning you need to bring the pressure from the turbo to the gauge itself. Easiest way to do this is to tap into the map sensor line. Personally I tap into the Turbo Spider, as this creates less boost flutter.
To do this, take the 5 clamps loose off the spider. Take the spider completely off, careful not to damage the rubber ring on the turbo. Now take the same drill bit you used for the exhaust manifold and drill a hole in the spider. Then tap it with the 1/8 inch NPT tap. Once done clean the shavings out of it, and put back on the truck and tighten all the clamps. Take a 1/8 NPT to 1/8 compression. Screw it in the hole with some Teflon tape. Now using the provided tubing with the gauge, put a nut on it and slide the compression feral on the tube and tighten it. Put the other end of the tube again by the fuse box.
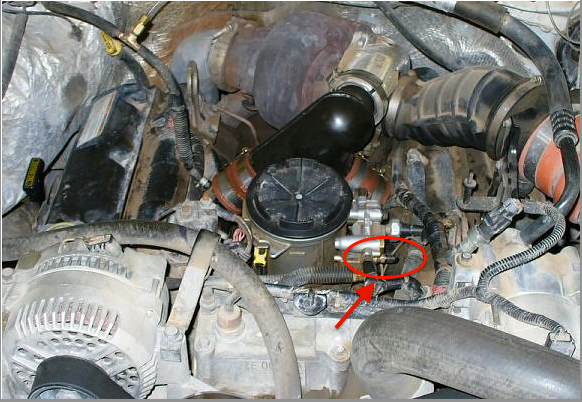
D. Fuel Pressure Gauge
This is something that most will not be purchasing. If that is the case, Skip this step.
On the fuel bowl there is a Schrader valve. It is where the fuel pressure should be read from. It is easy to unscrew the whole Schrader valve and put the new sending unit in the same place. Be careful to not tighten the new sending unit too much as the fuel bowl is only aluminum. Again use Teflon tape for sealing. Run the wires to the fuse box neatly.
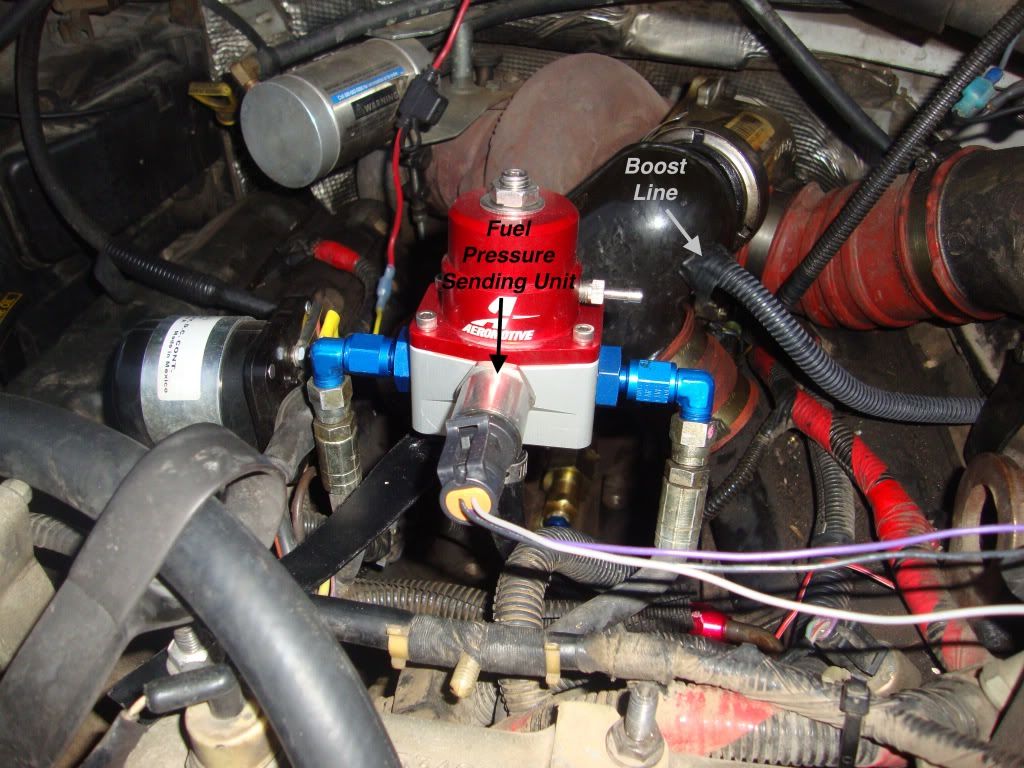
If you have an aftermarket fuel system, best place is to put the sending unit right in the port for the fuel pressure regulator. Again run the wires to fuse box and use Teflon tape to seal the sending unit.
4)
Now that the sending units and the boost line are in and all by the fuse box, now its time to get them through the firewall. Under the brake booster there is a rubber grommet. This is where you send the wiring through. Take a razor blade and cut an x pattern in the rubber and was able to easily slide the wires and boost gauge as one through the hole.
5)
Now lets route all those wires and boost line up towards the A-pillar. This is simple to do by just going under the dash towards the door. The A pillar trim piece should be removed by taking the 3 screws out. Once there, you slide the wires around the trim pieces til they come out the top, as shown in the picture. Now is a good time to zip tie all the wires together.
6)
Time to clearance the stock A pillar trim piece for the new gauges and wiring. To do so, take a large drill bit and drill holes for each gauge.
7)
Now the wires can each be run through the corresponding holes and the piece can be placed back where it belongs. Go ahead and screw it on like it was originally. Like shown.
8)
Most gauge pods require the studs on the gauges to be cut down. Don�t put too much pressure on the studs, but simply use a grinder, hack saw, or cut off wheel to cut the studs down.
9)
Now take the new painted gauge pod and put it up to the A pillar. Take a small screw and screw it to the factory trim in one place. Slide each gauge in connecting each wire and the boost gauge before hand.
In the end you will have them all in and a single screw holding it up. Now put in a few more screws wherever you would like.
10)
Now lets connect the power to the gauges for the lights and the gauges themselves.
For the power of the gauges use fuse 2 on the truck. It is the Windshield wipers. It is best to use an add a circuit from the parts stores. For the lights in the gauges use the factory illumination circuit, which is fuse 10. Also best to use an add a circuit. For the ground of both the gauges and the lights use the stud and nut that holds the emergency brake on. Tie all the wires together and use a ring Terminal to attach them.
10)
Go and test those gauges! They should dim like factory and work flawlessly when the key is on!
#2
01-25-2011, 12:12 PM
Posting Guru
Join Date: Jan 2009
Location: Wyoming
Posts: 1,955
Likes: 0
Received 0 Likes
on
0 Posts


#6
01-25-2011, 02:58 PM
Post Fiend
#7
01-25-2011, 04:17 PM
Join Date: Nov 2008
Location: Lakewood, Colorado
Posts: 1,138
Likes: 0
Received 0 Likes
on
0 Posts
But who else makes the 4 gauge pods now? I know CP was the only supplier.
Trending Topics
#9
01-26-2011, 02:21 PM
Join Date: Nov 2008
Location: Lakewood, Colorado
Posts: 1,138
Likes: 0
Received 0 Likes
on
0 Posts
#10
01-26-2011, 02:26 PM
Post Fiend
I am told that Joey at TE has them, but I have not verified with him yet. If I had known that I would have asked him about it before I bought these 2 from CP. The one from CP I put in my PSD I'm not too impressed with. Had to do some modifying to get it to look right and the angle of the top guage faces it up where I don't really see it very much, but oh well. It houses all 4 of my guages so I'm happy enough with it and after fiddling with it some I got it to fit right.
 Excellent.....photos are awesome!


Thread
Thread Starter
Forum
Replies
Last Post
MustangMatt96GT
1994.5 - 1997 7.3L Power Stroke Diesel
20
07-03-2013 06:53 AM
ThatJeepGuy
1948 - 1956 F1, F100 & Larger F-Series Trucks
19
01-18-2010 03:45 PM