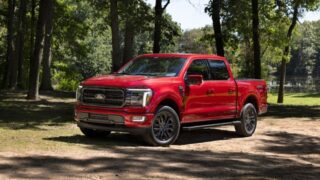
Fixing squeaky ball joints on your Ford F150
Do you have an annoying creak when turning the wheel of your F150? This is a common issue since Ford likes to use sealed ball joints on their trucks but it is something that you can fix in your driveway with some basic tools. To fix this issue, you will want to replace the upper control arm (it contains the ball joint) and lower ball joint and when purchasing the new parts, spend a little more money and make sure that your new ball joints have grease fittings. This will save you the headache of having to repeatedly change your ball joints.
Other than the parts, to do your own ball joints you will need the following items:
-A floor jack
-Jackstands
-Wheel wrench
-A wire hanger
-A socket set and ratchet
-A ball joint separator (pickle fork)
-Outside snap ring pliers
-A grease gun and grease
-A hammer (the larger the better)
-A ball joint press (most parts stores will loan tools like this)
-An impact gun isn’t required but this is a pretty tough job without one.
-An extra set of hands (a few steps are much easier if you have someone to help you)
Step One
Open the hood and check the brake fluid level before beginning. If your brake fluid is very low you may have more severe brake system problems. With your F150 on the ground, take your wheel lug wrench and break the lugnuts loose. DO NOT REMOVE THEM; just make sure that they are all broken loose. This can be much harder to do when the truck is off the ground.
Step Two
Jack up the driver’s side of your F150 and place a jack stand under the car then repeat on the passenger’s side. Use the wheel lug wrench to remove the lug nuts and front wheels. If you have an issue with brake fluid, inspect in around the brake calipers and brake hoses for any wetness. Follow the shrouded wire running along with the brake hose towards the engine and unplug it ““ it is easier with this out of the way.
Step Three
Locate the upper and lower ball joints and remove the cotter key holding the nut in place as well as the cotter key securing the outer tie-rod end nut. Remove the 18mm bolts that connect the brake caliper bracket to the steering knuckle. Swing the caliper assembly out of the way and make sure to support it with a coat hanger as to not stress and ruin the brake hose. Remove the nuts on the upper and lower ball joints, as well as the axle nut and outer tie-rod end nut. NOTE: When you remove these four nuts, the steering knuckle will be completely free. In MOST CASES, the knuckle will be corroded in place but be prepared to support the steering knuckle.
Step Four
If the knuckle does not swing freely once the nuts are removed, thread the bottom nut back on and get your large hammer. Strike the steering knuckle where it meets the outer tie-rod end until the tie-rod pops up and out. Then take your pickle fork and slide it between the steering knuckle and the ball joint, striking the end of the fork with your hammer. This time, once you have loosened both of the ball joints the knuckle WILL swing free with the only support being the lower nut. Now you can lift the steering knuckle away from the lower nut and remove the nut. This will allow you to remove the rotor and knuckle assembly from the truck.
Step Five
Locate the snap ring on the top of the lower ball joint and use your outside snap ring pliers to remove it. Take your large hammer and beat the top of the ball joint until you’ve removed it. Take your ball joint and ball joint press and run the new ball joint into place. Once tight, install the new snap ring and thread in the grease fitting.
Step Six
Locate the upper control arm bolts and remove them with a 21mm socket. The new control arm will contain the new ball joints but you may have to thread in the grease fitting. Once the old control arm is out, you are ready to start putting everything back together. Begin by bolting in the new control arm.
Step Seven
Put the steering knuckle back on the truck by sliding it over the axle and thread the axle nut on a bit to support the weight while lining up the ball joints and tie-rod end. Slide each of the ball joints through the knuckle and thread on the nut and finish by connecting the tie-rod to the knuckle. Tighten the ball joint nuts, axle nuts and outer tie-rod end nut and check the control arm nuts once more. Once everything is tight, secure the nuts by putting in new cotter keys.
Step Eight
Install the brake assembly by lining it up over the rotor and threading in the two 18mm bolts in the rear. Once you’ve tightened these, re-connect the speed sensor wire that you unplugged in Step Two, making sure that it is secured to the frame and not anywhere that it can be pinched or cut. Take your grease gun and lubricate the new ball joints.
Step Nine
Put the wheel back on and tighten the lugnuts. Follow these exact steps to the other side of the truck and when you are finished and have lowered the truck, re-check all of the lugnuts to ensure that they are tight.


