Daily Slideshow: Prerunner F-150 Shows off Nifty New Lift Kit
Lift kits are more popular than ever. And thankfully, installing one on your truck is getting easier, too.


1. The Lift That Keeps on Giving
These days, perhaps no aftermarket component reigns supreme like the humble lift kit. Gone are the days when slammed trucks ruled the streets. These days, we like our trucks as far off the ground as possible, whether we intend to actually use them off-road or just like the look a lifted truck portrays. Thankfully, this popularity has led to some pretty innovative products. Today, lifting a truck is a simple process that won't tear up your factory suspension. To demonstrate just how easy and painless installing a lift kit can be, Truck Trend tagged along as a 2013 Ford F-150 received a 6-inch lift at Outlaw Offroad in Santa Ana, California.
>>Join the conversation about lift kits right in in Ford-trucks.com.
2. Keeping It Simple (but Awesome)
Outlaw cranks out lifted trucks by the dozens on a weekly basis, so they've pretty much got the process down to an efficient science. In this case, a customer purchased a used 2013 F-150 from a local dealer and immediately brought it over for a lift. He decided to go with a BDS 4 to 6-inch lift kit and a set of Fox 2.5 remote-reservoir coilovers for his two-wheel drive pickup. The nice thing about kits like this one is that everything you need is included, and it's all designed to make this a simple bolt-on job.
>>Join the conversation about lift kits right in in Ford-trucks.com.
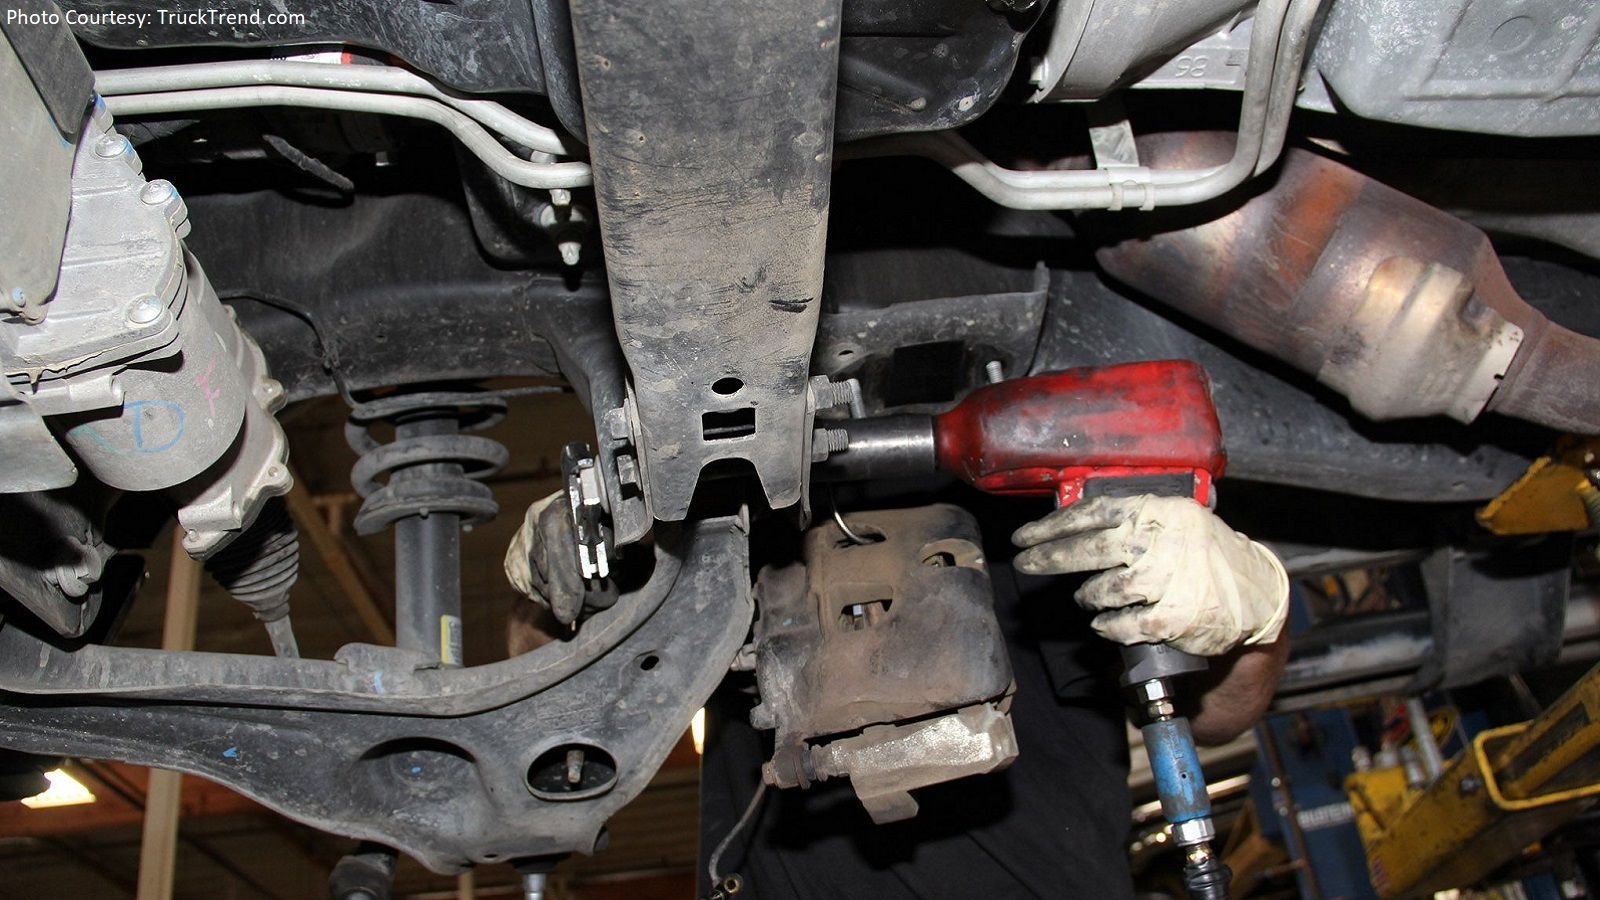
3. Tear it Down
Installing a lift kit from any manufacturer always begins with removing all of the old components. In this case, that involves removing the tie rod and breaking down the steering knuckle assembly, as the BDS kit comes with a new one. Next, the brake calipers, rotors, and dust shield come off. Then, the sway bar and hub, both of which are retained with the installation. The lower control arm is relocated with a new crossmember. And, of course, the old coilovers come out so that the new Fox shocks can be installed later.
>>Join the conversation about lift kits right in in Ford-trucks.com.
4. Leap of Faith
Perhaps the only intimidating part of an installation like this involves the need to make a small triangular cut in both sides of the rear control arm pockets. This is necessary to make clearance for the new (and much larger) crossmember. But with a Sawzall or angle grinder, it's quick and easy work. Next, simply remove the skidplate and bolt in the new crossmember. All of the new parts can now go in, but it's smart to leave all the bolts loose until everything is in place.
>>Join the conversation about lift kits right in in Ford-trucks.com.
5. Finishing the Job
As easy as installing the front portion of a lift kit is, the rear is even easier. Simply remove the rear shocks and U-bolts to separate the leafs from their mounting point. Slide the blocks in between the two and install the new, longer U-bolts. In this case, a brake line relocation bracket is necessary, as is adjusting the angle of the carrier bearing. But all of this is a piece of cake thanks to excellent instructions and all the kit you need to make it work. So if you've been thinking about lifting your truck but find the process intimidating, rest assured. Taking your Ford truck to the new heights has never been easier!
>>Join the conversation about lift kits right in in Ford-trucks.com.
For help with your maintenance and repair projects, please visit our how-to section in the forum.