Ford F-150/F-250: How To Replace Brake Line
The problem isn't always your brake pads, calipers, or rotors; it could be your brake line. Here's how to replace your brake line you find it is indeed the problem.
This article applies to the Ford F-150 (2004-2014) and F-250 Super Duty (2005-2014).
Changing a brake line isn’t the easiest of tasks, but can be accomplished and save you lots of money. This job is recommend only for more mechanically inclined people. If you mess up your brake lines, your brakes can and will most likely fail.

Safety Tips
- Always wear eye protection and gloves
- Never have an open flame or use a cutting tool that generates sparks near a brake line
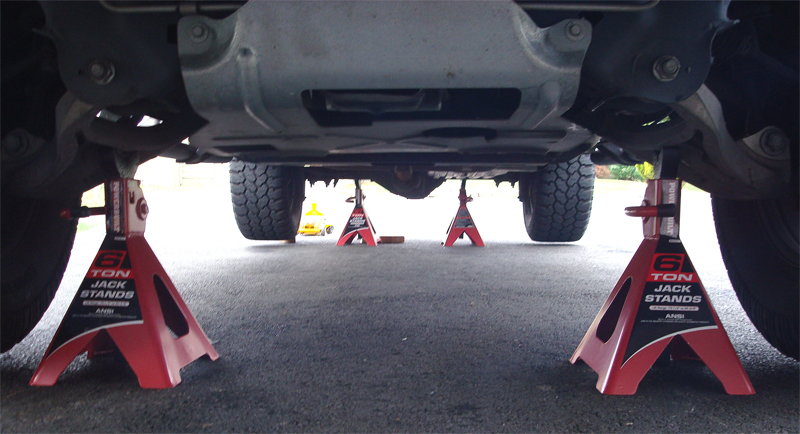
- Never lie under a vehicle that isn’t supported by a jack stand with the proper weight rating
Tools and Materials Needed
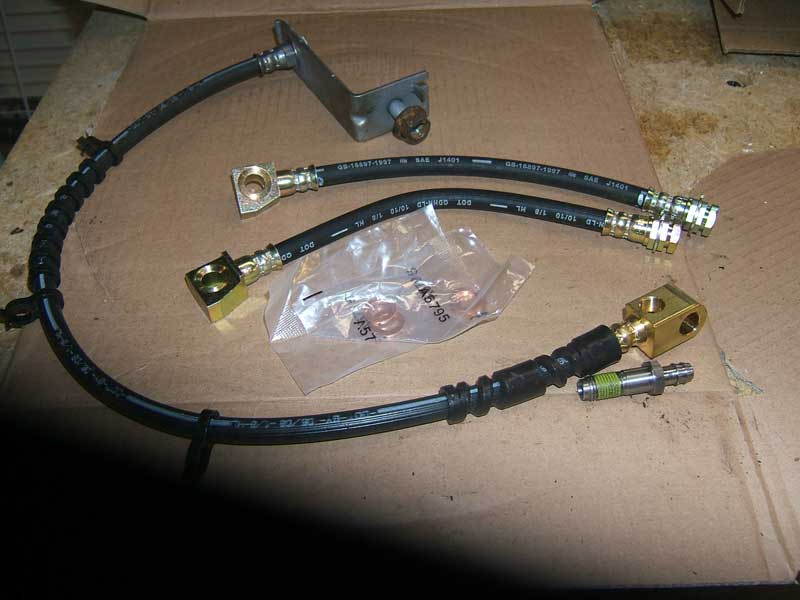
- Replacement brake lines
- Jack and 4 jack stands
- Tire iron
- Line wrenches
- Non-absorbent plugs (rubber)
- Pipe cutter
- Clear vinyl tubing to fit over bleeder valve
- Dot 3 brake fluid (4-5 quarts)
- Pipe bender (optional depending on replacement brake line style)
- Plenty of rags
- Plastic wrap (optional)
- A helping hand
Step 1 - Prepare the truck
- Loosen the lug nuts, use the jack to raise the vehicle enough to secure the jack stand under the lower control arm, and remove all four wheels.
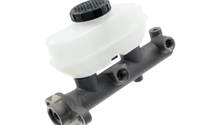
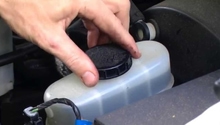
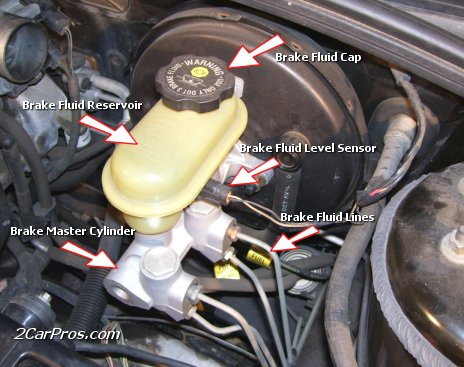
- Clean the brake fluid cap and any areas where you will be removing lines; you don’t want dirt in the system.
- Remove the cap on the master cylinder.
- It's recommended to place some plastic wrap over the master cylinder opening. Leave a small opening where air can still get in; this will minimize the amount of dripping fluid from the lines.
- Place the rag underneath the line you are about to remove. Brake fluid is very caustic and will eat through paint easily, so clean up whatever the rag misses quickly.
Step 2 - Remove brake line
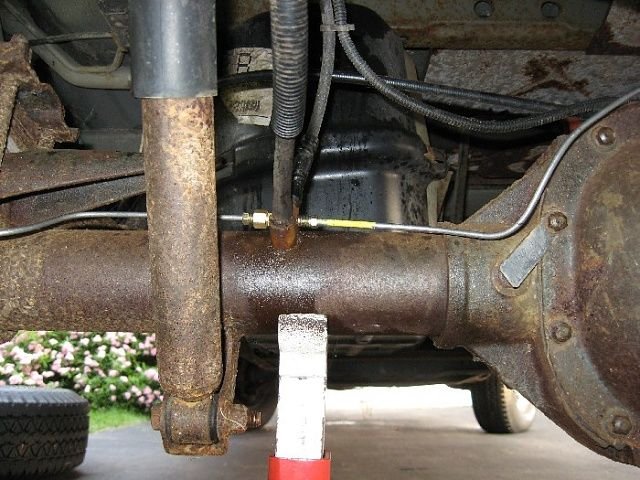
- Locate the section you need to remove. If you’re just patching a small section, have the pipe cutters ready as well as the rubber plug. If replacing an entire section, have the line wrench ready as well as the rubber plug.
- Remove any attachment clips holding the brake line in place.
- Remove the bad section of brake line by unscrewing it with the line wrench or cutting it out with the pipe cutters.
- Quickly plug both ends of the line with the rubber plugs to minimize leaks.
Step 3 - Install
- If you bought a straight line that needs to be bent, do it now using the old removed line as a template. You need to get it very close to the original for it to fit properly.
- Prepare your lines and install any fittings needed now. Position your lines into place.
- One side at a time, remove a rubber plug and then hand tighten the flare nut on the line. Once it’s hand tightened, use the line wrench to finish tightening the line into place.
- Re-install any brake line attachment clips that you removed previously.
Step 4 - Bleed the brakes
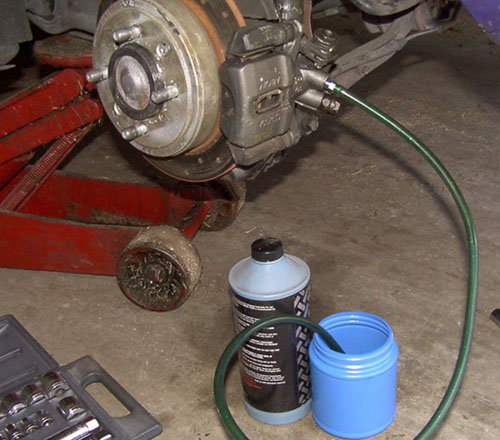
You will now need to bleed all the brake lines, starting with the wheel farthest from the master cylinder and ending with the wheel closest. Use the vinyl tubing to control where the fluid is going, make sure to never let the fluid reservoir go dry, and to never fully depress the brake pedal (only go about 2/3 of the way).
- Attach the vinyl tubing to the brake bleeder valve.
- Loosen the valve slightly and have your assistant pump the brakes a couple times.
- Have your assistant hold the pedal 2/3 of the way down and open the valve.
- Let fluid flow until no more air bubbles come out.
- Close the valve and move to the next wheel.
Pro Tip
Make sure the fluid reservoir is full and then pump your brakes slightly a couple times until they firm up. Go for a drive at slow speeds to test the brakes; if they feel spongy, you may have air in the lines and will need to bleed the brakes again.
Featured Video : How to Replace Brake Line
Related Sites
- How to Replace Brake Line F-series - Ehow.com
- Brake Line Replacement - F150online.com