Coolant Change 101
#166
 01-07-2014, 07:50 PM


Senior User
Join Date: Jan 2011
Location: Los Angeles - South Bay
Posts: 198
Likes: 0
Received 0 Likes
on
0 Posts
#167
01-25-2014, 09:47 AM

Here's a breakdown of how my coolant flush went earlier this week.
Started by draining out the original coolant. Drained from the stopcock valve, lower radiator hose, and drivers side of the engine block. When I first bought the truck I looked at the coolant and notice that it wasn't green. After bringing it home and looking at it more I thought it had a slight green tint to it. I was concerned about the type of coolant in there.
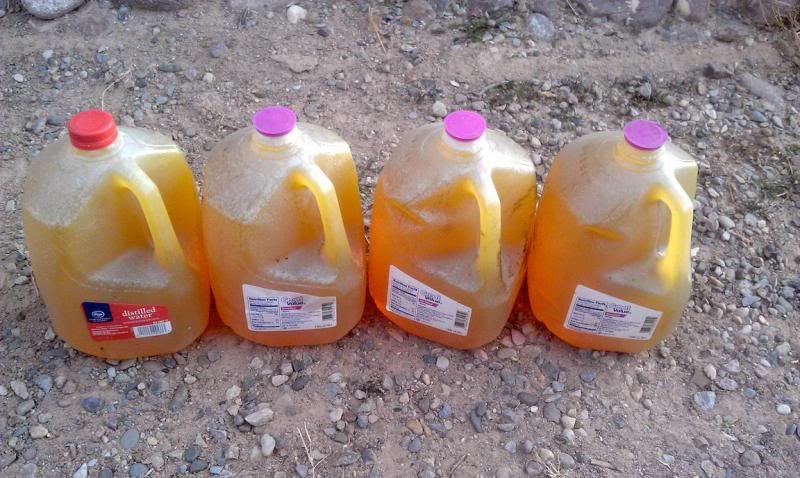
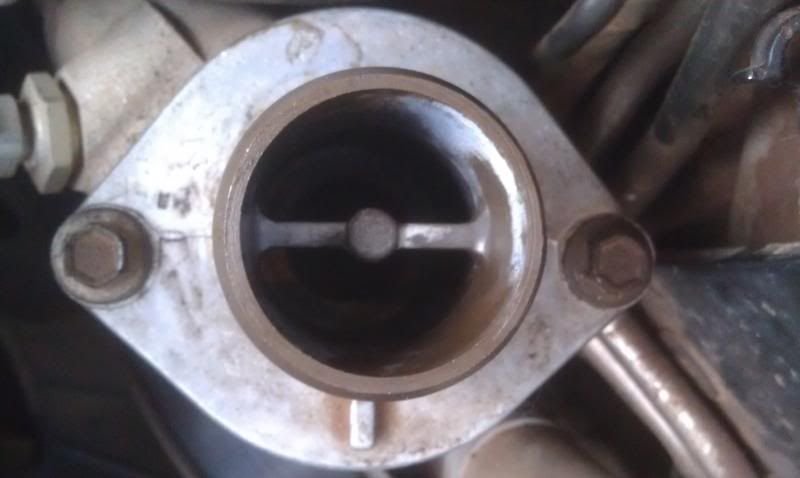
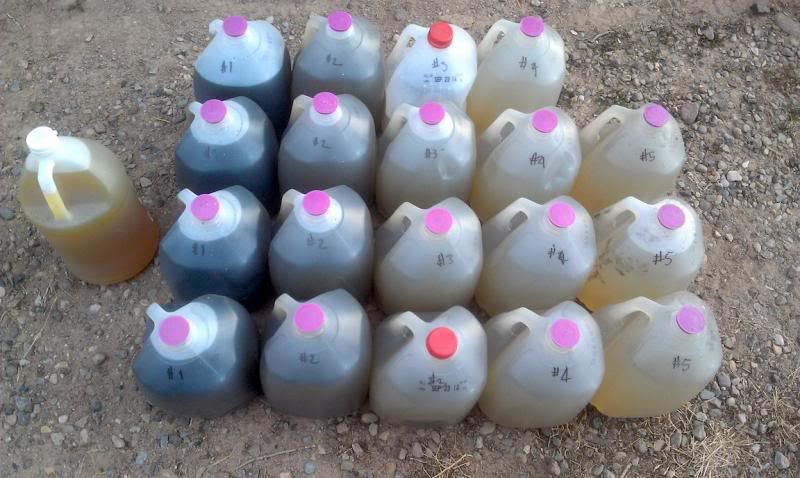
I put in (2) quarts of Ford's VC-9 and filled up with distilled water to the MIN line. I drove the truck for about 2 hours (80% freeway and 20% stop and go). I then removed the thermostat and then went through (5) flushes with distilled water, drained, and here is the progression of what came out of my truck. I drove the truck during the distilled water flush for about 10 minutes. I went with Ford's VC-7B Gold coolant to refill the cooling system.
(original coolant is on the left for reference)
Observations
- Have an extra stop **** valve on hand. If the coolant is changed periodically I would think that this part would be worthwhile to change as well (at the end during the final fill) . I broke mine between the 4th and 5th flush and it was 5:30PM...
- As I crawled under the truck several times, I pondered the benefits of having the Fumoto valves. $50 (current price for two) is quite the expense. Yes, it would have been easier with less mess. Something to consider for the next time.
- I found it helpful to have (2) two five gallon buckets to place each under the stopcock valve and lower radiator hose, the height of my buckets cleared the bottom of the truck. A small catch pan for the drivers side engine drain plug.
- When emptying the drivers side engine drain plug I placed a narrow but long piece of cardboard between me and the small catch pan to prevent fluid splashing onto me.
- My ECT/EOT before the flush was 180/190F. I needed to change out the thermostat. And after the flush I had an ECT/EOT of 192/199F. I am happier to know that my ECT/EOT are at temperatures to be expected.
- 8mm allen head with about 6-8" extension is good for removing the drivers side engine drain plug (anything shorter or longer gives a smaller wrenching arc).
- Took me about 45 minutes to drain from the three locations, refill, check fill level and leaks, then take out for a drive. Then repeat.
- I didn't let the truck cool down before draining. I found that if I drained most of the fluid out the stop **** valve, 3/4 of the 5 gallon bucket, I could carefully remove the lower radiator hose to empty into another 5 gallon bucket without making a mess. After draining from these two locations I would drain from the drivers side engine drain plug.
Started by draining out the original coolant. Drained from the stopcock valve, lower radiator hose, and drivers side of the engine block. When I first bought the truck I looked at the coolant and notice that it wasn't green. After bringing it home and looking at it more I thought it had a slight green tint to it. I was concerned about the type of coolant in there.

I put in (2) quarts of Ford's VC-9 and filled up with distilled water to the MIN line. I drove the truck for about 2 hours (80% freeway and 20% stop and go). I then removed the thermostat and then went through (5) flushes with distilled water, drained, and here is the progression of what came out of my truck. I drove the truck during the distilled water flush for about 10 minutes. I went with Ford's VC-7B Gold coolant to refill the cooling system.

(original coolant is on the left for reference)

Observations
- Have an extra stop **** valve on hand. If the coolant is changed periodically I would think that this part would be worthwhile to change as well (at the end during the final fill) . I broke mine between the 4th and 5th flush and it was 5:30PM...
- As I crawled under the truck several times, I pondered the benefits of having the Fumoto valves. $50 (current price for two) is quite the expense. Yes, it would have been easier with less mess. Something to consider for the next time.
- I found it helpful to have (2) two five gallon buckets to place each under the stopcock valve and lower radiator hose, the height of my buckets cleared the bottom of the truck. A small catch pan for the drivers side engine drain plug.
- When emptying the drivers side engine drain plug I placed a narrow but long piece of cardboard between me and the small catch pan to prevent fluid splashing onto me.
- My ECT/EOT before the flush was 180/190F. I needed to change out the thermostat. And after the flush I had an ECT/EOT of 192/199F. I am happier to know that my ECT/EOT are at temperatures to be expected.
- 8mm allen head with about 6-8" extension is good for removing the drivers side engine drain plug (anything shorter or longer gives a smaller wrenching arc).
- Took me about 45 minutes to drain from the three locations, refill, check fill level and leaks, then take out for a drive. Then repeat.
- I didn't let the truck cool down before draining. I found that if I drained most of the fluid out the stop **** valve, 3/4 of the 5 gallon bucket, I could carefully remove the lower radiator hose to empty into another 5 gallon bucket without making a mess. After draining from these two locations I would drain from the drivers side engine drain plug.
#168
02-02-2014, 05:06 PM

Hotshot
#169
02-02-2014, 11:01 PM
Laughing Gas
#171
09-03-2014, 12:41 PM
I agree that dealers are not likely to do the job as thoroughly as you would do it.
#172
09-03-2014, 10:25 PM
Elder User
Join Date: Apr 2013
Location: Bothell, WA
Posts: 941
Likes: 0
Received 0 Likes
on
0 Posts
#173
09-03-2014, 10:43 PM
Postmaster
Join Date: Jul 2011
Location: Houston, TX
Posts: 3,263
Likes: 0
Received 0 Likes
on
0 Posts
Dom
Sent from my iPhone using IB AutoGroup
#175
11-06-2014, 03:58 PM

Senior User
Join Date: Aug 2014
Location: Meridian,Ms
Posts: 105
Likes: 0
Received 0 Likes
on
0 Posts
It was about 2 hours.
Next question I have is I'm going to do this with VC-9 and I already have a coolant filter do I need to shut it of during the procedure I saw someone earlier say that's what they did, but doesn't that restrict flow?
Next question I have is I'm going to do this with VC-9 and I already have a coolant filter do I need to shut it of during the procedure I saw someone earlier say that's what they did, but doesn't that restrict flow?
#176
03-05-2015, 08:56 PM


#180
03-13-2015, 03:16 PM

Freshman User