
Tutorial/How to - New Headliner!
#1
 02-04-2017, 09:06 PM

Join Date: Jan 2017
Location: Dallas-Ft Worth
Posts: 146
Likes: 0
Received 0 Likes
on
0 Posts
Tutorial/How to - New Headliner!
Hey fellow Ford lovers,
I figured that I've gotten enough help from you all that it's high time that I give something back.
Today I decided to tackle my ratty, tatty headliner in my new 1995 F-150. I've done this task before in my 1987 Jeep Cherokee, so I have done it before. It's quite an easy job, but it can seem daunting if you've never done it before.
Tool required:
1 - #2 Philips Screw driver (medium size, everyone has one)
1 - 1-1.5" Paint Scraper
1 - Medium bristle brush
1 - Pair Scissors
1 - Sharp Razor Blade
1 - Table or set of sawhorse (or anything that you can set the board on while working)
1 - Roll duct tape (Note - Only used if you tear the headliner board)
1 - 59''x60'' Roll of headliner fabric, whatever color you want
1 - Can of 3M Headliner Glue
(Sorry no pics for Steps 1-5, but it's very easy. I already had most of my interior out doing a deep clean - PO was gross and apparently slathered the whole thing with melted Jolly Ranchers & Bud Light bottle caps. It was disgusting.)
Step 1: Ok, first things first, remove upper door trim from both sides and set the screws aside.
Step 2: Remove the trim from the front of the headliner by the windshield and set the screws aside.
Step 3: Remove the trim from the rear of the headliner and set the screws aside (Note: There is also a screw that holds the hangar clip on as well).
Step 4: Remove the sun visors, there are three screws holding each pivot in. Also remove the two visor retaining brackets.
Step 5: Next you need to remove interior dome light. To remove the lens, just lightly squeeze the lens and it should easily pop out. Under the lens you'll find three screws. Loosen the screws (you don't need to remove them completely) and the light should come right off).
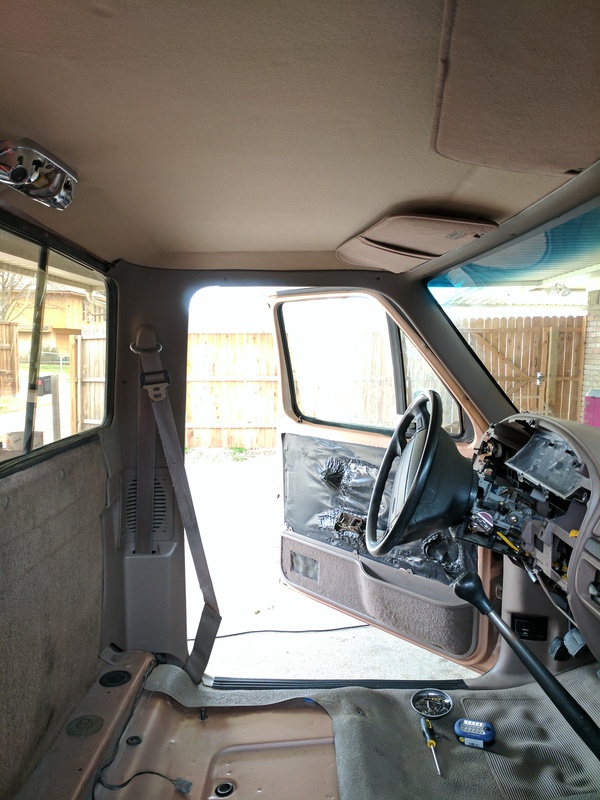
Step 5: When you loosen the last screw on the dome light, the headliner should come loose. Gently orient the headliner and pull out of the cab. Yours will probably look something like this:
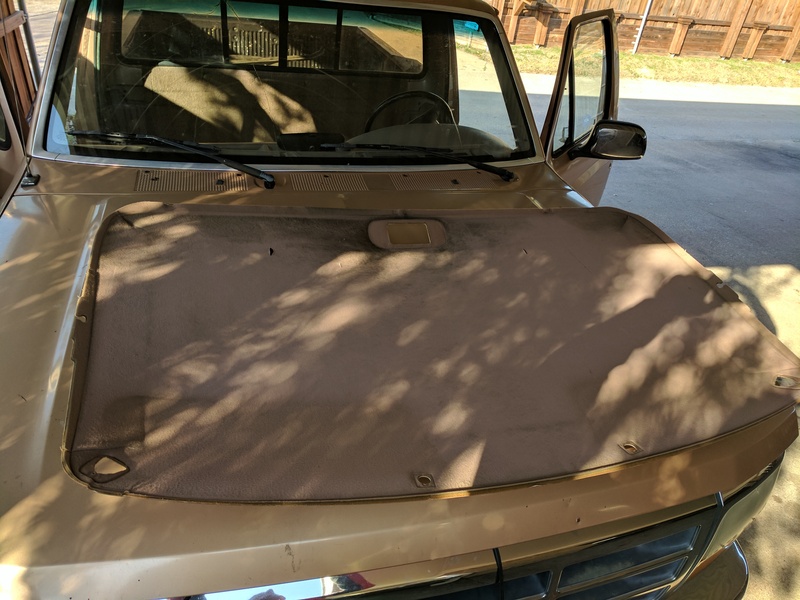
Step 6: Take your headliner to your workspace (obviously my tailgate) and gently pull off the old headliner. You'll probably not get much of the old foam off, but no worries. Now begins the oh so fun job of removing the old foam.
Using your paint scraper, begin removing the foam by getting under it and scraping. The board underneath is pretty sturdy, but still take care, especially along the joints. Try to stay on one flat piece at a time so you don't mare up the surface.

Pretty easy, but takes about 30 mins.
Step 7: Once you're finished, take your brush and scrub all the rest of the old foam off. When you'll done it should look like a normal piece of cardboard. Proper prep is key here for good glue adhesion.
Should look like this:
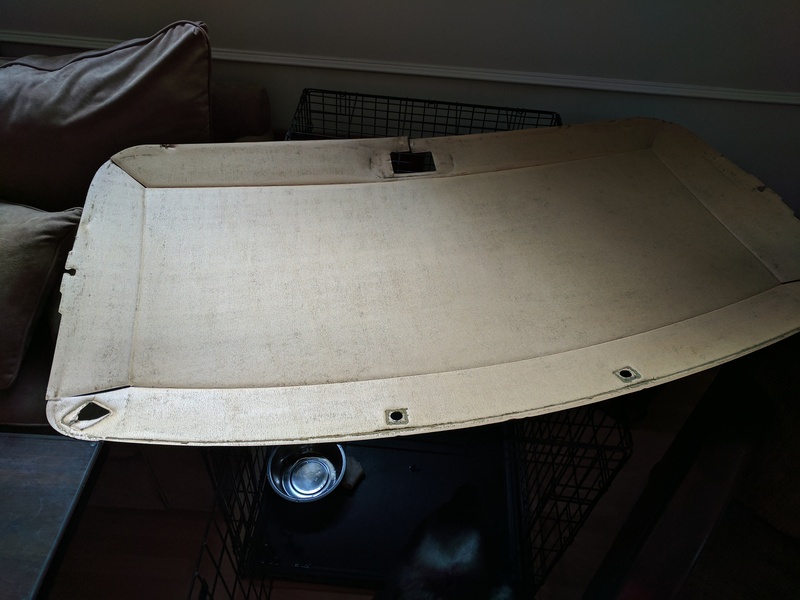
Step 8: Once complete, grab your 3M spray and liberally spray the board with the glue. Make two parallel coats on the board with the glue. At the end, do one coating perpendicularly to the first two. Make sure you get all the surface coated. Give it about 3-4 minutes to get tacky.
While you're waiting for 3-4 mins to elapse, grab your buddy and have him hold up your new headliner fabric - you can do this alone, but you don't want to mess up the fresh fabric, so be sure where ever you have it laid down is a clean area.
Now take the 3M spray and make two parallel coats of the glue on the back of the headliner fabric. Finish by doing one perpendicular pass. By the time you're finished with this, the previously sprayed board will be ready for the new fabric.
Have your buddy help you orient the headliner over the top of the headliner board and slowly lower it to the board. Make sure you have it where you want it because ones it's on there it's hard to get off without stretching it - small stretches are recoverable, but if you do it too much the fabric is toast and you'll be starting over at Step 1 with new fabric.
When you have the fabric where you want it, lower the fabric to the board and using your hands slowly start to tamp it down to the board to fill into the seams, etc. If you need to, go ahead and lift the edges up and re-spray some glue to ensure the edges are well sealed. Be careful not to push too hard, remember the glue is wet so if you push too hard you'll completely compress the foam and could get some glue to show. I made this mistake as well, but luckily when the glue dried it wasn't in a noticeable area when the trim was up.
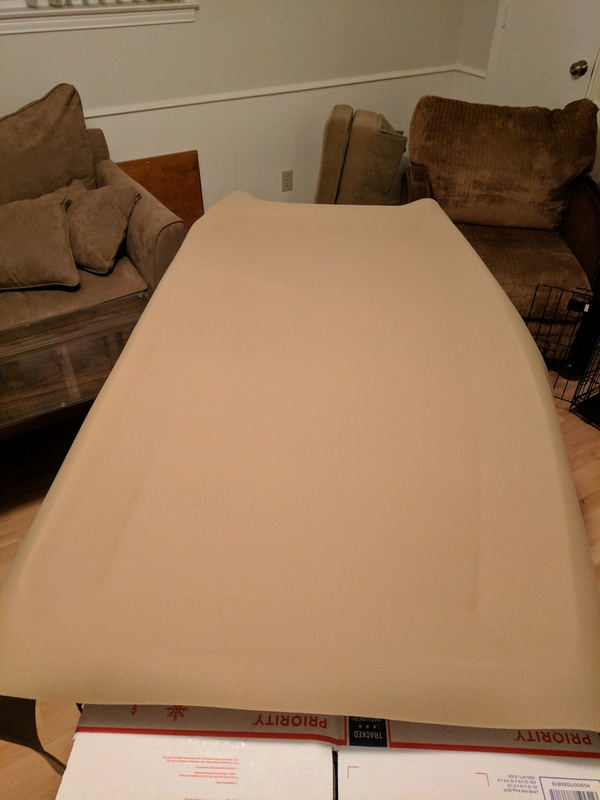
Do keep in mind that when the board is installed, the corner edges will come together. I didn't think about it ahead of time, so when I put mine up I had some creases in the corners. They aren't really noticeable, but I'm a perfectionist, but if I were to do it again, I would have taped up the corners so that the fabric fit neatly without the creases.
When you're done, you'll have something that looks like this:
Step 9: Again, sorry no pictures, but I wasn't thinking about doing a write-up while doing this - just snapping pics to show a friend.
Give the board a couple of hours to fully dry, but honestly, depending on the temperature, 30 mins is probably plenty. I let mine dry overnight.
After the glue is dry, flip your board over (this is a good time to put some clean towels down to protect the new fabric from snags) and use your scissors to trim around the board's edge. Cut right up to the cardboard.
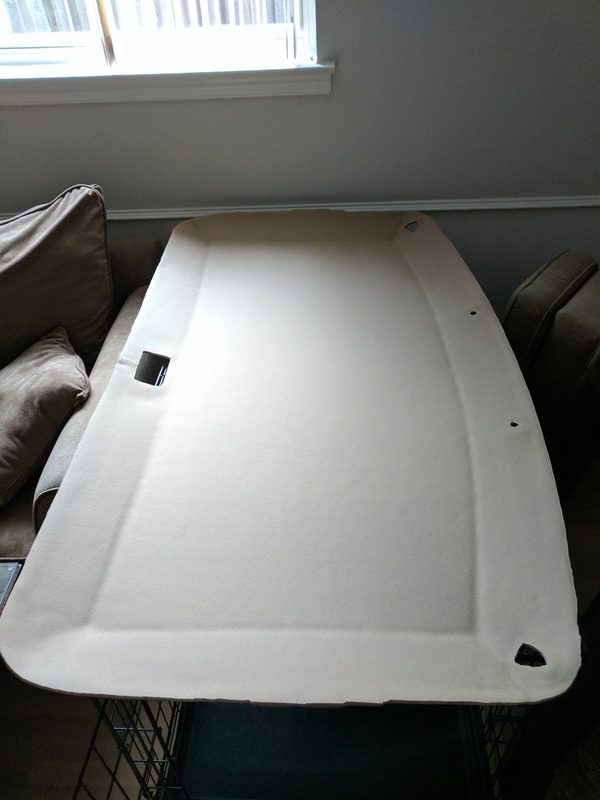
Step 10: Next take your razor blade and cut out the holes for the sun visors and light. You *do not* need to cut the channel leading to the light hole section where cardboard has a channel cut, ie, just cut out the rectangle.
You can see the little blip/bump where I made the unnecessary cut, though it's barely noticeable when mounted.
Step 11: Installation is basically Steps 5-1, in that order. When doing the installation, it very much helps to have a second set of hands to have help hold it in place. Make sure you and your partner's hands are clean before handling the new board.
You'll likely have a few little indentations where you or your friend was holding up the headliner, but don't worry, the foam will re-expand after a few/hours days, just be gentle with it.
I started with the dome light so that the rear of the board was secured.
Voila! You've got yourself a nice, new headliner!
Hope this helps!
S/F,
-Matt
I figured that I've gotten enough help from you all that it's high time that I give something back.
Today I decided to tackle my ratty, tatty headliner in my new 1995 F-150. I've done this task before in my 1987 Jeep Cherokee, so I have done it before. It's quite an easy job, but it can seem daunting if you've never done it before.
Tool required:
1 - #2 Philips Screw driver (medium size, everyone has one)
1 - 1-1.5" Paint Scraper
1 - Medium bristle brush
1 - Pair Scissors
1 - Sharp Razor Blade
1 - Table or set of sawhorse (or anything that you can set the board on while working)
1 - Roll duct tape (Note - Only used if you tear the headliner board)
1 - 59''x60'' Roll of headliner fabric, whatever color you want
1 - Can of 3M Headliner Glue
(Sorry no pics for Steps 1-5, but it's very easy. I already had most of my interior out doing a deep clean - PO was gross and apparently slathered the whole thing with melted Jolly Ranchers & Bud Light bottle caps. It was disgusting.)
Step 1: Ok, first things first, remove upper door trim from both sides and set the screws aside.
Step 2: Remove the trim from the front of the headliner by the windshield and set the screws aside.
Step 3: Remove the trim from the rear of the headliner and set the screws aside (Note: There is also a screw that holds the hangar clip on as well).
Step 4: Remove the sun visors, there are three screws holding each pivot in. Also remove the two visor retaining brackets.
Step 5: Next you need to remove interior dome light. To remove the lens, just lightly squeeze the lens and it should easily pop out. Under the lens you'll find three screws. Loosen the screws (you don't need to remove them completely) and the light should come right off).
Step 5: When you loosen the last screw on the dome light, the headliner should come loose. Gently orient the headliner and pull out of the cab. Yours will probably look something like this:

Step 6: Take your headliner to your workspace (obviously my tailgate) and gently pull off the old headliner. You'll probably not get much of the old foam off, but no worries. Now begins the oh so fun job of removing the old foam.
Using your paint scraper, begin removing the foam by getting under it and scraping. The board underneath is pretty sturdy, but still take care, especially along the joints. Try to stay on one flat piece at a time so you don't mare up the surface.

Pretty easy, but takes about 30 mins.
Step 7: Once you're finished, take your brush and scrub all the rest of the old foam off. When you'll done it should look like a normal piece of cardboard. Proper prep is key here for good glue adhesion.
Should look like this:

Step 8: Once complete, grab your 3M spray and liberally spray the board with the glue. Make two parallel coats on the board with the glue. At the end, do one coating perpendicularly to the first two. Make sure you get all the surface coated. Give it about 3-4 minutes to get tacky.
While you're waiting for 3-4 mins to elapse, grab your buddy and have him hold up your new headliner fabric - you can do this alone, but you don't want to mess up the fresh fabric, so be sure where ever you have it laid down is a clean area.
Now take the 3M spray and make two parallel coats of the glue on the back of the headliner fabric. Finish by doing one perpendicular pass. By the time you're finished with this, the previously sprayed board will be ready for the new fabric.
Have your buddy help you orient the headliner over the top of the headliner board and slowly lower it to the board. Make sure you have it where you want it because ones it's on there it's hard to get off without stretching it - small stretches are recoverable, but if you do it too much the fabric is toast and you'll be starting over at Step 1 with new fabric.
When you have the fabric where you want it, lower the fabric to the board and using your hands slowly start to tamp it down to the board to fill into the seams, etc. If you need to, go ahead and lift the edges up and re-spray some glue to ensure the edges are well sealed. Be careful not to push too hard, remember the glue is wet so if you push too hard you'll completely compress the foam and could get some glue to show. I made this mistake as well, but luckily when the glue dried it wasn't in a noticeable area when the trim was up.
Do keep in mind that when the board is installed, the corner edges will come together. I didn't think about it ahead of time, so when I put mine up I had some creases in the corners. They aren't really noticeable, but I'm a perfectionist, but if I were to do it again, I would have taped up the corners so that the fabric fit neatly without the creases.
When you're done, you'll have something that looks like this:

Step 9: Again, sorry no pictures, but I wasn't thinking about doing a write-up while doing this - just snapping pics to show a friend.
Give the board a couple of hours to fully dry, but honestly, depending on the temperature, 30 mins is probably plenty. I let mine dry overnight.
After the glue is dry, flip your board over (this is a good time to put some clean towels down to protect the new fabric from snags) and use your scissors to trim around the board's edge. Cut right up to the cardboard.
Step 10: Next take your razor blade and cut out the holes for the sun visors and light. You *do not* need to cut the channel leading to the light hole section where cardboard has a channel cut, ie, just cut out the rectangle.
You can see the little blip/bump where I made the unnecessary cut, though it's barely noticeable when mounted.

Step 11: Installation is basically Steps 5-1, in that order. When doing the installation, it very much helps to have a second set of hands to have help hold it in place. Make sure you and your partner's hands are clean before handling the new board.
You'll likely have a few little indentations where you or your friend was holding up the headliner, but don't worry, the foam will re-expand after a few/hours days, just be gentle with it.
I started with the dome light so that the rear of the board was secured.
Voila! You've got yourself a nice, new headliner!

Hope this helps!
S/F,
-Matt
#2
02-04-2017, 09:16 PM
Join Date: Jan 2017
Location: Dallas-Ft Worth
Posts: 146
Likes: 0
Received 0 Likes
on
0 Posts

#5
02-05-2017, 07:05 PM
So....let me make sure I understand.....the new fabric has the foam already attached??? I always thought that the "board" was some sort of pressed together fiberglass insulation stuff......was always afraid if I started peeling off the old fabric that I would have a lumpy mess......also.....My current headliner has some 3/8" diameter holes in it from where aftermarket radio gear had been mounted (was an Ex Govt. truck) how would be the best way to fill or cover those holes so they wouldn't be noticeable under the new fabric? Maybe this isn't as scary of a project as I had always envisioned......I just want it to look right when I'm done, not like stupid DIY'er did it.....BTW....yours looks very professional......
TIA
TIA
#6
02-05-2017, 07:21 PM
Fleet Owner
So....let me make sure I understand.....the new fabric has the foam already attached??? I always thought that the "board" was some sort of pressed together fiberglass insulation stuff......was always afraid if I started peeling off the old fabric that I would have a lumpy mess......also.....My current headliner has some 3/8" diameter holes in it from where aftermarket radio gear had been mounted (was an Ex Govt. truck) how would be the best way to fill or cover those holes so they wouldn't be noticeable under the new fabric? Maybe this isn't as scary of a project as I had always envisioned......I just want it to look right when I'm done, not like stupid DIY'er did it.....BTW....yours looks very professional......
TIA
TIA
Also, I lay the fabric on. Use cloths pins to hold it onto 1/2. Then peal back the other half. Spary your glue and lay it down. No un pin the other side and repeat. MUCH easier to do it that way and not work with all the material
#7
02-05-2017, 08:26 PM
Join Date: Jan 2017
Location: Dallas-Ft Worth
Posts: 146
Likes: 0
Received 0 Likes
on
0 Posts
So....let me make sure I understand.....the new fabric has the foam already attached??? I always thought that the "board" was some sort of pressed together fiberglass insulation stuff......was always afraid if I started peeling off the old fabric that I would have a lumpy mess......also.....My current headliner has some 3/8" diameter holes in it from where aftermarket radio gear had been mounted (was an Ex Govt. truck) how would be the best way to fill or cover those holes so they wouldn't be noticeable under the new fabric? Maybe this isn't as scary of a project as I had always envisioned......I just want it to look right when I'm done, not like stupid DIY'er did it.....BTW....yours looks very professional......
TIA
TIA
PEB, to answer your question, yes, headliner fabric comes with the foam already attached. As already mentioned in a previous response to your question, yes you can just pull off the old stuff, but be prepared to constantly have little flakes of deteriorating foam falling on your interior. I've read that some folks just reuse the old foam and put regular fabric over it, but honestly, it's not the route I'd suggest. Years of deteriorating makes for a lumpy appearance, not to mention it's less forgiving on over-gluing or too much pressure - the glue would just come right through it. The two yards I used was $16 on eBay.
Also, keep in mind, this is only the second one I've ever done - it's not a hard job at all.
Thanks for the compliment as well; I'm much happier with the old fabric not lightly brushing the top of my head!

Thread
Thread Starter
Forum
Replies
Last Post
Da_Lariat_Chariot
1987 - 1996 F150 & Larger F-Series Trucks
6
02-22-2019 06:38 PM
LARIAT 85
1980 - 1986 Bullnose F100, F150 & Larger F-Series Trucks
12
12-11-2010 05:12 PM