Adding Pioneer backup camera to 2008 F350 steel bumper
#1
 07-18-2016, 07:41 PM

Join Date: May 2013
Location: Boise, ID
Posts: 7
Likes: 0
Received 0 Likes
on
0 Posts
I thought I would take the time to describe how I added a Pioneer ND-BC8 backup camera to a Fusion Bumper on a 2008 Ford F350 DRW. Since I don't have a spare tire under my truck I decided to repurpose the hole in the steel bumper used for releasing the spare.
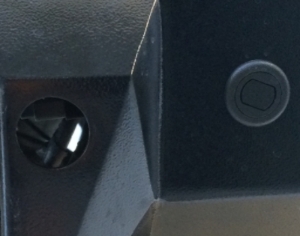
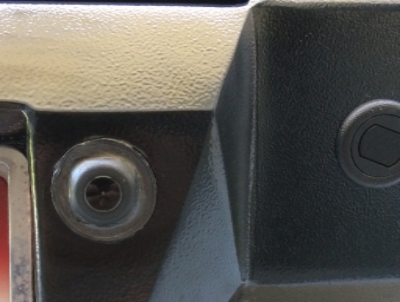
It just so happened that the cap from a can of brake cleaner fit tightly within the hole
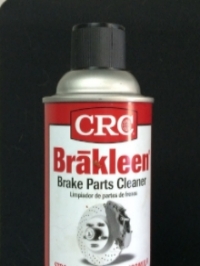
so I drilled a hold in the back of the cap and ran the camera cable through it. Also, inside the cap are fins that just happened to hold the camera perfectly square in place.
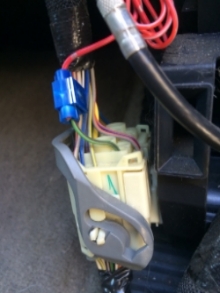
I then climbed into the truck to connect up the camera. Obviously the RCA cable went to the back of the Pioneer AVIC 8100NEC while the ground went to ground and the red 2 amp fuse wire went to the reverse control (Green with brown stripe) wire behind the passenger side kick panel.
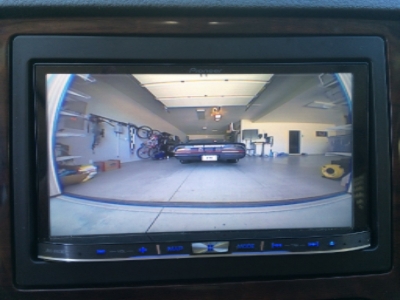
I chocked the truck, emergency brake and then started and placed in reverse to check the camera angle. Once I had it where I wanted it then I continued to the next step.
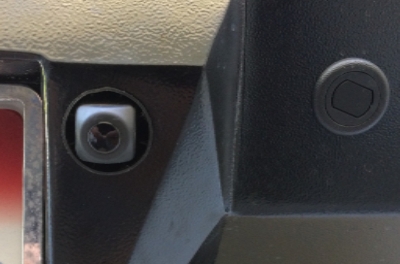
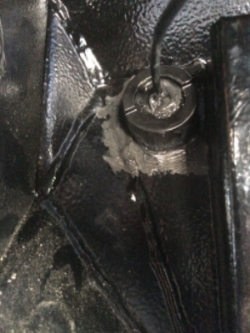
I added some black RTV to the back of the camera to hold it in place, as well as, some sealant to the back of the cap. Then ran the cable through the bumper hole and placed more RTV on the backside of the bumper to ensure it was sealed tightly.
After checking once again the camera angle I finished by sealing around the camera.
I hope this helps.

It just so happened that the cap from a can of brake cleaner fit tightly within the hole

so I drilled a hold in the back of the cap and ran the camera cable through it. Also, inside the cap are fins that just happened to hold the camera perfectly square in place.

I then climbed into the truck to connect up the camera. Obviously the RCA cable went to the back of the Pioneer AVIC 8100NEC while the ground went to ground and the red 2 amp fuse wire went to the reverse control (Green with brown stripe) wire behind the passenger side kick panel.

I chocked the truck, emergency brake and then started and placed in reverse to check the camera angle. Once I had it where I wanted it then I continued to the next step.

I added some black RTV to the back of the camera to hold it in place, as well as, some sealant to the back of the cap. Then ran the cable through the bumper hole and placed more RTV on the backside of the bumper to ensure it was sealed tightly.

After checking once again the camera angle I finished by sealing around the camera.

I hope this helps.


Thread
Thread Starter
Forum
Replies
Last Post
rowdyredneck
1987 - 1996 F150 & Larger F-Series Trucks
10
05-21-2017 09:09 PM
hivoltj
1973 - 1979 F-100 & Larger F-Series Trucks
10
03-19-2016 12:49 AM