E350 Econoline RV Project


#32
 03-06-2016, 03:39 PM

Join Date: Feb 2015
Posts: 84
Likes: 0
Received 0 Likes
on
0 Posts
Hi, I haven't fitted them yet! Been so busy with other stuff lately. But have switched my attention back to the van, and hope to have them fitted within the next few months, and will do another dyno run to see if they make any difference.
#33
04-04-2016, 05:18 AM
Join Date: Feb 2015
Posts: 84
Likes: 0
Received 0 Likes
on
0 Posts
I have been really busy lately, and haven't done much on the camper project, but I got stuck back into it a few weeks ago. Ended up completely stripping the interior out. It needed rewiring anyway, as NZ is 240 volts vs. your 110volts. And the cabinetry was really dated, all of that horrible woodgrain veneer! So here it is at the moment, a blank canvas:
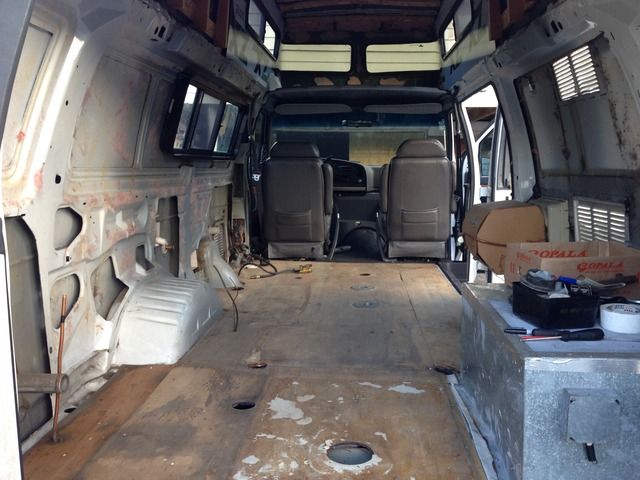
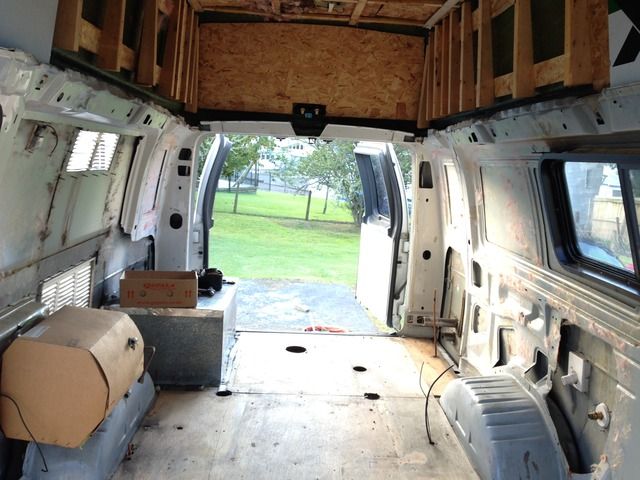
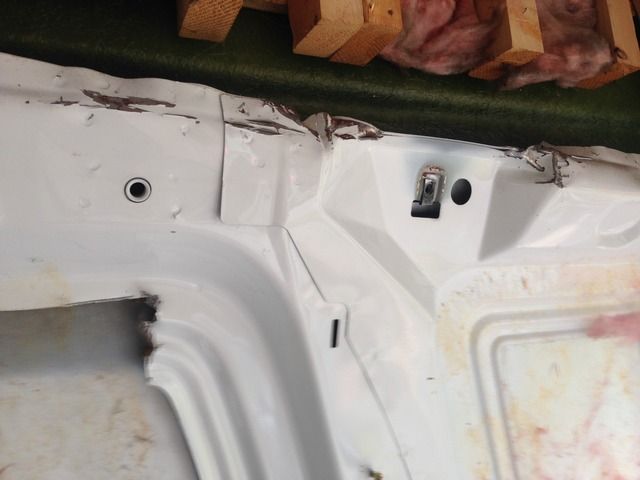
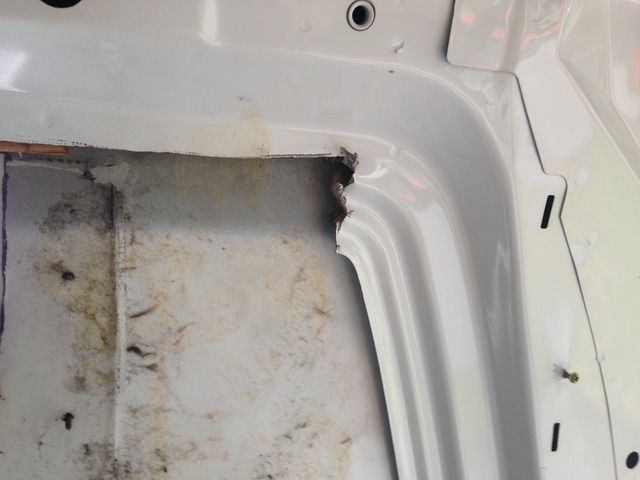
One of the things that surprised me was how ROUGH the conversion was! All appeared fine when everything was installed. But once I started removing the cabinetry, I was quite shocked how badly it had been built by Intervec. Everything was plasma cut, nibblers or tin snips, still with big spirals of steel hanging off the ends of cuts. Not a straight cut anywhere, all jagged edges, and where clearance was required hitting with a large hammer seemed to be the order of the day! Check out a few pics here, bloody animals these guys It will take a few hours of work to tidy this lot up.


After about 12 months of thinking about the layout, I have come up with a plan, which will allow all of the features I want, and utilise the space better. More to come on this later.
I took the van in today for a WOF (that's our roadworthy certificate which is required every six months over here) and to my dismay the balljoints on the front axle were shot - a lot of play in both upper joints. The van has only done 36K miles from new, so a bit surprised about this. After searching this forum for the best solution, I ordered new top and bottom ball joints by Moog from Amazon, which should be here in 3 days "guaranteed"


One of the things that surprised me was how ROUGH the conversion was! All appeared fine when everything was installed. But once I started removing the cabinetry, I was quite shocked how badly it had been built by Intervec. Everything was plasma cut, nibblers or tin snips, still with big spirals of steel hanging off the ends of cuts. Not a straight cut anywhere, all jagged edges, and where clearance was required hitting with a large hammer seemed to be the order of the day! Check out a few pics here, bloody animals these guys
It will take a few hours of work to tidy this lot up. 


After about 12 months of thinking about the layout, I have come up with a plan, which will allow all of the features I want, and utilise the space better. More to come on this later.
I took the van in today for a WOF (that's our roadworthy certificate which is required every six months over here) and to my dismay the balljoints on the front axle were shot - a lot of play in both upper joints. The van has only done 36K miles from new, so a bit surprised about this. After searching this forum for the best solution, I ordered new top and bottom ball joints by Moog from Amazon, which should be here in 3 days "guaranteed"
#35
04-17-2016, 11:35 PM
Join Date: Feb 2015
Posts: 84
Likes: 0
Received 0 Likes
on
0 Posts
replaced the ball joints with the Moog parts, and van tracks dead straight now, it used to wander a little bit before. Gave it a bootful up to 80 mph and it felt really steady, before it would be wandering around a fair bit, so quite happy with that.
Checked wheel alignment, and it was very close, toe and camber were good, but steering wheel was slightly to the right, so needed a minor adjustment. Put it on the race car scales, and it tipped the scales at 2755 kgs, that's about 6100lbs in your currency. Now that is with the interior completely gutted. So I am hoping to be around 3100 -3200kgs when it is back together. Certainly goes a little bit better with no weight in it!
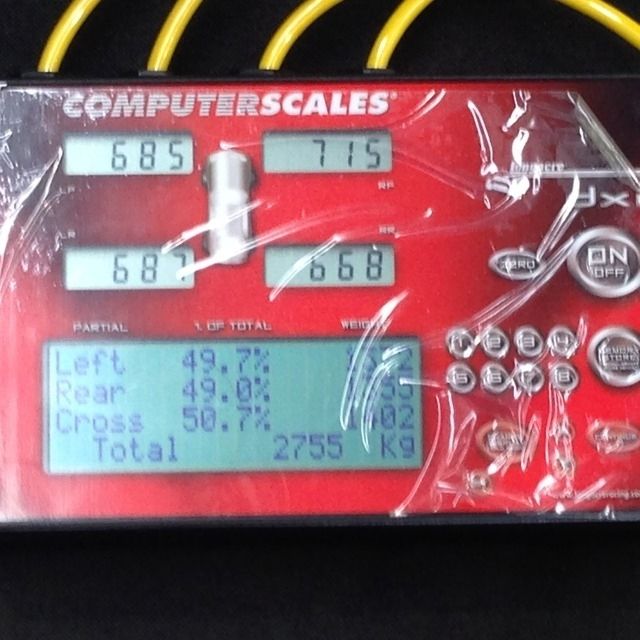
Checked wheel alignment, and it was very close, toe and camber were good, but steering wheel was slightly to the right, so needed a minor adjustment. Put it on the race car scales, and it tipped the scales at 2755 kgs, that's about 6100lbs in your currency. Now that is with the interior completely gutted. So I am hoping to be around 3100 -3200kgs when it is back together. Certainly goes a little bit better with no weight in it!

#36
05-11-2016, 02:30 AM
Join Date: Feb 2015
Posts: 84
Likes: 0
Received 0 Likes
on
0 Posts
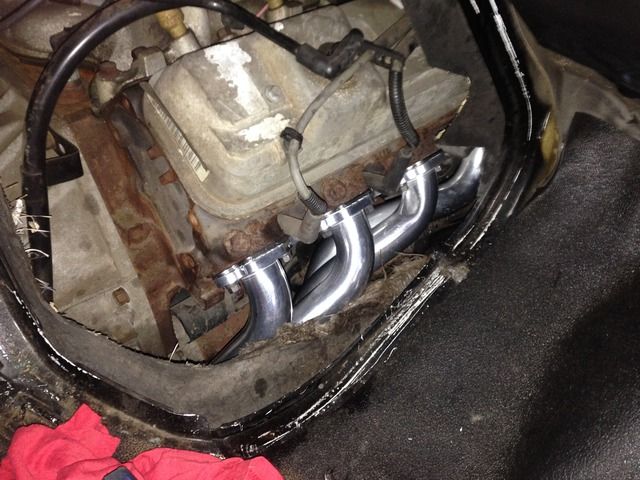
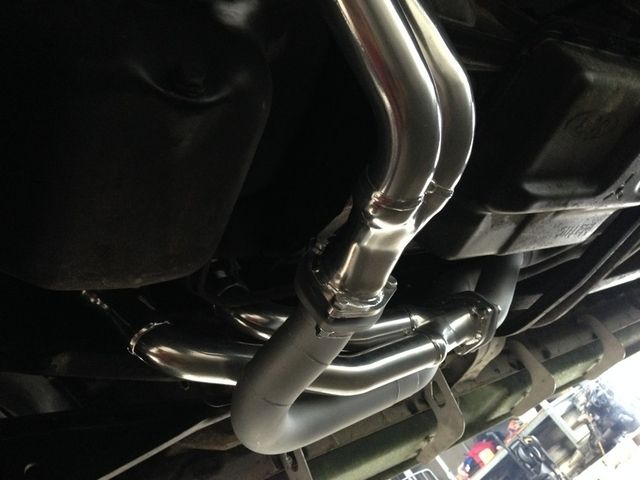
Finally got around to fitting the "Doug Thorley" headers I bought last year. Well what a bloody mission of a job that was! I spent Saturday and Sunday doing this, had the van up on a hoist, being very careful not to break any header bolts. In the end I had to swing on the ring spanner really hard, and each one gave a loud "crack" as it loosened. Luckily none of them broke! I think in all it took about 12 hours total to fit the headers. The bracket that holds the coil and an air valve on top of the LH rocker cover needed a little modifying, and the front header bolt on the LH side was a real pig to get back in, I think I had it in 3 or 4 times before I got the bolt length right - it has a spacer and also holds the dipstick and power steering support bracket on. I changed the spark plugs while I was in there too. It had 5 newish NGK plugs in the rear cylinders, and 3 old Motorcraft plugs that were very rusty and with very worn electrodes in the front most 3 cylinders,(the really inaccessible ones!) which were probably the original plugs fitted when it was built!
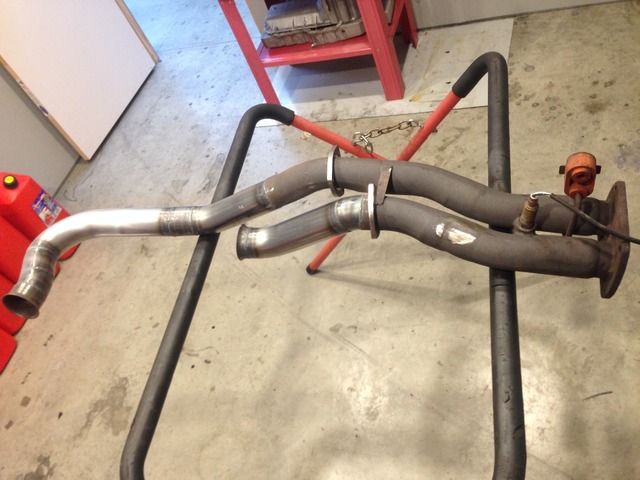
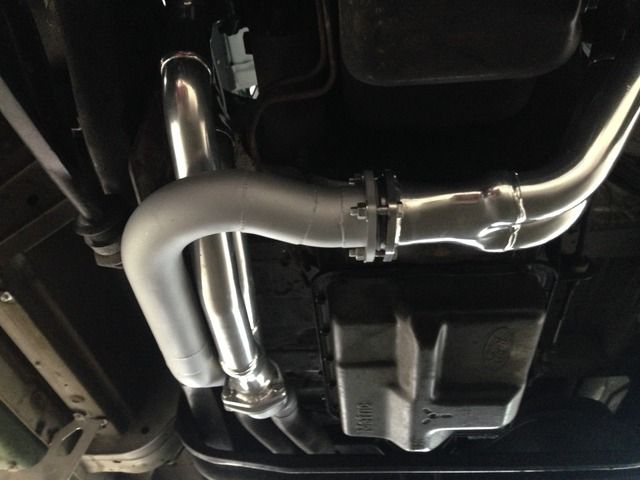
Anyway, the headers fitted really nicely, and then to connect to the exhaust system - well, it didn't quite! The box said "Ford F250 F350 E250 E350. I think it was more designed for an F250, as the outlet weren't quite in the right place of the E350 exhaust. So a few U bends and 6 or 7 hours later, and I had the system connected.

And on to the road test. Well I have bolted on a few go faster parts in my time. Sometimes you drive the thing and wonder if it is actually going faster, or if you are just imagining it. I thought this might be the case here, a small increase that might have me wondering if it was just my imagination or not.
How wrong I was! Talk about taking the cork out of the bottle!!
Off the line it has lots more torque. Managed to spin both wheels on a damp road, absolutely no way would it do that before! And revs a higher now. Butt dyno tells me +50hp and +50 ft/lbs. The real dyno will confirm how good the butt dyno is sooner or later!
A nice little bonus is that while I had it up on the hoist I discovered it has a posi rear end fitted! Didn't expect that!
Anyway, the headers fitted really nicely, and then to connect to the exhaust system - well, it didn't quite! The box said "Ford F250 F350 E250 E350. I think it was more designed for an F250, as the outlet weren't quite in the right place of the E350 exhaust. So a few U bends and 6 or 7 hours later, and I had the system connected.


And on to the road test. Well I have bolted on a few go faster parts in my time. Sometimes you drive the thing and wonder if it is actually going faster, or if you are just imagining it. I thought this might be the case here, a small increase that might have me wondering if it was just my imagination or not.
How wrong I was! Talk about taking the cork out of the bottle!!
Off the line it has lots more torque. Managed to spin both wheels on a damp road, absolutely no way would it do that before! And revs a higher now. Butt dyno tells me +50hp and +50 ft/lbs. The real dyno will confirm how good the butt dyno is sooner or later!
A nice little bonus is that while I had it up on the hoist I discovered it has a posi rear end fitted!
Didn't expect that!
#37
05-11-2016, 07:53 PM
Elder User
Join Date: Dec 2009
Location: Ohio
Posts: 882
Likes: 0
Received 0 Likes
on
0 Posts
#38
05-11-2016, 08:43 PM
Join Date: Feb 2015
Posts: 84
Likes: 0
Received 0 Likes
on
0 Posts

#39
05-11-2016, 11:51 PM
Elder User
Join Date: Dec 2009
Location: Ohio
Posts: 882
Likes: 0
Received 0 Likes
on
0 Posts
As far as I can tell, it's the norm. They stuff them full of the cheapest gee-whiz electronic junk that China produces and fill them full of some of the shoddiest construction I have ever seen. Most of it the average user doesn't see, at least until they start doing their own repairs once the ridiculous warranty has expired. When you start pulling off panels and see the ugly under the pretty skin is when it starts to sink in.
I'm in the market for a diesel coach and went to the dealer the other day to look around. The wife and I are standing inside in the living area and the salesman is standing behind the drivers area. We stood there watching water dripping out of a light fixture onto the drivers seat. In a brand new $300,000 unit. A leaky roof in a brand new 40' diesel pusher that costs $300,000.00 and the sales persons response was to laugh and say "well whadaya expect? It's built by man".
#40
05-12-2016, 03:03 AM
Join Date: Feb 2015
Posts: 84
Likes: 0
Received 0 Likes
on
0 Posts
We stood there watching water dripping out of a light fixture onto the drivers seat. In a brand new $300,000 unit. A leaky roof in a brand new 40' diesel pusher that costs $300,000.00 and the sales persons response was to laugh and say "well whadaya expect? It's built by man".
#41
07-11-2016, 10:02 PM
Join Date: Feb 2015
Posts: 84
Likes: 0
Received 0 Likes
on
0 Posts
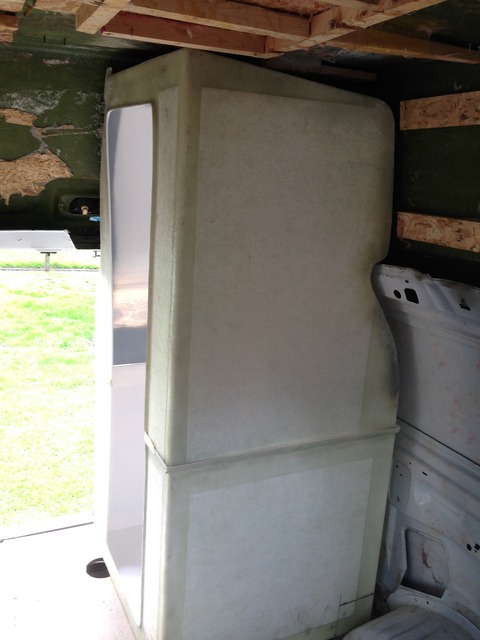
Have been on and off the camper/RV project lately. Mostly off if I am honest! But have accomplished a few things. First up was a custom shower/toilet cubicle. I wanted a proper "stand up" shower, not the stupid small bathtub thing it had which you had to sit down in to take a shower. So I bought a universal fit shower/toilet cubicle, and gave it to my fibreglass guy, who cut 2 sides off it and basically made it fit the shape of the side of the van. A huge amount of work, but I am really happy with the result. I will fit a shower and cassette type toilet inside, with a bi-fold door.
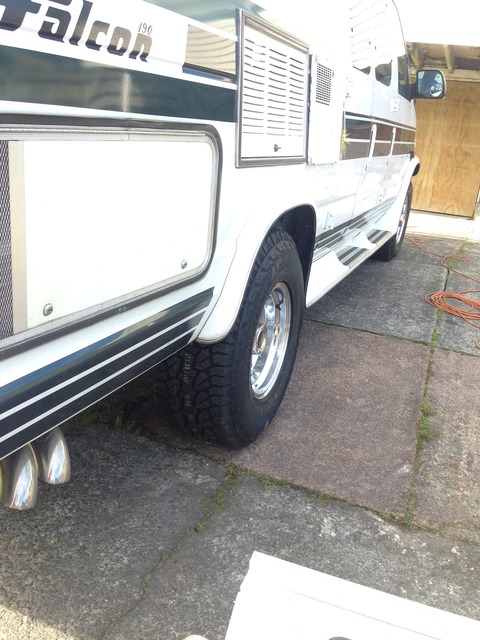
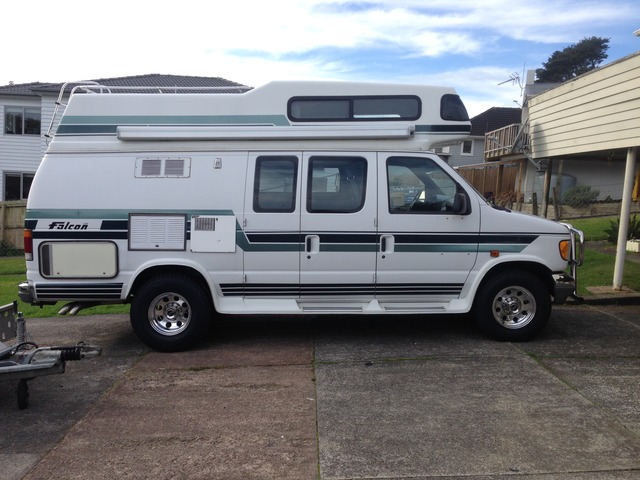
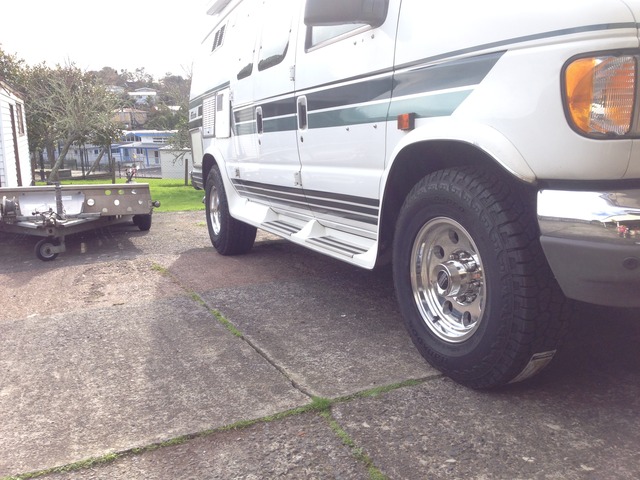
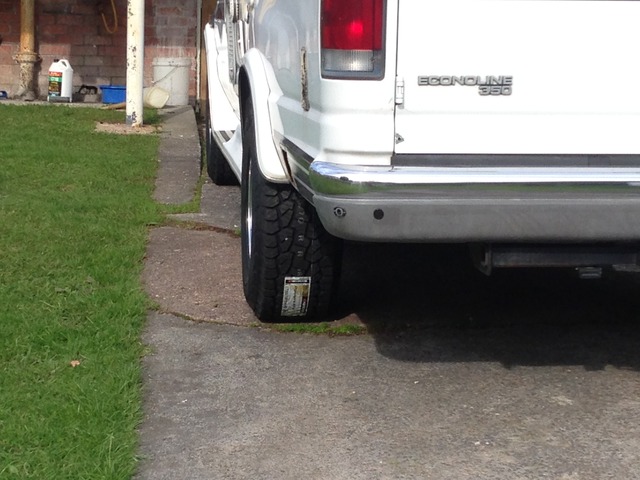
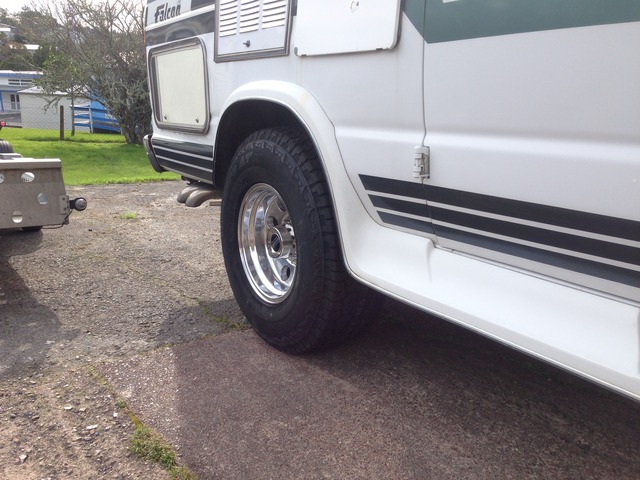
Next up were the wheels. Originally I had bought a set of American Racing wheels in 8x16, and fitted LT245/75x16 tyres, same spec. as original. But it looked so goofy at the back, with the narrow rear axle. This was accentuated by the add on fender flares. The rear wheels really did look a bit lost in there.
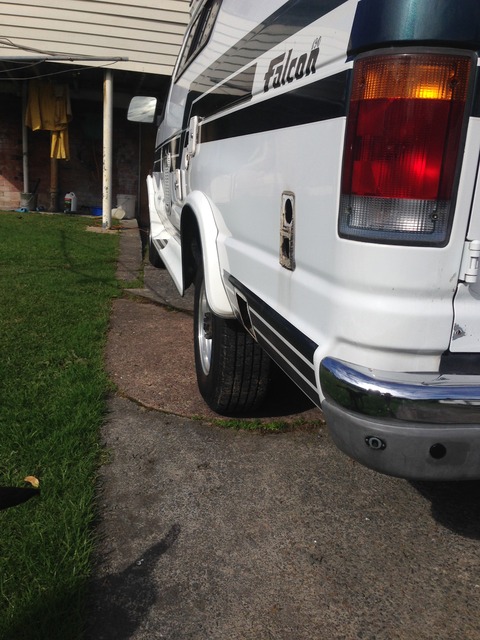
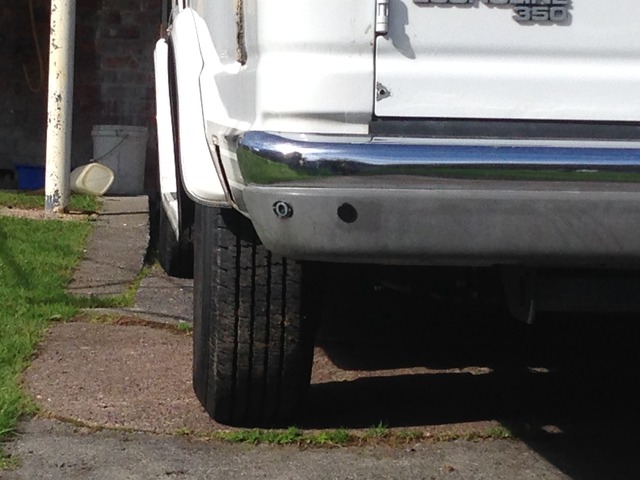
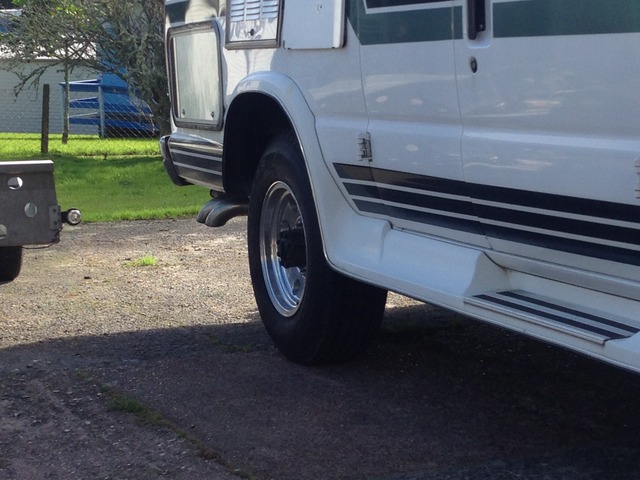
So I bought a pair of 10x16 wheels in the same style, and new all-terrain tyres all round. New tyres are Hankook DynaPro ATM in LT265/70 x16 front, and LT305/70x16 rear. The load rating on the rears is 124, which is a whopping 1600kg per tyre! The rears are now about 1.75" taller than the 245's I removed. The fronts are about 0.75" smaller. They are both smaller than their listed height, which helps things here. Clearance on all tyres looks okay, and once I have the weight of the interior back in I think the rake should be about right. The gearing difference will make the overall gearing about the same as a 3.9 rear end (it has a 4.1 fitted) so I think that will be a plus too. It could easily pull taller gears. I might have to adjust the speedo calibration though, I will check it on my GPS first though.
Anyway, here's a few pics, it looks so much better now don't you think?!

Next up were the wheels. Originally I had bought a set of American Racing wheels in 8x16, and fitted LT245/75x16 tyres, same spec. as original. But it looked so goofy at the back, with the narrow rear axle. This was accentuated by the add on fender flares. The rear wheels really did look a bit lost in there.


So I bought a pair of 10x16 wheels in the same style, and new all-terrain tyres all round. New tyres are Hankook DynaPro ATM in LT265/70 x16 front, and LT305/70x16 rear. The load rating on the rears is 124, which is a whopping 1600kg per tyre! The rears are now about 1.75" taller than the 245's I removed. The fronts are about 0.75" smaller. They are both smaller than their listed height, which helps things here. Clearance on all tyres looks okay, and once I have the weight of the interior back in I think the rake should be about right. The gearing difference will make the overall gearing about the same as a 3.9 rear end (it has a 4.1 fitted) so I think that will be a plus too. It could easily pull taller gears. I might have to adjust the speedo calibration though, I will check it on my GPS first though.
Anyway, here's a few pics, it looks so much better now don't you think?!


#42
07-12-2016, 01:54 PM
#44
07-12-2016, 10:33 PM
Join Date: Feb 2015
Posts: 84
Likes: 0
Received 0 Likes
on
0 Posts
That is probably a good option too. But if the rears pop off the bead there is no way I would get them back on with a little compressor. The tyre shop struggled to get them to pop on the beads!