When you click on links to various merchants on this site and make a purchase, this can result in this site earning a commission. Affiliate programs and affiliations include, but are not limited to, the eBay Partner Network.
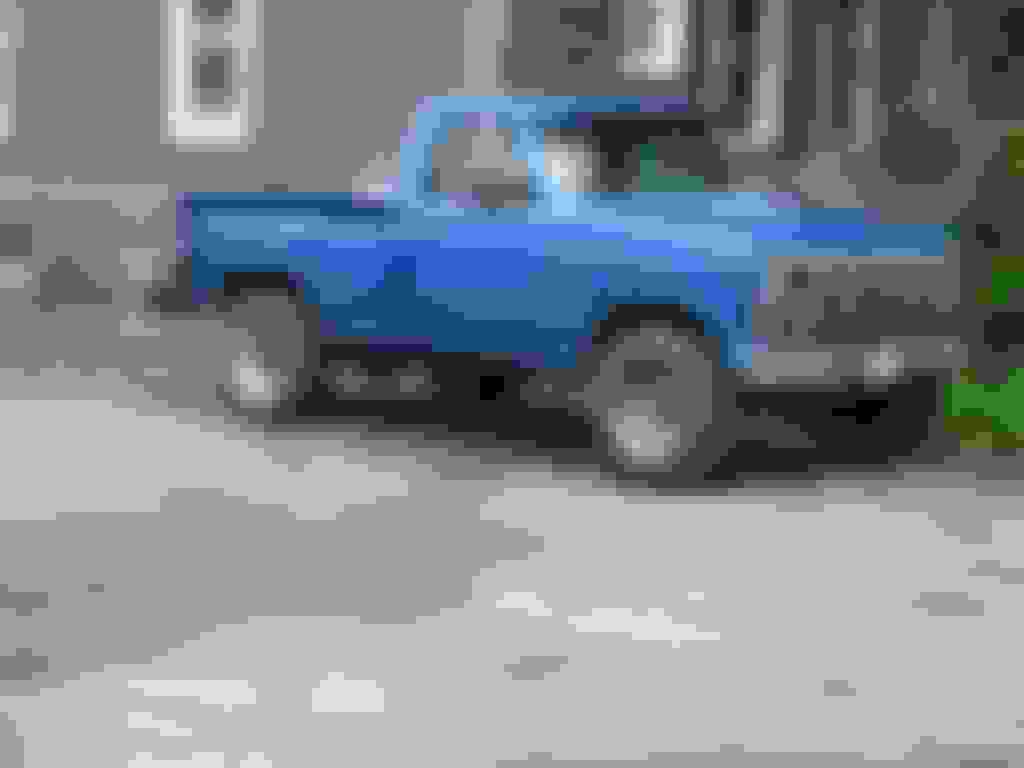
Ok, had to pause for a bit of inspiration. Here's a pic of a flareside, found on cardomain. Owner built it by shortening an F350 diesel's frame by 16 inches and adding a flareside bed. Like the Alcoa wheels. Look at the lugs - nice axles... sweet
Check out the hood that I picked up from the local junkyard... it was off a green F100 that had seen some better days but was very straight. I almost hated taking the hood off the old girl.
For the patina guys, it's perfect. No dings that I can find at all, even has all four letters on it. I got it though because mine has dings and it's cheaper to replace with this one than to have the body work done.
Ok, back to the steps and brackets, and the rear pan.
Thanks to some great advice earlier in the thread (Thanks Brad!) I'm only using good PPG or SEM primer on the surfaces that will be finish painted. The underside is getting rustoleum primer and overall will be semi-flat black.
Here are the steps and brackets, and the rear pan. Undersides done in primer then semi-flat, surfaces to be painted done in SEM's self etching grey primer:
Need to do a second coat of the grey primer. With all, tried to get good thicknesses on the edges and corners.
Weather finally a bit cooler here in the Carolinas. Did a few things on the truck, most interestingly - found what appears to be a good Rustoleum paint match for the burgundy interior.
Rustoleum's Satin Cabernet, sprayed on the back of my '85 XLT door card, was very close. When I then hit it with a second coat of Clear Flat, it got very, very close.
I'll report on how it holds up. It's not a dedicated plastic / vinyl paint, so am not sure how it would hold up on a flexible dash pad ... but for the harder surfaces I am hoping that it works well.
Moving forward now more rapidly, got the truck back from Ted at Archer Automotive in Lake Wylie - props for Ted if there are any FTE members in the Charlotte NC area by the way, he knows Fords and cut his teeth in the California Desert in the early eighties so he's especially fond of our trucks
BIG difference with the Redhead steering gearbox installed. It's gone from occasionally scary with a broad dead spot in the steering - to fun to drive. I wouldn't say the truck drives like new yet, but it completely changed the driving experience.
The bed is getting close to ready, and also need to give big props to Eric at Amvet Auto for his repairs. He butt welded new flange sections on where needed and repaired the fenders, some things that were beyond my knowledge.
Today did some little things with the interior because of rain. Re-installing the painted door and kick panels, etc. Amazing how much funk there is in the truck that seems to come back. Am convinced that there's a hidden funk tank up under the dash someplace and it keeps slowly depositing it in the interior. Looking forward to the bigger stuff getting done so I can strip the interior out and get it redone.
Moved the bed last night, to get it back to the house where I can work on it more frequently. Still to go: levelling the flanges up on the bedside, drilling holes, filing them square to accept the carriage bolts. Then mounting on the truck! Will be using plywood as a temporary bed until the final paint is done.
Here it is, first time the bed is "on the truck"... well, both beds are. And the workstand...
Im doing the oppisite lol, i wound up buying a bullnose with 137k on the clock i want a flareside bed for, appearntly ford didnt make an ext cab flareside. So im hunting a bed. Probably buy a worn out flareside rob the bed and misc parts then throw my parts on that truck and recoup some cash. Ill be tuning in for sure. I used to live outside of Charlette
Yep I'll be putting the Flareside bed on shortly - the 1995 styleside bed is coming off, hopefully can sell it to recoup a little something. Let us know when you get a build thread going!
When you find a flareside, don't forget to grab the fuel filler neck, bumper, and sheet metal at the back of the cab if its just bolted on
 08-21-2015, 11:58 AM